Payroll Information - Payroll Import
Welcome to Citicon Payroll and Accounting Systems Configuration for Payroll Import under the Payroll Information section of the Payroll & HR Module. This module allows HR and payroll personnel to manage and process time-based earnings and deductions efficiently for each employee during a cutoff period.
Key Purposes
- Import Timekeeping Data: Upload and manage payroll-relevant data such as lates, absences, leaves, and overtime across different workday types.
- Support Multi-Employee Selection: Apply imported entries to one or more employees and groups for seamless bulk operations.
- Configure Pay Based on Holiday Types: Define durations and premiums for Special, Regular, and Double Holidays, including when these fall on rest days.
- Enable Night Differential Tracking: Record night shift durations across day types for proper computation of night differential pay.
- Generate and Approve Payroll Records: Automate payroll entry generation while ensuring proper review and approval before payout.
Payroll Import Module User-Manual
This section provides details, and set-by-step instructions to access, view, and update the Payroll Import entries stored in the system.
Index Page
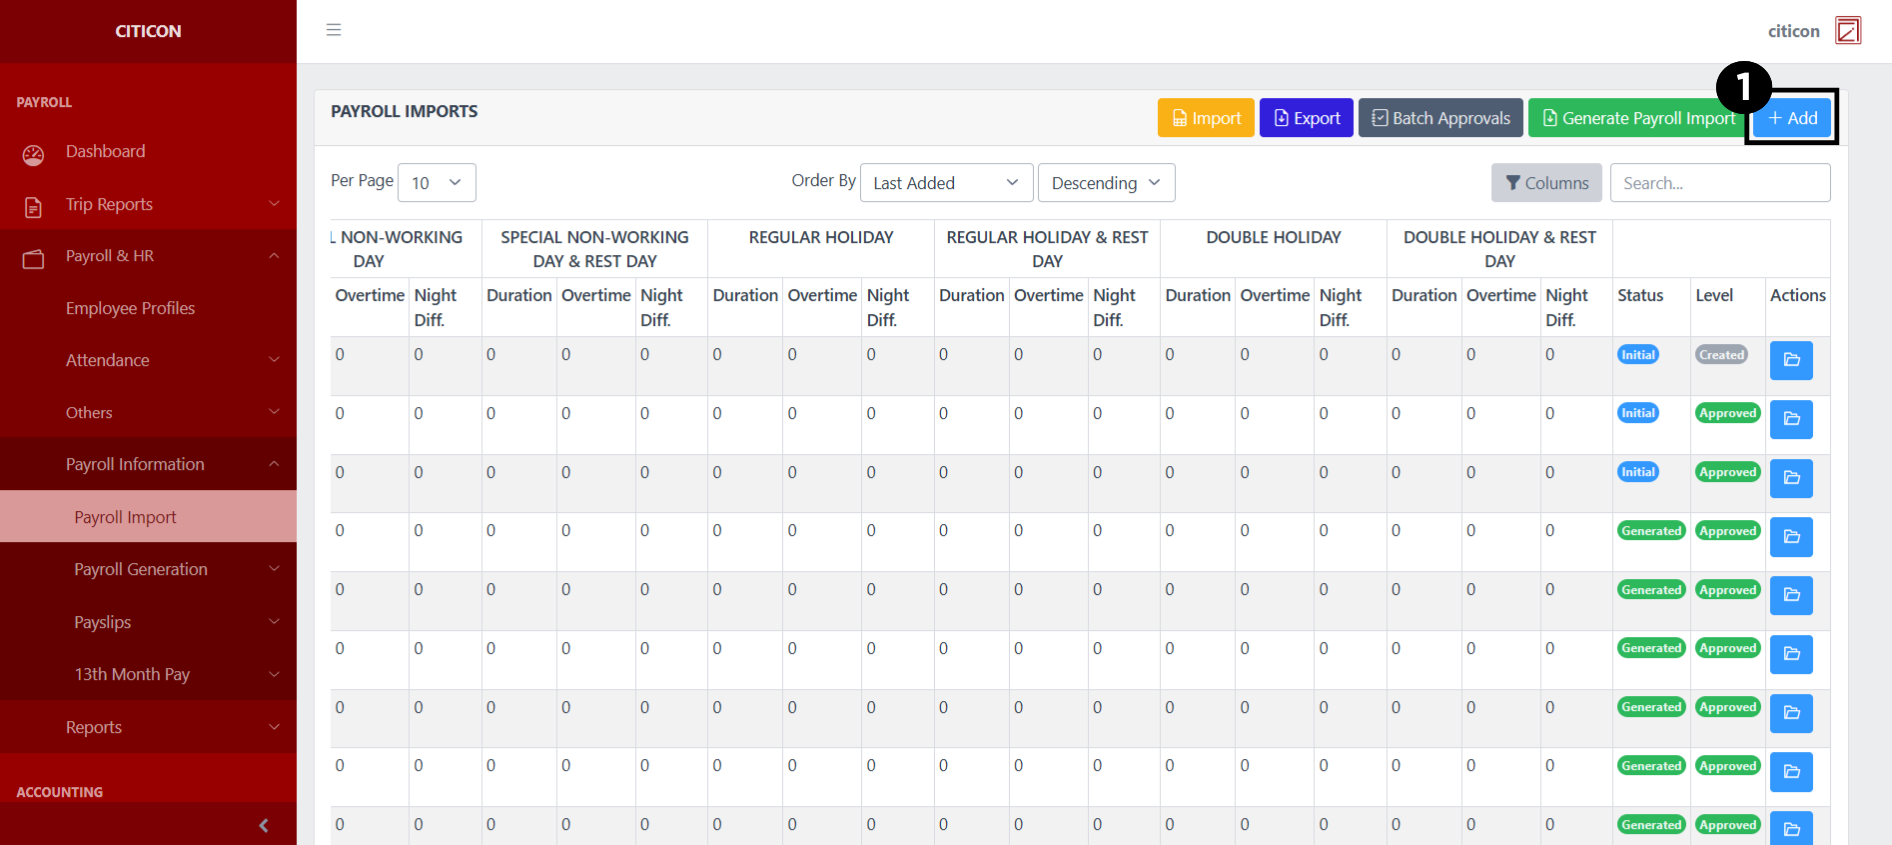
To access the Payroll Import. Go to Payroll, select Payroll & HR, select Payroll Information, then select Payroll Import.
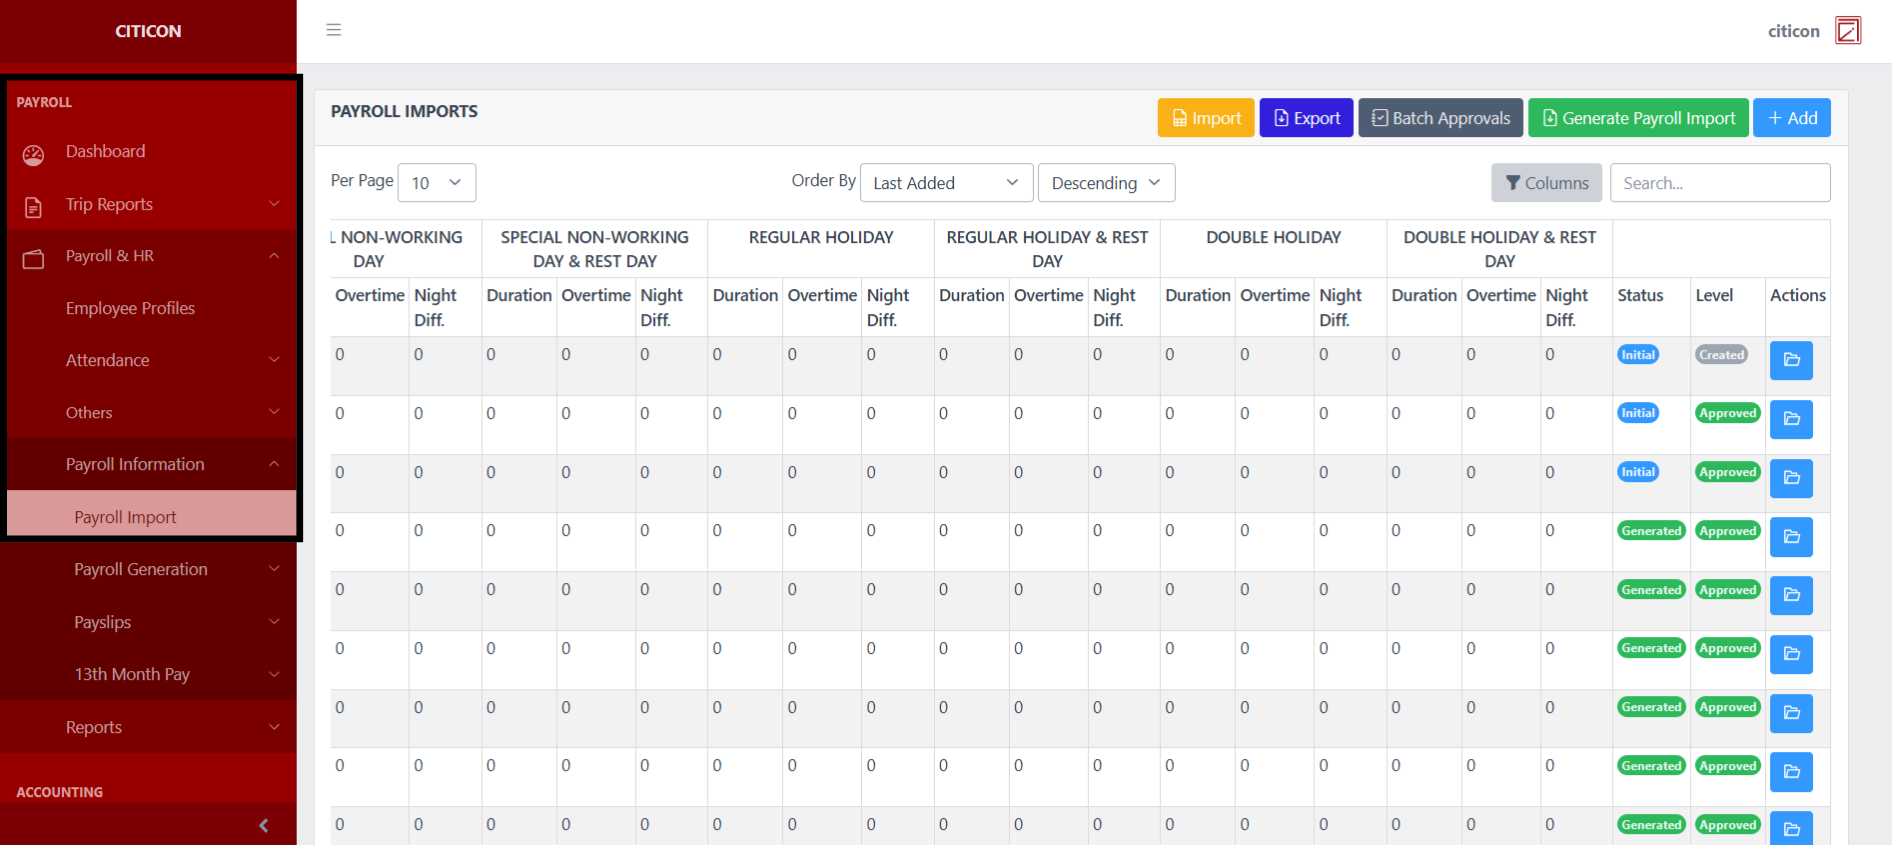
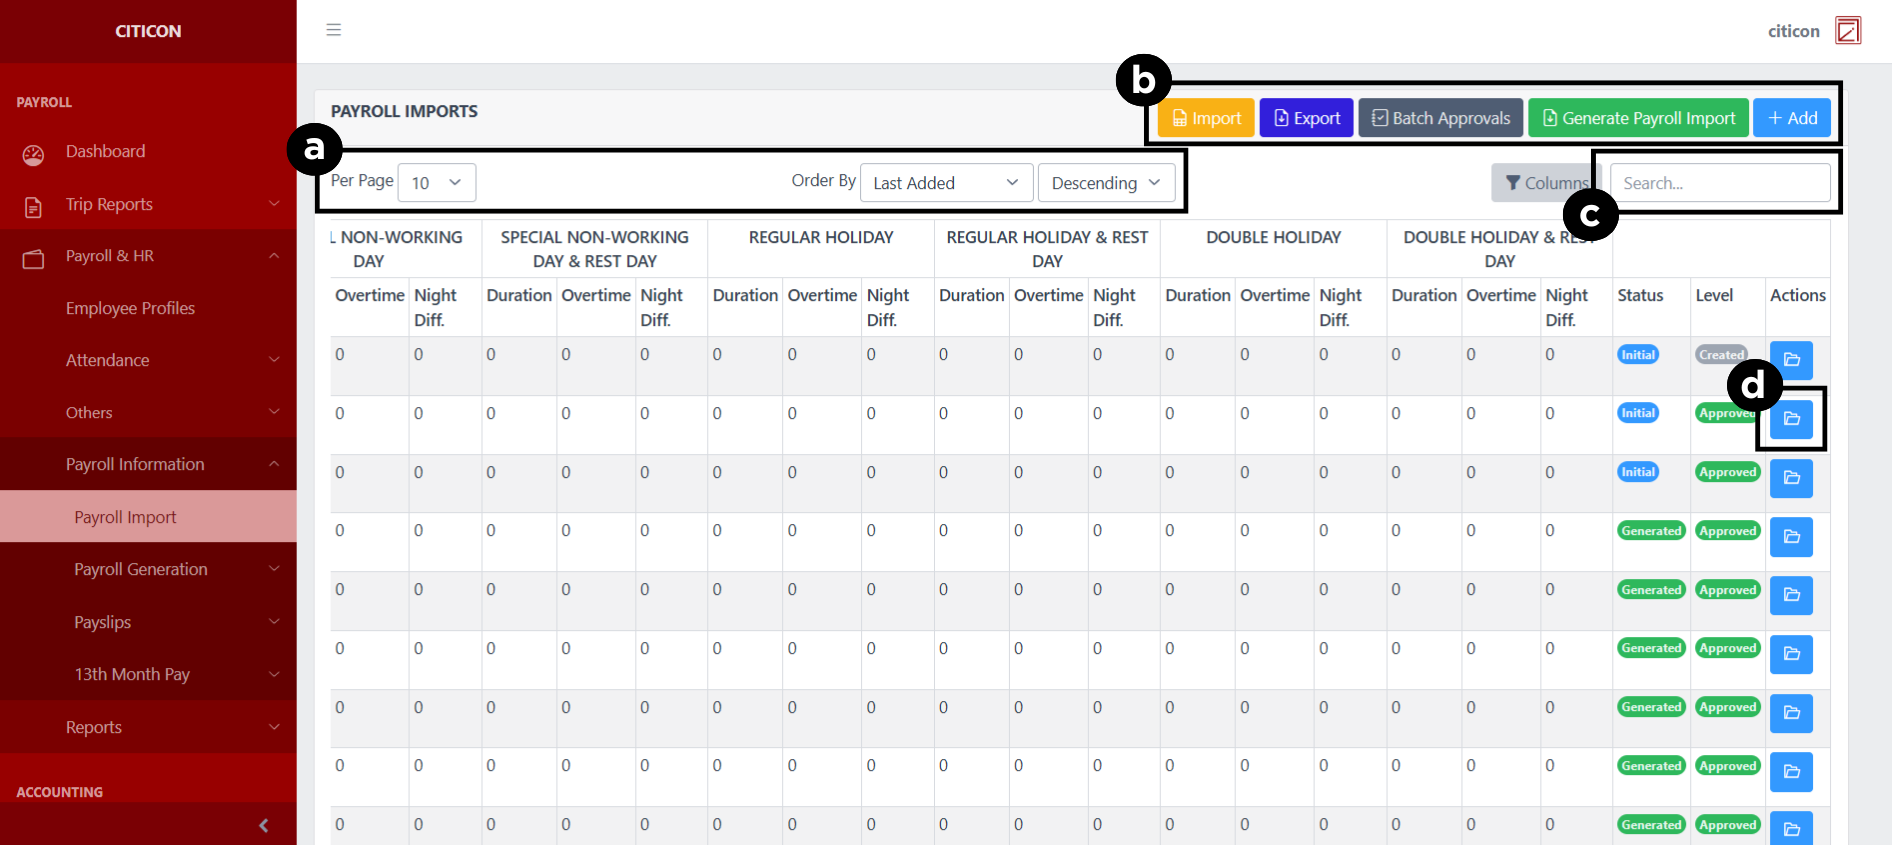
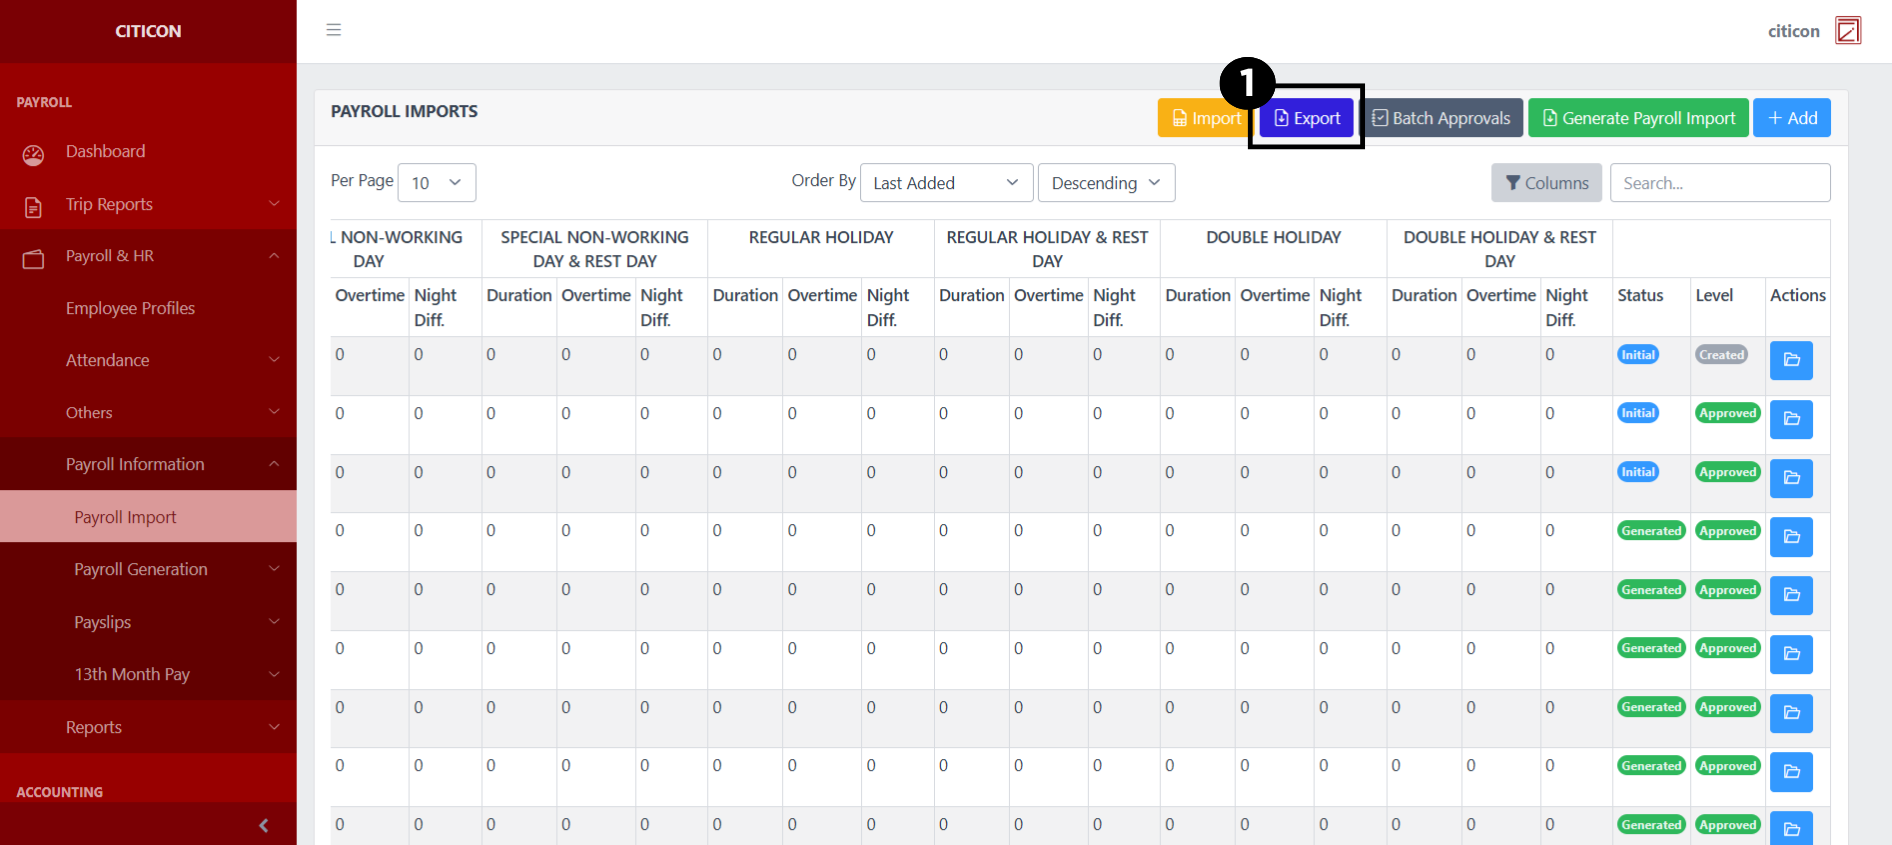
a. Adjust the paging, ordering, and sorting of the Payroll Import Page here.
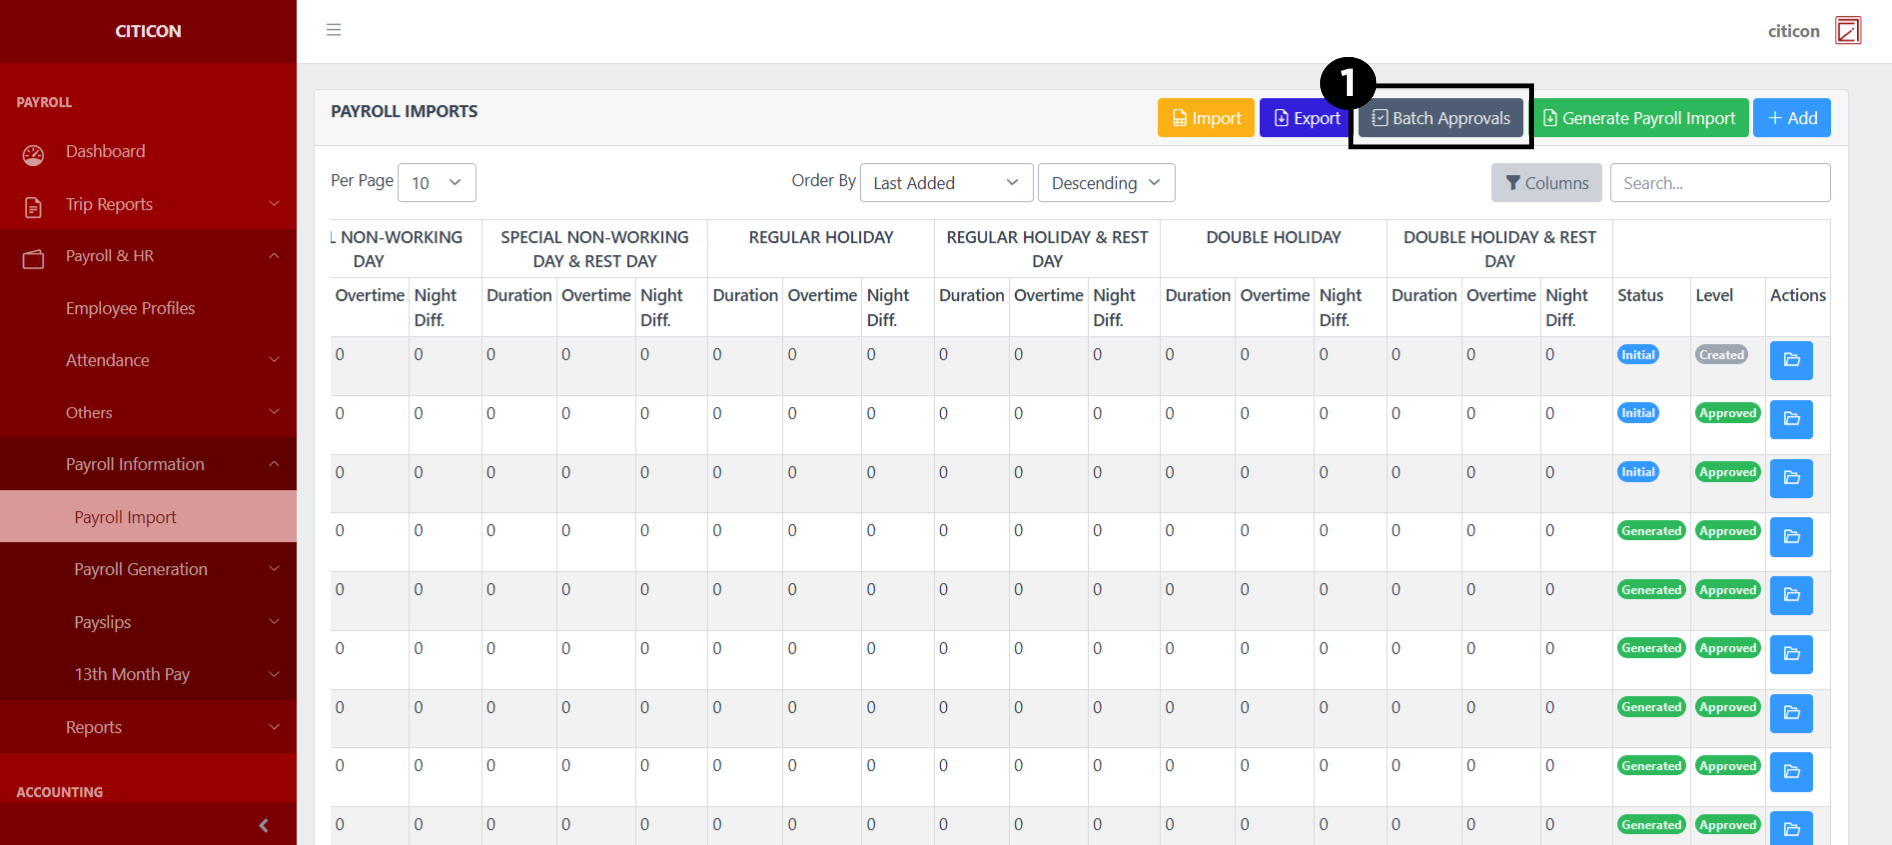
b. Select the respective button to either Import entries, Export current entries, process entries for Approval, Generate Payrol Imports, or Add new imports.
c. Search for specific entry details using the search bar.
d. View or Edit data by selecting the folder button.
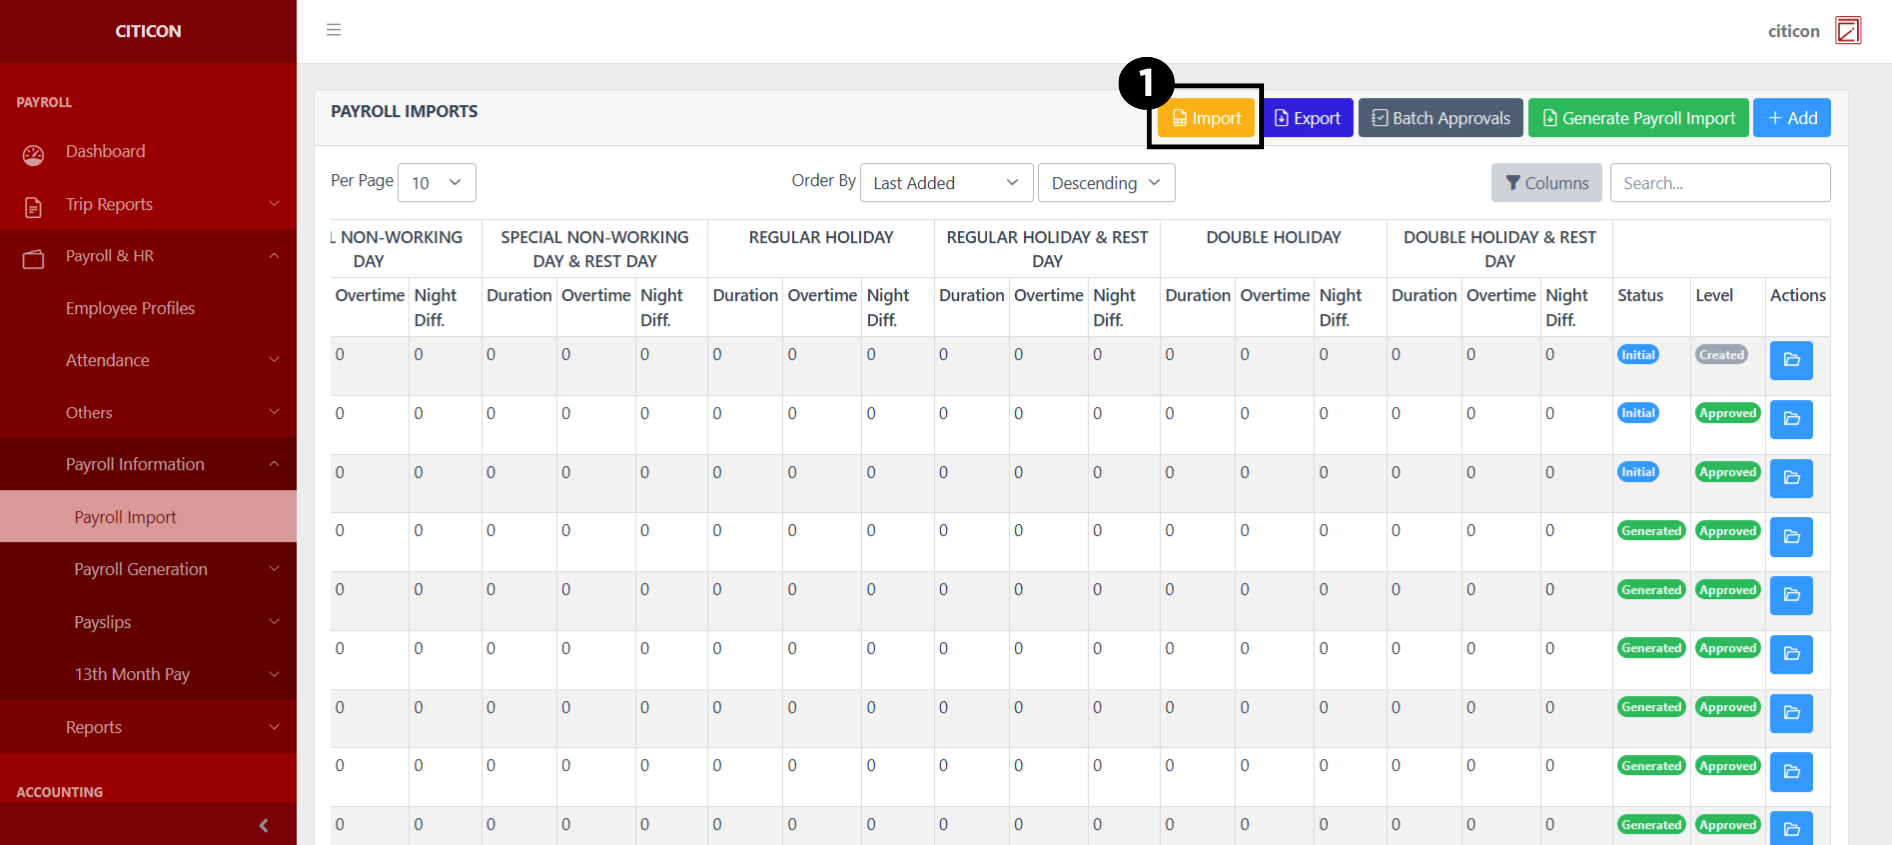
Import Entries
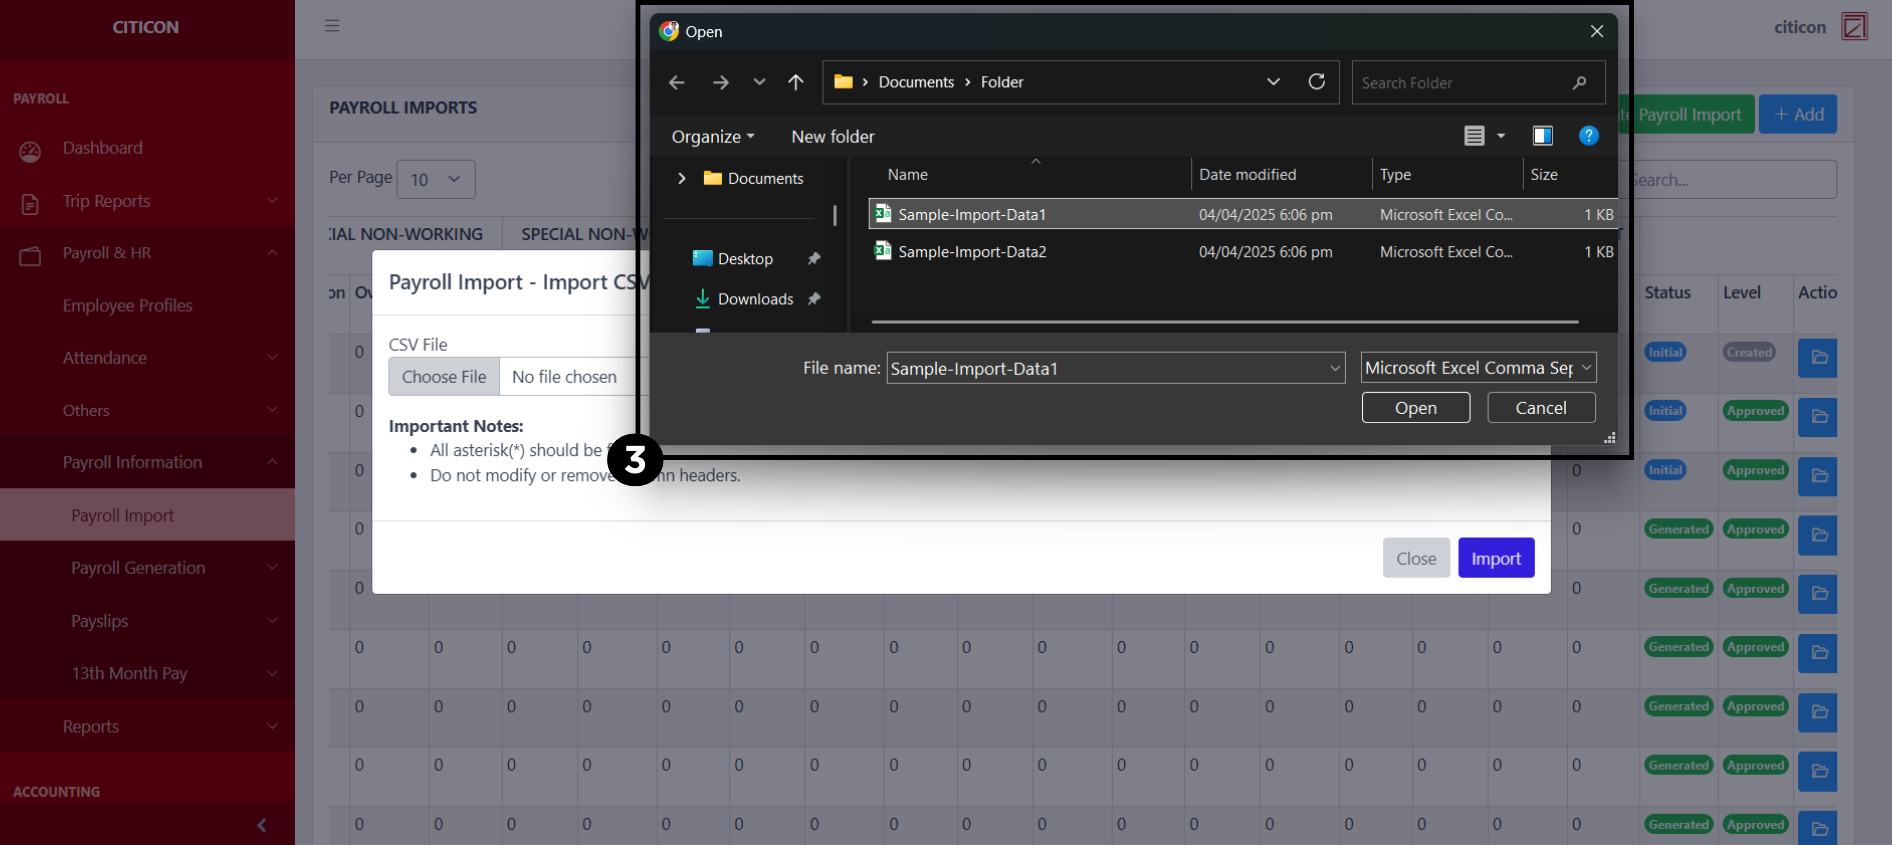
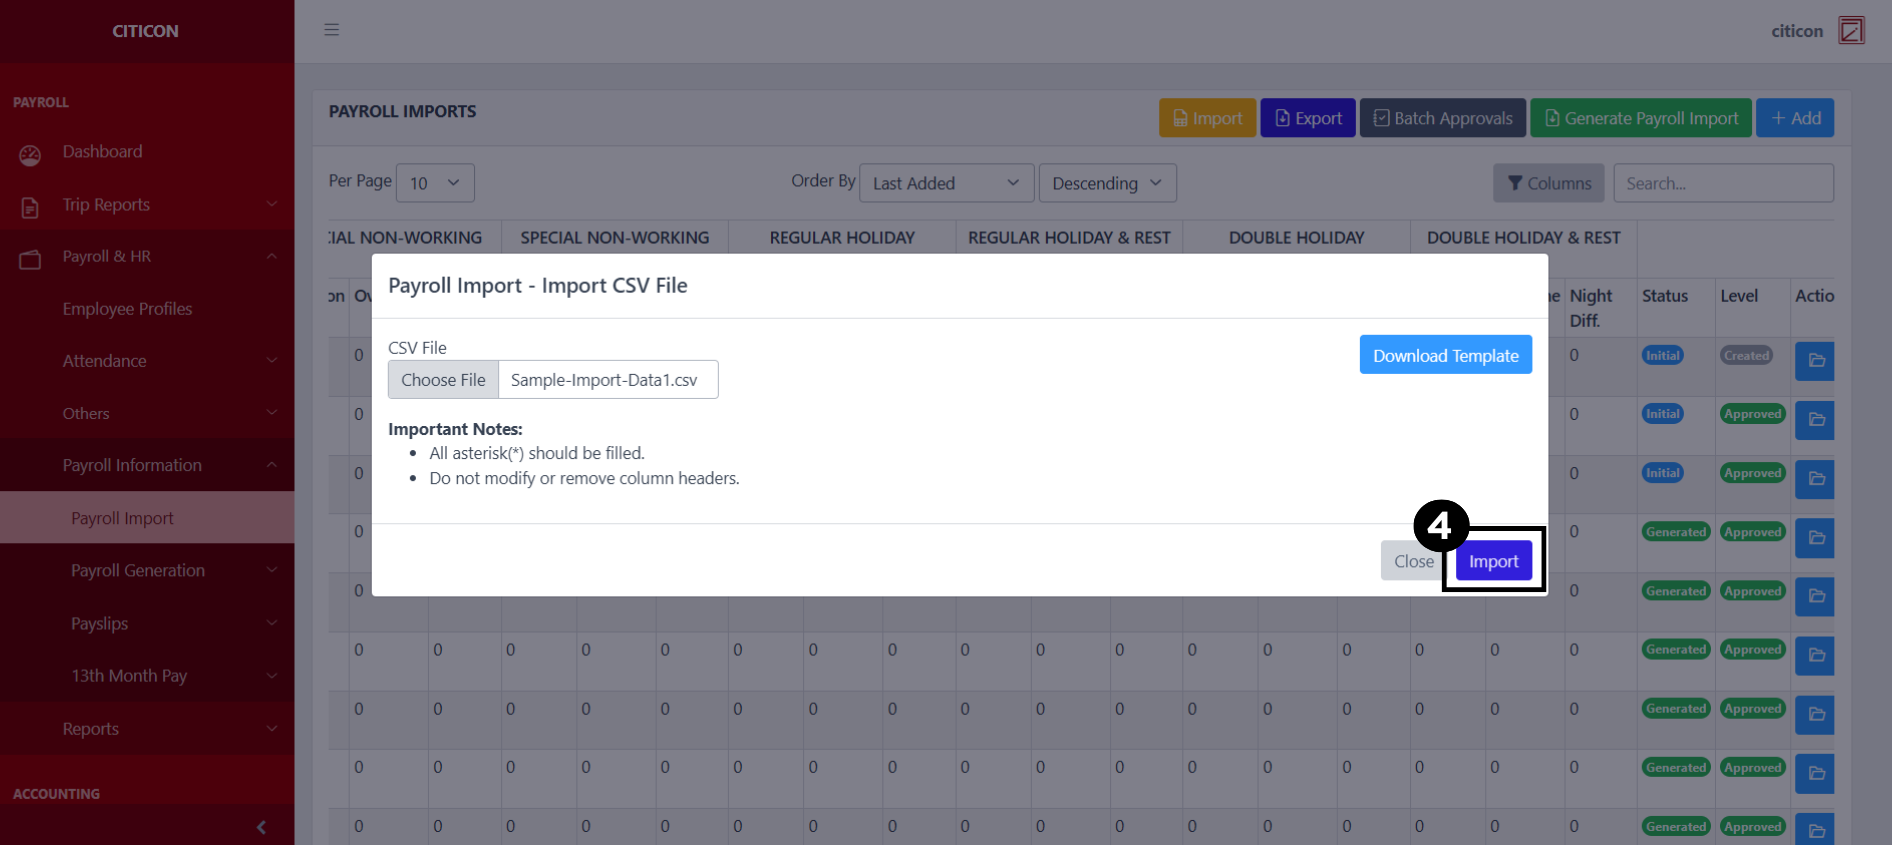
- Select the Import button to import new entries.
- Select the Choose File button.
Select the Download Template button to view the required format for imported entries, including the number of columns, and mandatory fields to be filled.
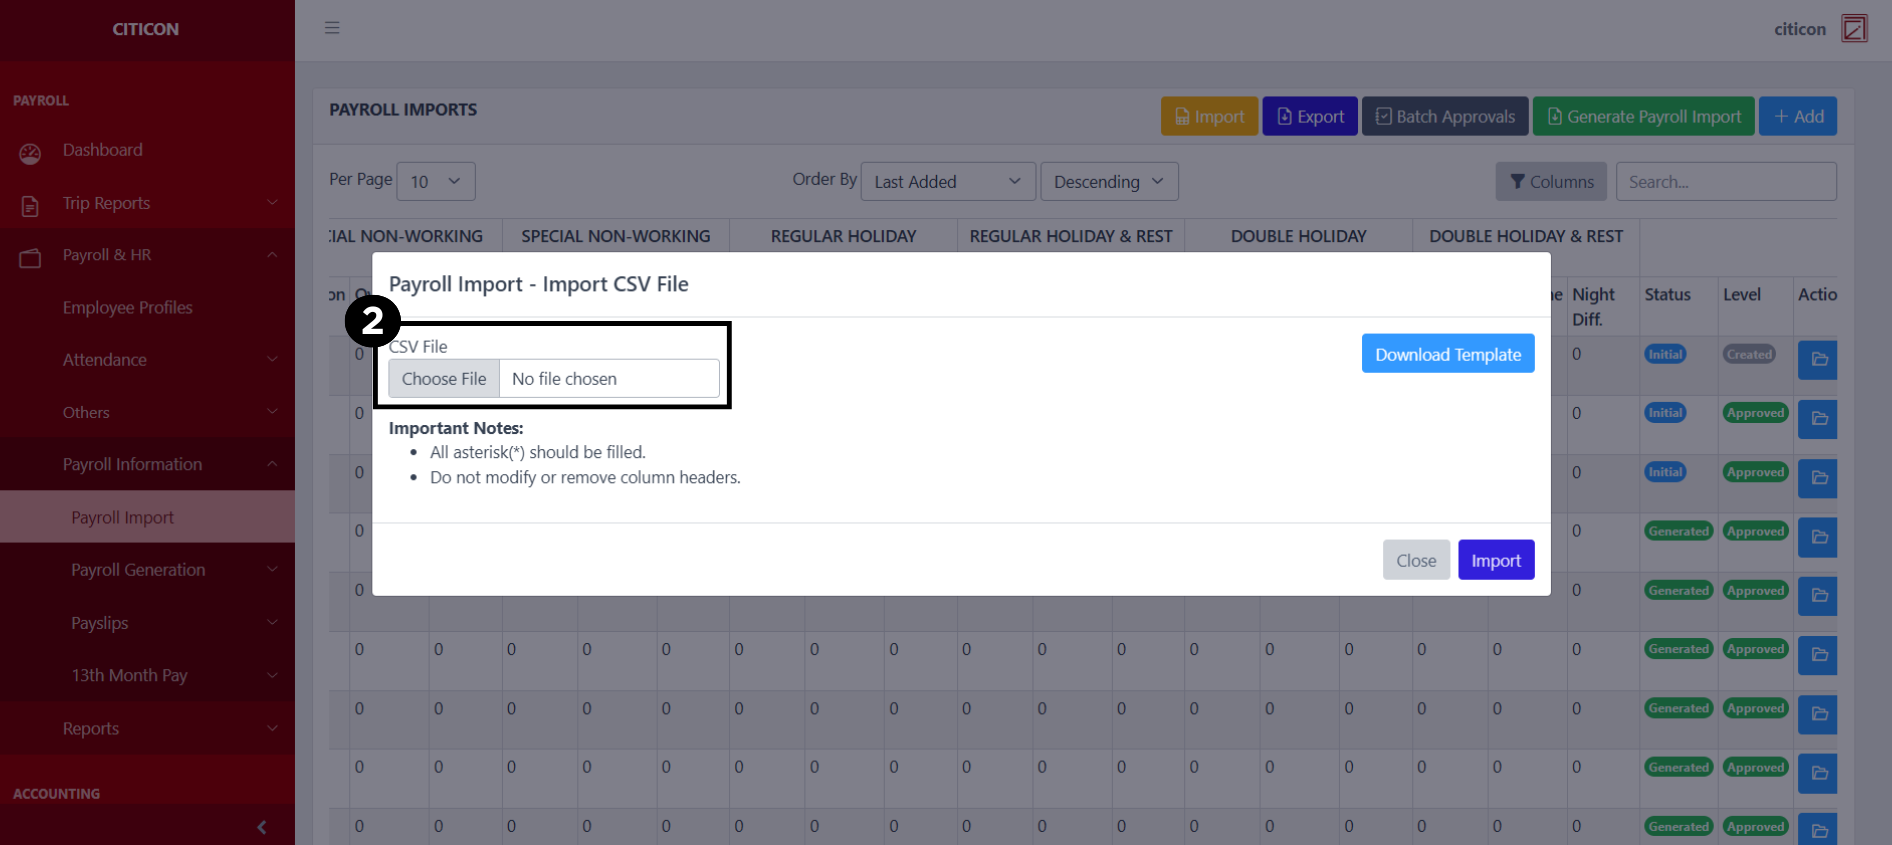
- From your local storage, select the file you want to import, then select the Open button.
- Select the Import button.
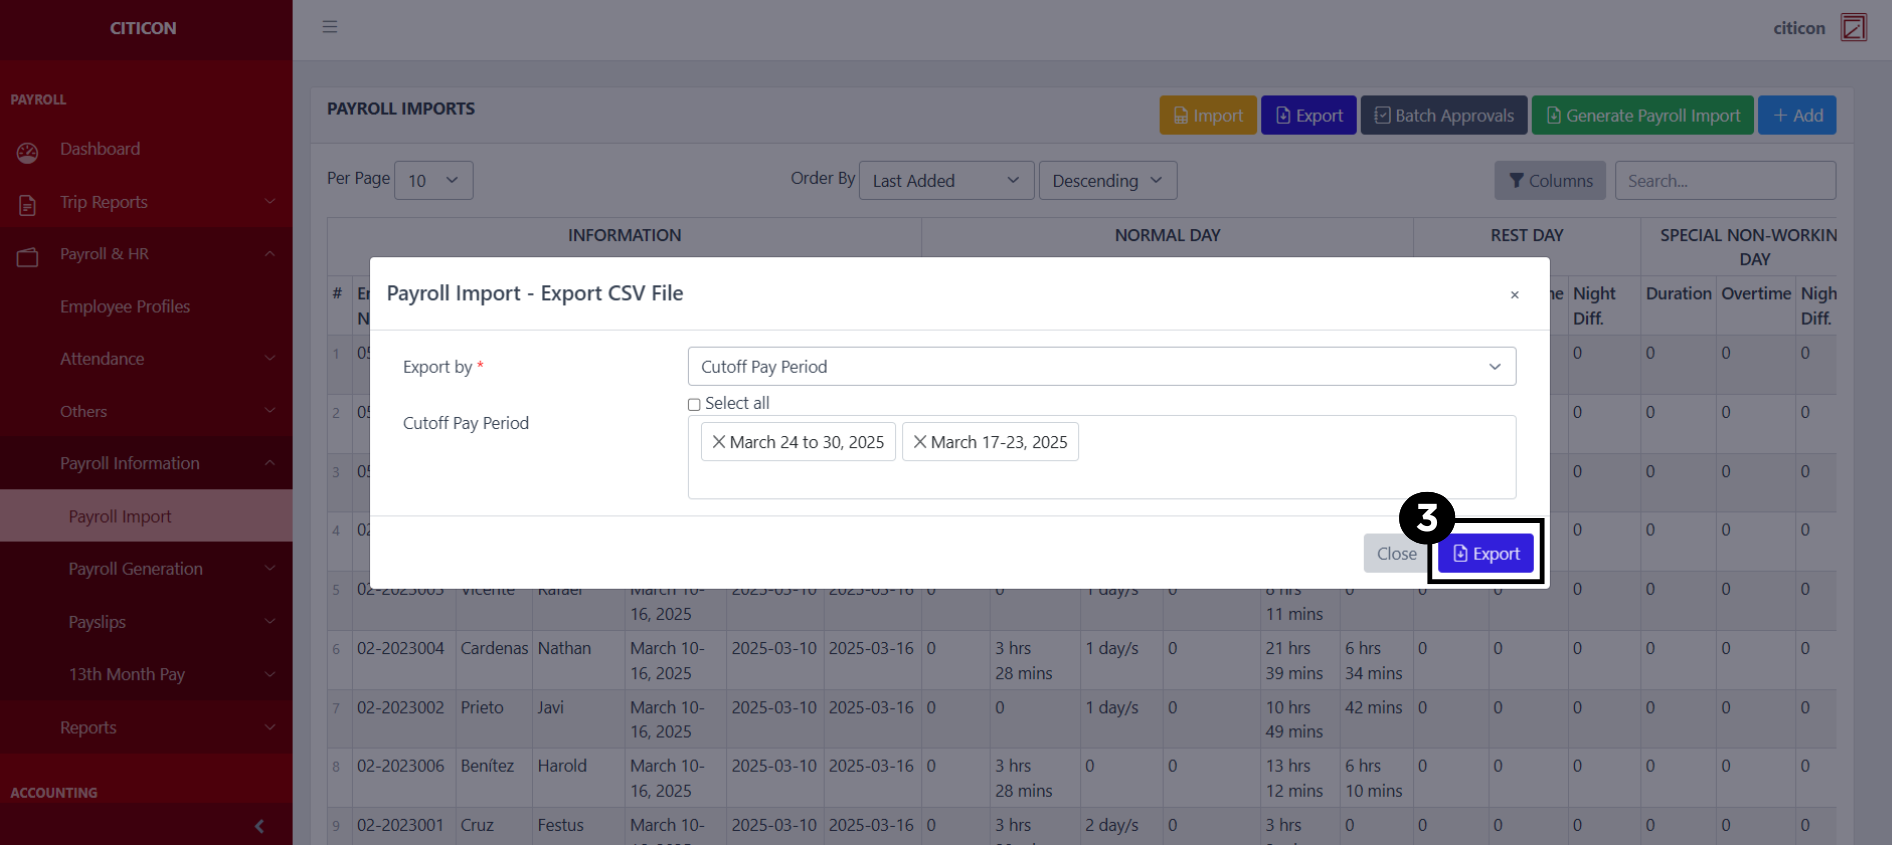
Export Entries
- Select the Export button.
- Input the necessary details regarding the entries you would like to export (type, group, duration, etc.)
All fields that has an asterisk (*) are required to have an input.
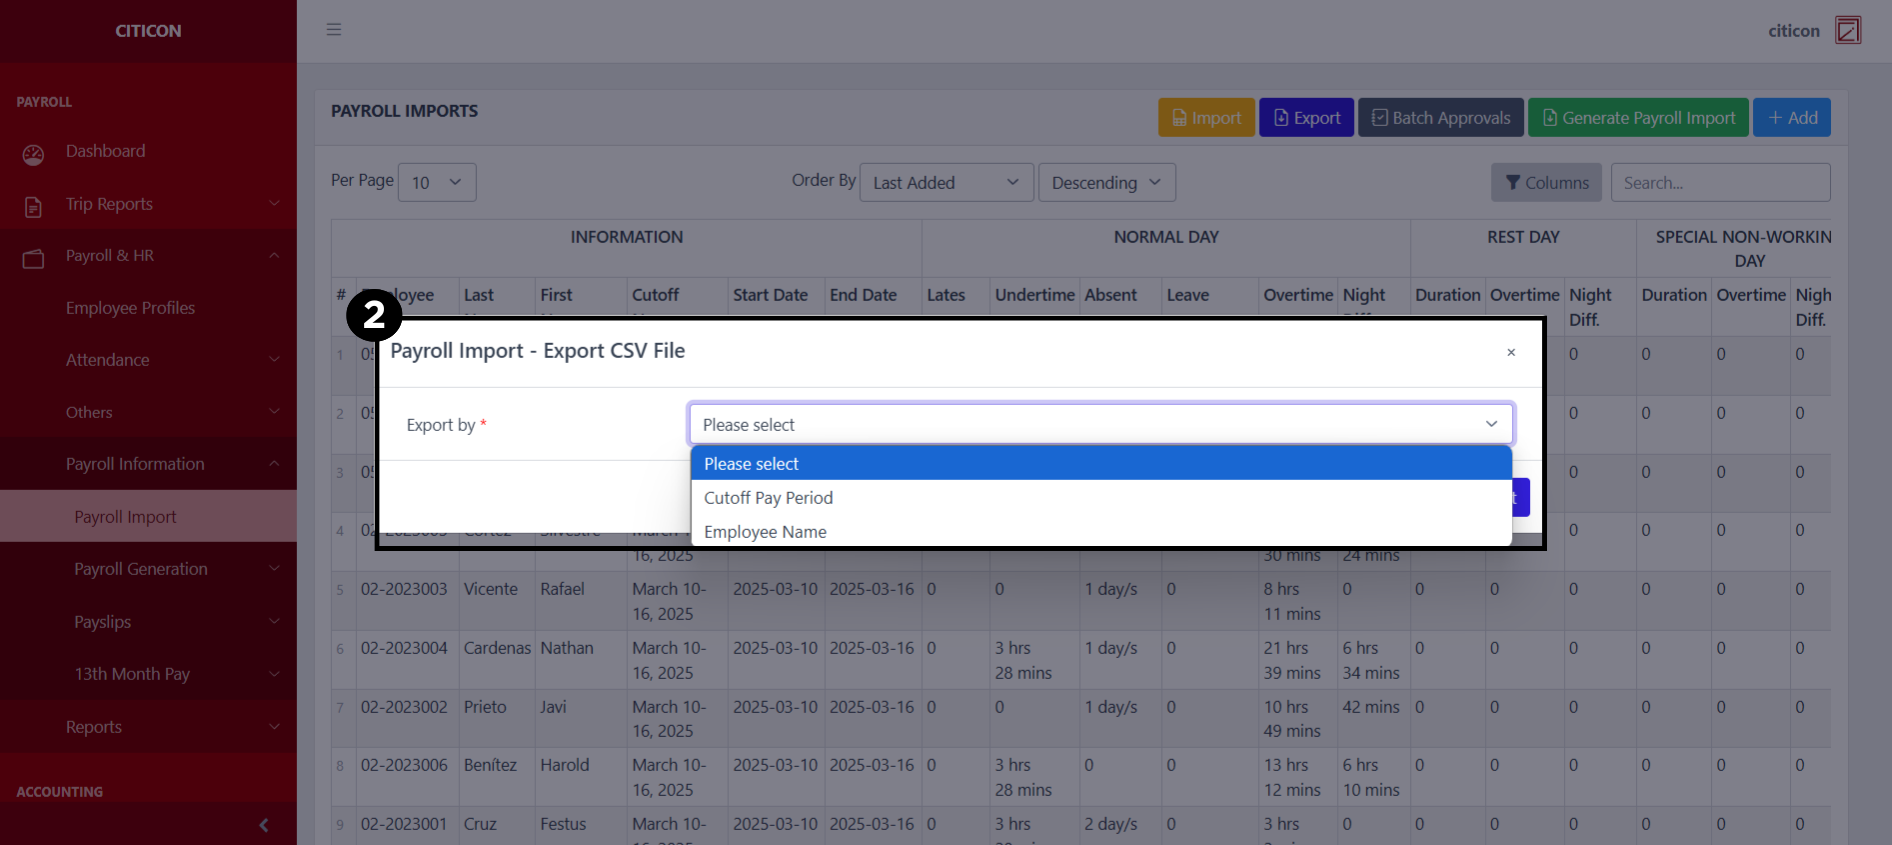
- Select the Export PDF button.
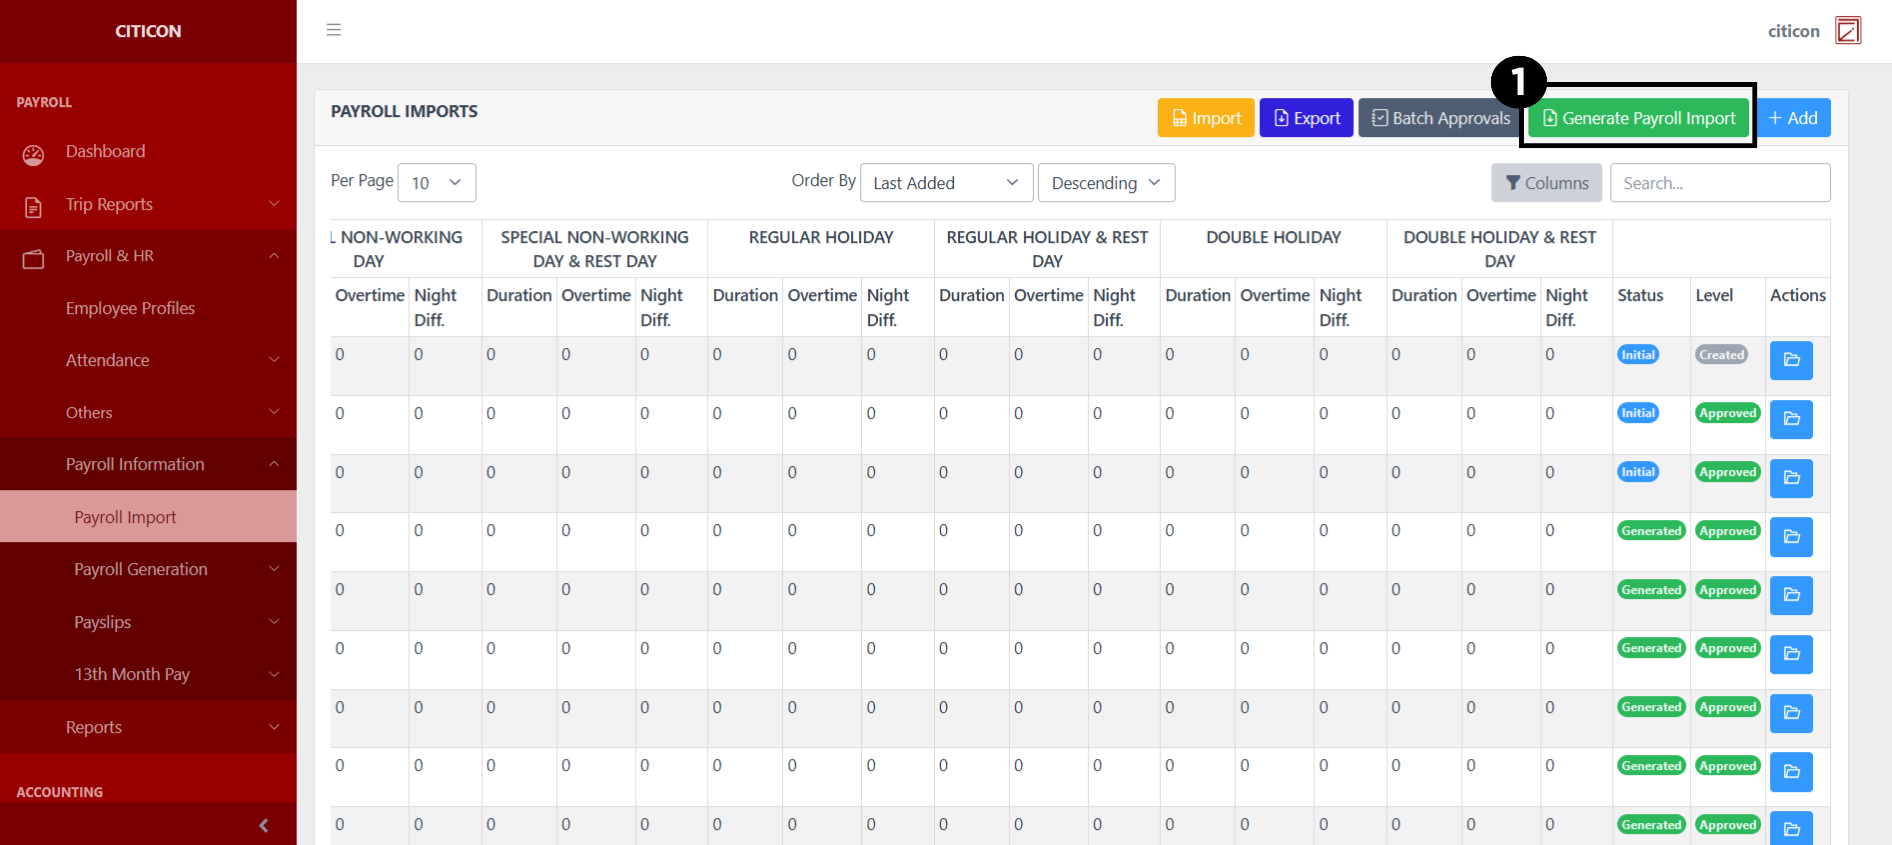
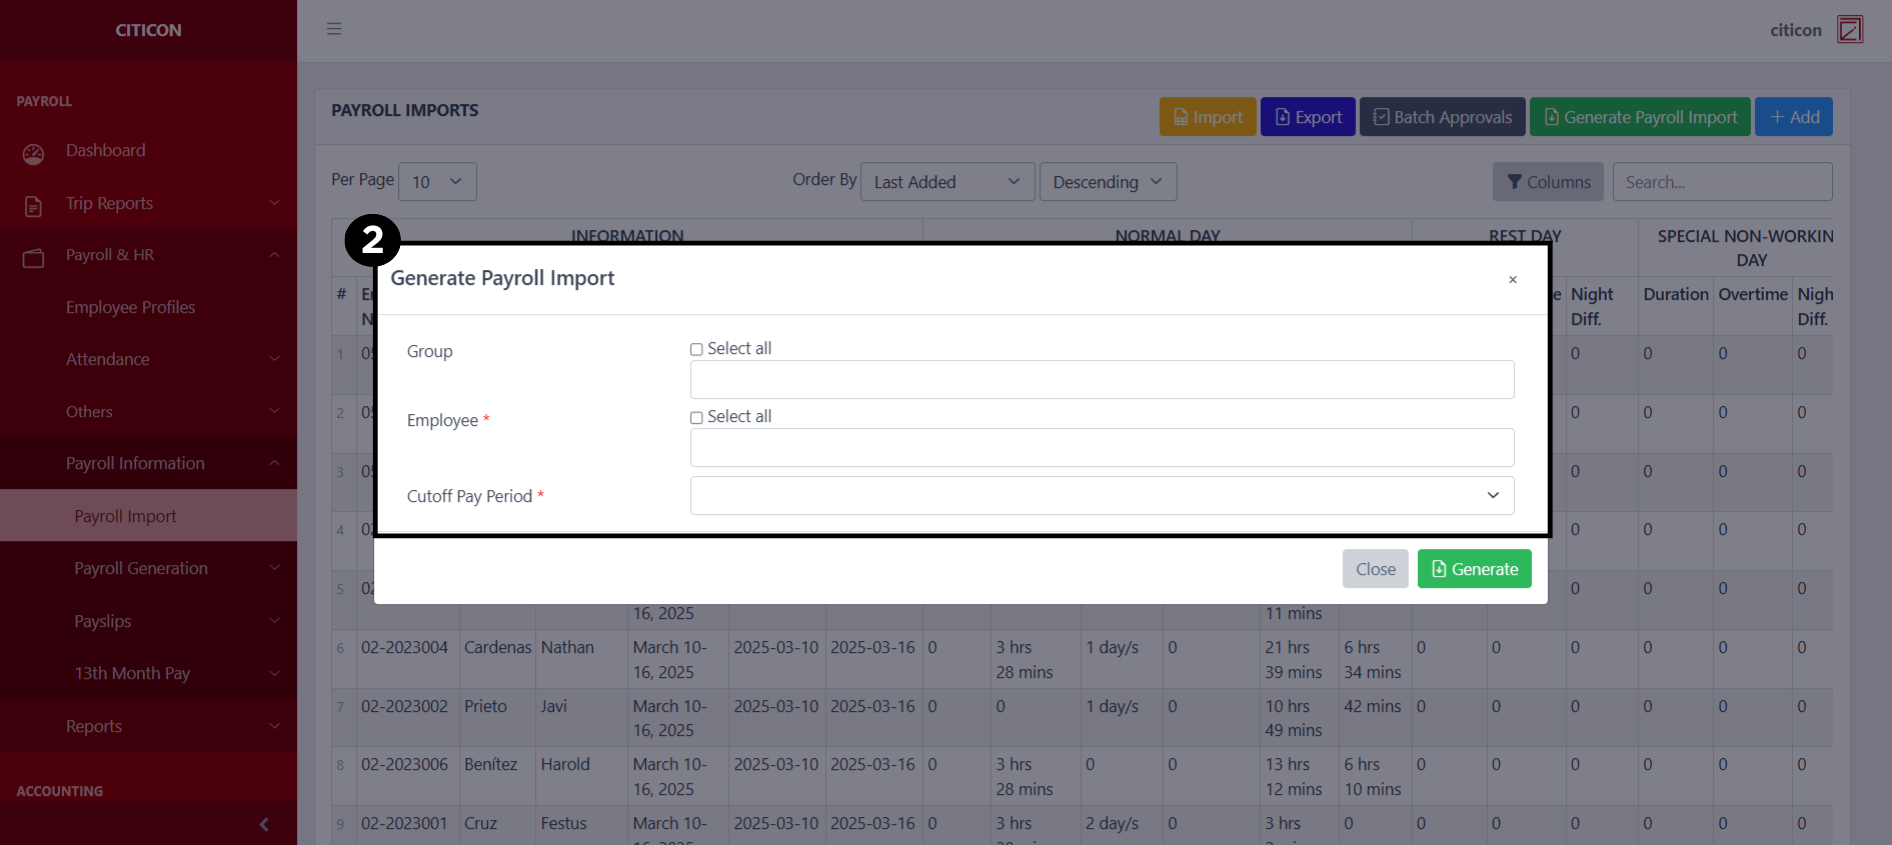
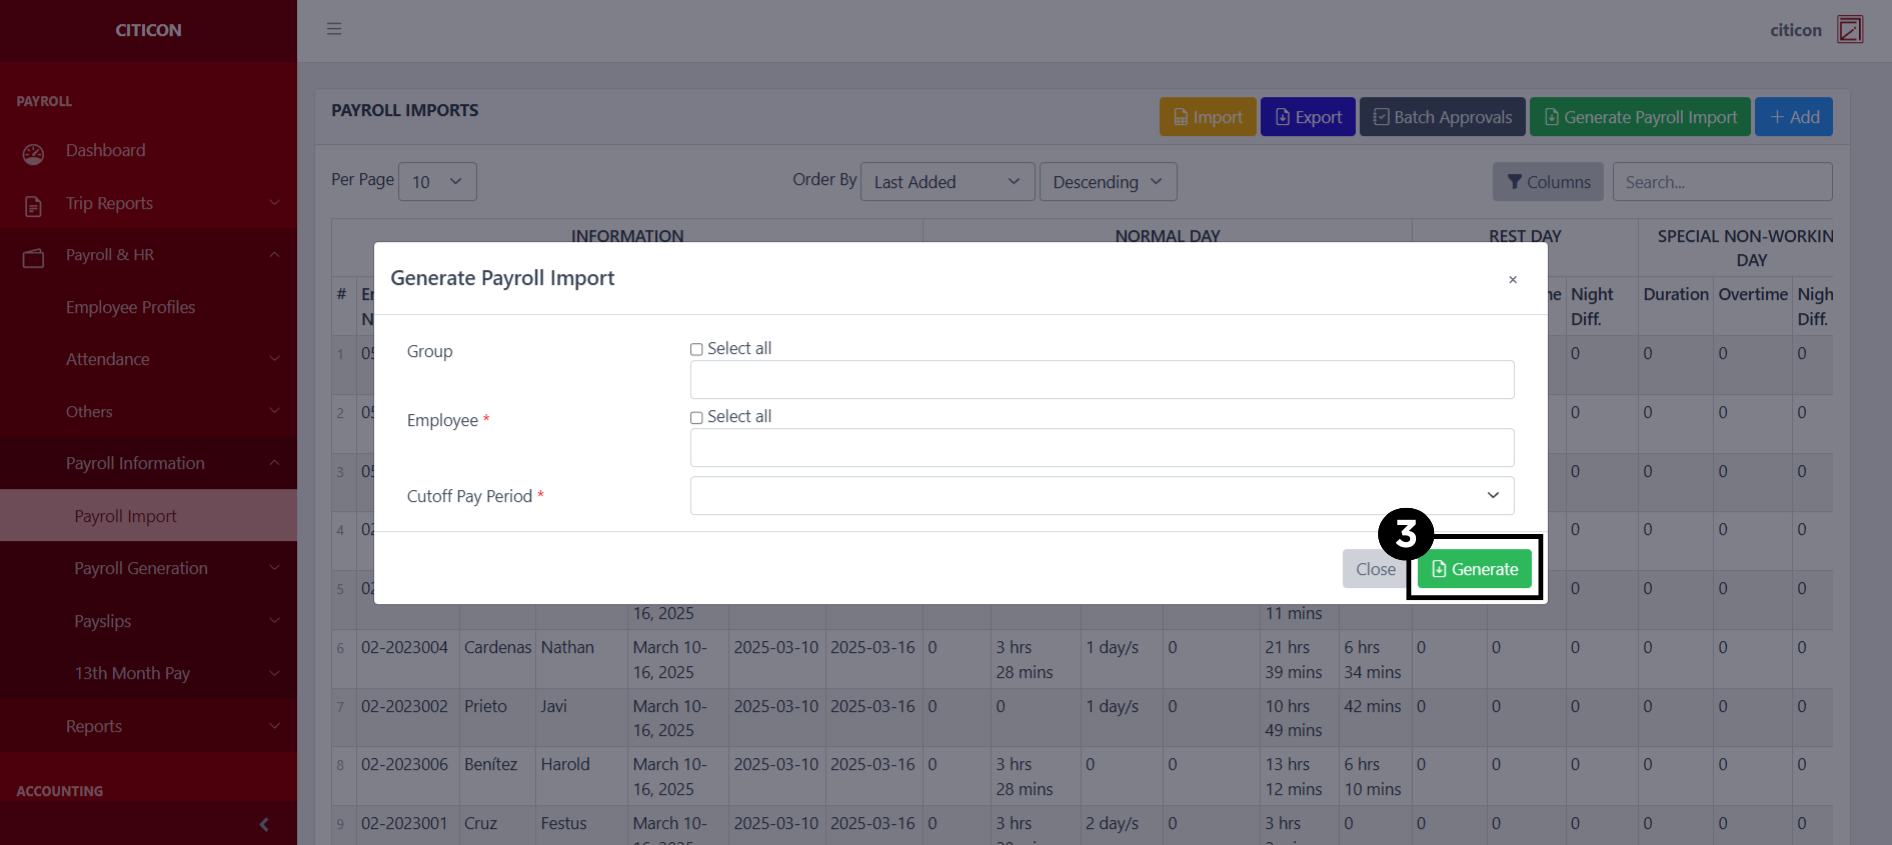
Generate Payroll
- Select the Generate Payroll Import button.
- Input the necessary details regarding the payroll entries you would like to generate.
All fields that has an asterisk (*) are required to have an input.
- Select the Generate button.
Add Entry
- Select the Add button to add a new entry.
Select if the entry is One Time or a Recurring type.
- Input the necessary details for your new entry.
All fields that has an asterisk (*) are required to be filled up.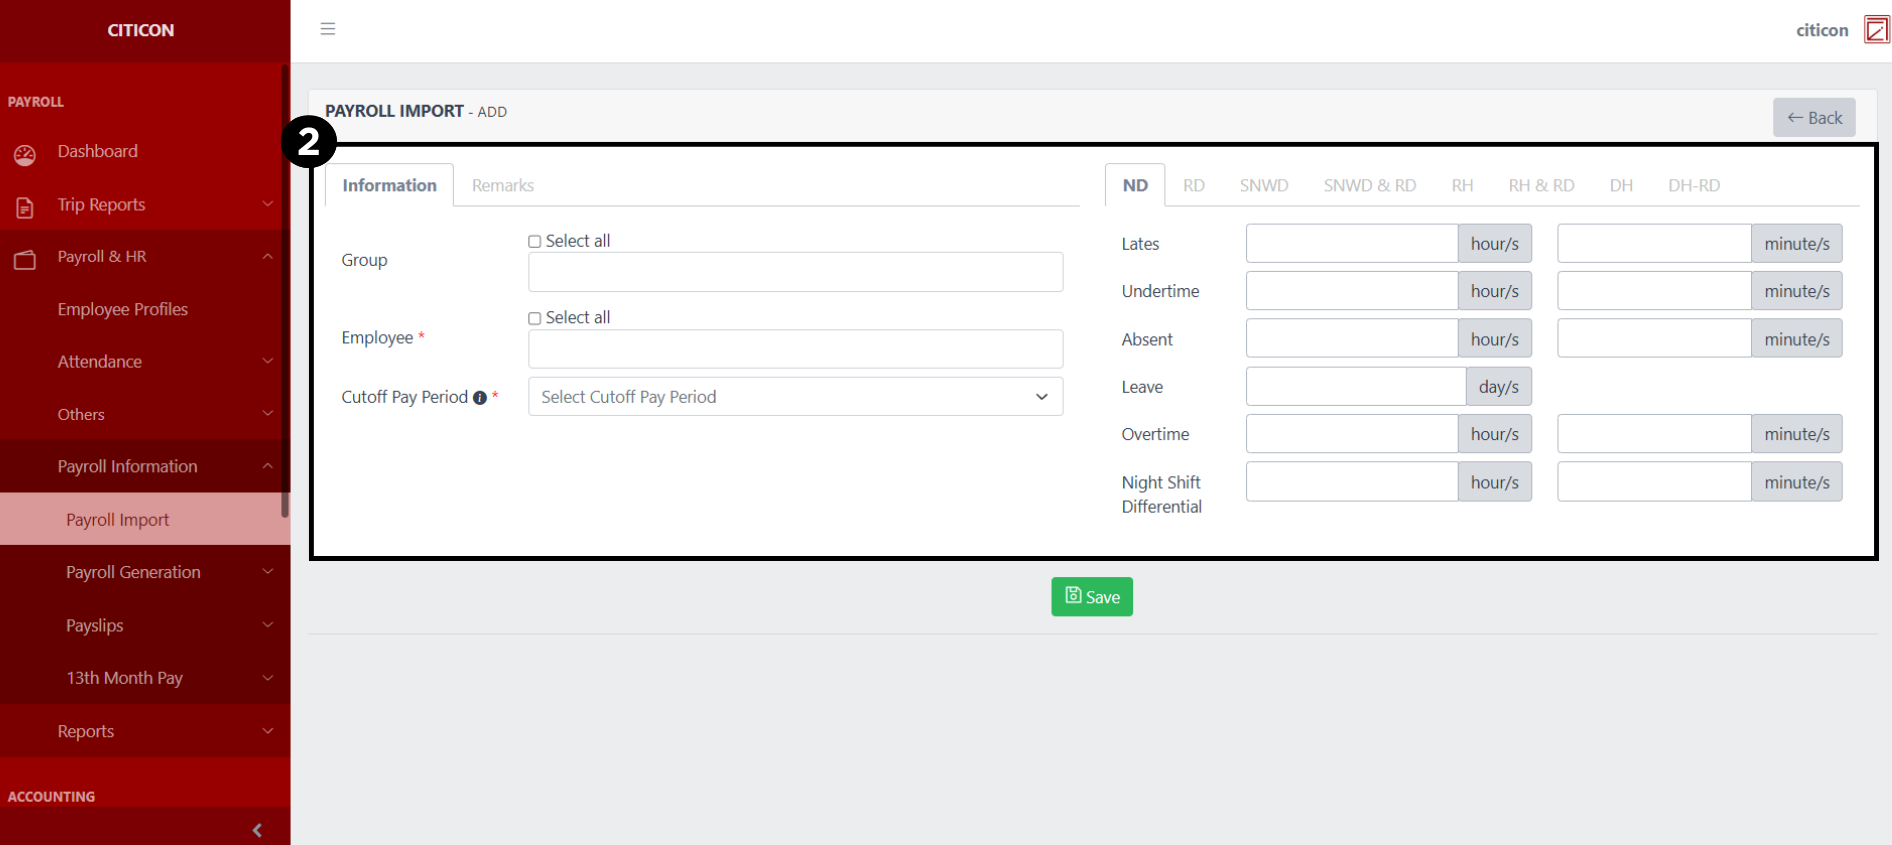
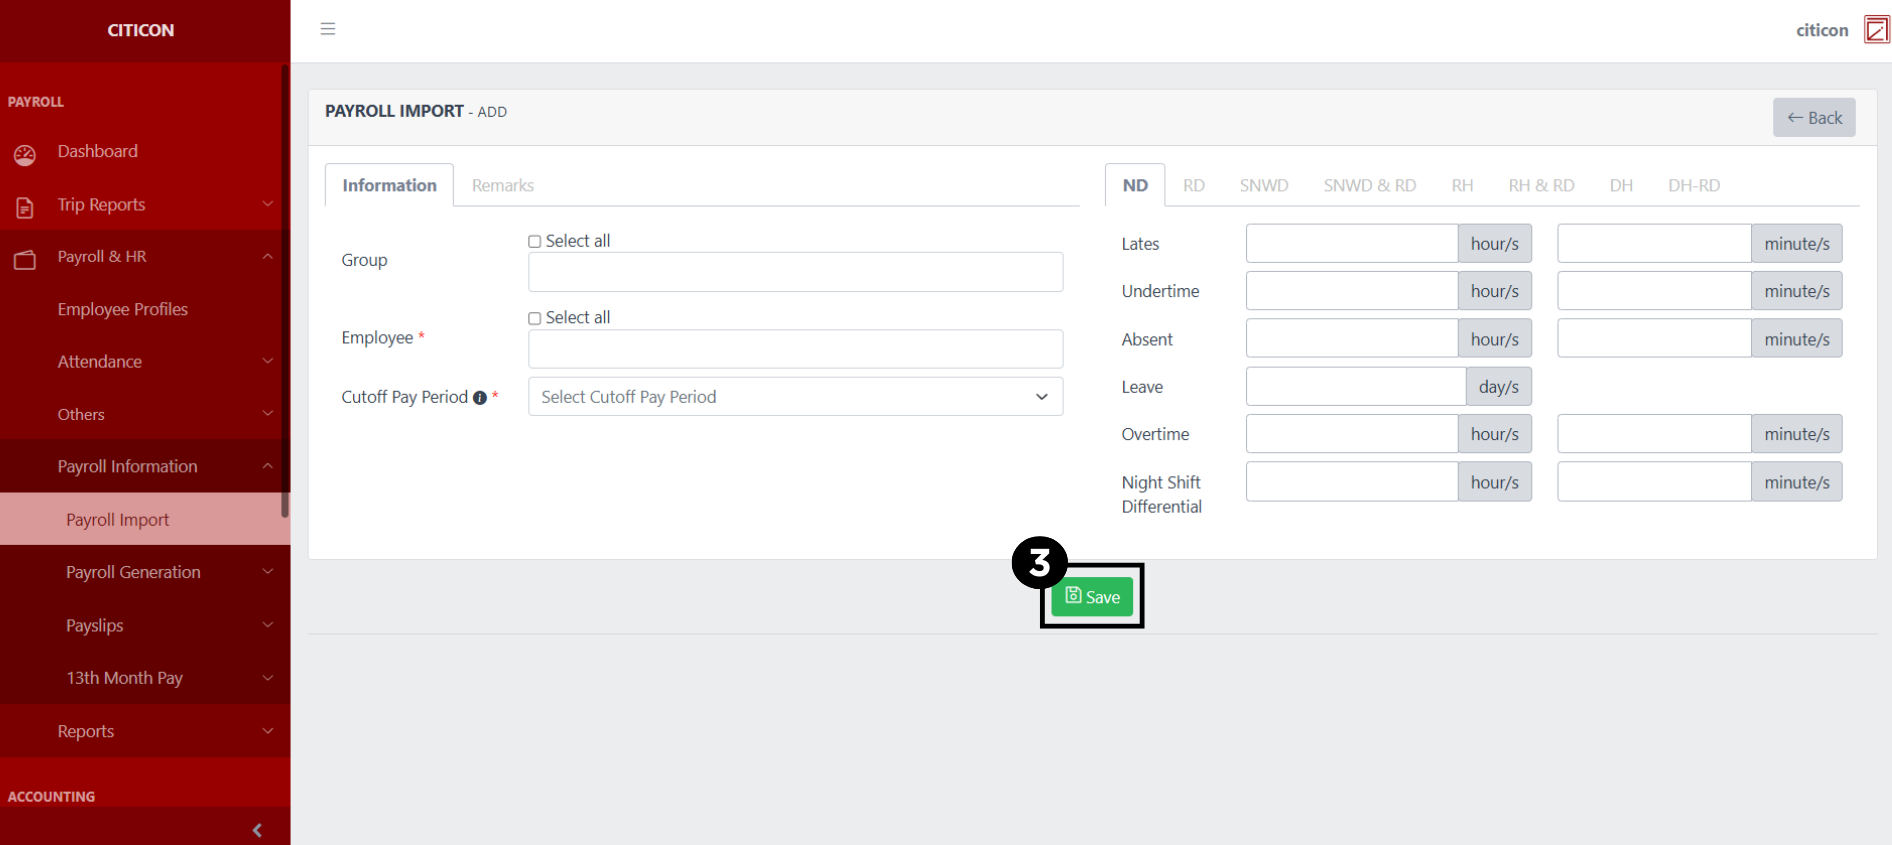
- Select the Save button to save your new entry.
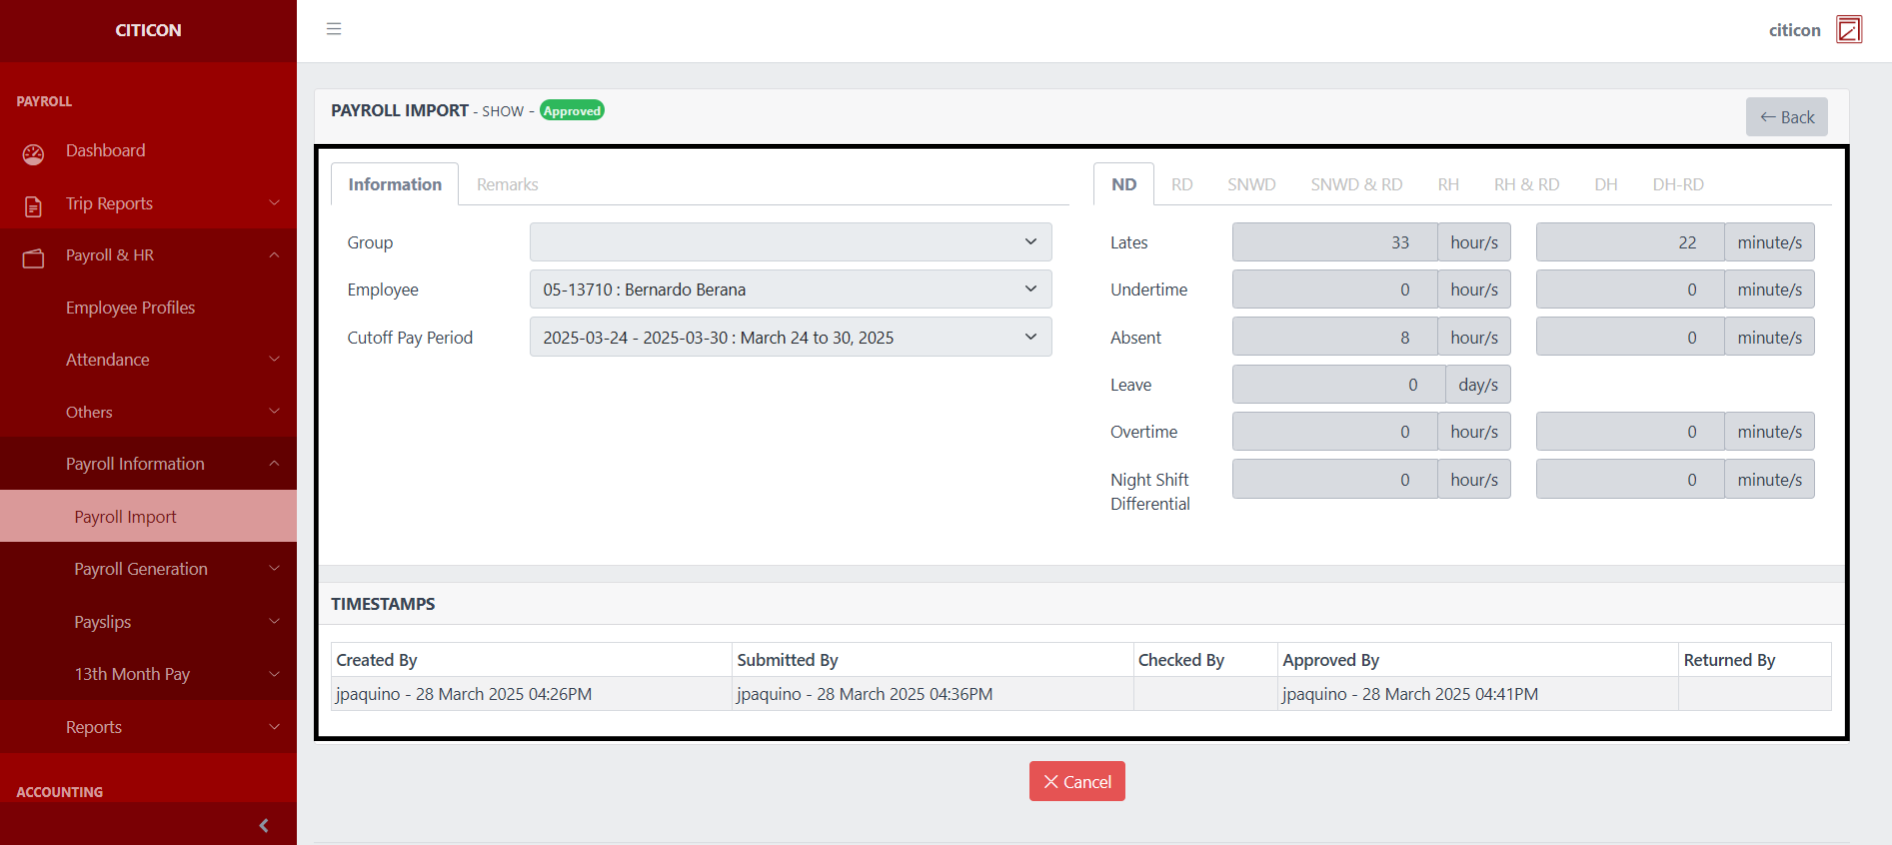
Show Entry
- Select the folder button to view an entry.
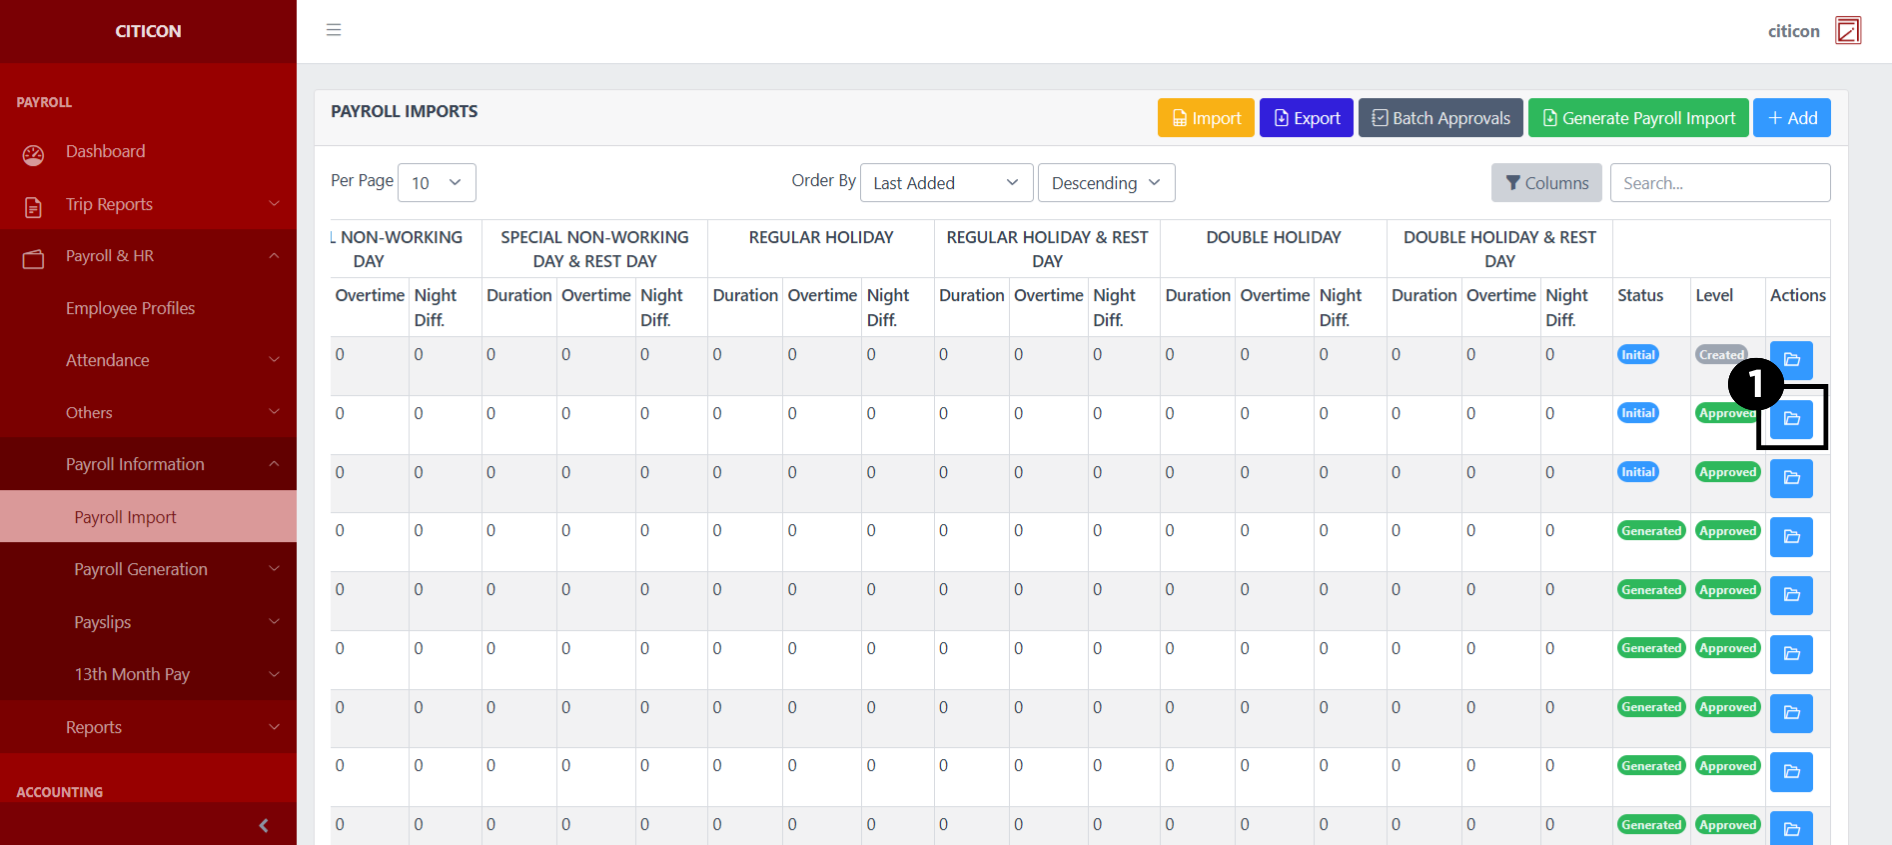 Here you can view more specific details on the entry that you selected.
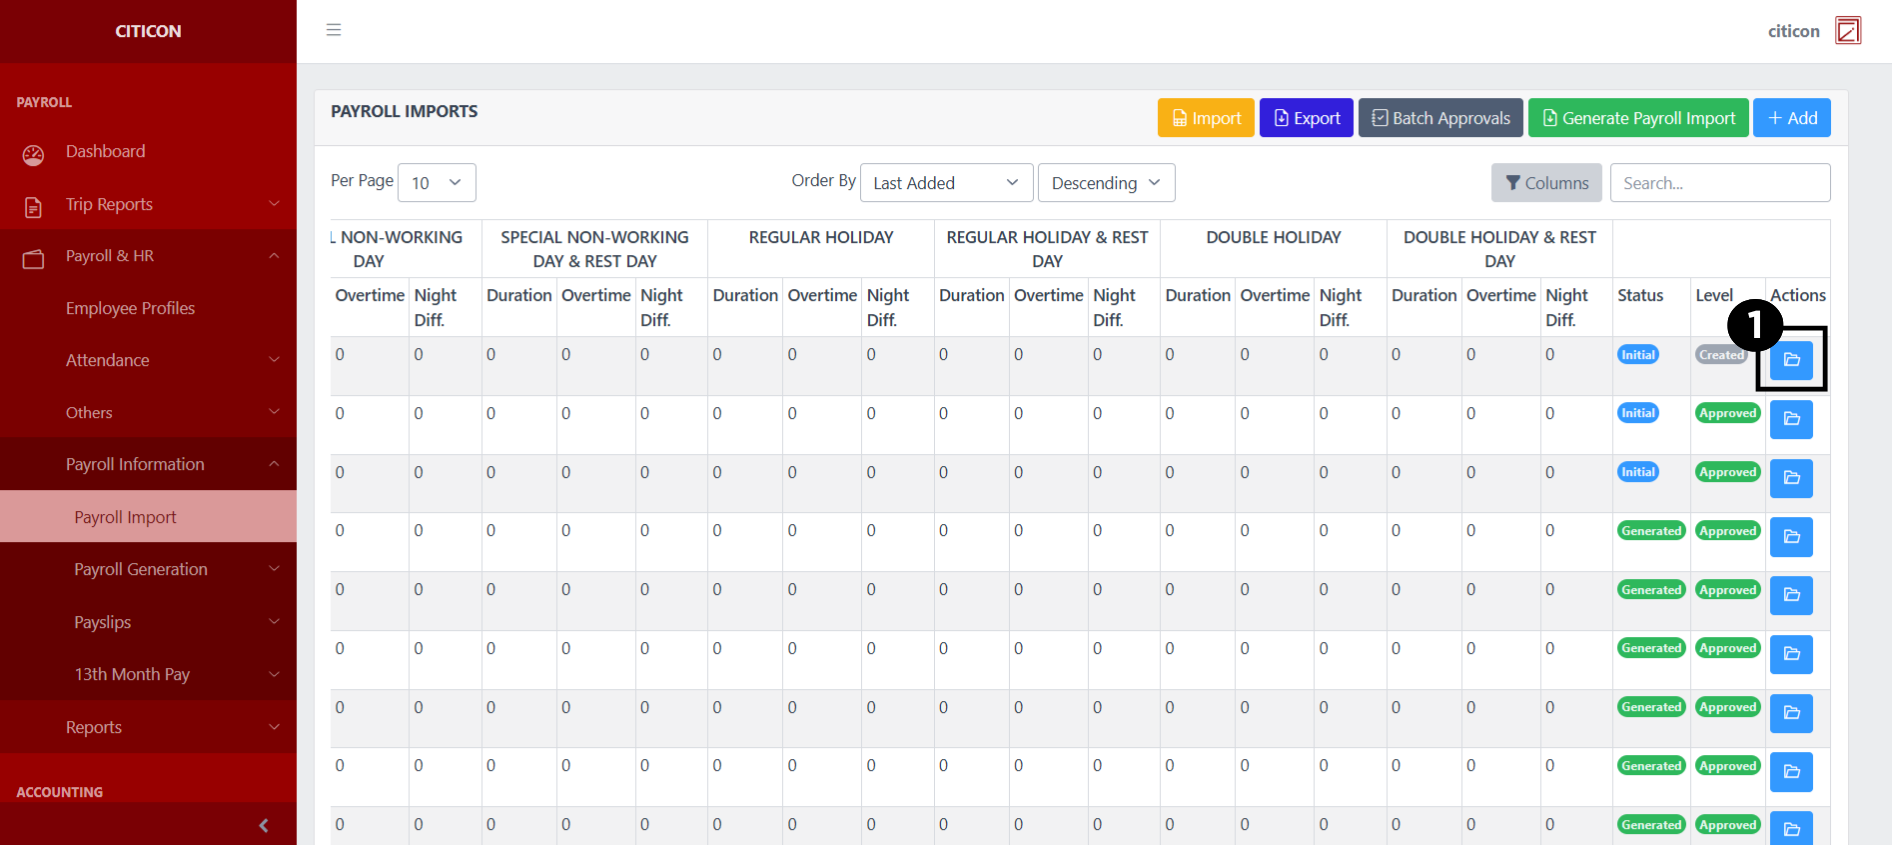
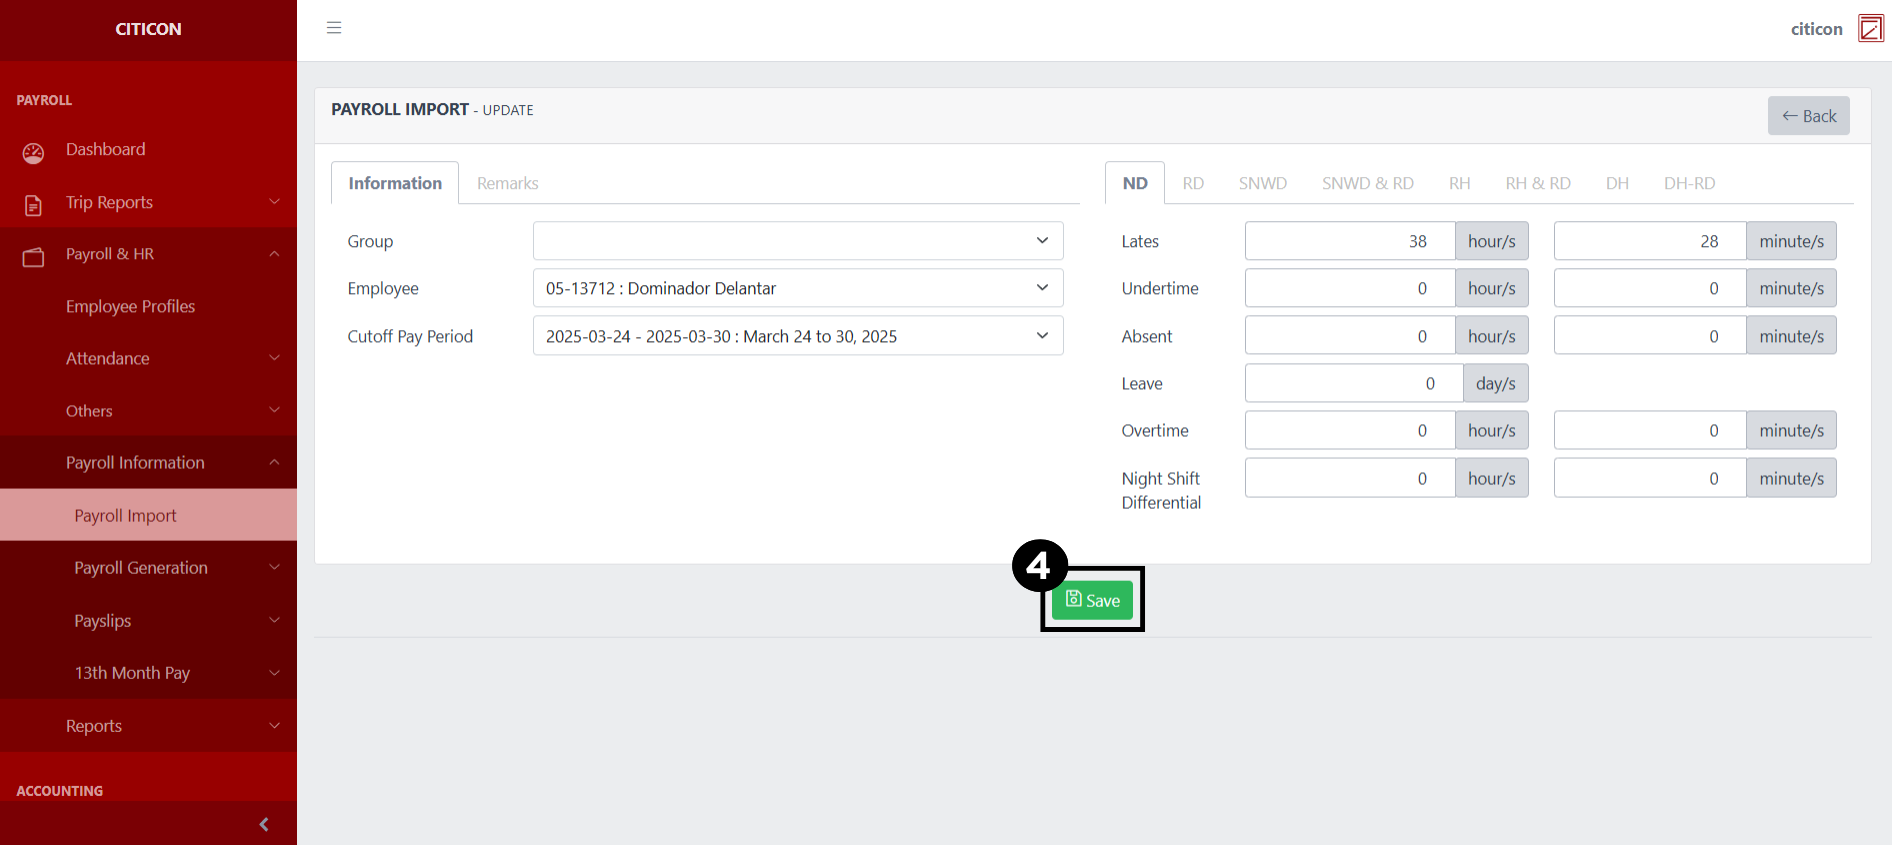
Update Entry
- Select the folder button of the entry which you want to edit.
- Select the Edit button to update the details of the entry.
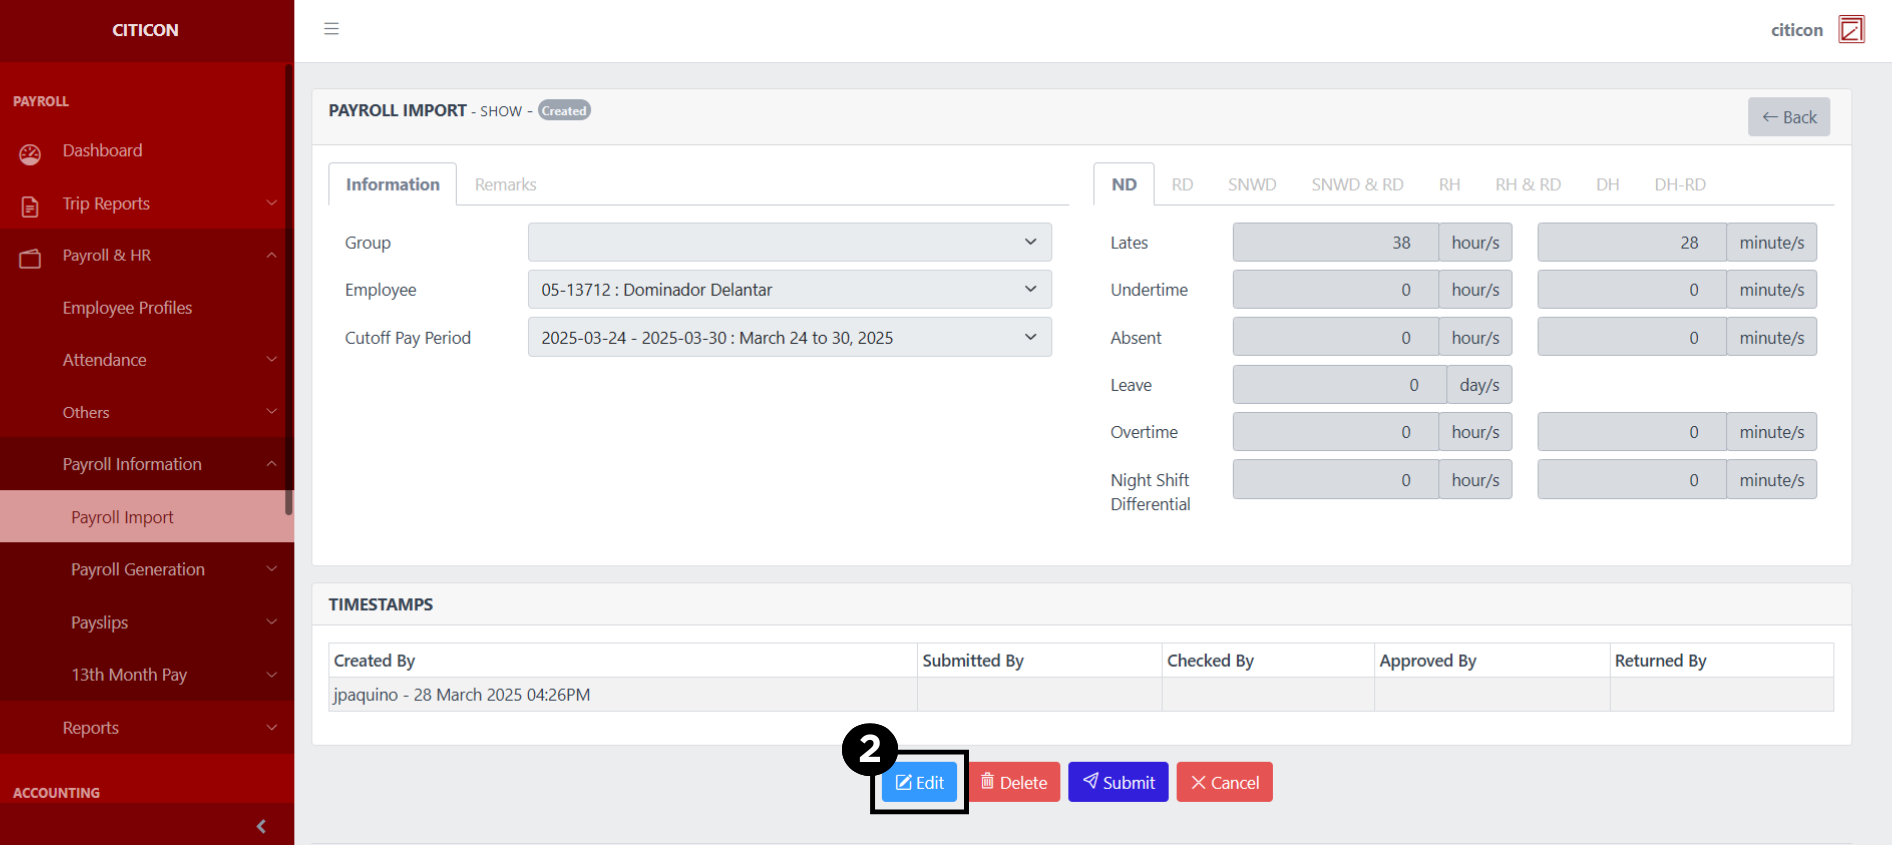
- Select a detail section which you want to edit, and enter the necessary changes.
All fields with an asterisk (*) are required to be filled up.
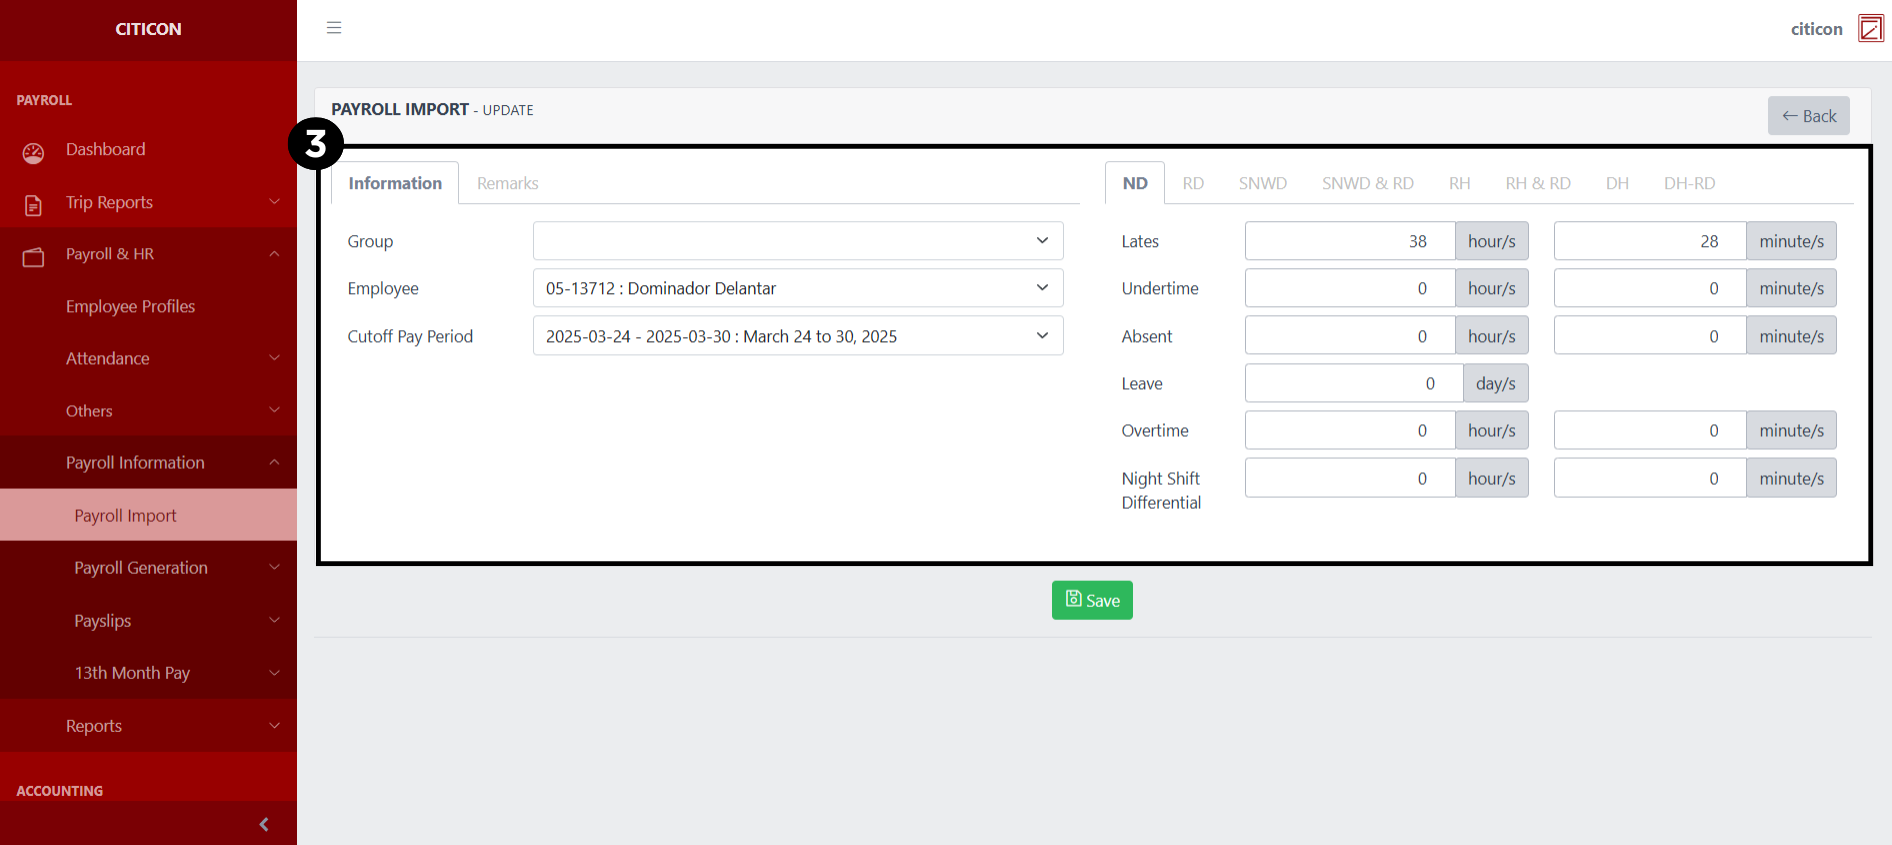
- Select the Save button to save the changes you have made.
Submit Entry
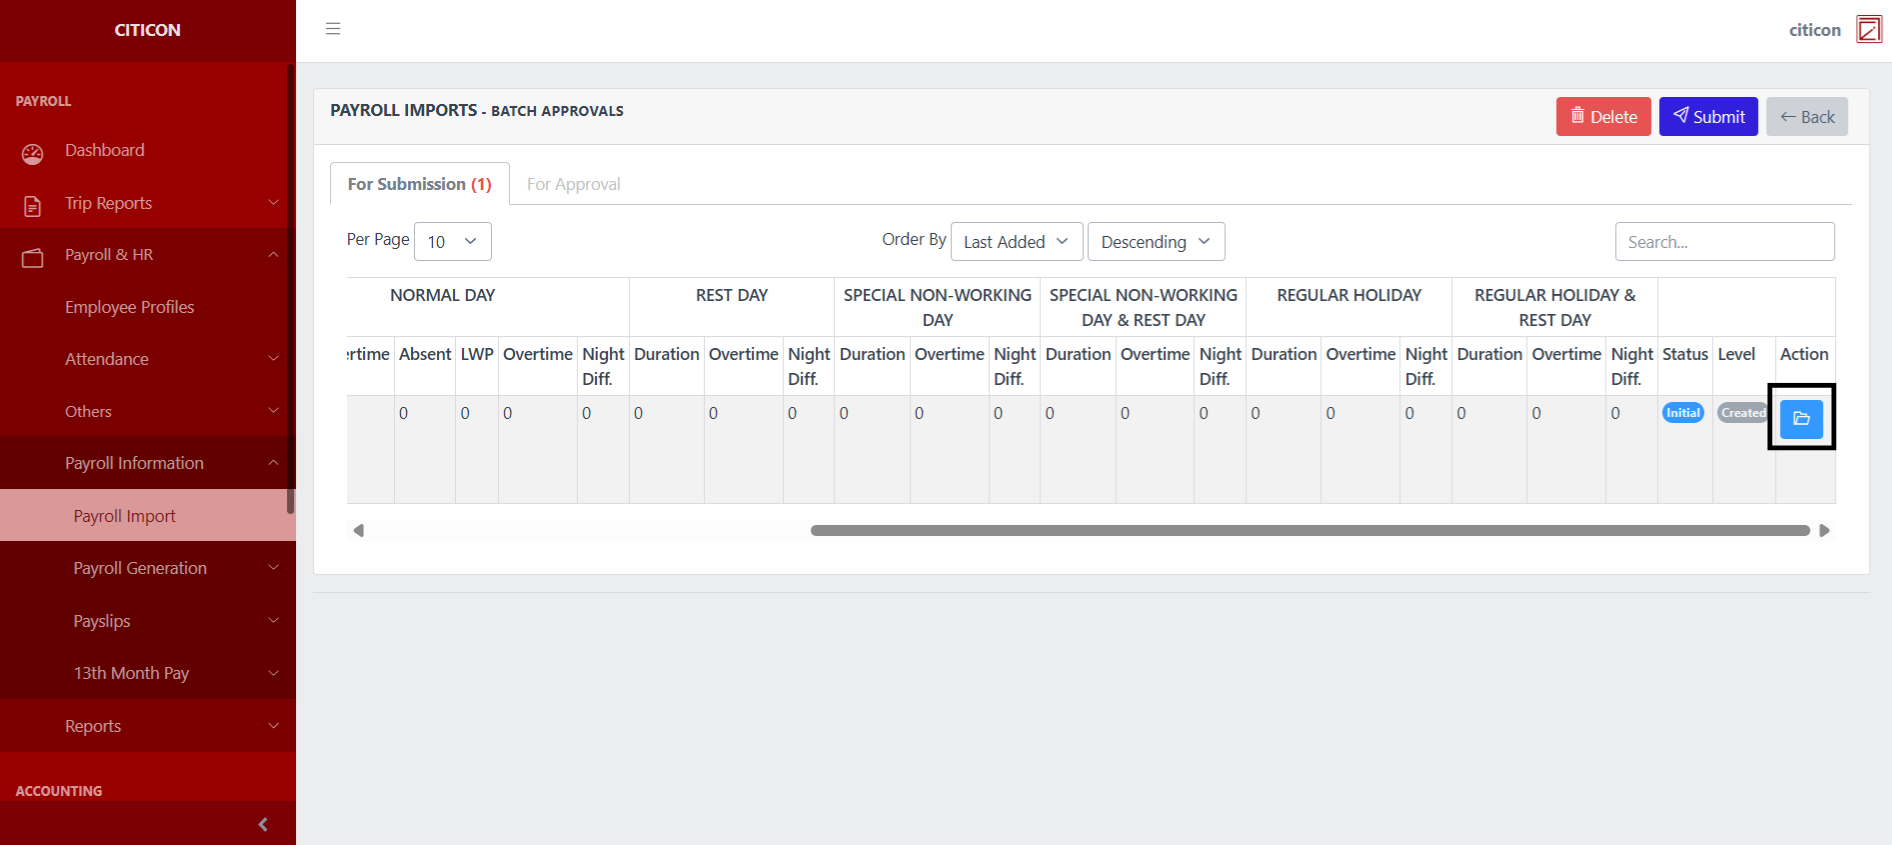
- Select the Batch Approvals button to submit an entry.

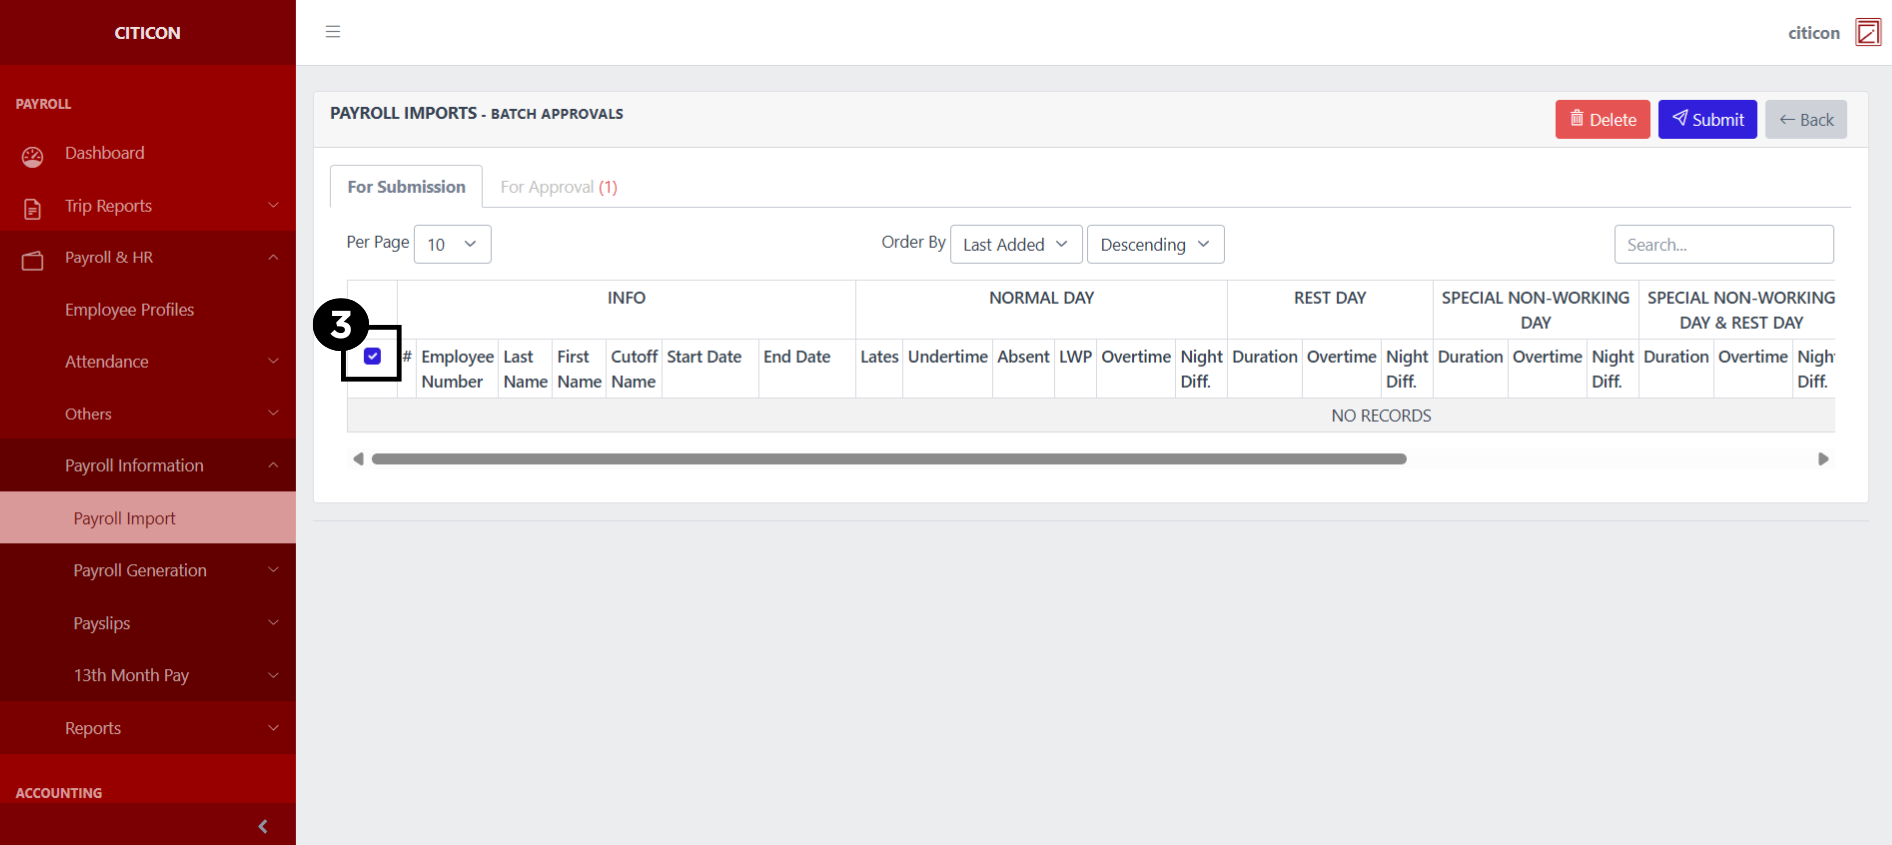
- Select the For Submission tab.
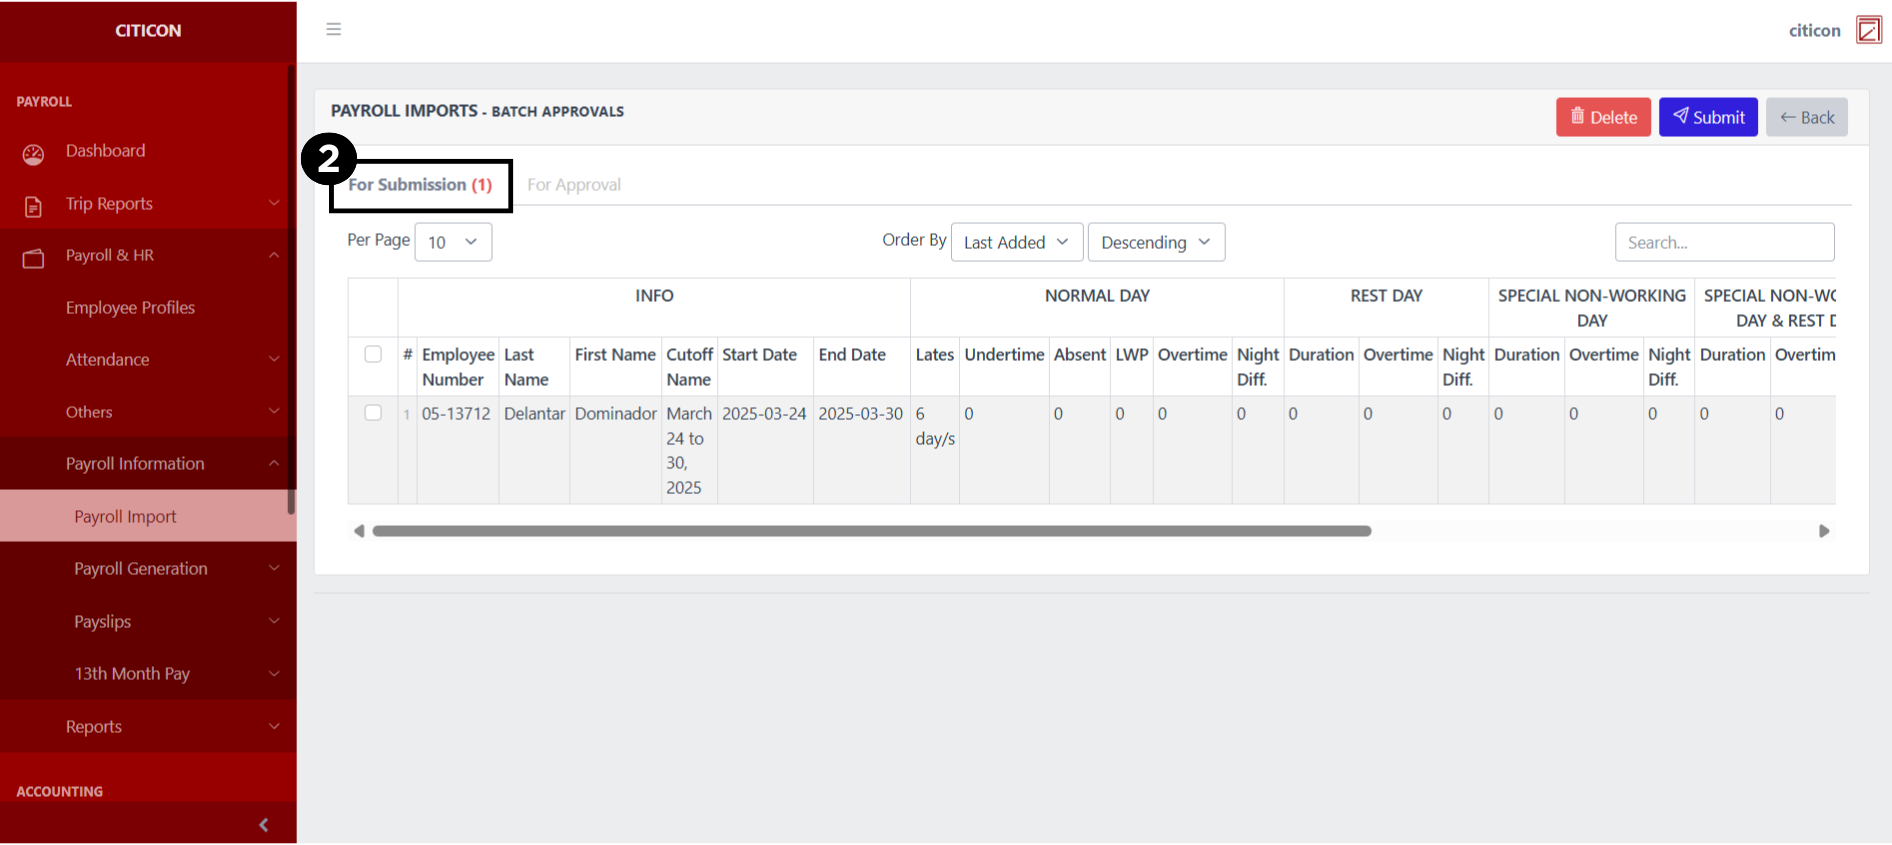
- Select the entry that you want to submit.
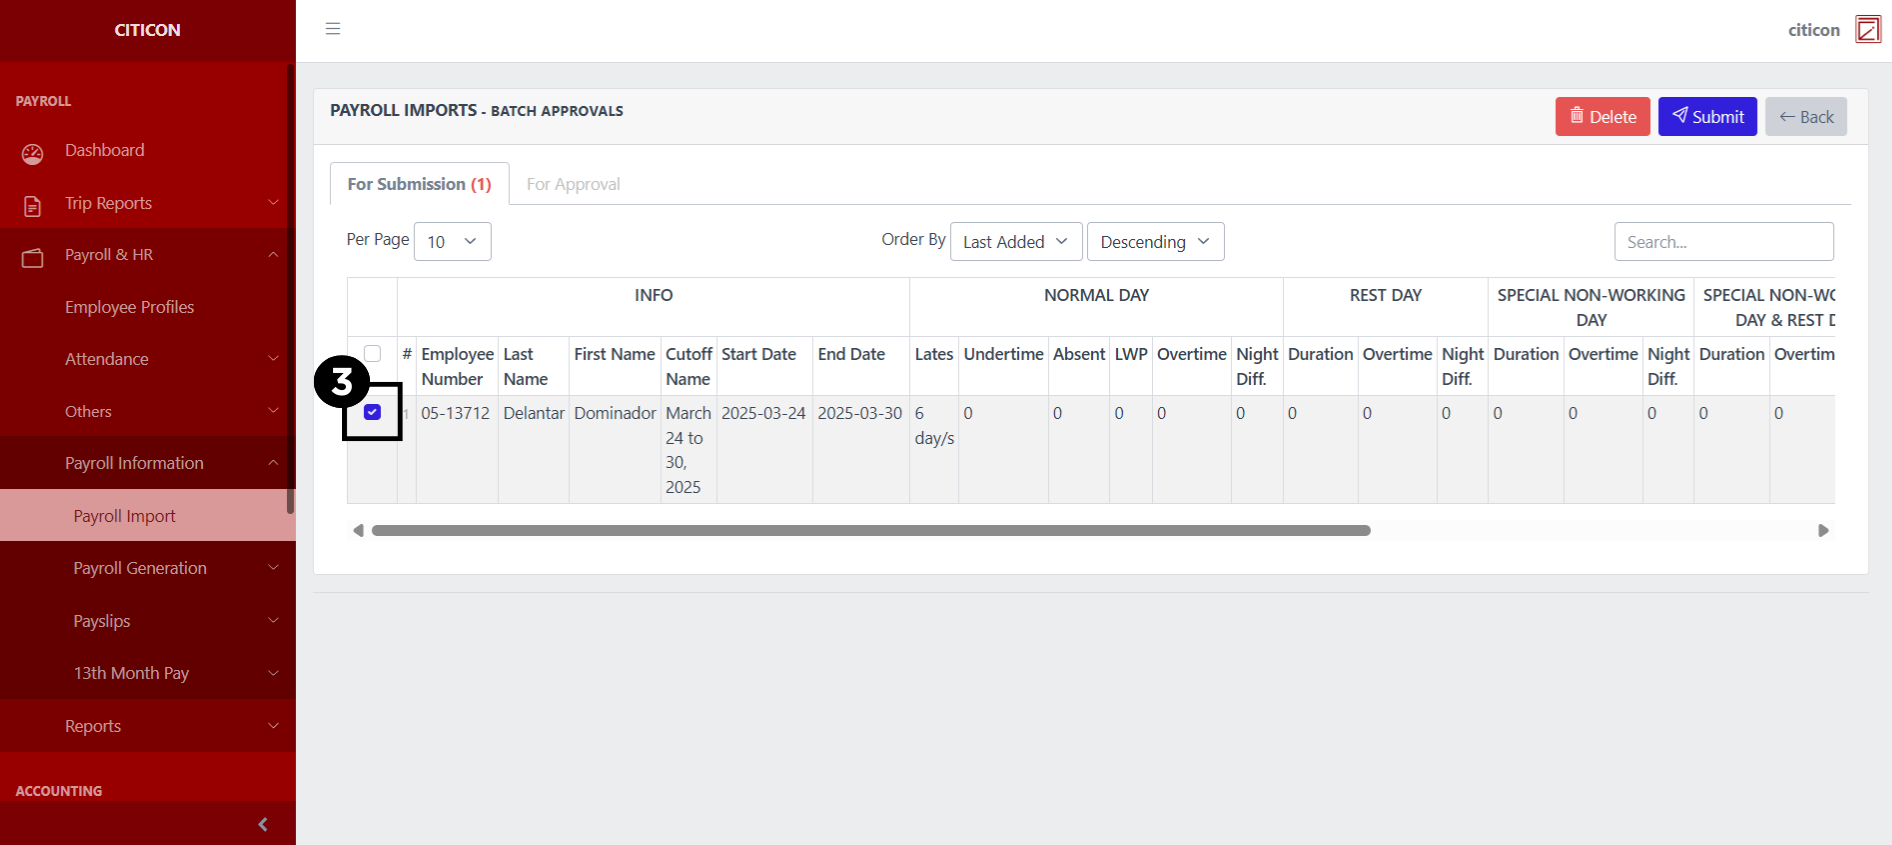
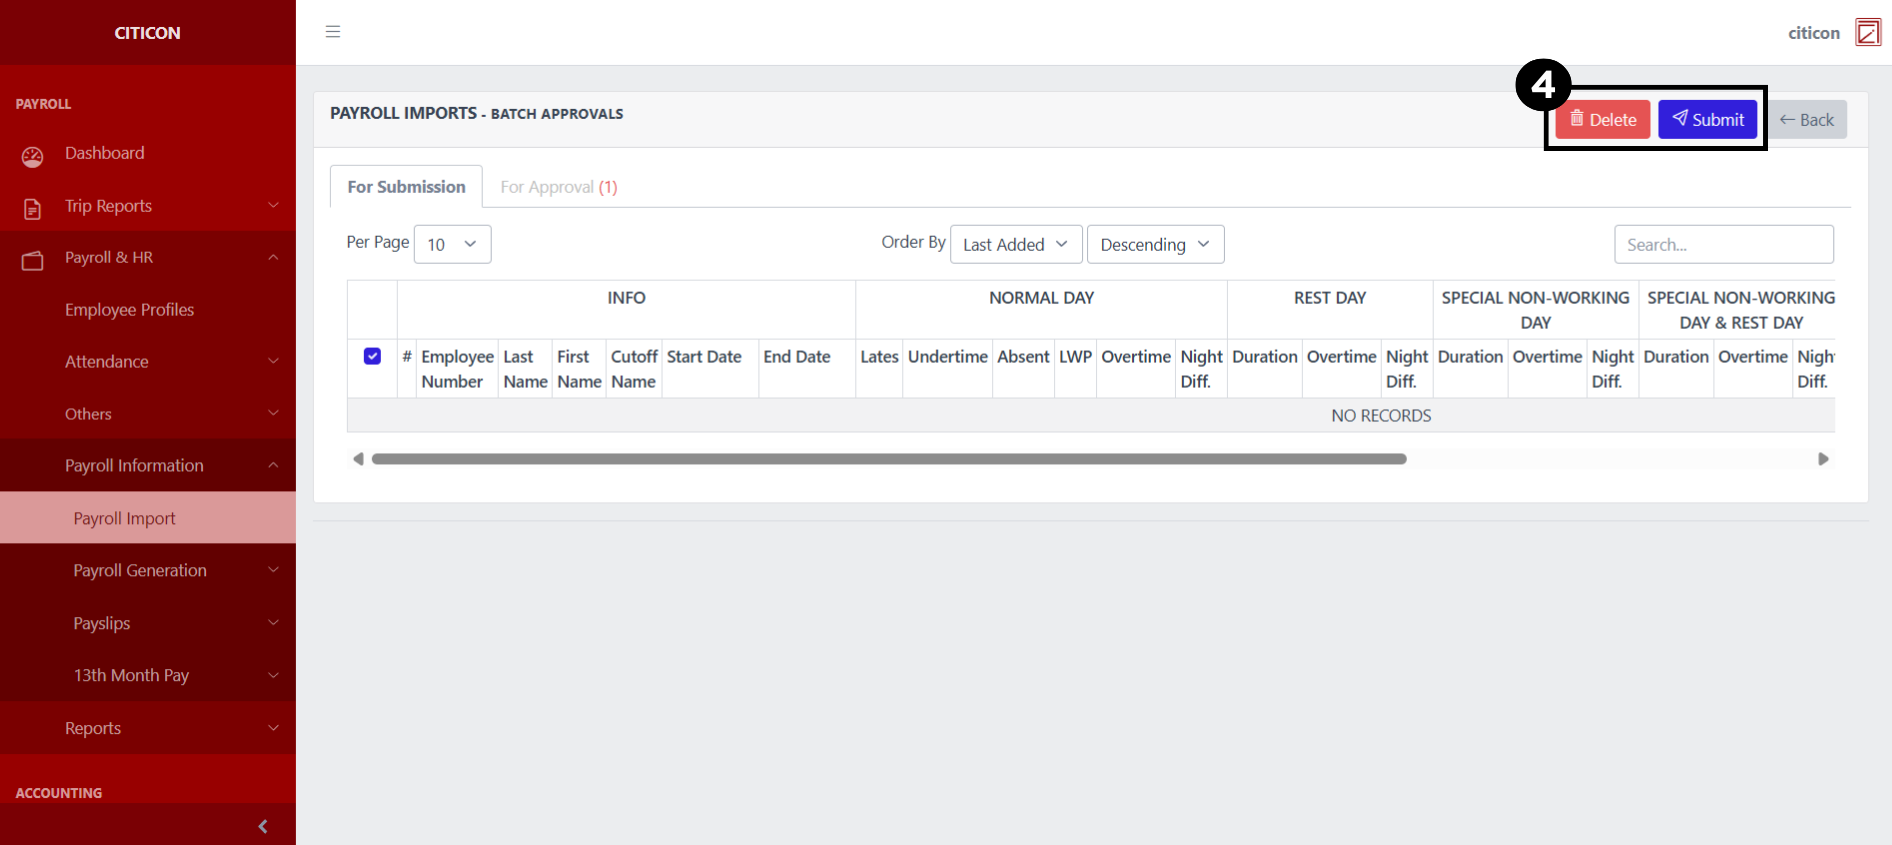
- Select the Submit button to submit the entry. In cases where you want to delete a entry, select the entry you want to delete, then select the Delete button.
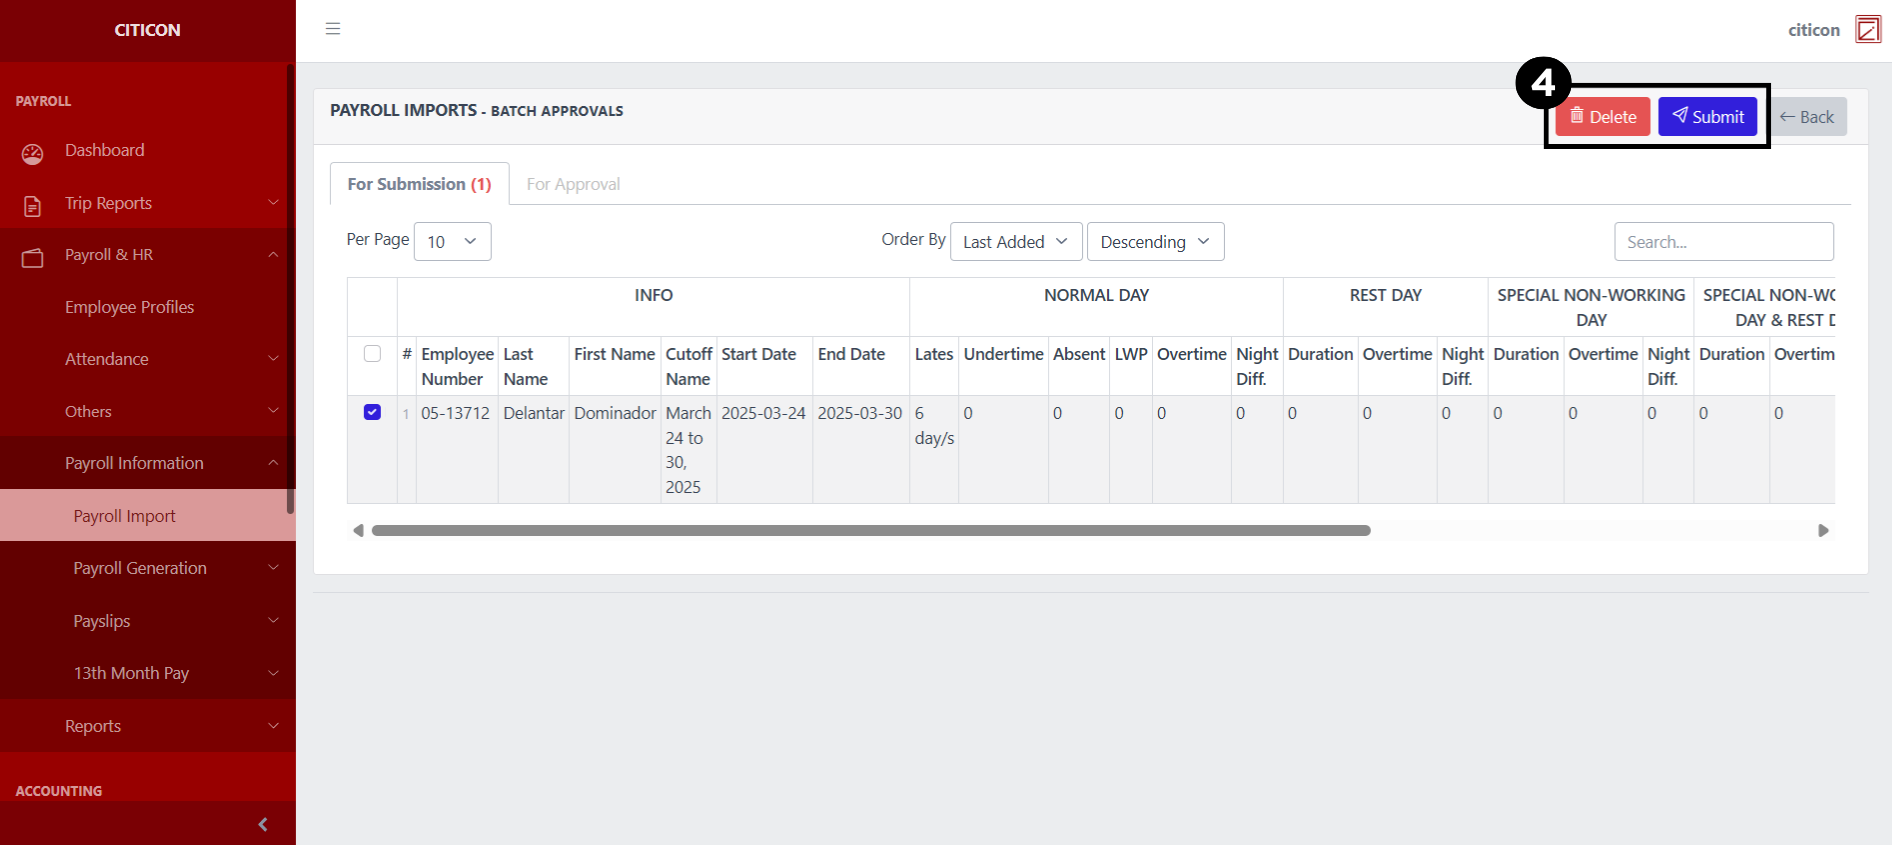 To view the details of an individual entry, select the folder button and from here, you may either Edit, Delete, Submit, or Cancel the entry.
Approve Entry
- Select the Batch Approvals button to approve a entry.
- Select the For Approval tab.

- Select the entry that you want to approve.
- Select the Approve button to approve the entry. In cases where you want to return a entry to submission section, select the entry you want to return, then select the Return button.
Explore Citicon Payroll and Accounting System: Payroll & HR - Payroll Generation - Semi-Monthly