Employee Profiles
Welcome to Citicon Payroll and Accounting Systems Configuration for Employee Profiles. This section is the central hub for managing all employee-related records that support payroll processing, HR management, and government compliance.
From personal data and contact information to salary structures and contribution details, this module ensures a comprehensive and up-to-date employee record that empowers accurate computation, reporting, and compliance.
Key Purposes
- Maintain Comprehensive Employee Records: Store essential personal details such as name, sex, date of birth, civil status, contact information, and emergency contacts to ensure accurate identification and communication.
- Document Address and Employment Background: Capture both current and permanent addresses, as well as previous employment data to support government documentation and HR processes.
- Track HR and Payroll Information: Configure employment type, branch, department, salary classification, bank details, and payroll-related attributes to streamline payroll and reporting accuracy.
- Manage Leave Balances and Qualifications: Monitor various leave enEmployee Profilesments and record educational background and performance reviews for informed HR decisions and policy applications.
- Ensure Government and Internal Compliance: Maintain employee ID numbers (SSS, PhilHealth, TIN, HDMF), configure contributions, and define e-signatories to support official reporting and system-based approvals.
Employee Profiles Module User-Manual
This section provides details, and set-by-step instructions to access, view, and update the Employee Profiles entries stored in the system.
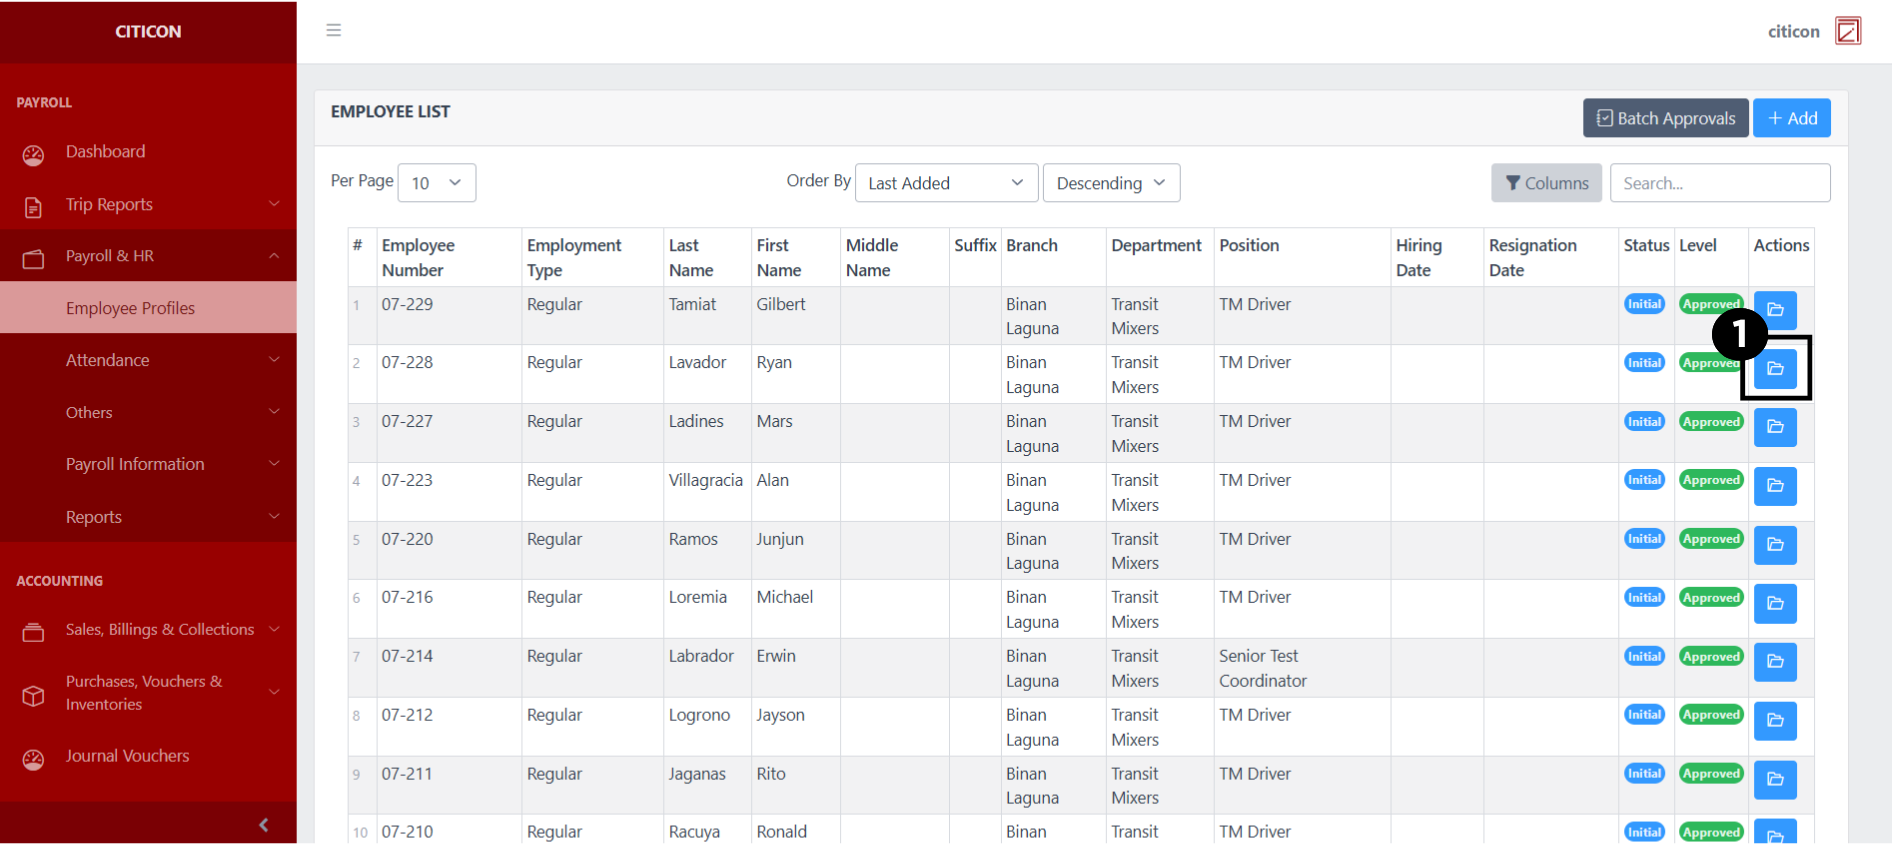
Index Page
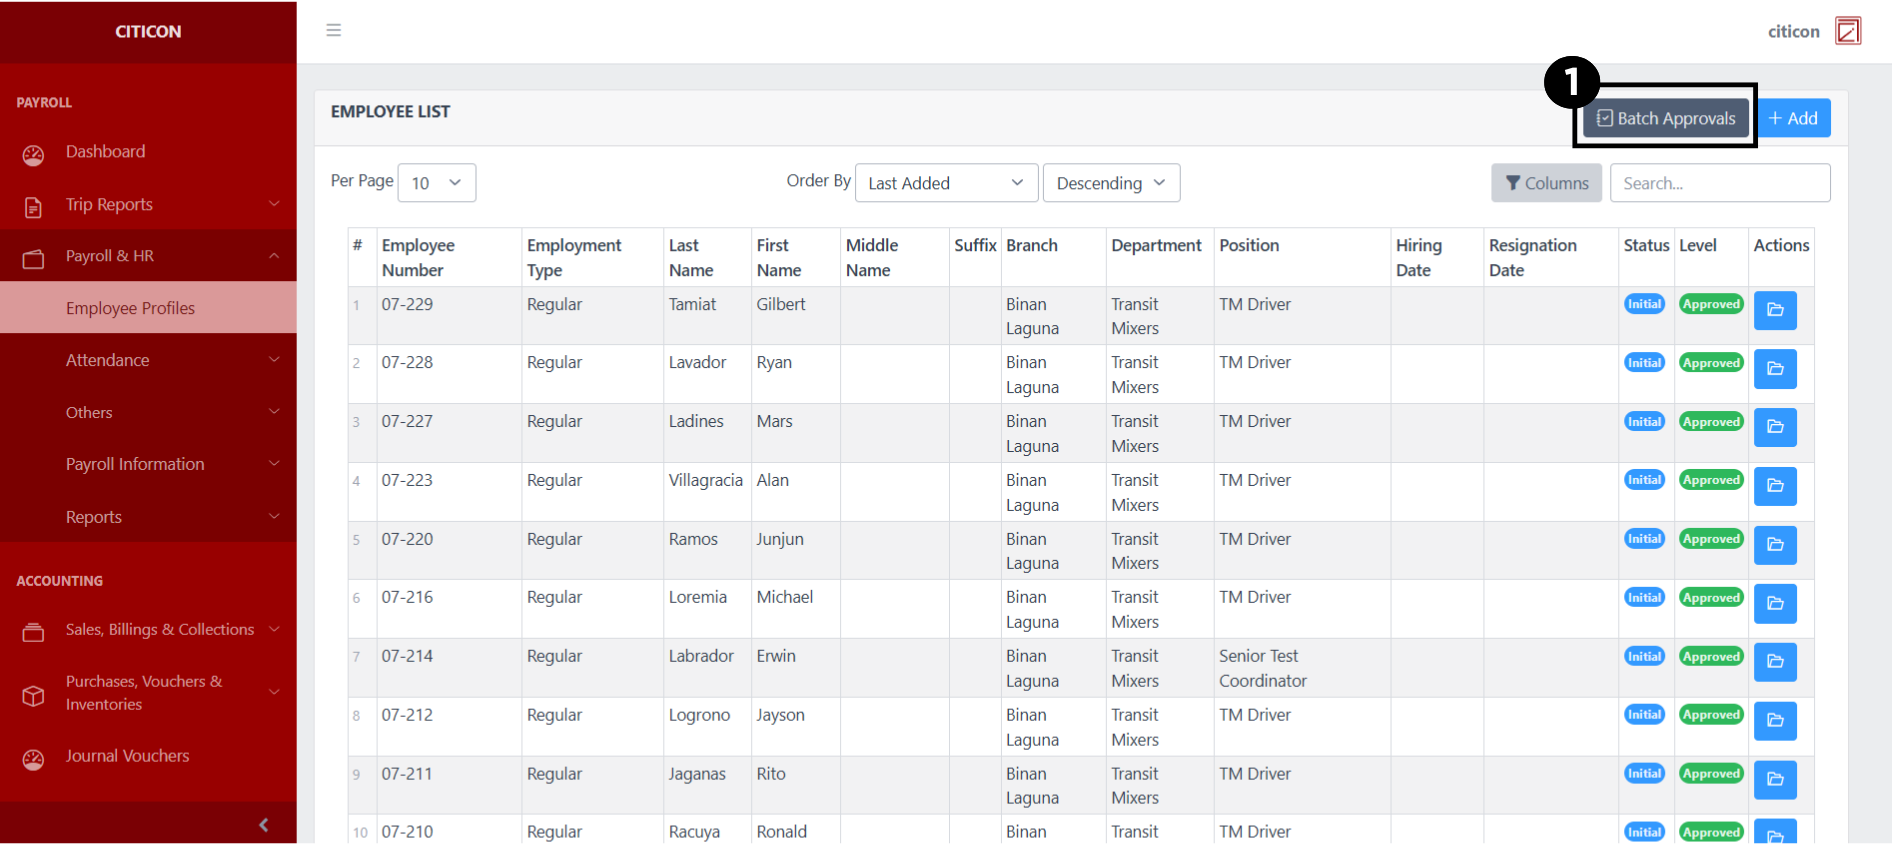
To access the Employee Profiles. Go to Payroll, select Payroll & HR, then select Employee Profiles.
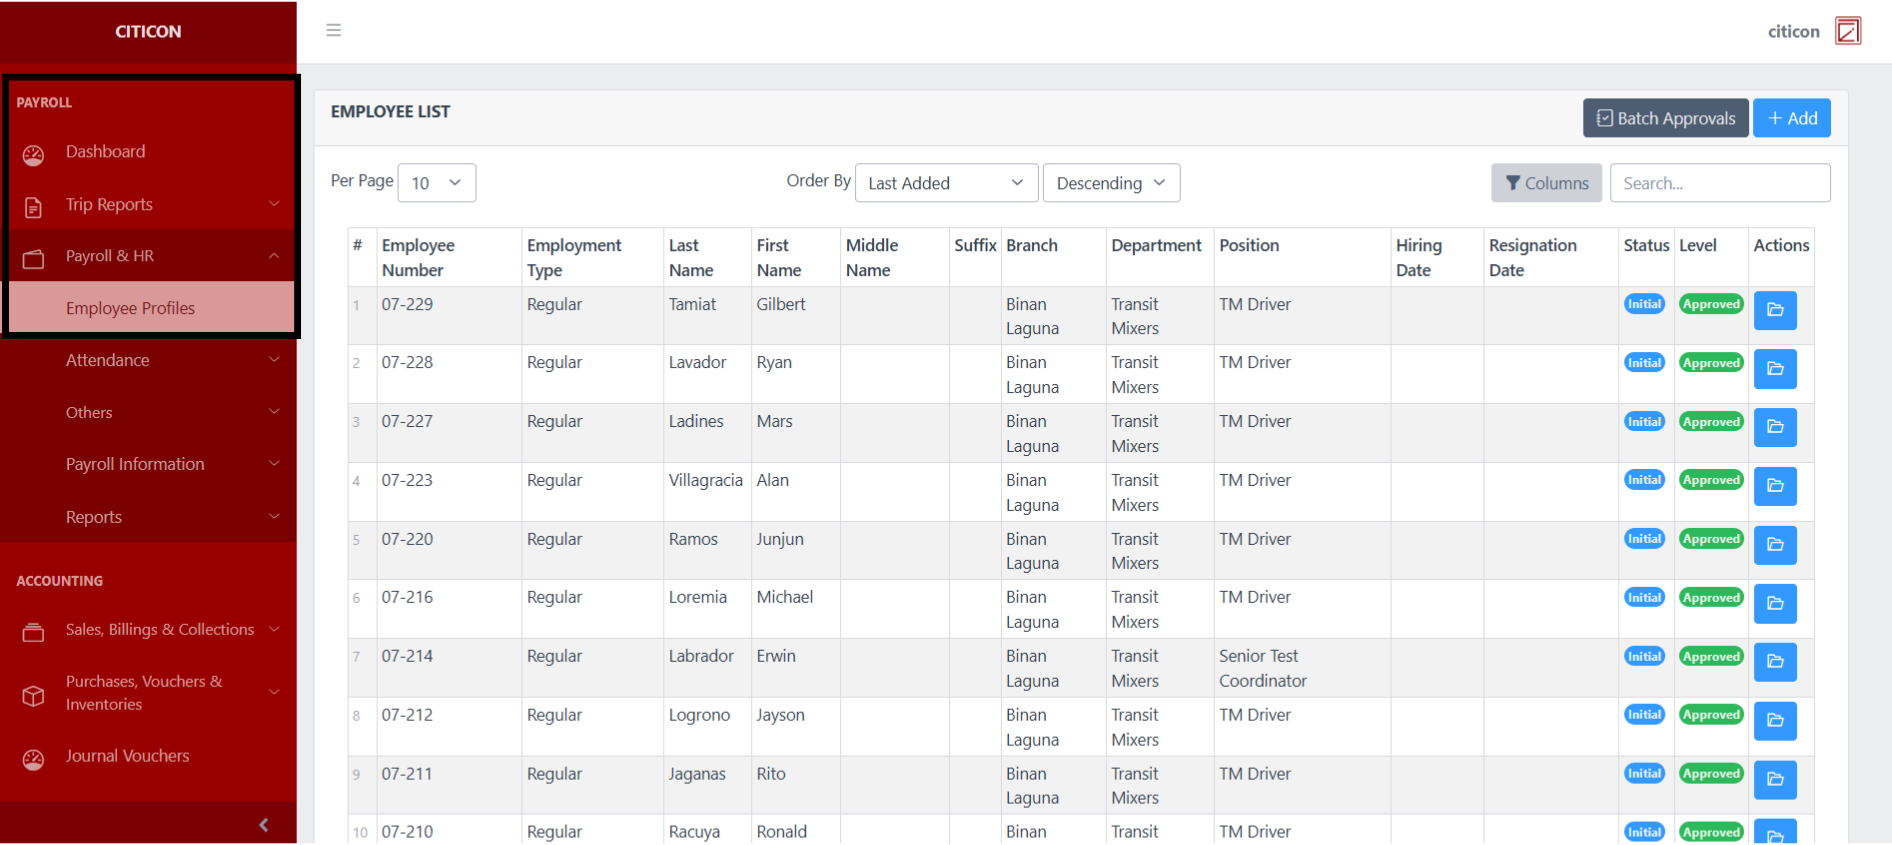
a. Adjust the paging, ordering, and sorting of the Employee Profiles Page here.
b. Select the respective button to either Add new entry or process reports to be approved.
c. Search for specific entry details using the search bar.
d. View or Edit data by selecting the folder button.

Add Report
- Select the Add button to add a new entry.
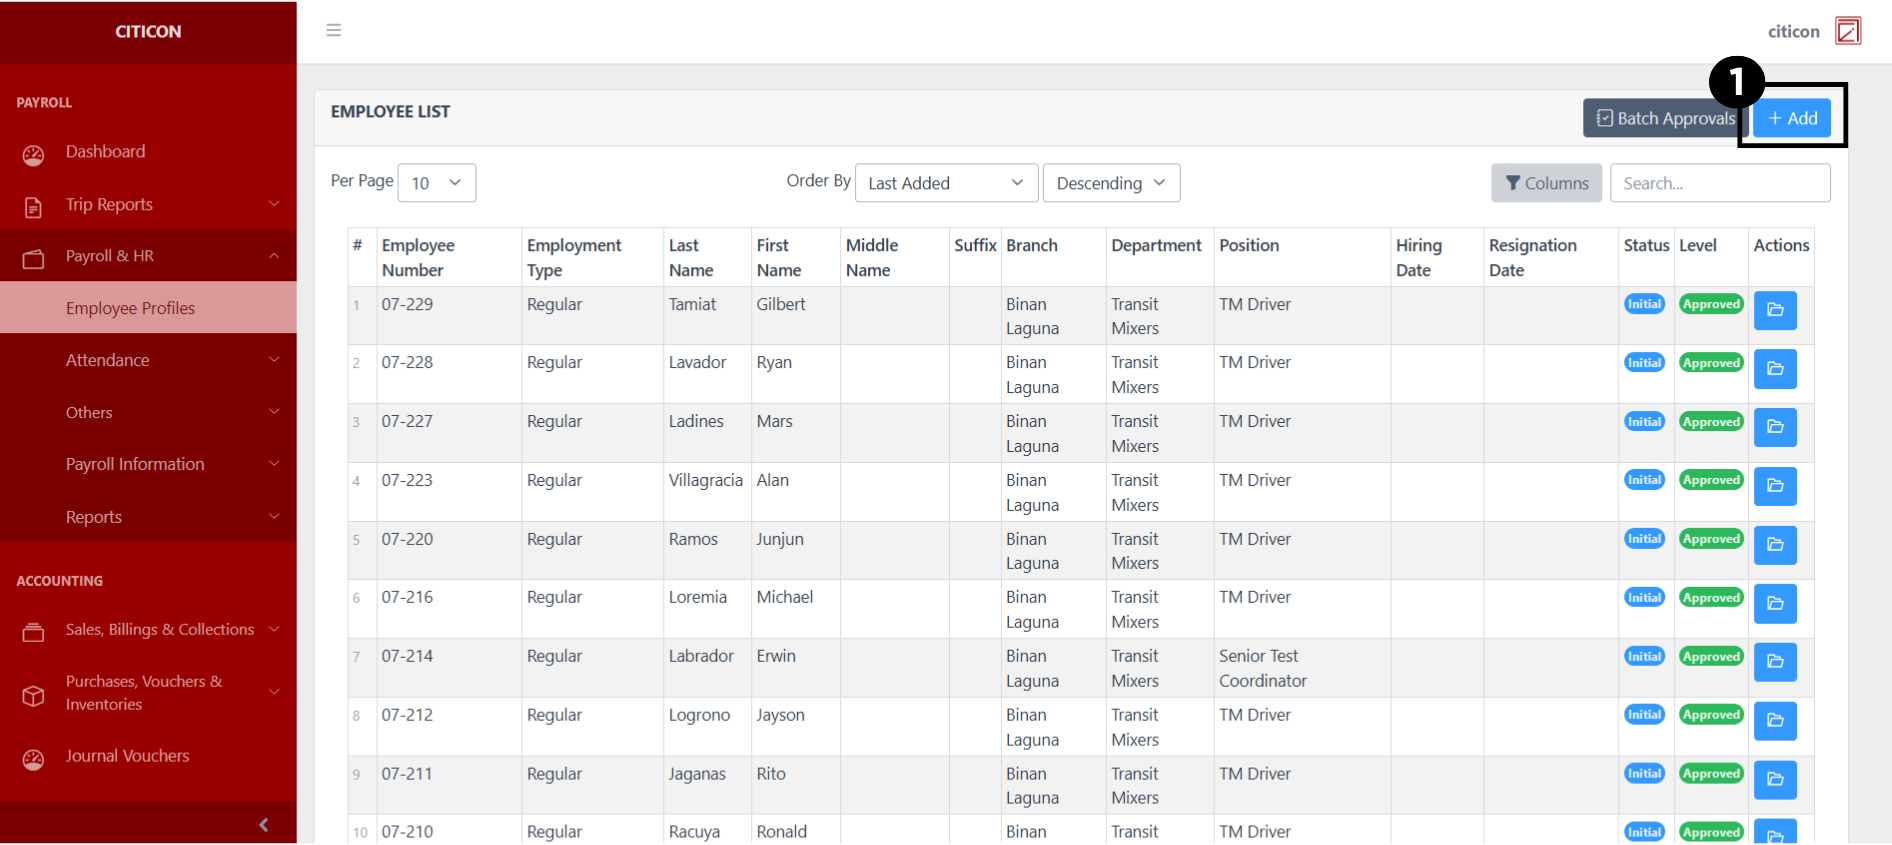
- Input the necessary details for your new entry.
All fields that has an asterisk (*) are required to be filled up.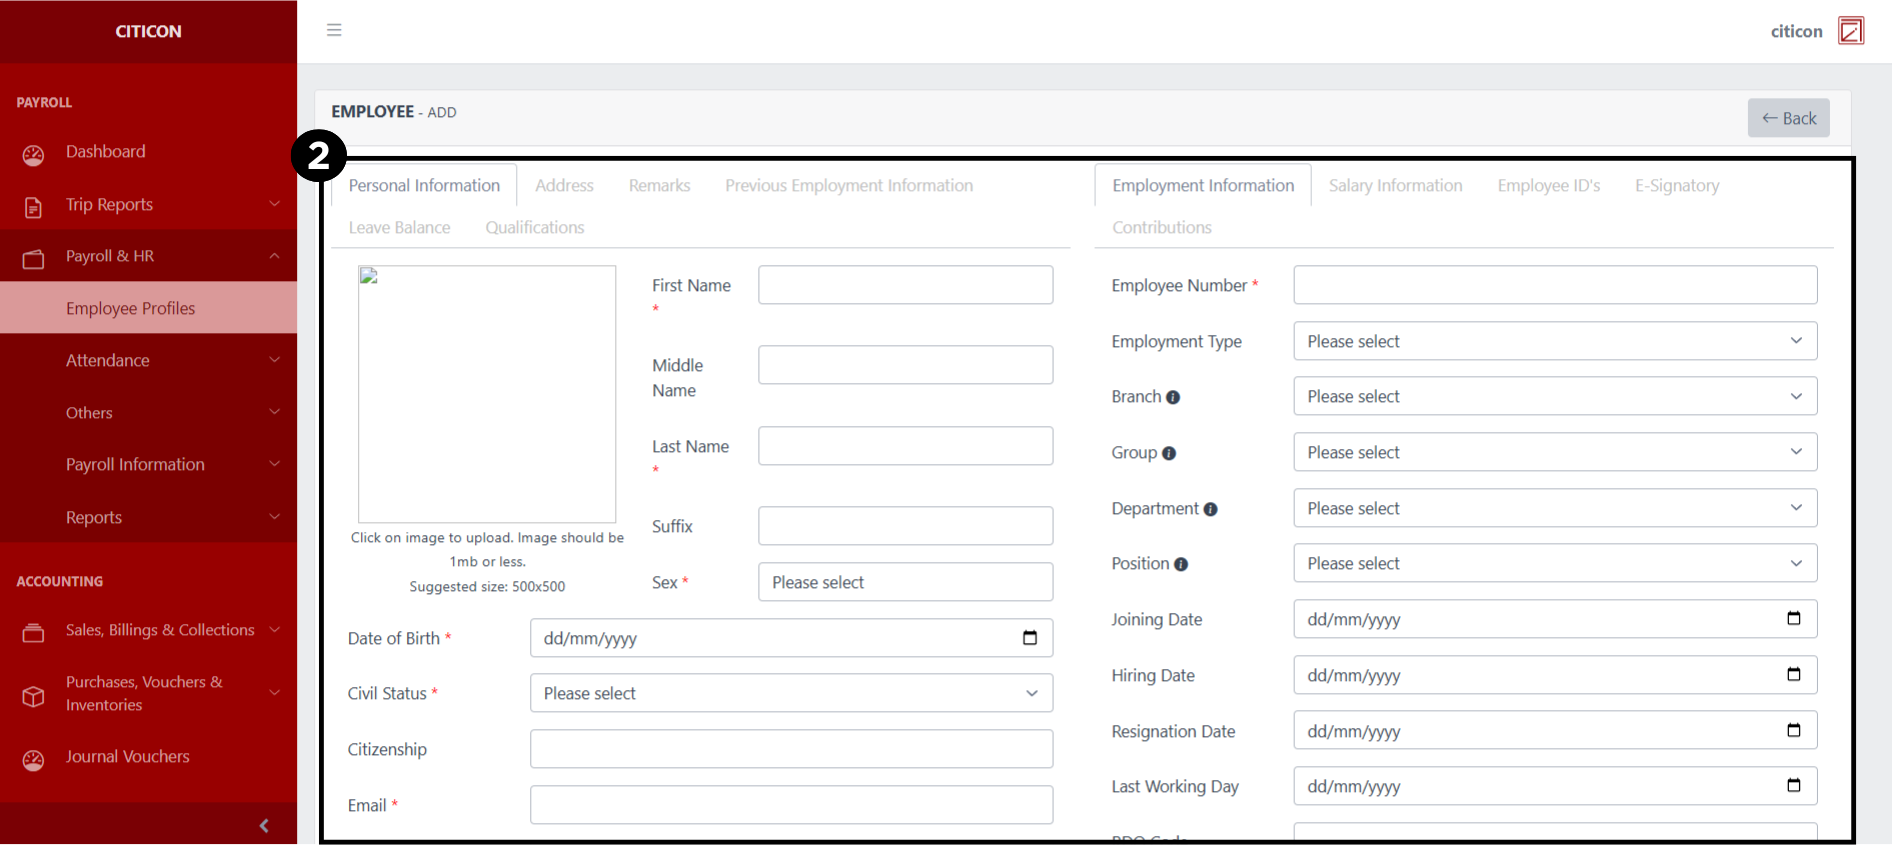
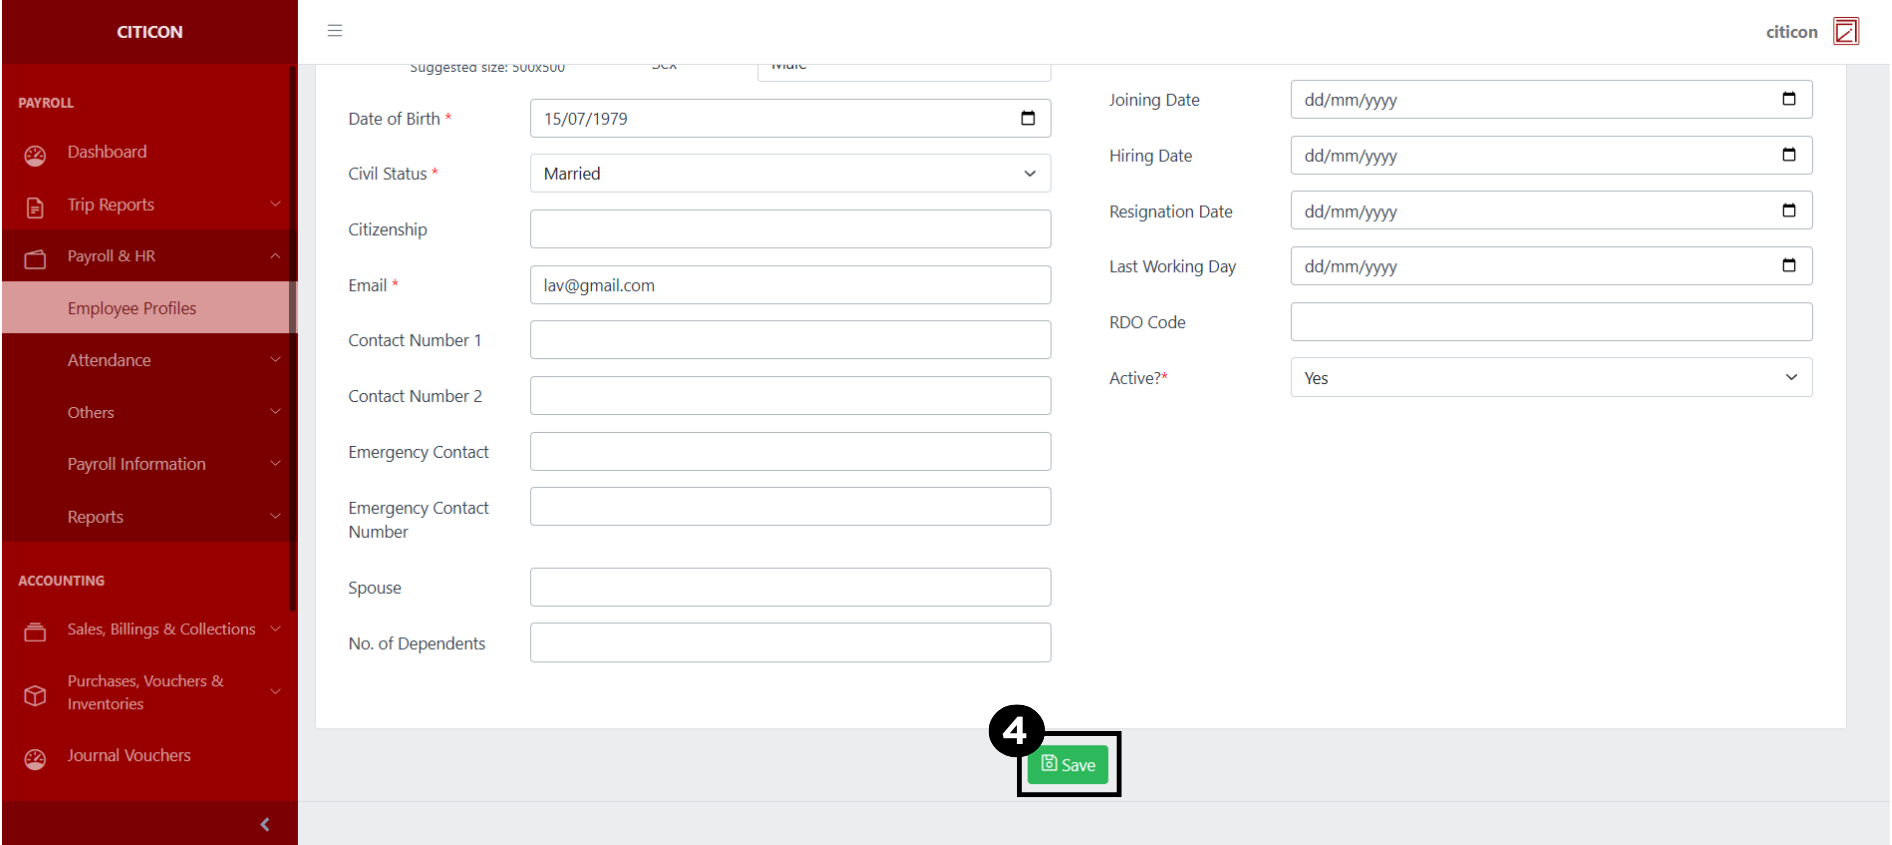
- Select the Save button to save your new entry.

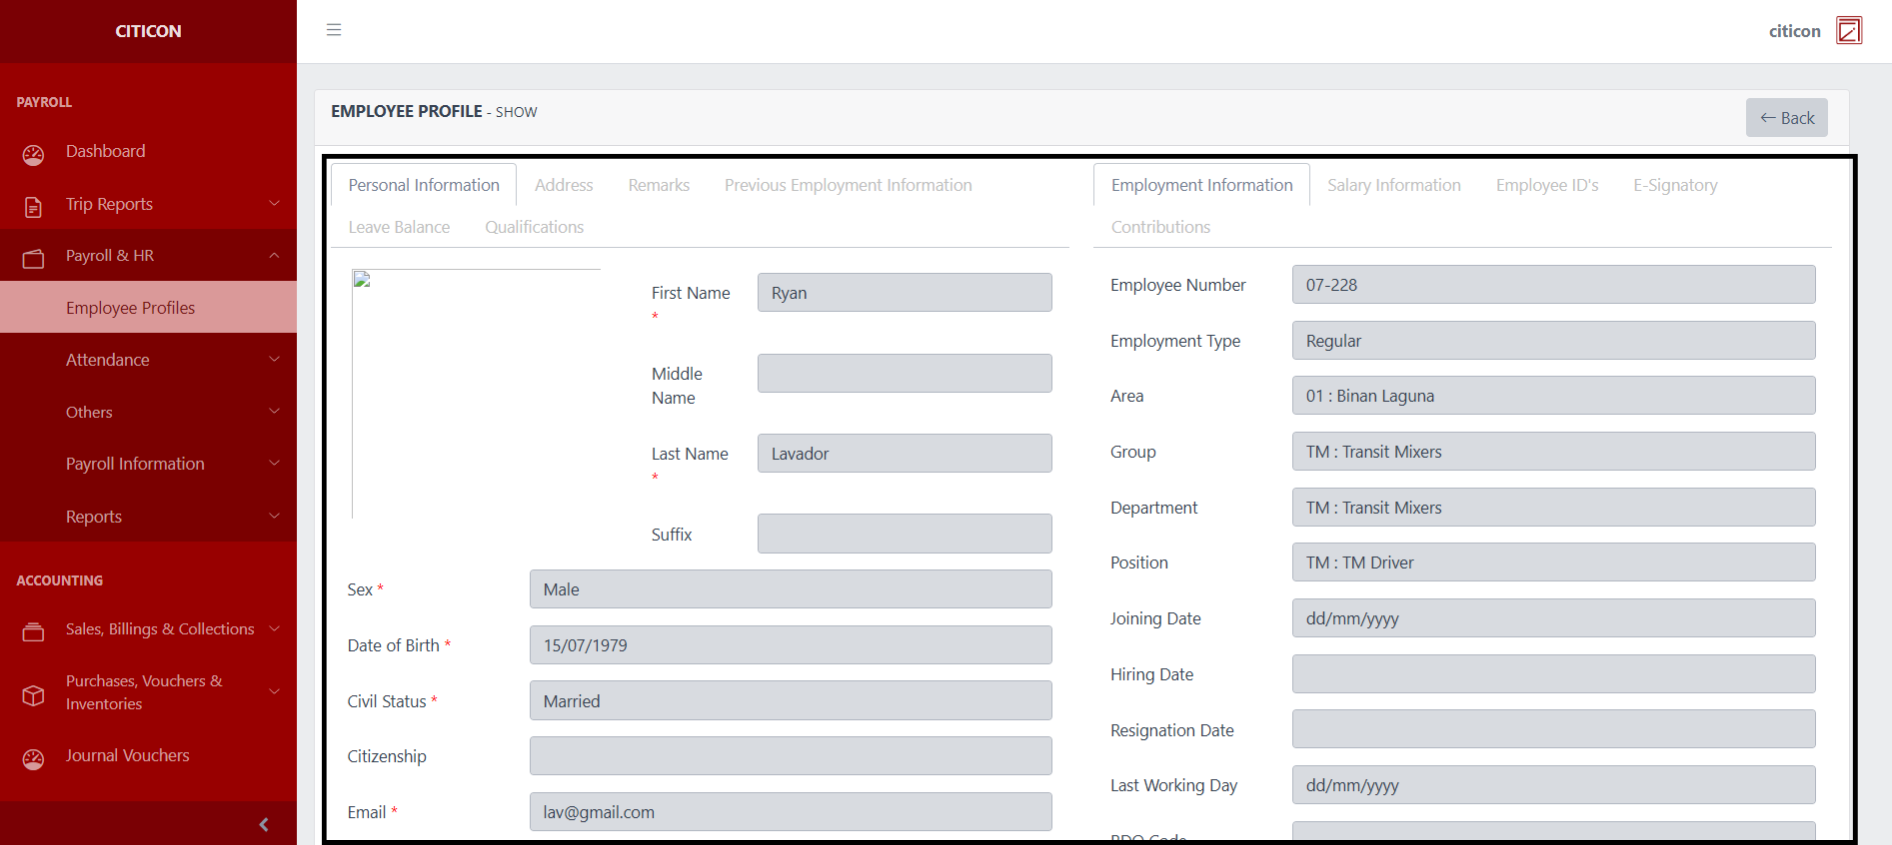
Show Entry
- Select the folder button to view an entry.
 Here you can view more specific details on the entry that you selected.
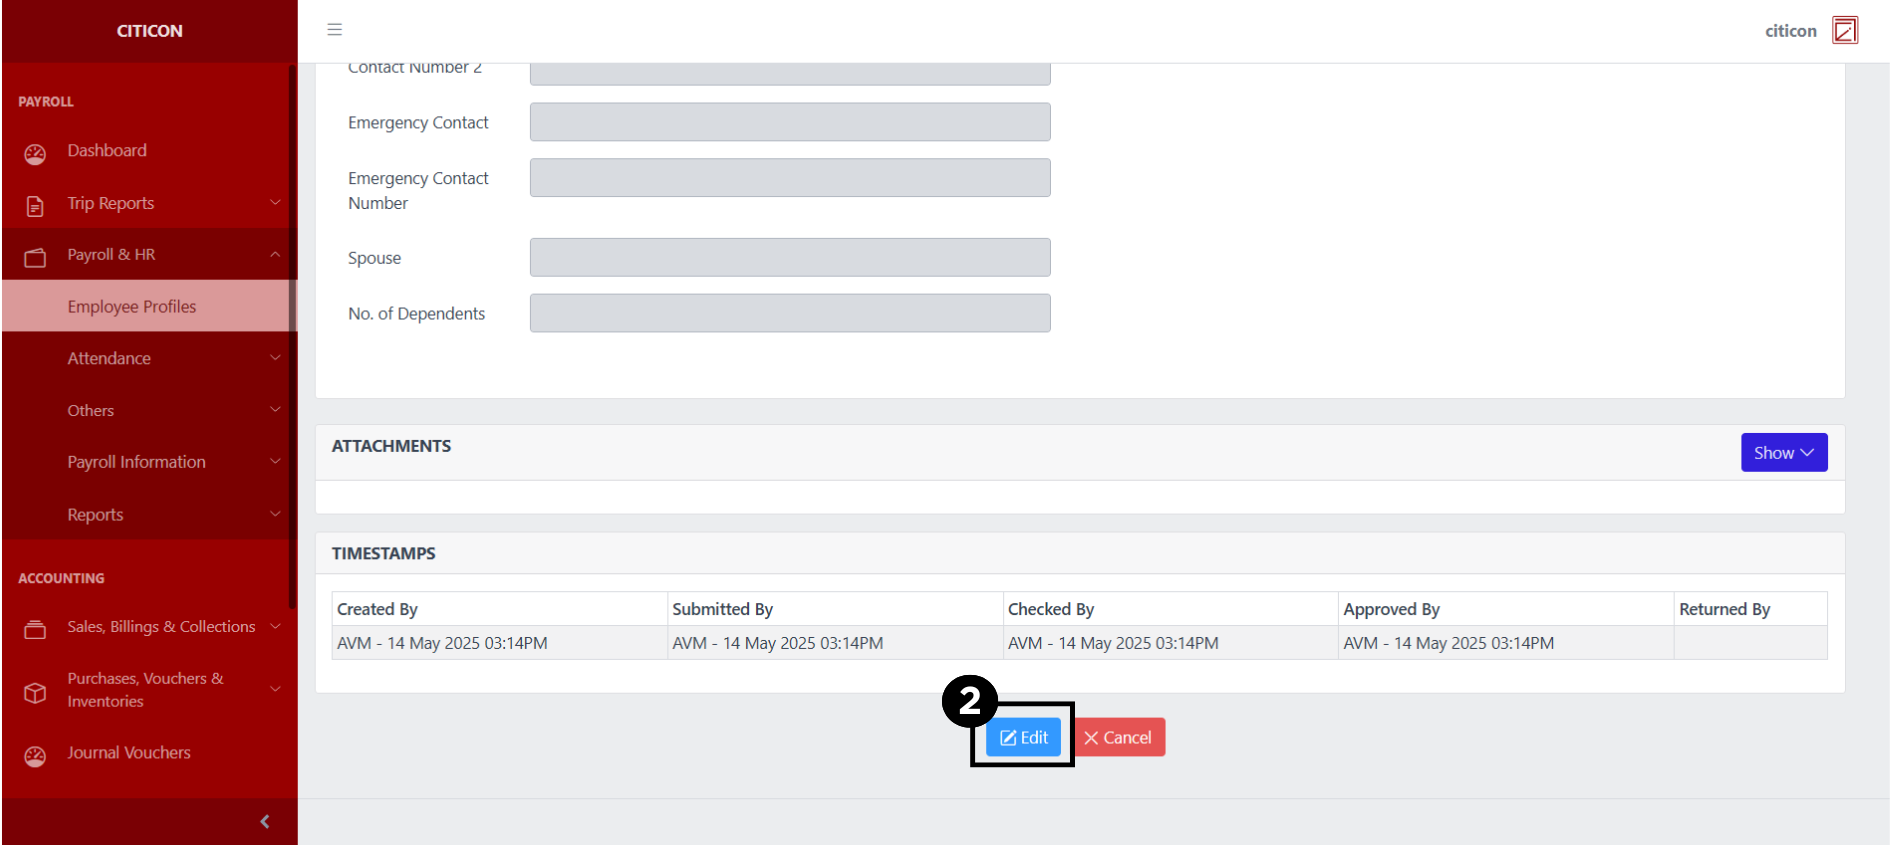
Update Entry
- Select the folder button of the entry which you want to edit.

- Select the Edit button to update the details of the entry.
- Select a detail section which you want to edit, and enter the necessary changes.
All fields with an asterisk (*) are required to be filled up.
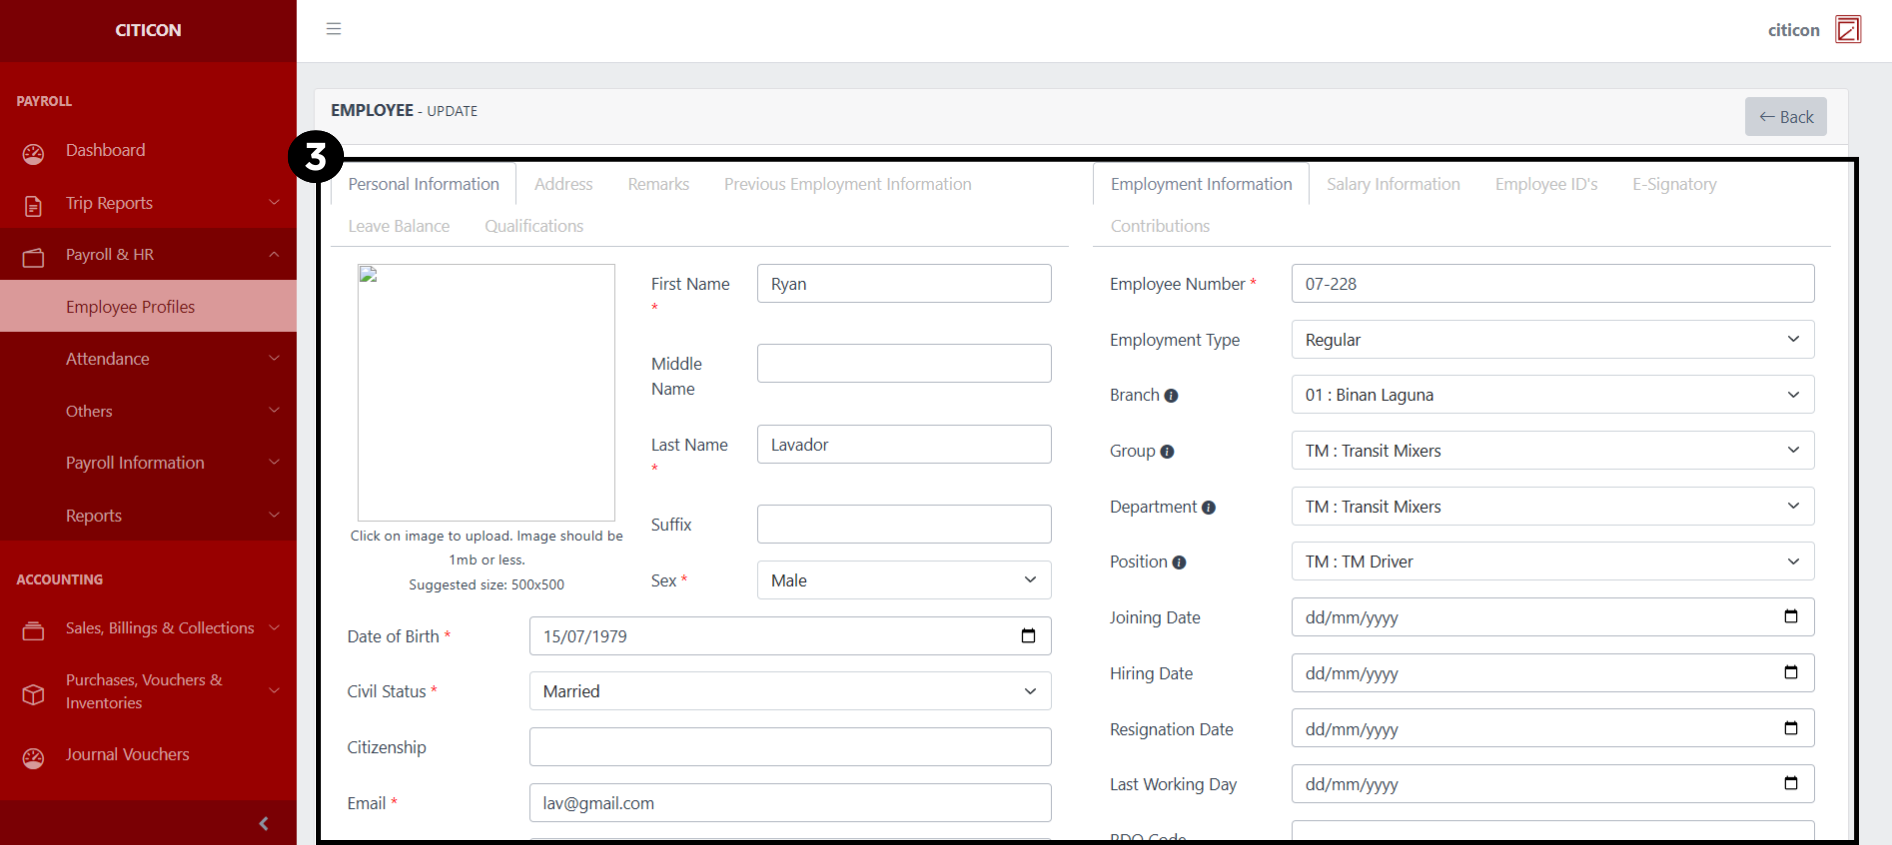
- Select the Save button to save the changes you have made.
Submit Entry
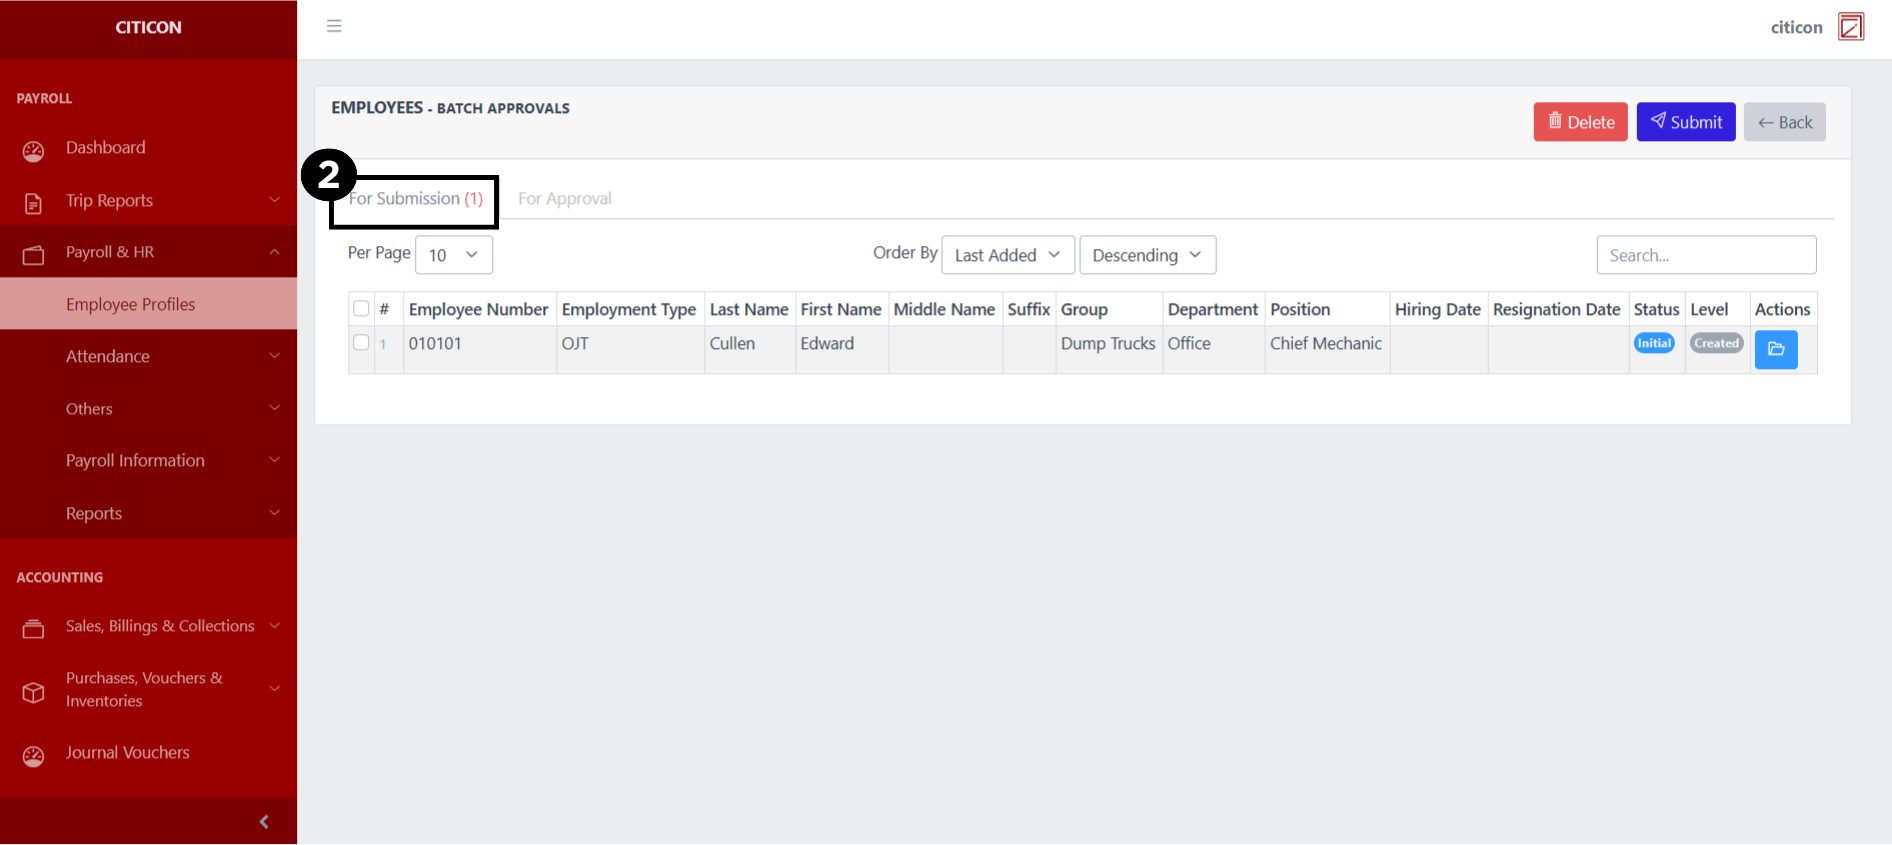
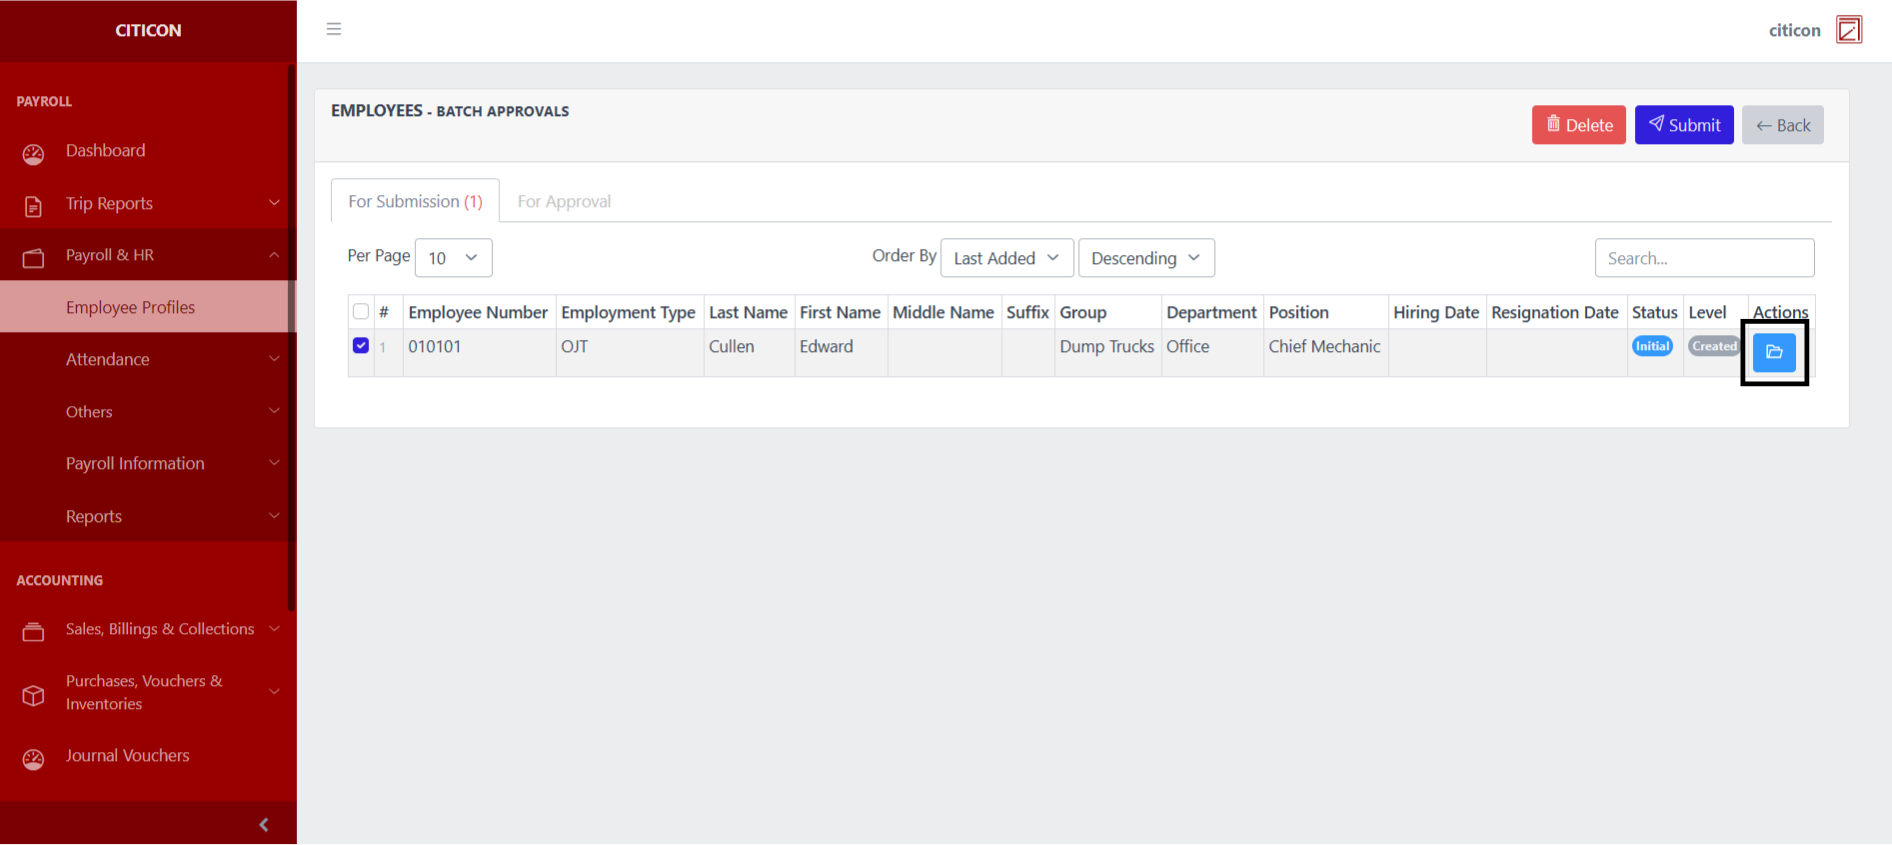
- Select the Batch Approvals button to submit an entry.

- Select the For Submission tab.
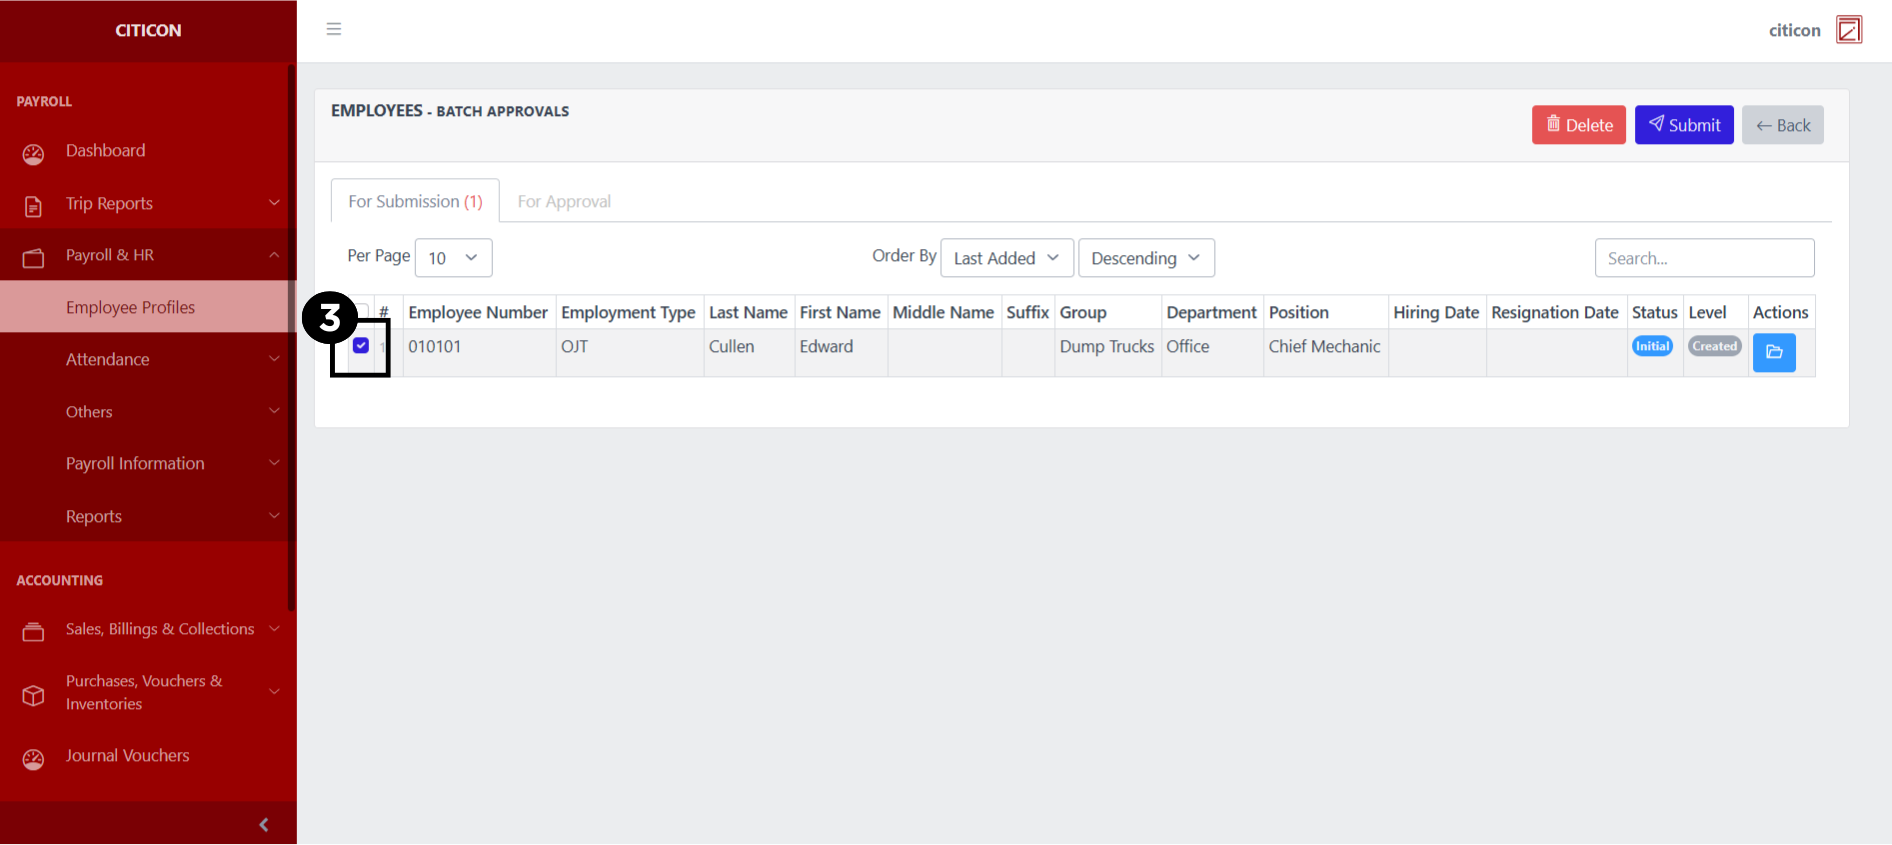
- Select the entry that you want to submit.
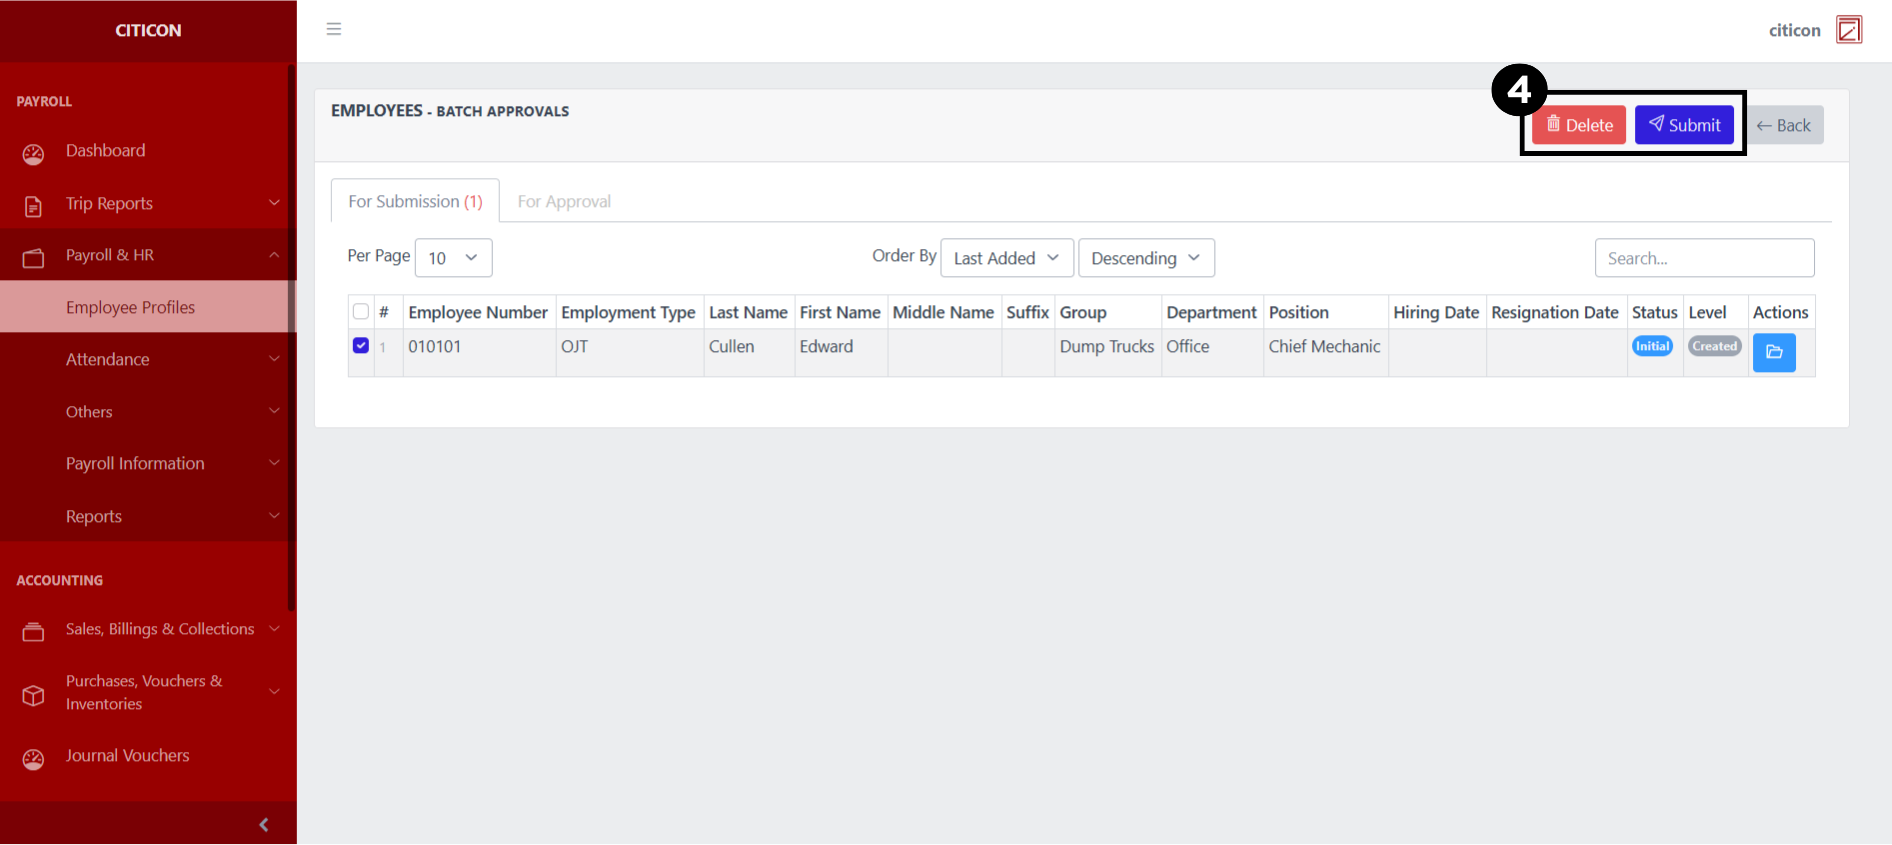
- Select the Submit button to submit the entry. In cases where you want to delete a entry, select the entry you want to delete, then select the Delete button.
 To view the details of an individual entry, select the folder button and from here, you may either Edit, Delete, Submit, or Cancel the entry.
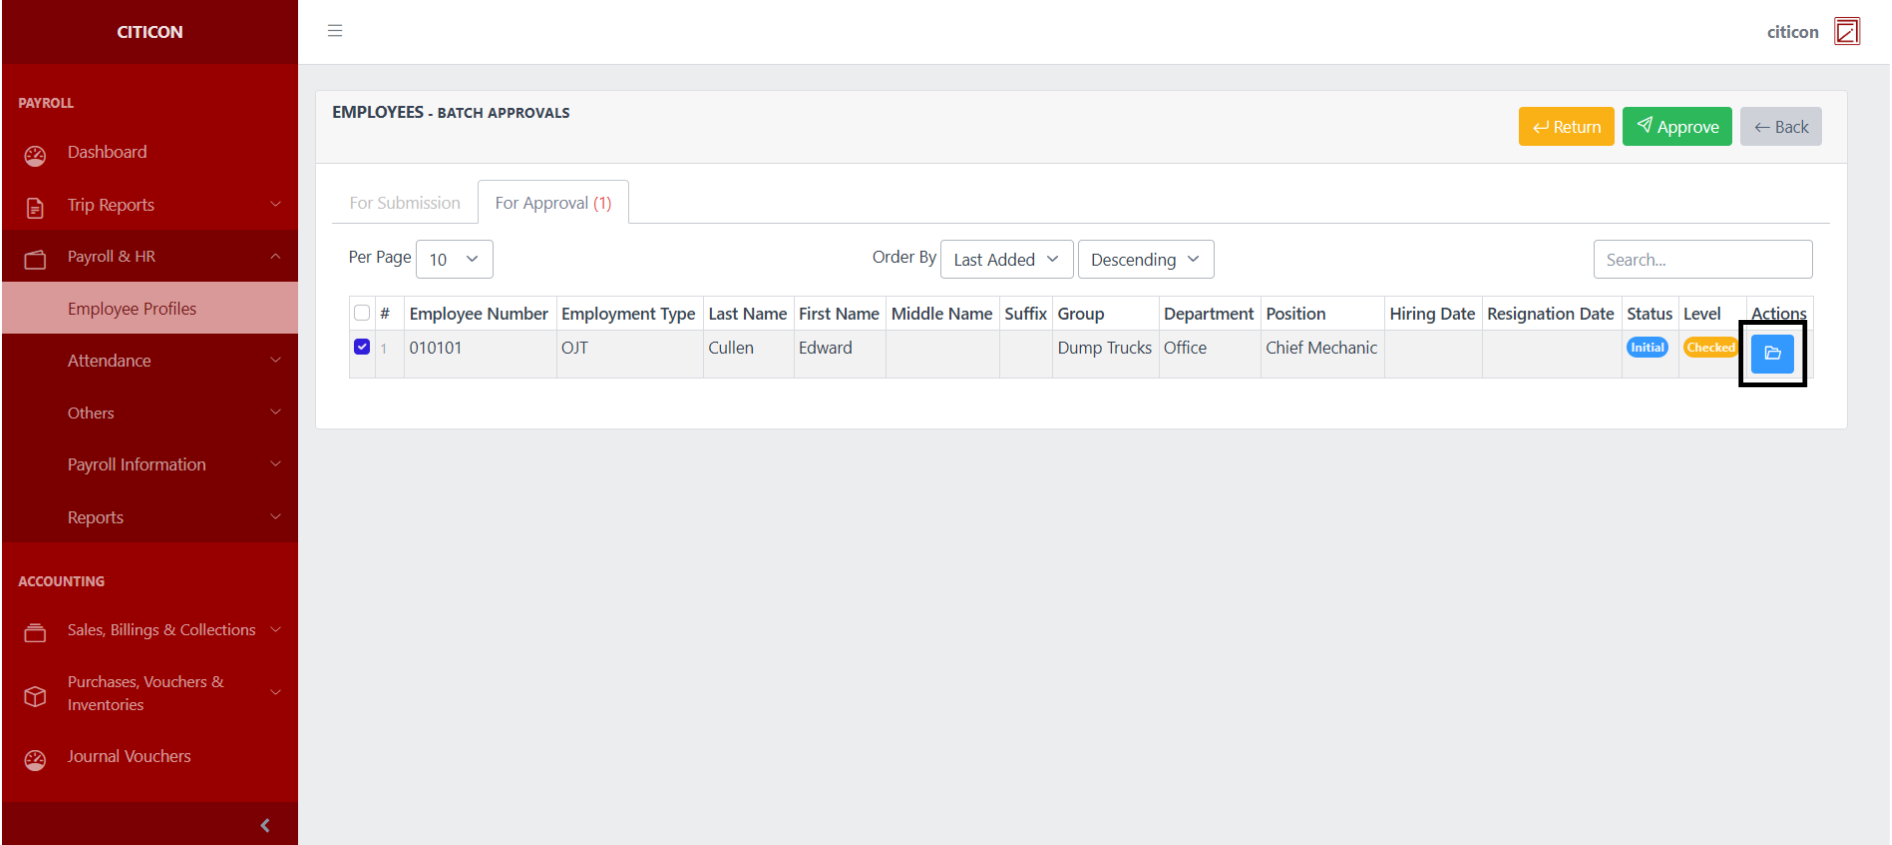
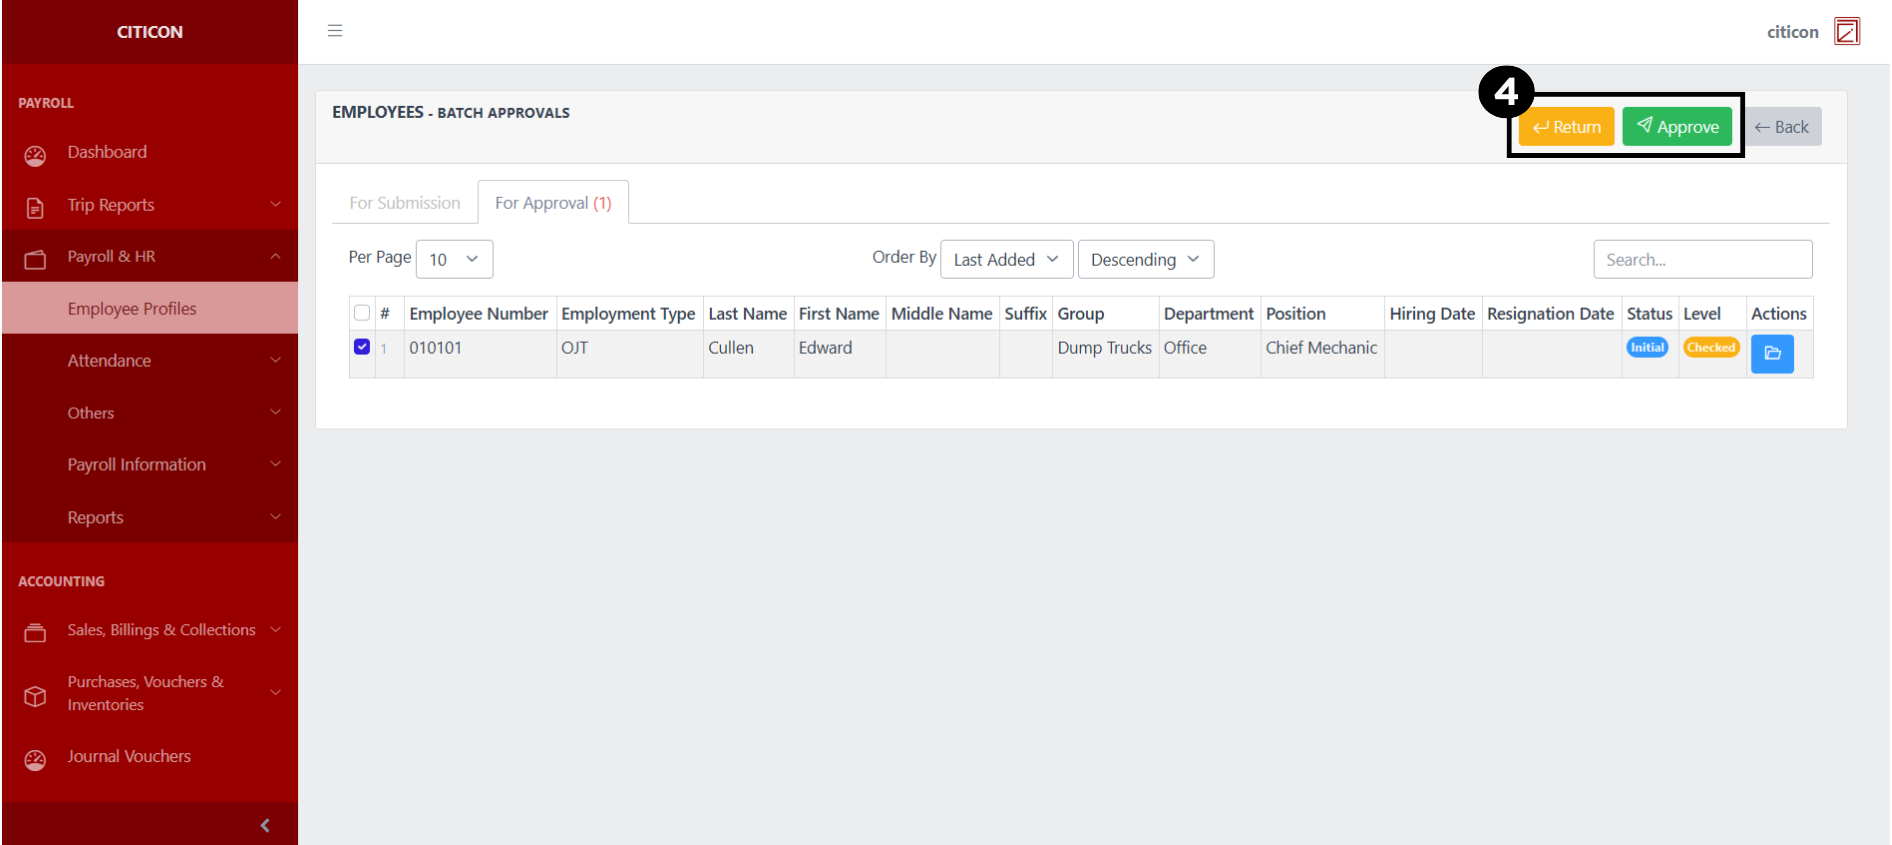
Approve Entry
- Select the Batch Approvals button to approve a entry.
- Select the For Approval tab.
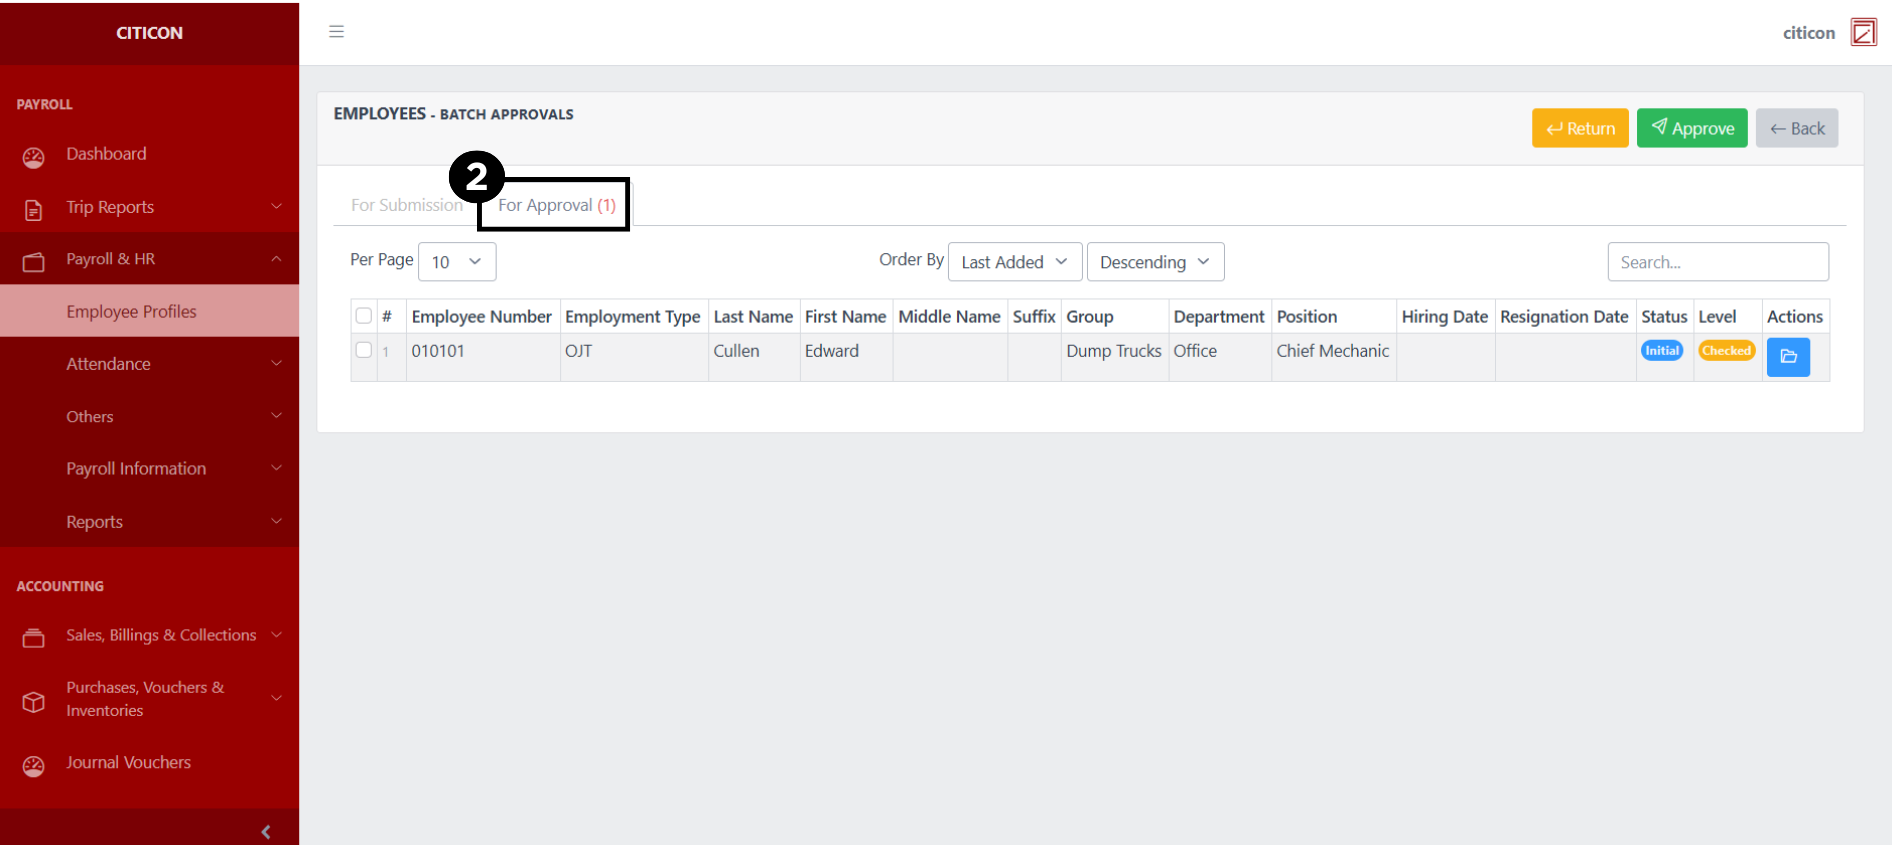
- Select the entry that you want to approve.
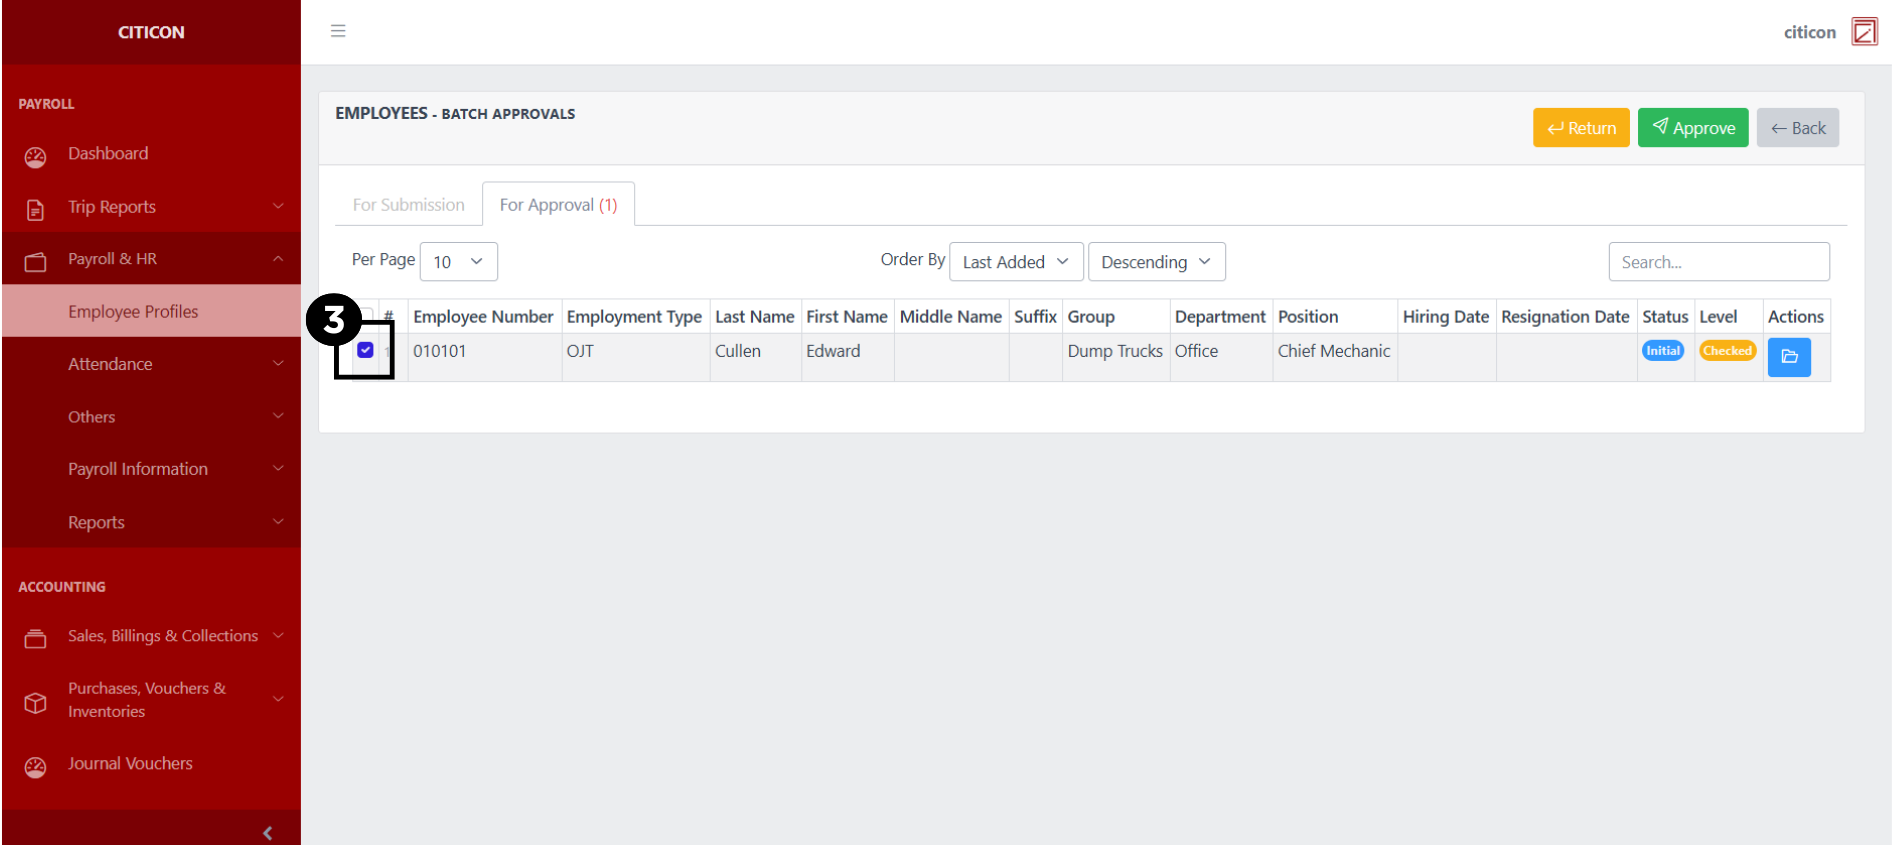
- Select the Approve button to approve the entry. In cases where you want to return a entry to submission section, select the entry you want to return, then select the Return button.
 To view the details of an individual entry, select the folder button and from here, you may either Return, Approve, or Cancel the entry.