Shift Management - All Shifts
Welcome to Citicon Payroll and Accounting Systems Configuration for Shift Templates under the Attendance submodule of the Payroll & HR module. This section allows you to create and manage predefined work shift structures that can be assigned to employees to standardize attendance tracking across the organization.
By configuring shift templates, you ensure consistency in work schedules, optimize workforce planning, and support accurate timekeeping for payroll computations.
Key Purposes
- Define Standard Shift Structures: Create named shift templates that include shift types and work schedules, ensuring consistency and clarity across departments.
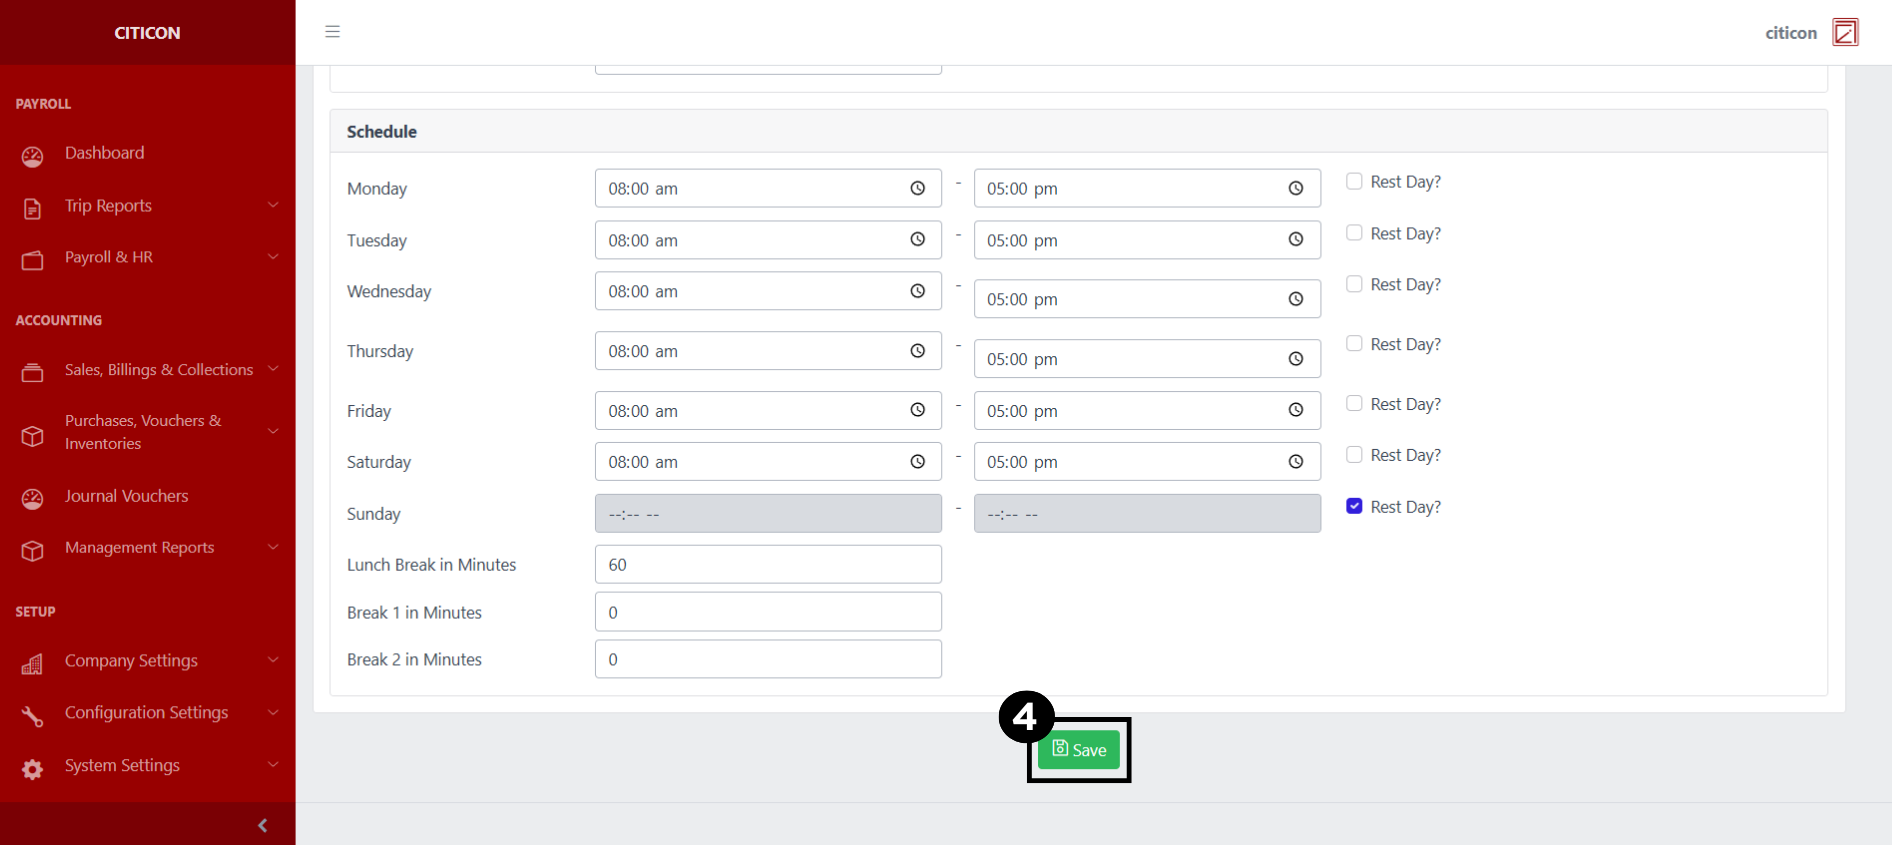
- Customize Weekly Work Schedules: Specify the expected working hours for each day of the week (Monday to Sunday), including variations in shifts to suit operational needs.
- Allocate Break Durations: Set fixed durations for lunch breaks and additional breaks to support fair labor practices and maintain productivity.
- Streamline Shift Assignments: Easily assign predefined shift templates to employees, reducing manual entry and improving administrative efficiency.
- Support Accurate Attendance Tracking: Align shift templates with attendance monitoring tools to ensure precise logging of work hours, tardiness, and overtime.
Shift Templates Module User-Manual
This section provides details, and set-by-step instructions to access, view, and update the Shift Templates entries stored in the system.
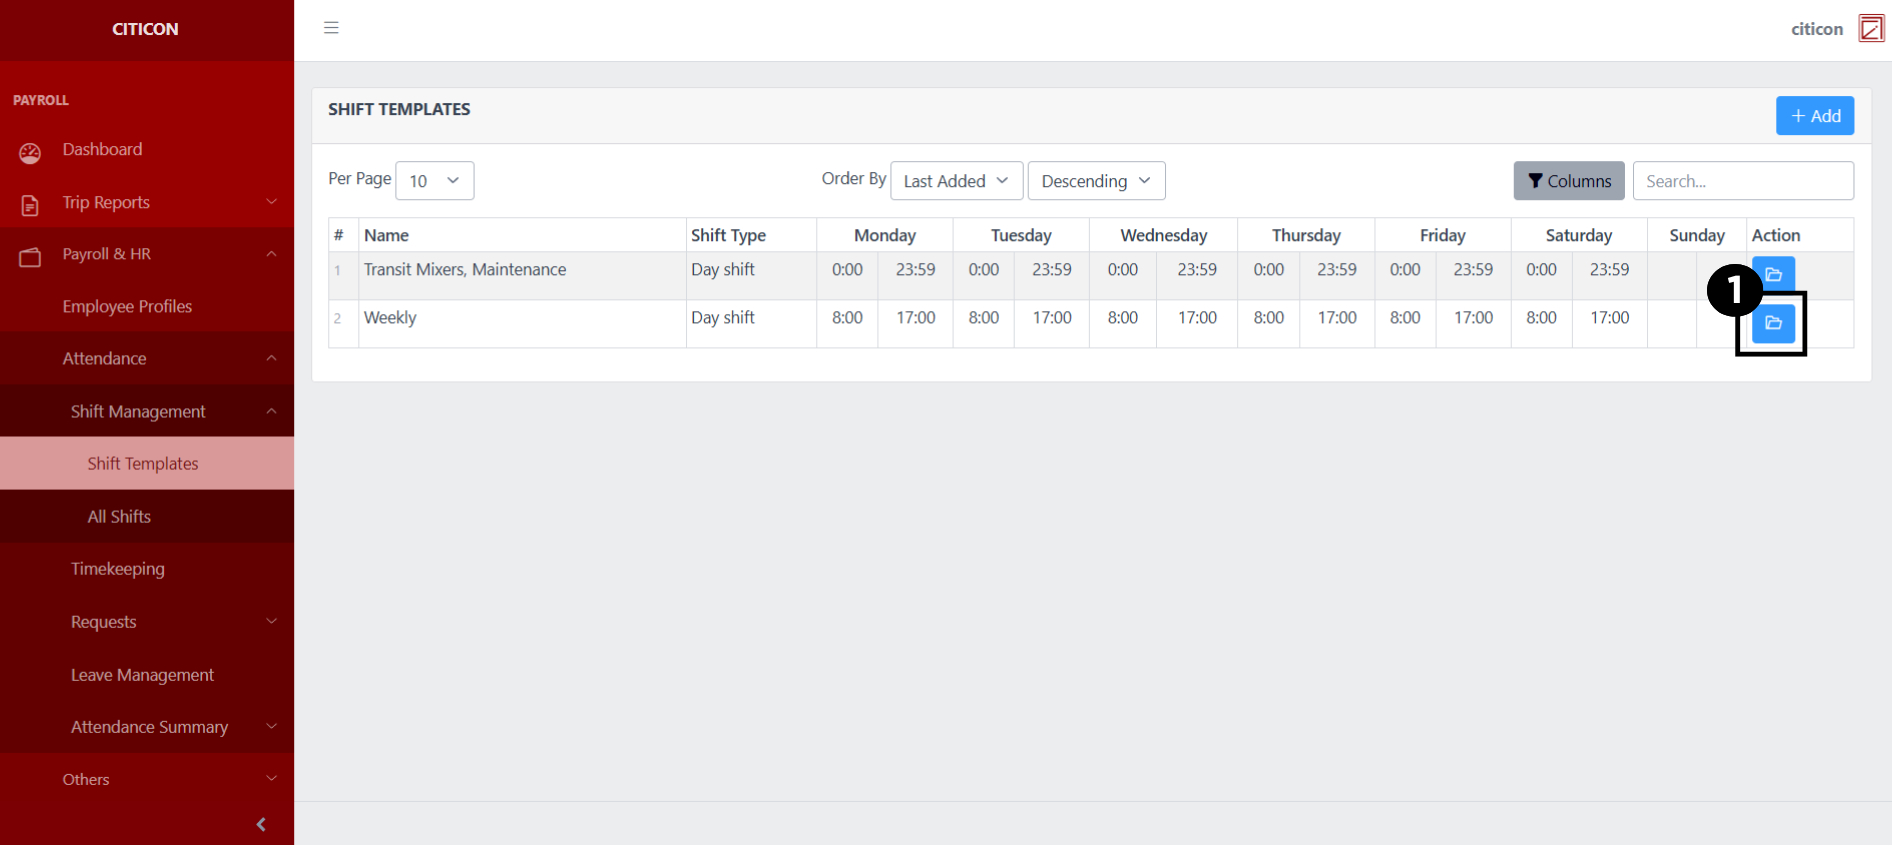
Index Page
To access the Shift Templates. Go to Payroll, select Payroll & HR, select Attendance, select Shift Management, then select Shift Templates.
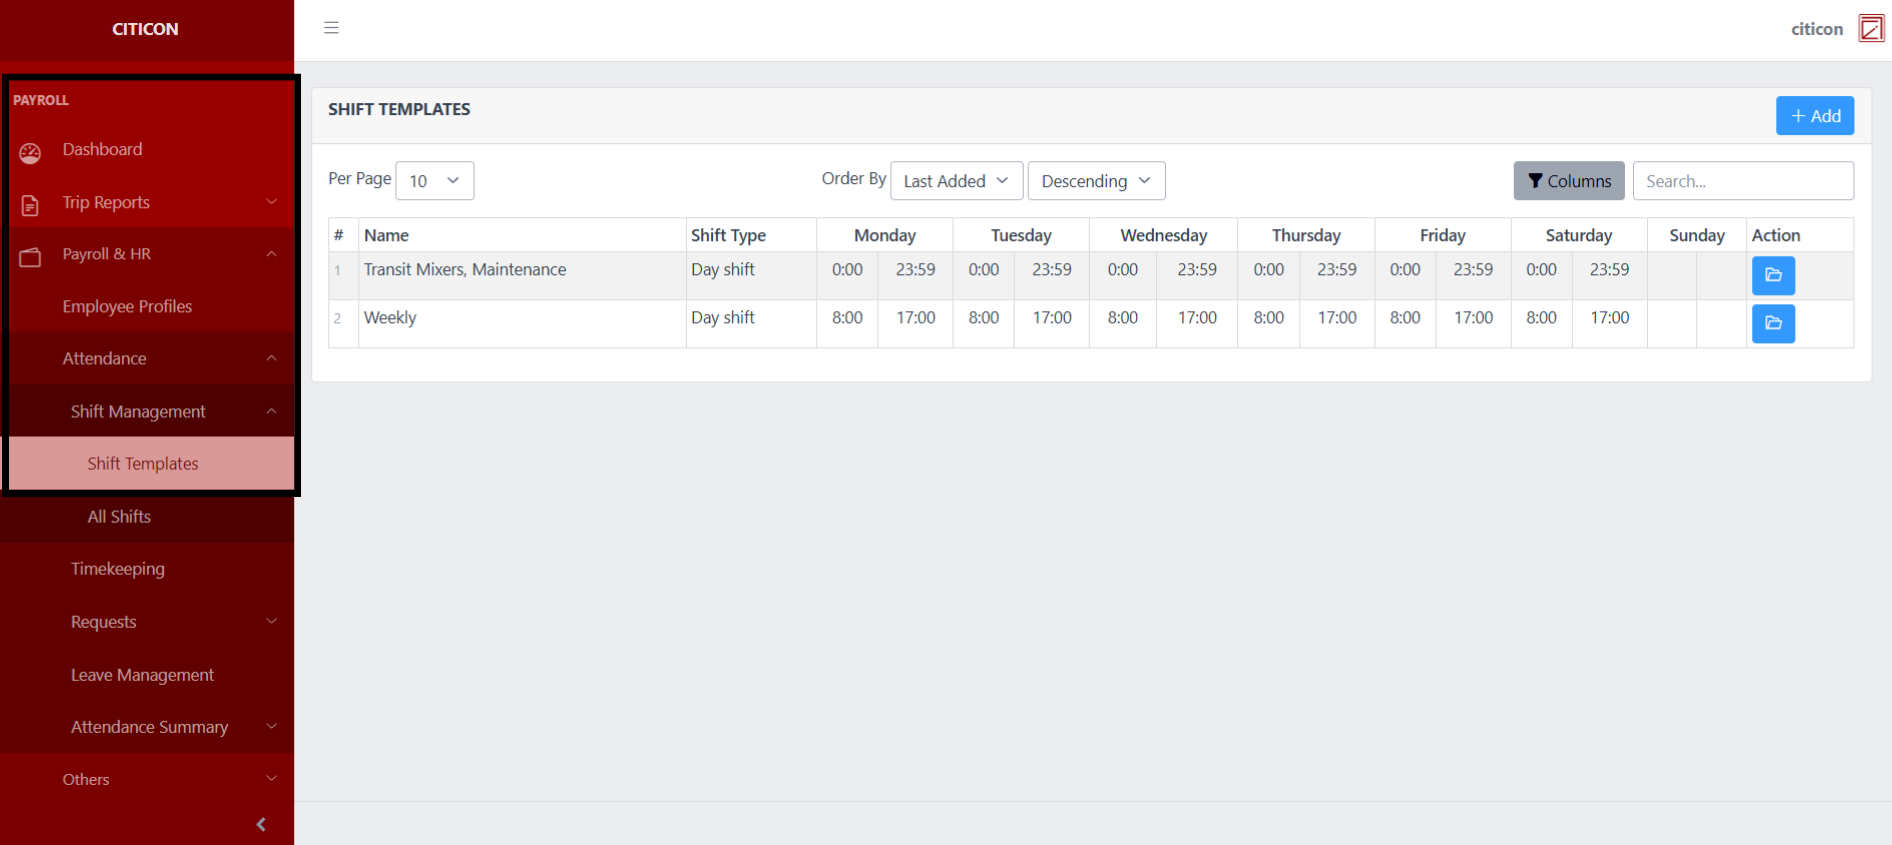
a. Adjust the paging, ordering, and sorting of the Shift Templates Page here.
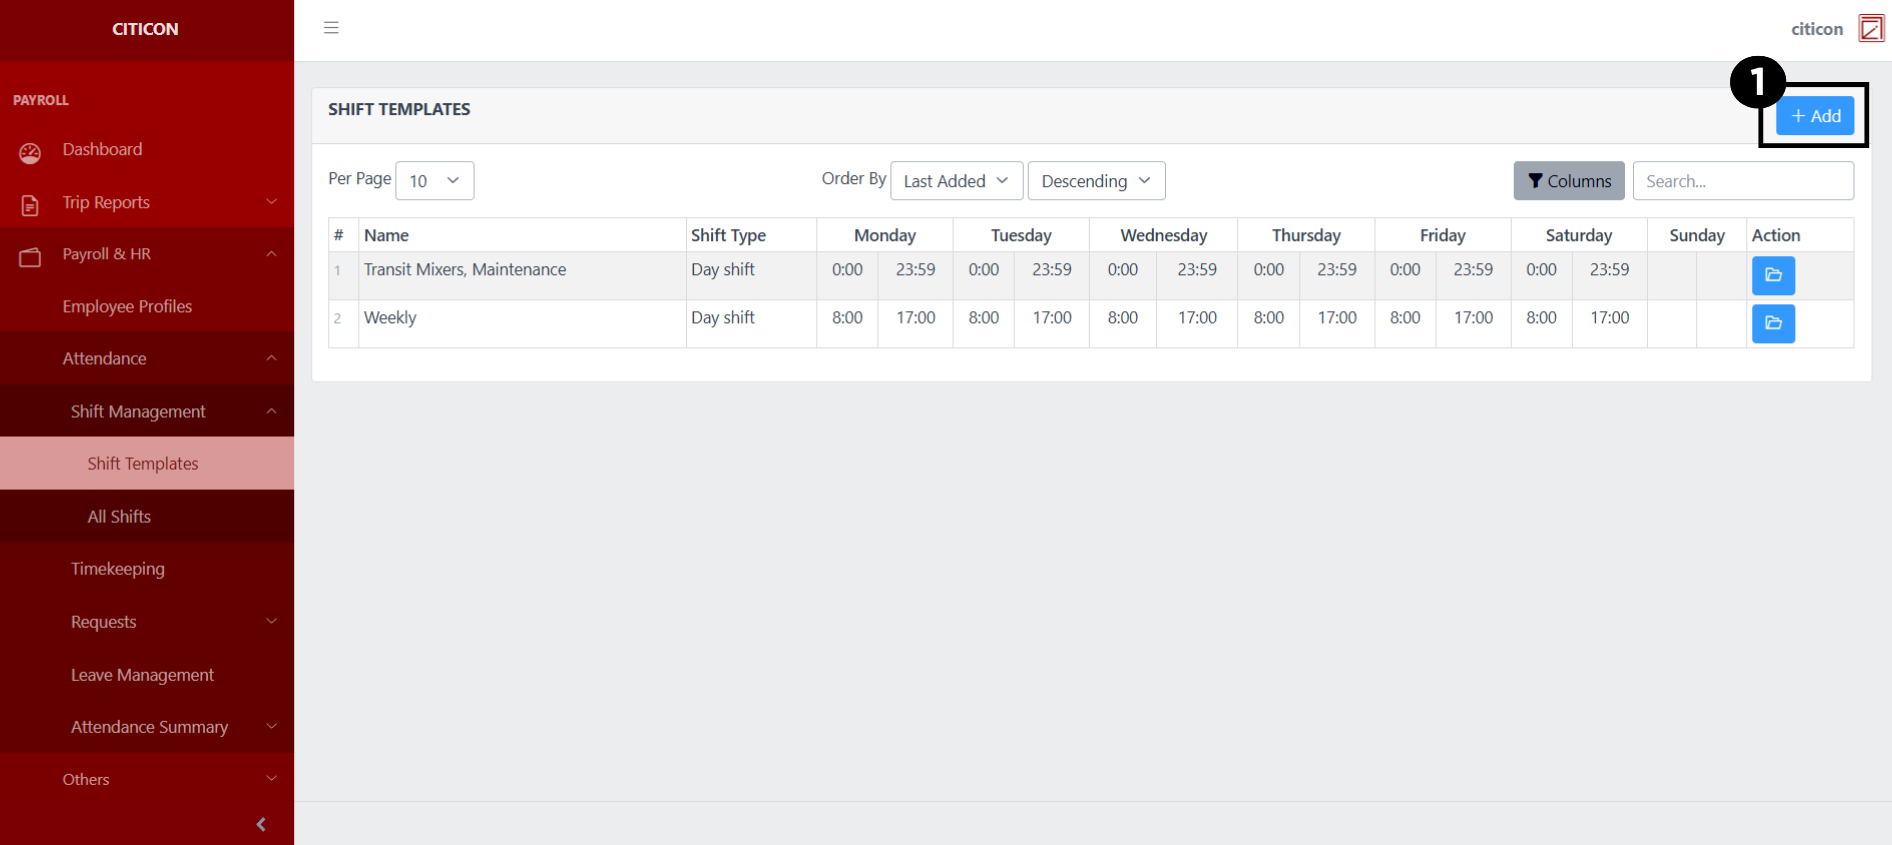
b. Select the Add button to add a new entry.
c. Search for specific entry details using the search bar.
d. View, Edit, or Delete data by selecting the folder button.

Add Entry
- Select the Add button to add a new entry.
- Input the necessary details for your new entry.
All fields that has an asterisk (*) are required to be filled up.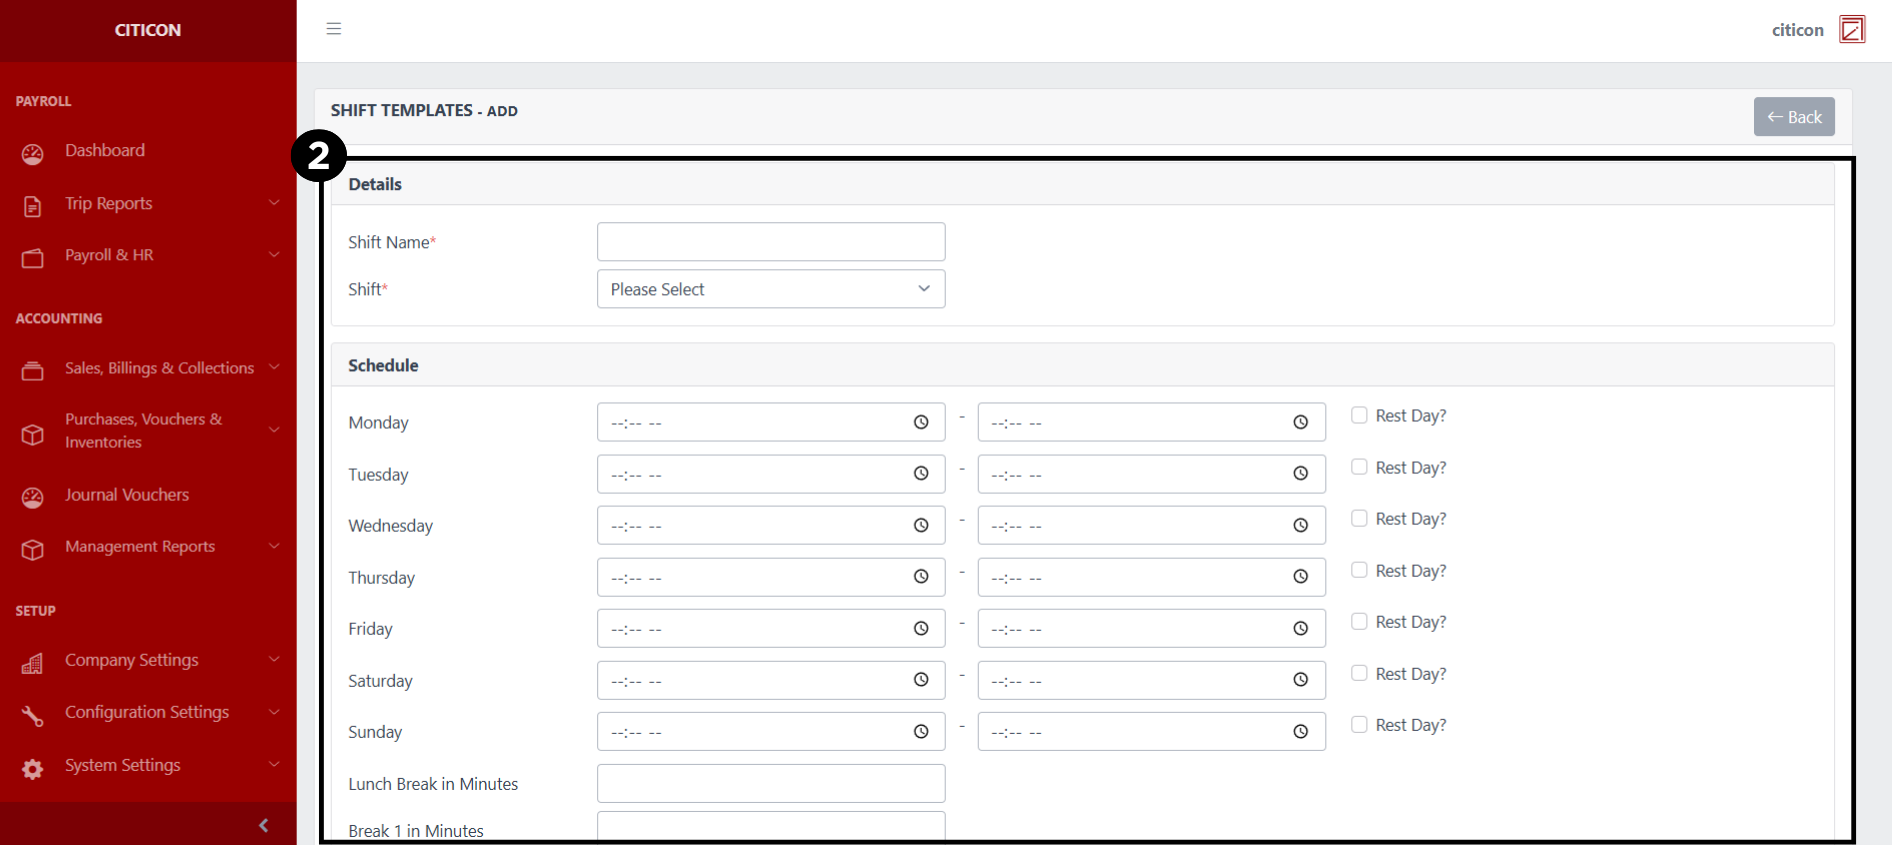
- Select the Save button to save your new entry.

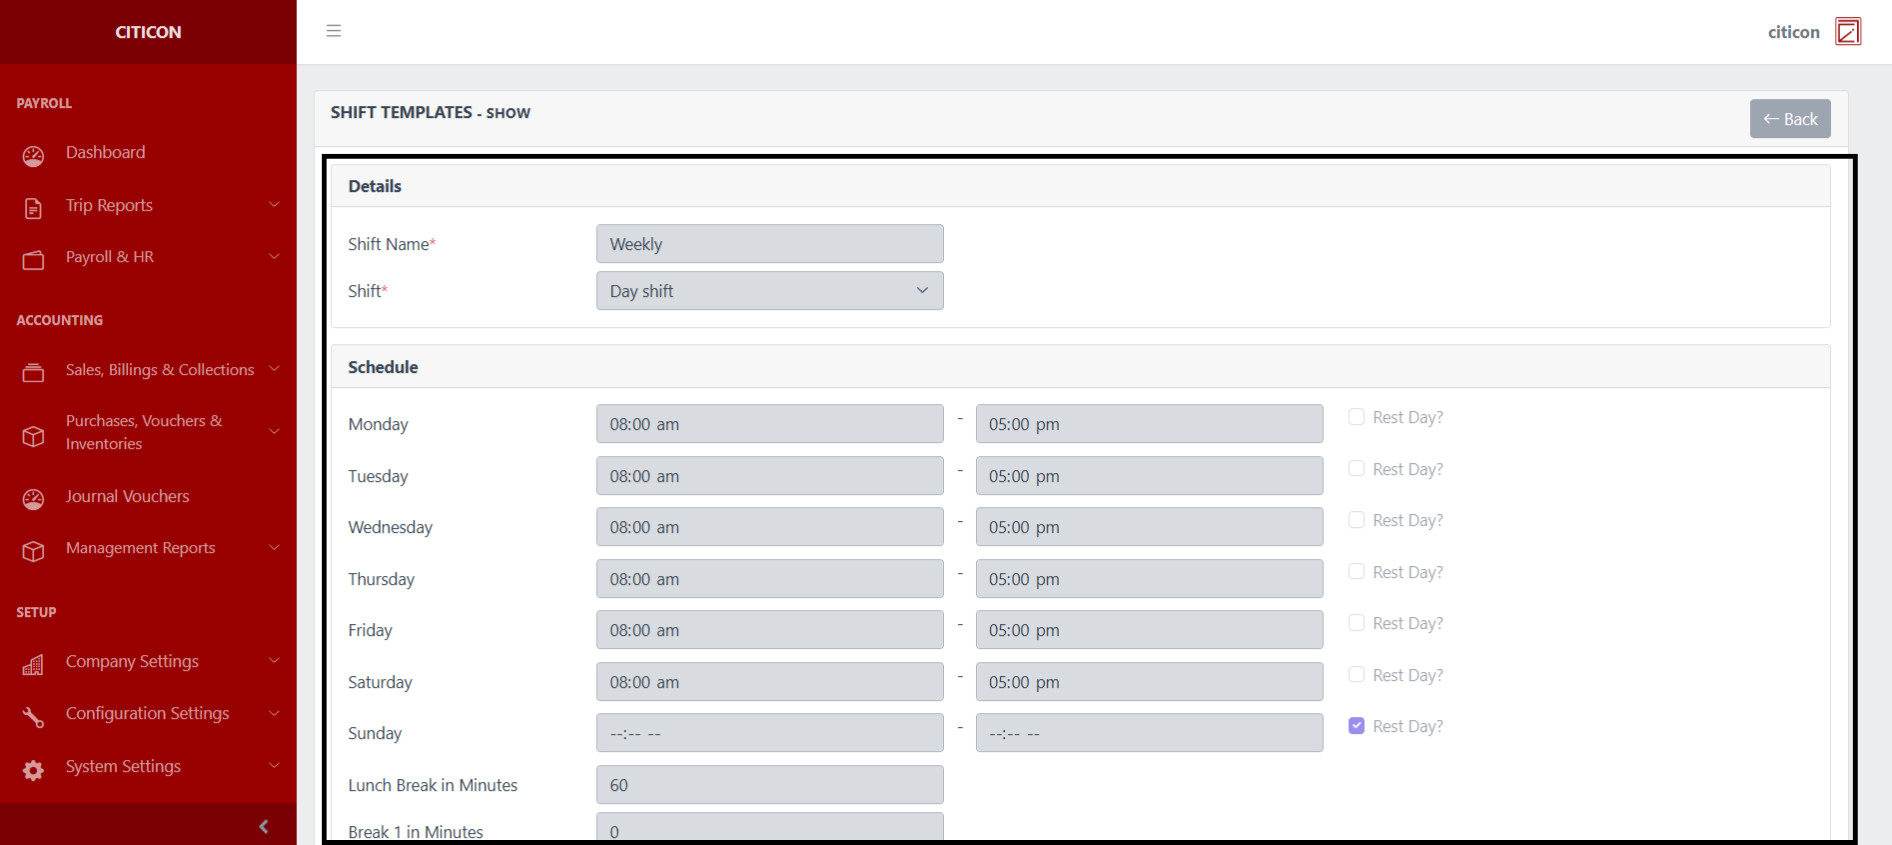
Show Entry
- Select the folder button to view an entry.
 Here you can view more specific details on the entry that you selected.
Update Entry
- Select the folder button of the entry which you want to edit.
- Select the Edit button to update the details of the entry.
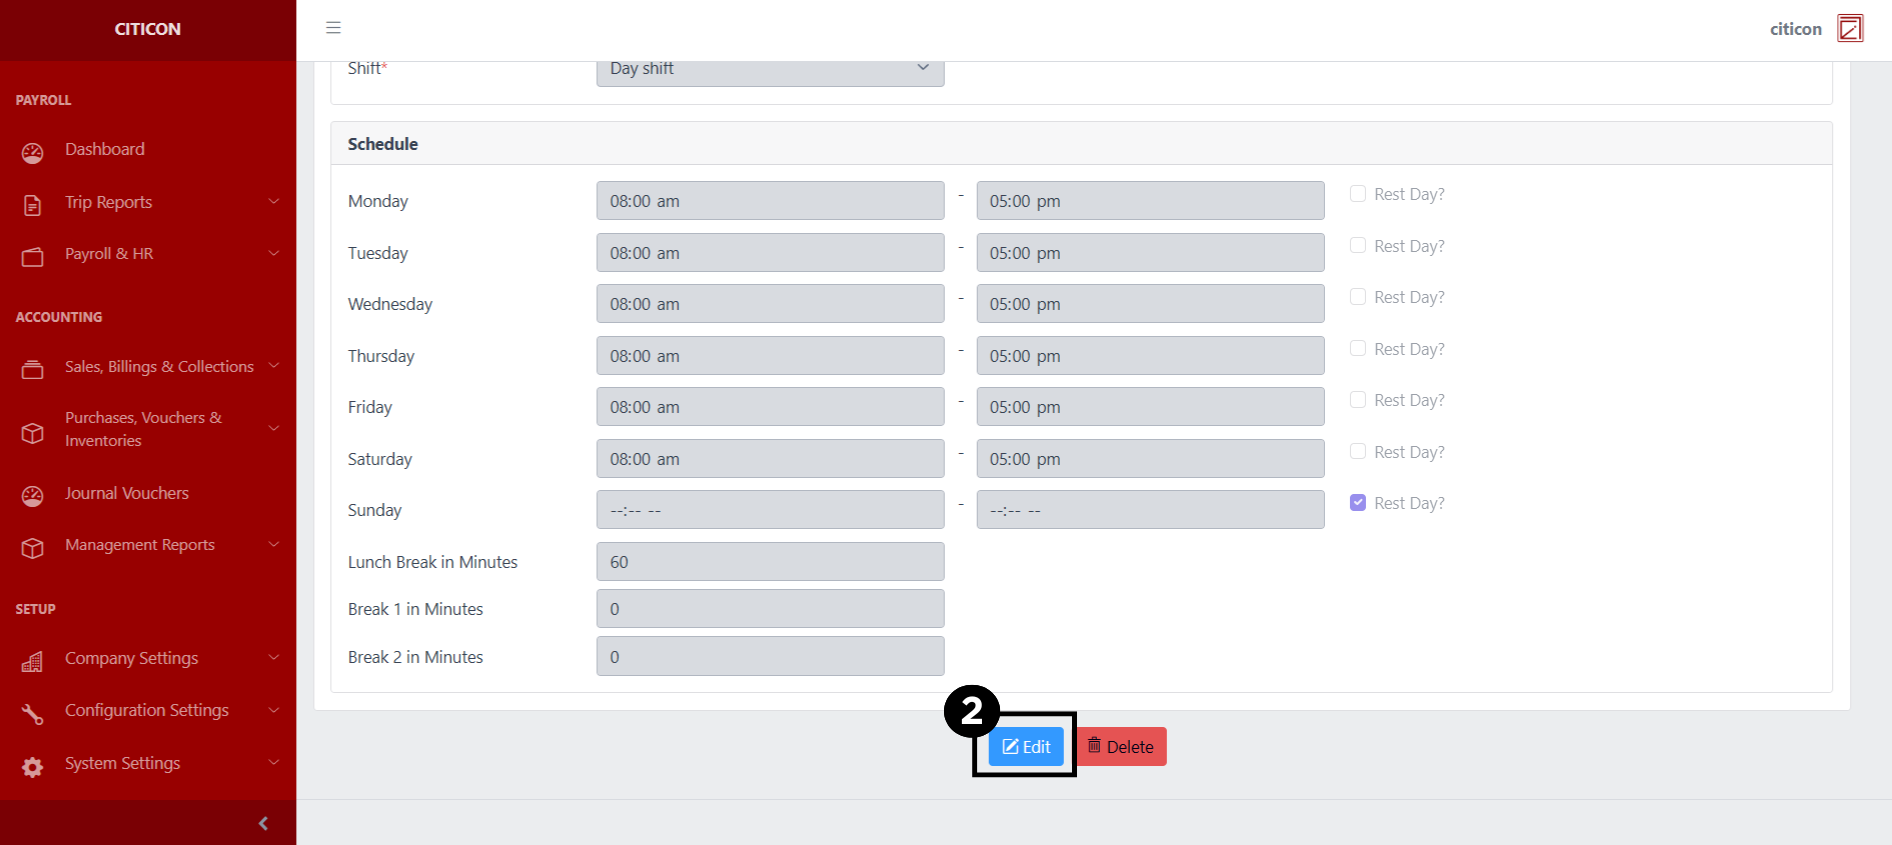
- Select a detail section which you want to edit, and enter the necessary changes.
All fields with an asterisk (*) are required to be filled up.

- Select the Save button to save the changes you have made.