Requests - Overtime Requests
Welcome to Citicon Payroll and Accounting Systems Configuration for Overtime Requests under the Attendance submodule of the Payroll & HR module. This section manages employee-submitted overtime requests, allowing for proper validation, tracking, and integration into payroll calculations.
Managing overtime requests effectively helps ensure fairness, labor compliance, and accurate compensation for extended work hours.
Key Purposes
- Submit Overtime Work Requests: Allow employees to formally file requests for overtime, including details such as date filed, overtime type, and work duration.
- Track and Calculate Overtime Hours: Automatically compute total overtime and night differential durations, including adjustments for designated break times.
- Enable Justification and Remarks: Require clear reasons for each overtime request while allowing optional remarks for added context and clarification.
- Support Multi-Level Approval Workflow: Facilitate secure and efficient approval processes, ensuring that only valid and authorized overtime entries are processed.
- Integrate with Payroll for Compensation: Seamlessly link approved overtime records to payroll for accurate salary adjustments and employee compensation.
Overtime Requests Module User-Manual
This section provides details, and set-by-step instructions to access, view, and update the Overtime Requests entries stored in the system.
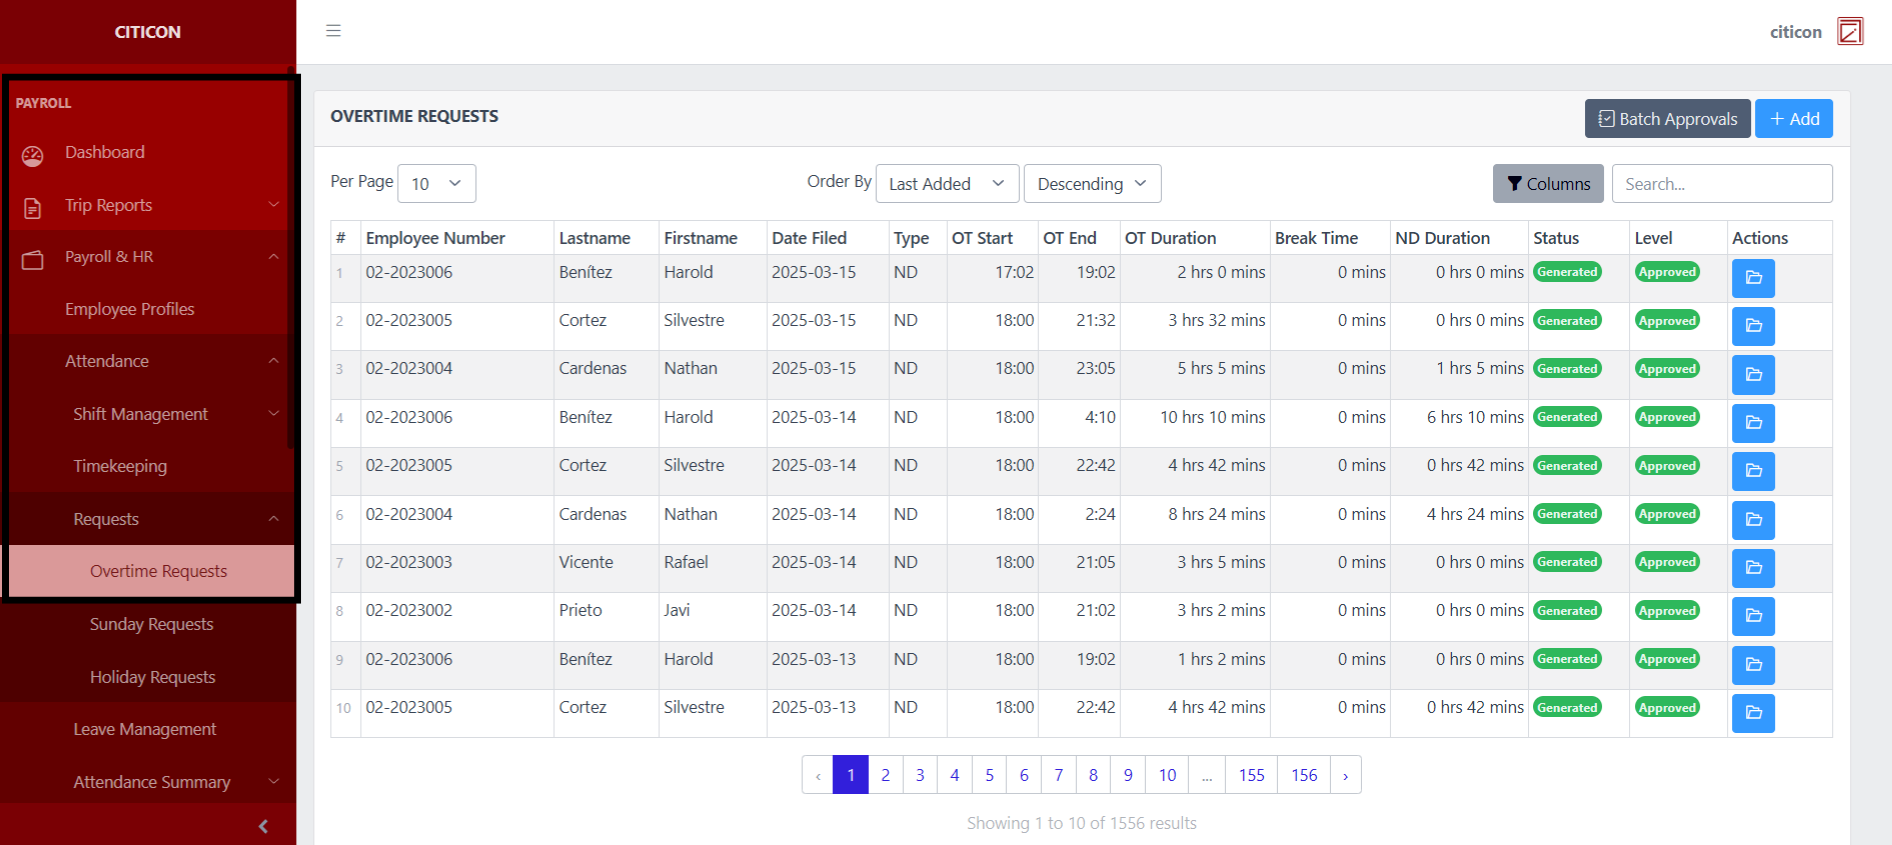
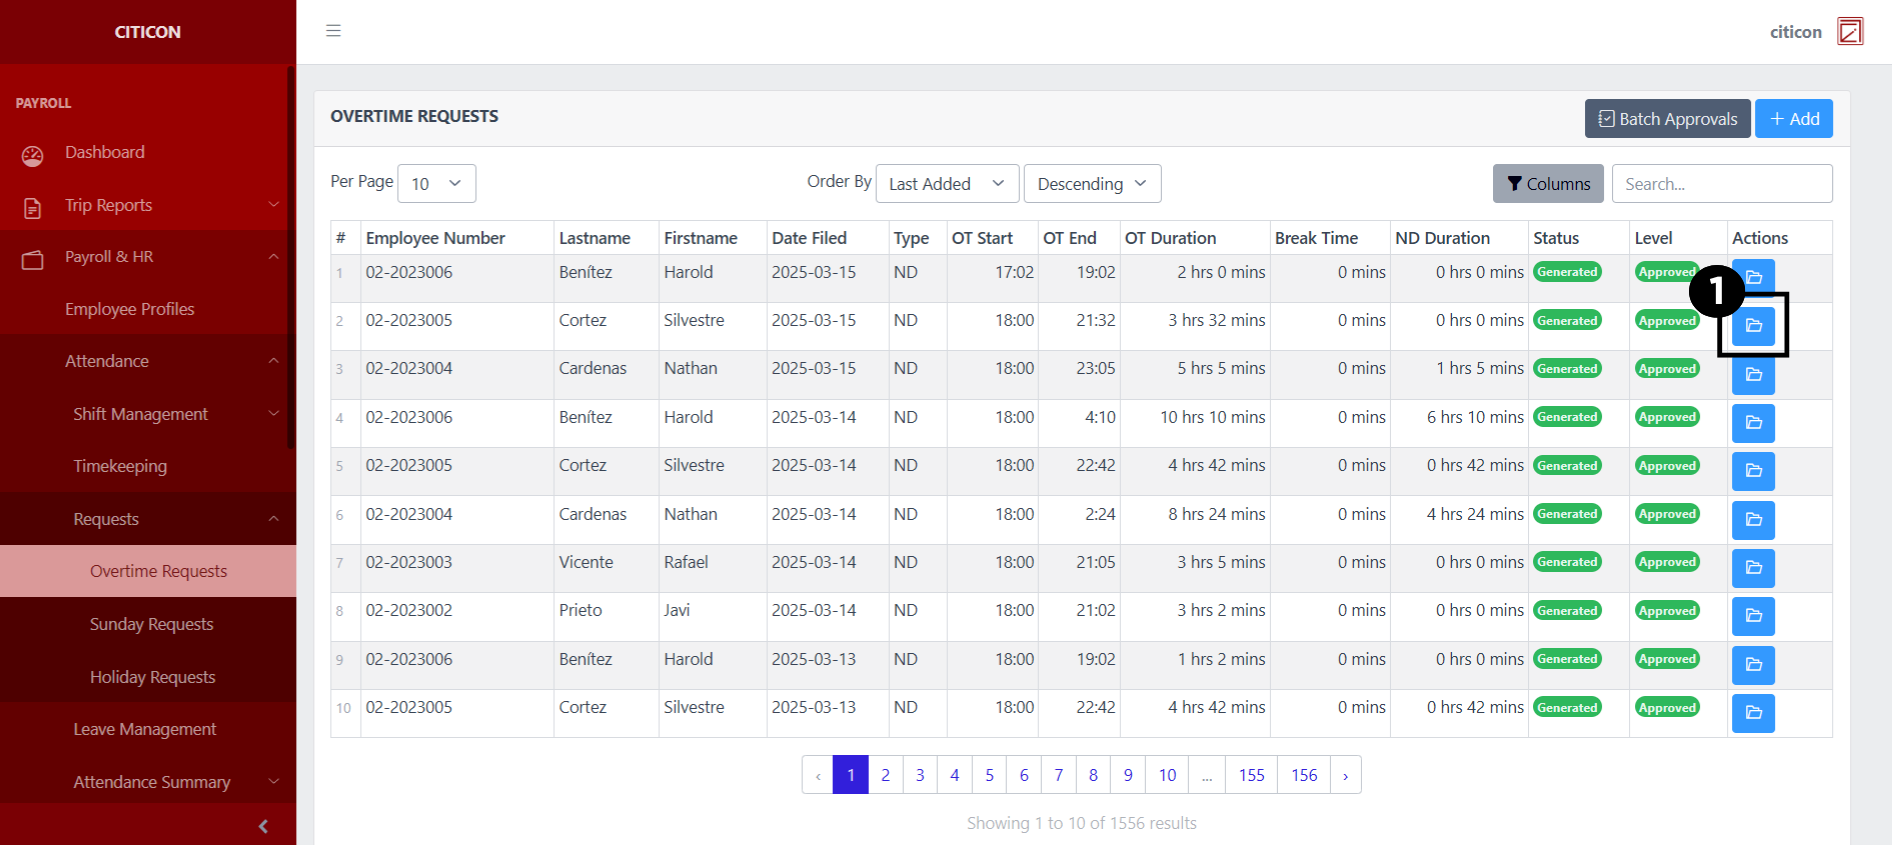
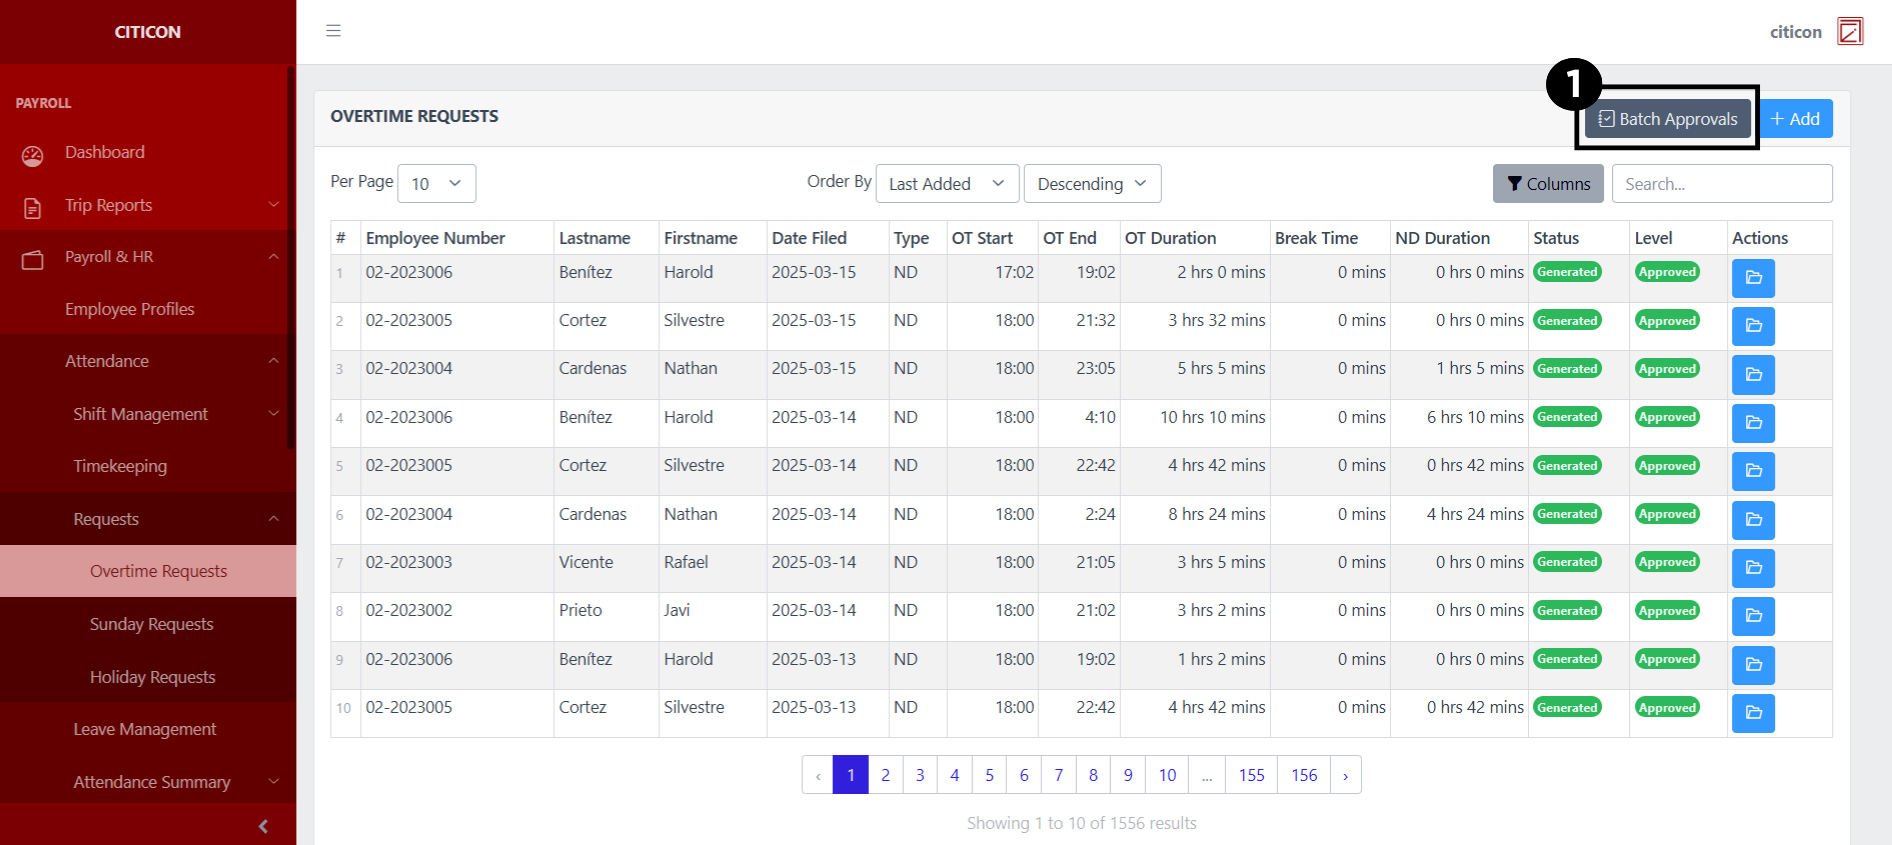
Index Page
To access the Overtime Requests. Go to Payroll, select Payroll & HR, select Attendance, select Requests, then select Overtime Requests.
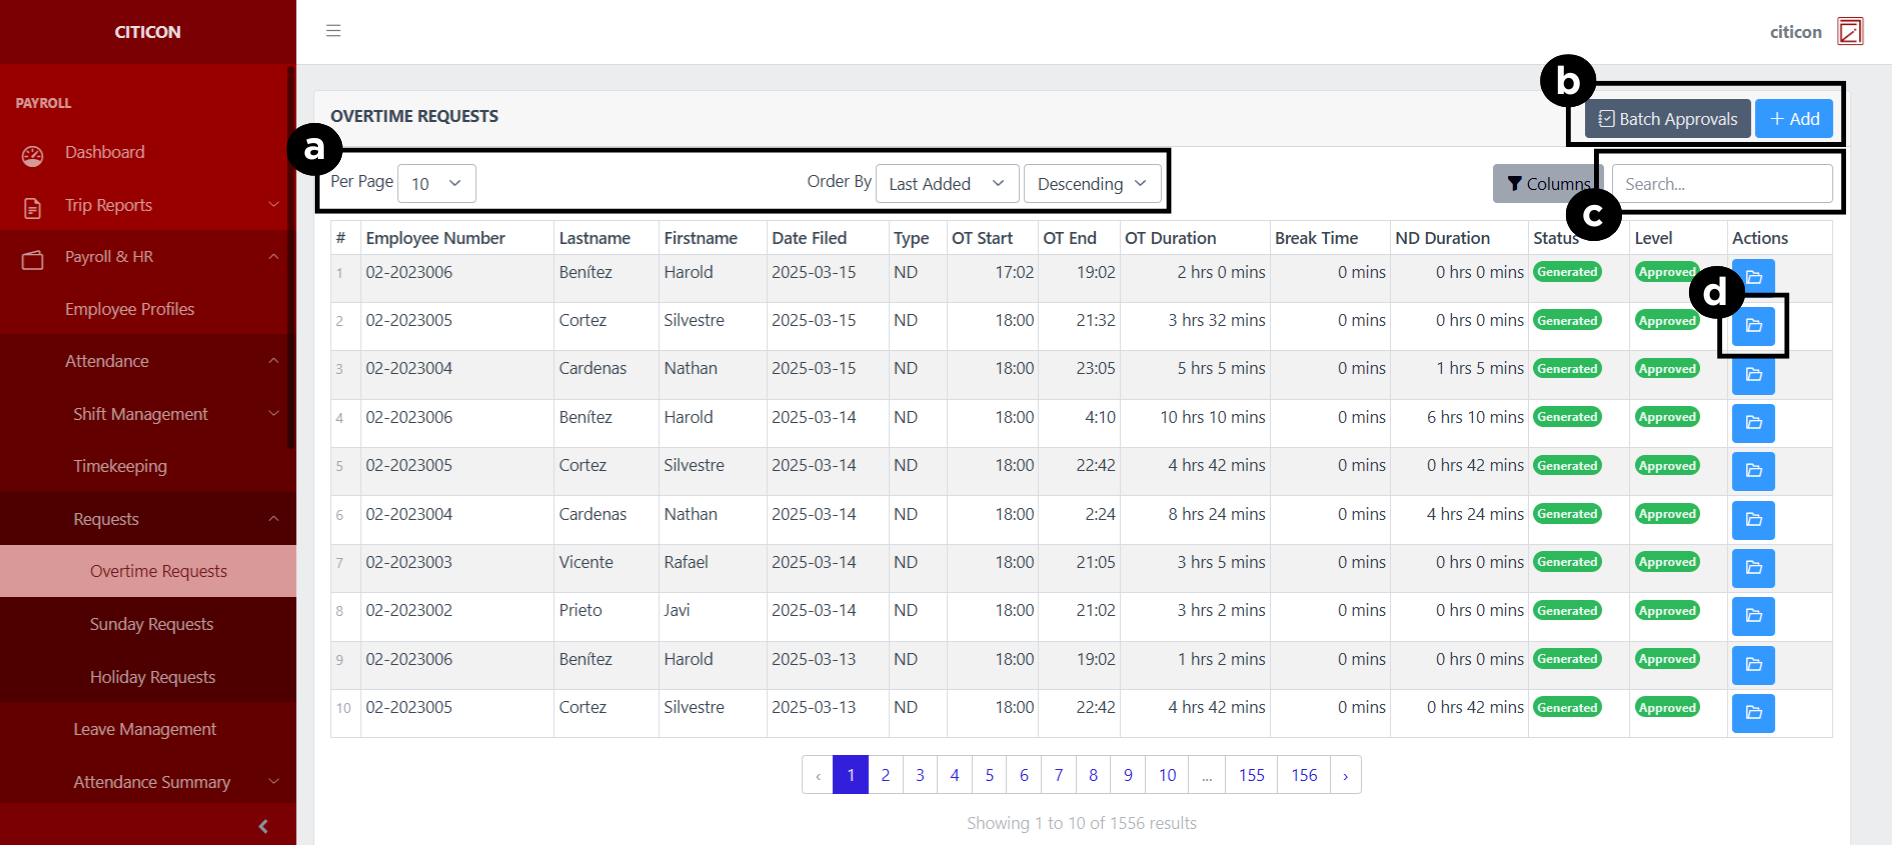
a. Adjust the paging, ordering, and sorting of the Overtime Requests Page here.
b. Select the respective button to either Add new entry or process entries to be approved.
c. Search for specific entry details using the search bar.
d. View, Edit, or Delete data by selecting the folder button.
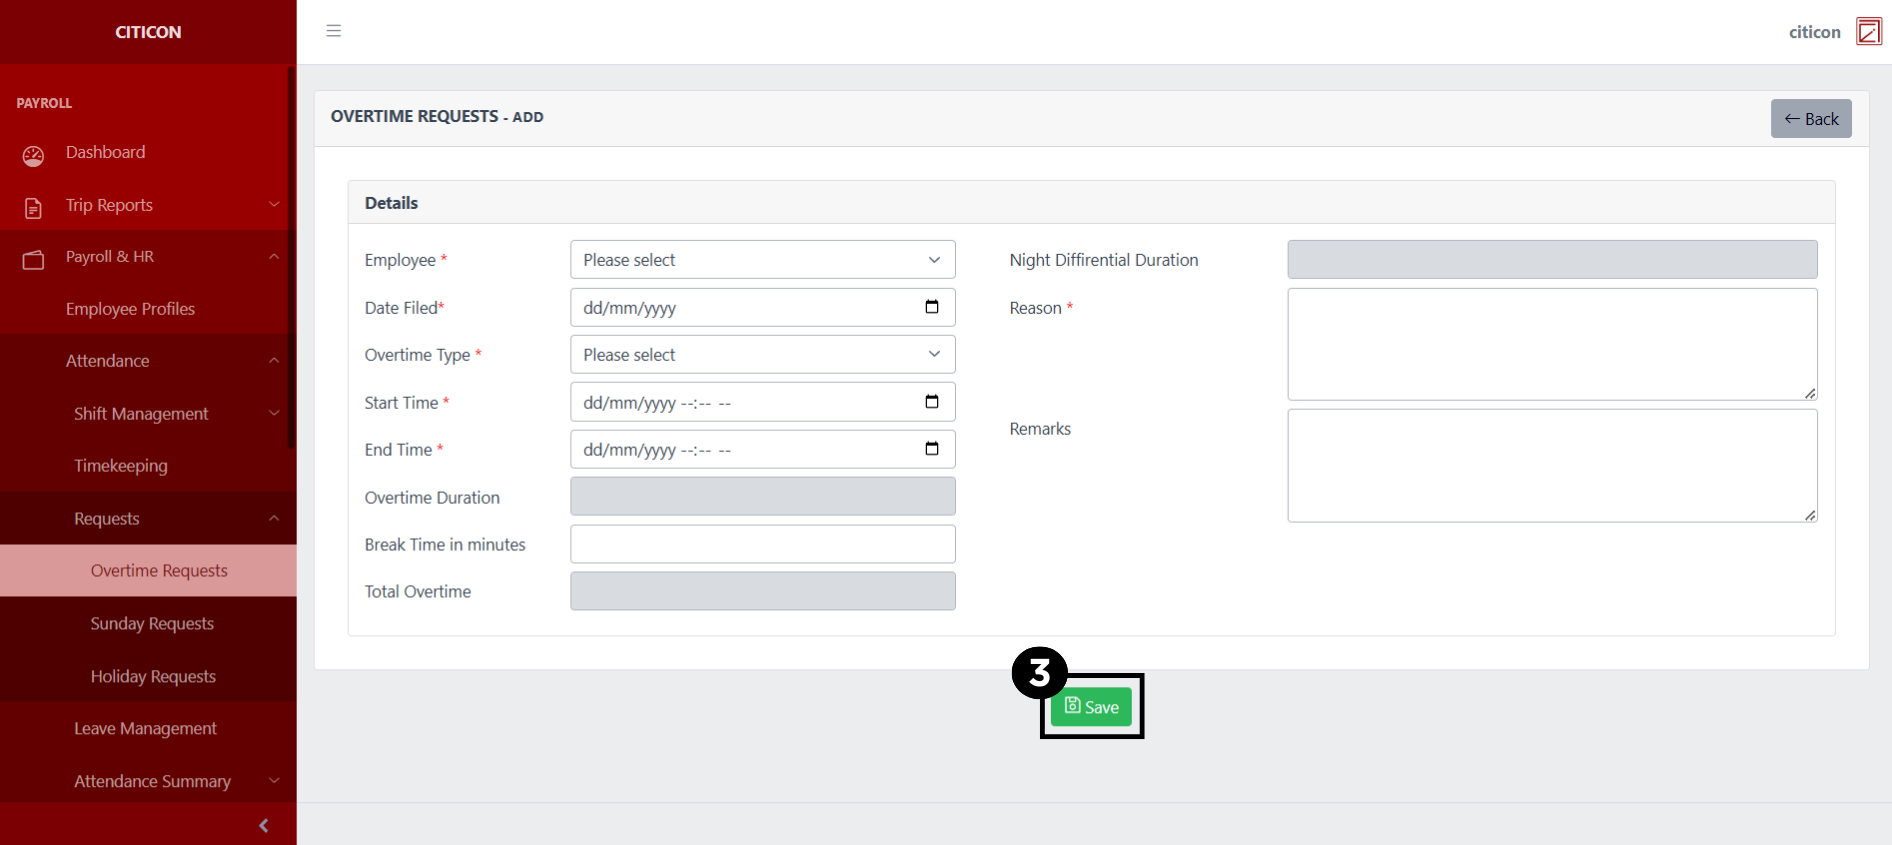
Add Entry
- Select the Add button to add a new entry.

- Input the necessary details for your new entry.
All fields that has an asterisk (*) are required to be filled up.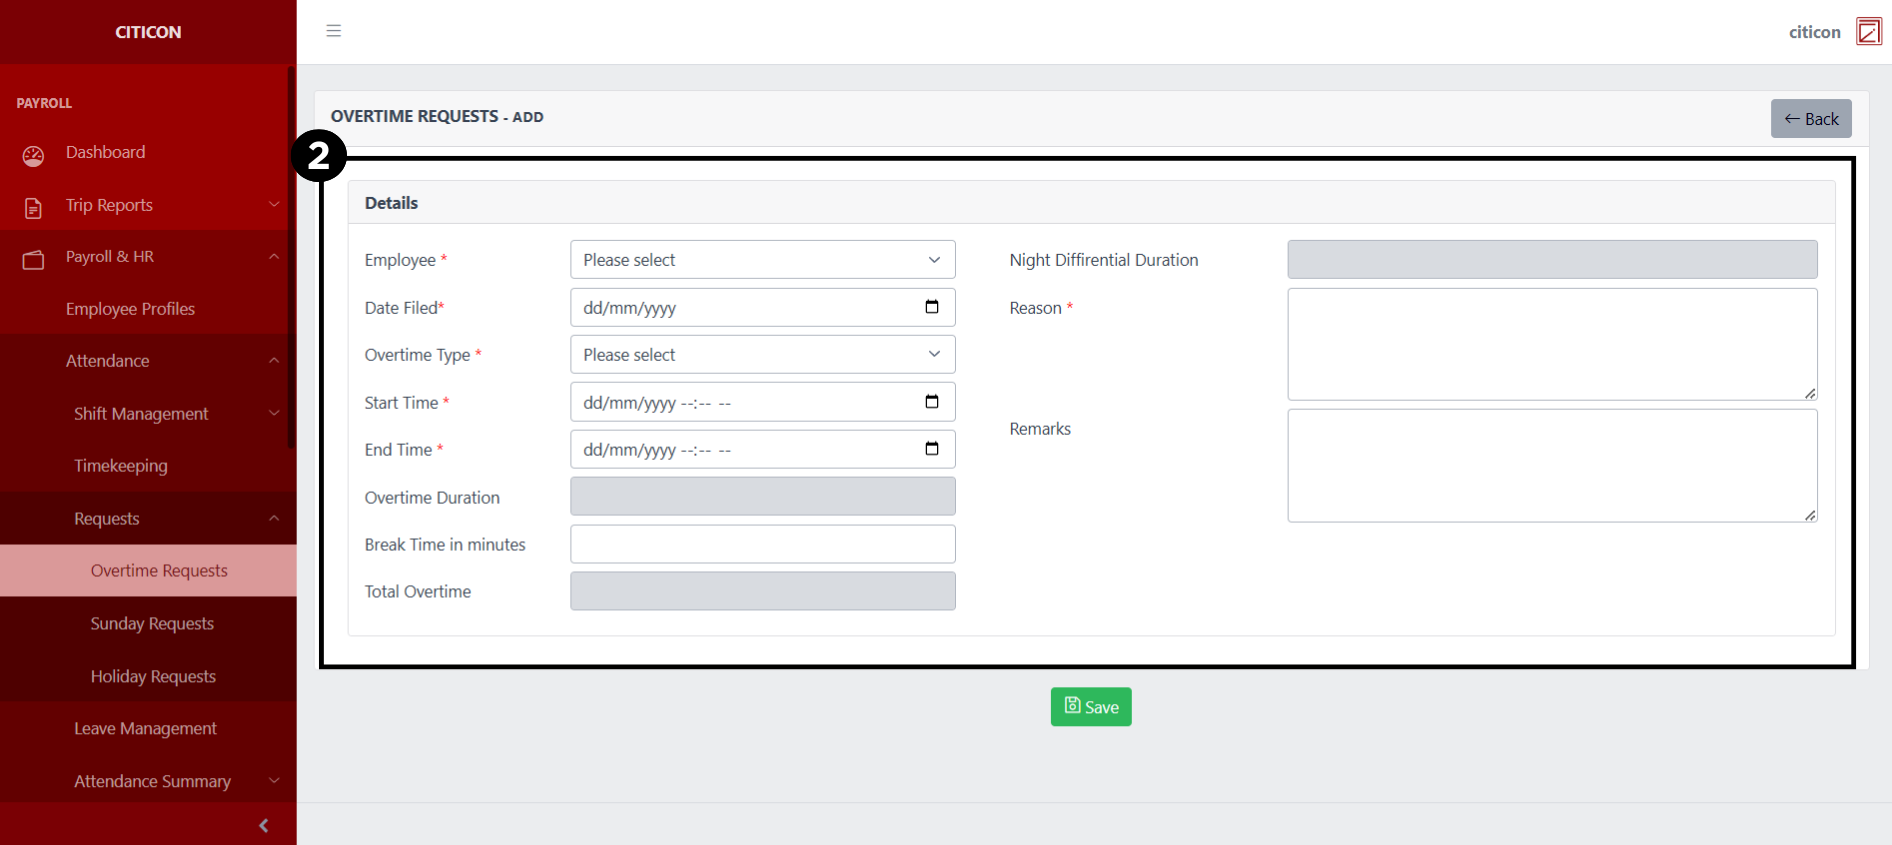
- Select the Save button to save your new entry.
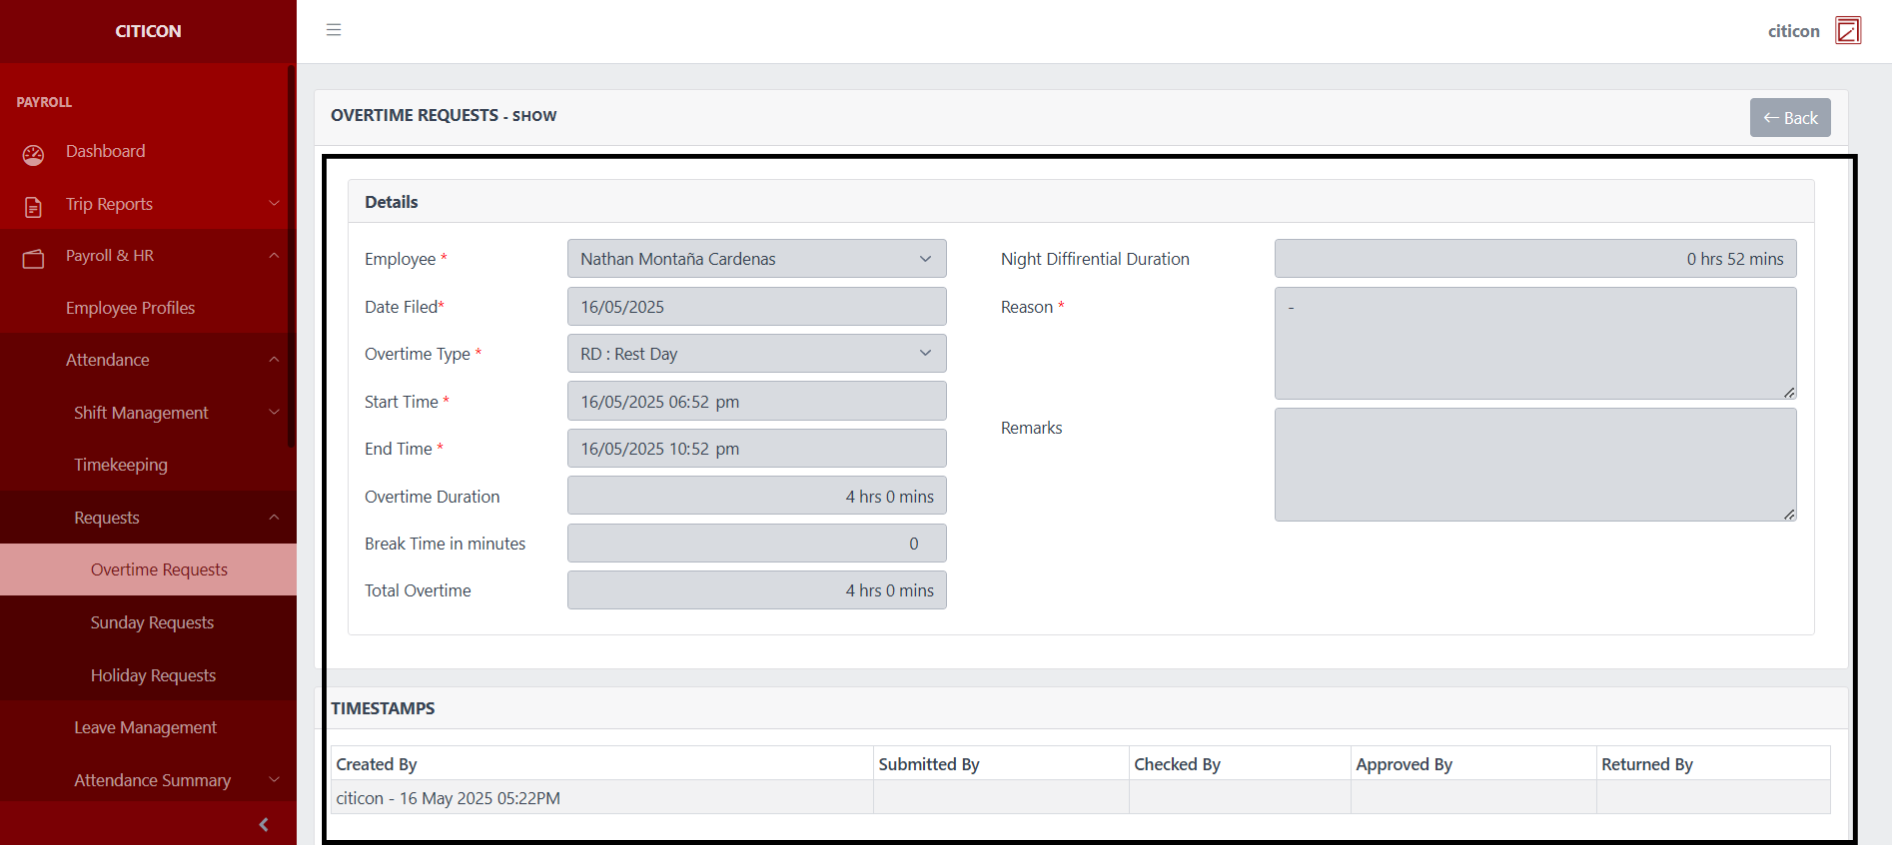
Show Entry
- Select the folder button to view an entry.
 Here you can view more specific details on the entry that you selected.
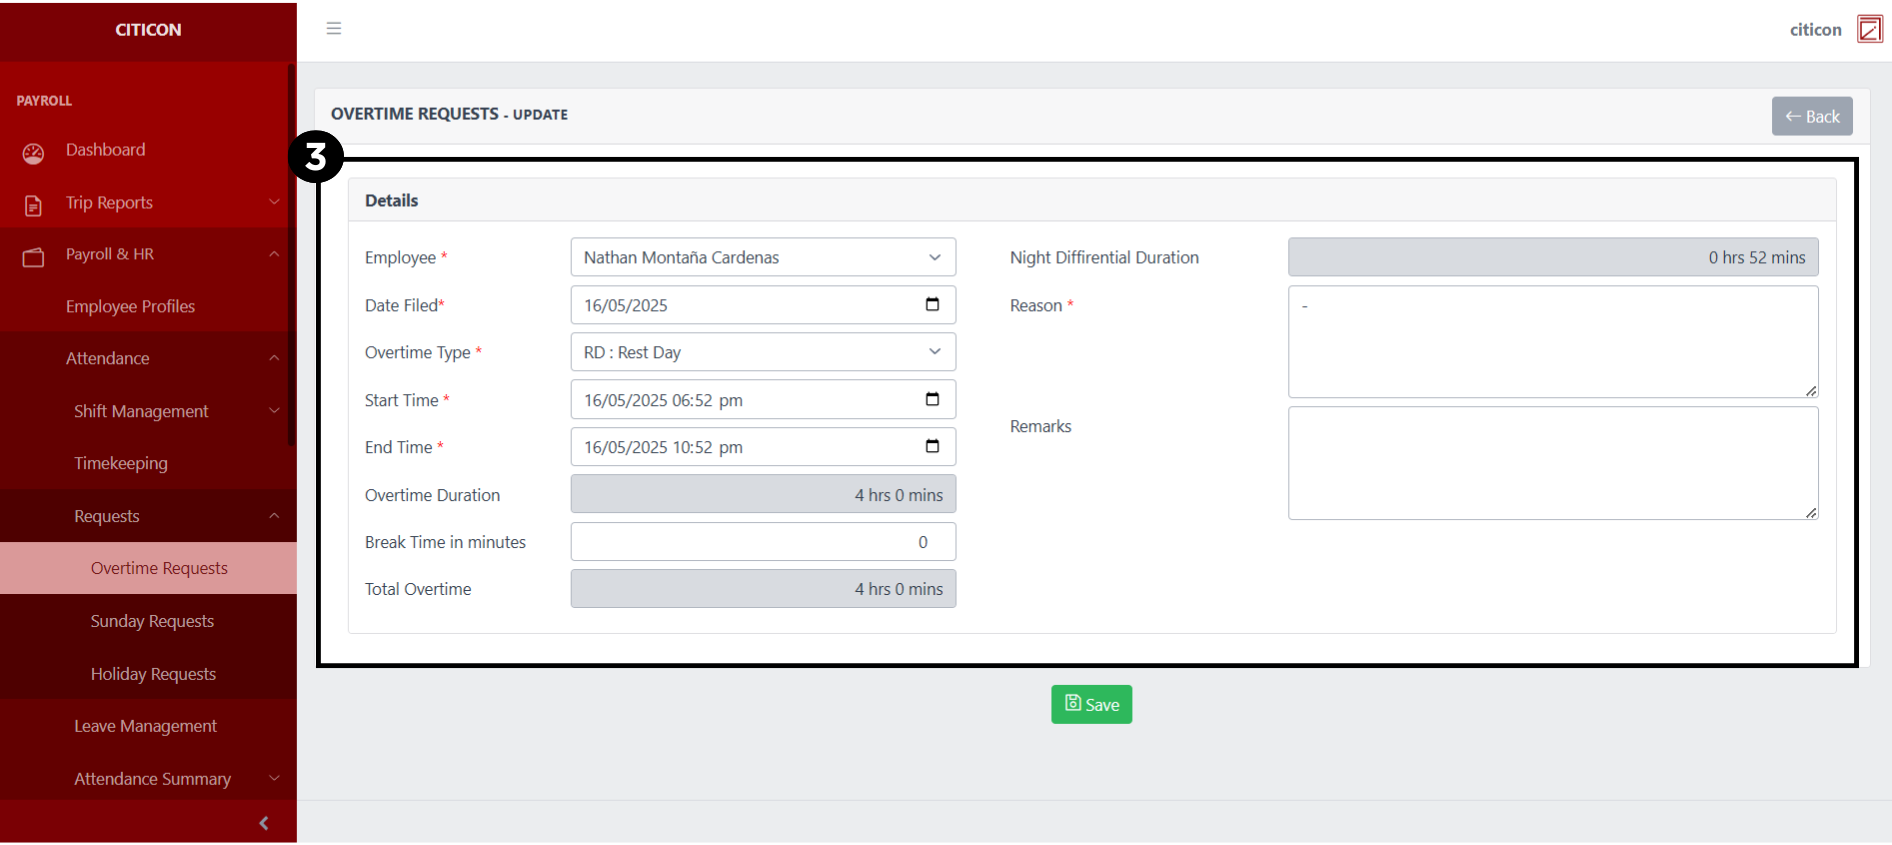
Update Entry
- Select the folder button of the entry which you want to edit.
- Select the Edit button to update the details of the entry.
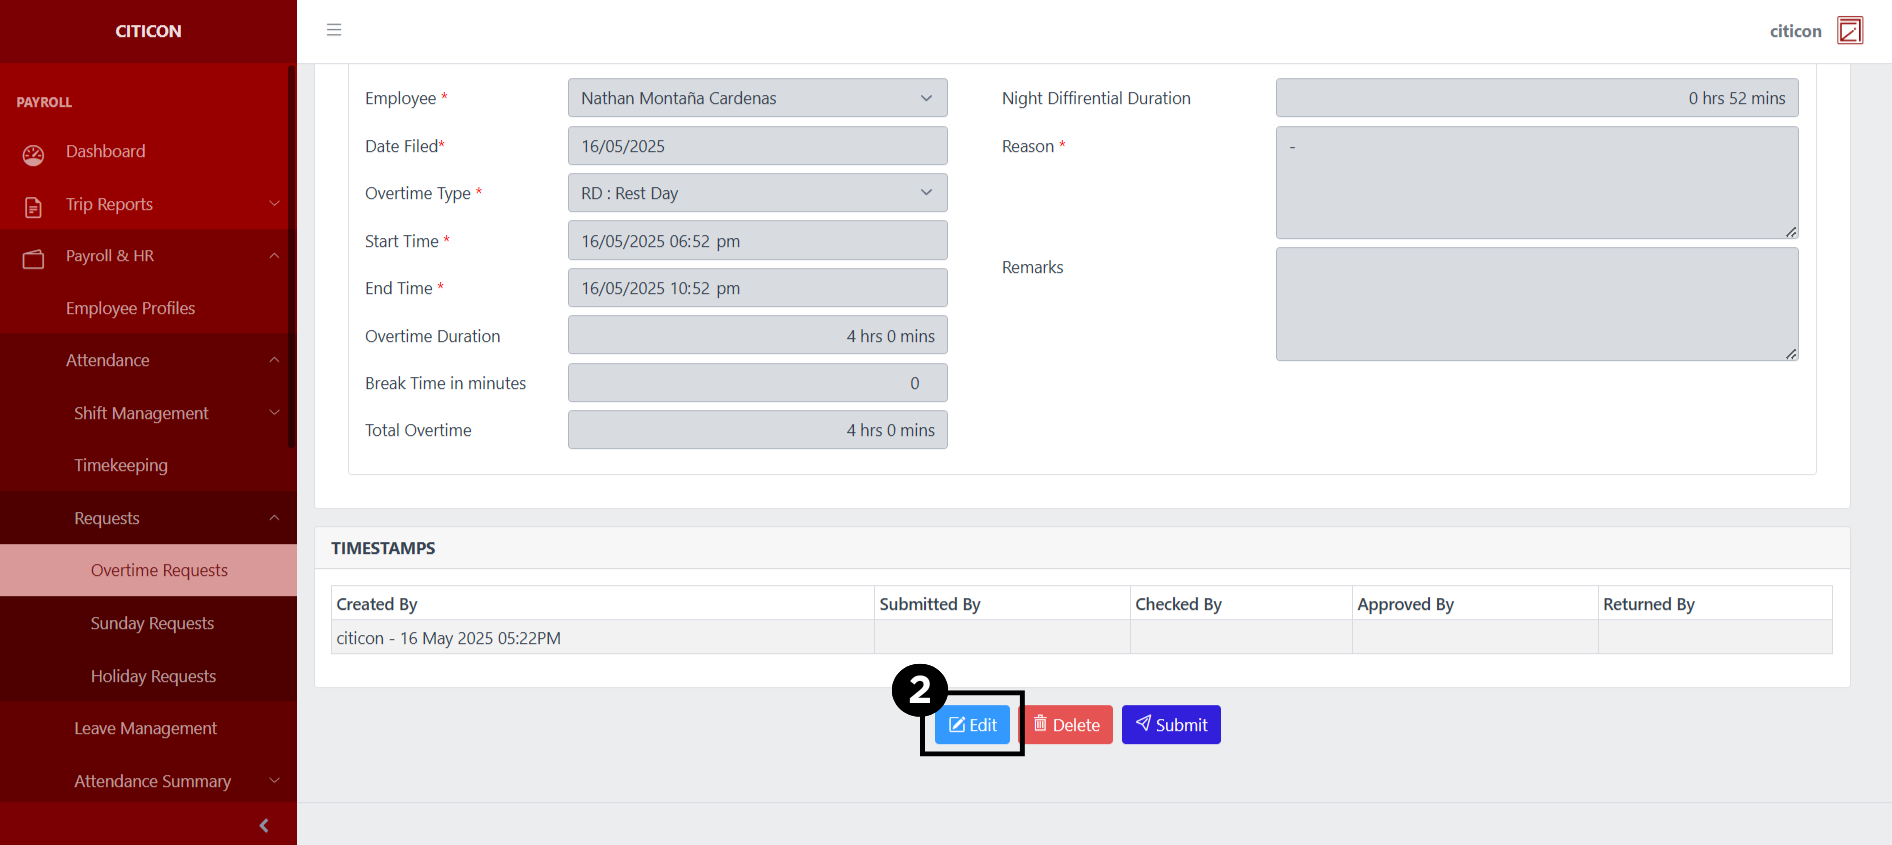
- Select a detail section which you want to edit, and enter the necessary changes.
All fields with an asterisk (*) are required to be filled up.
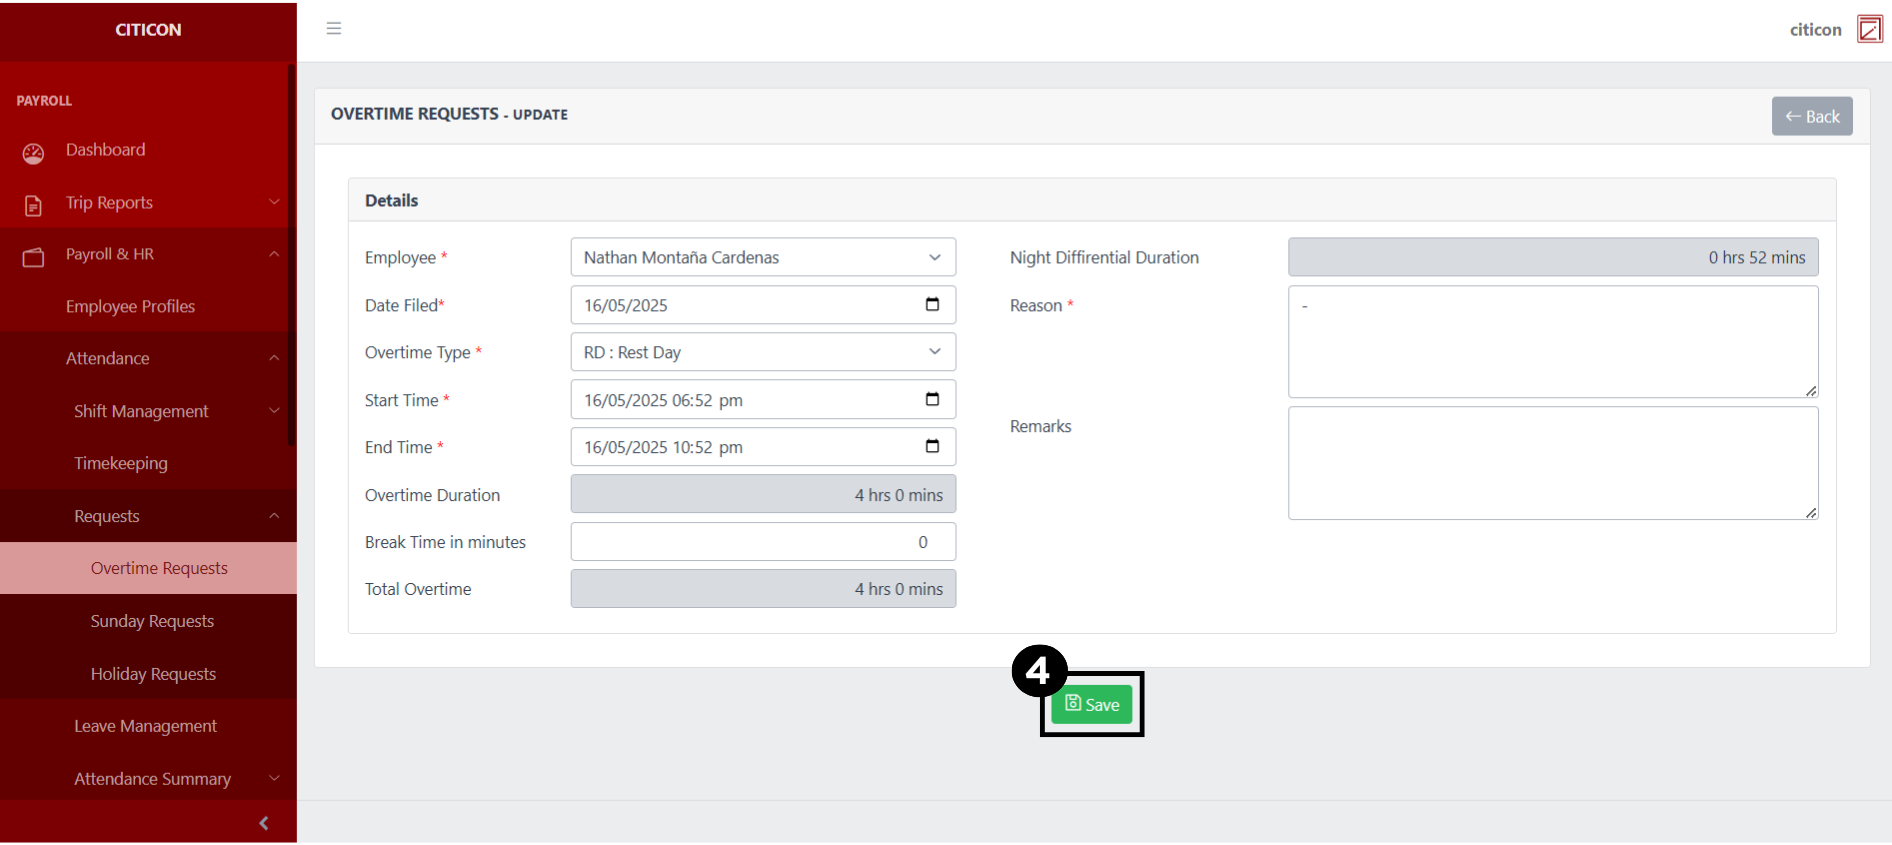
- Select the Save button to save the changes you have made.
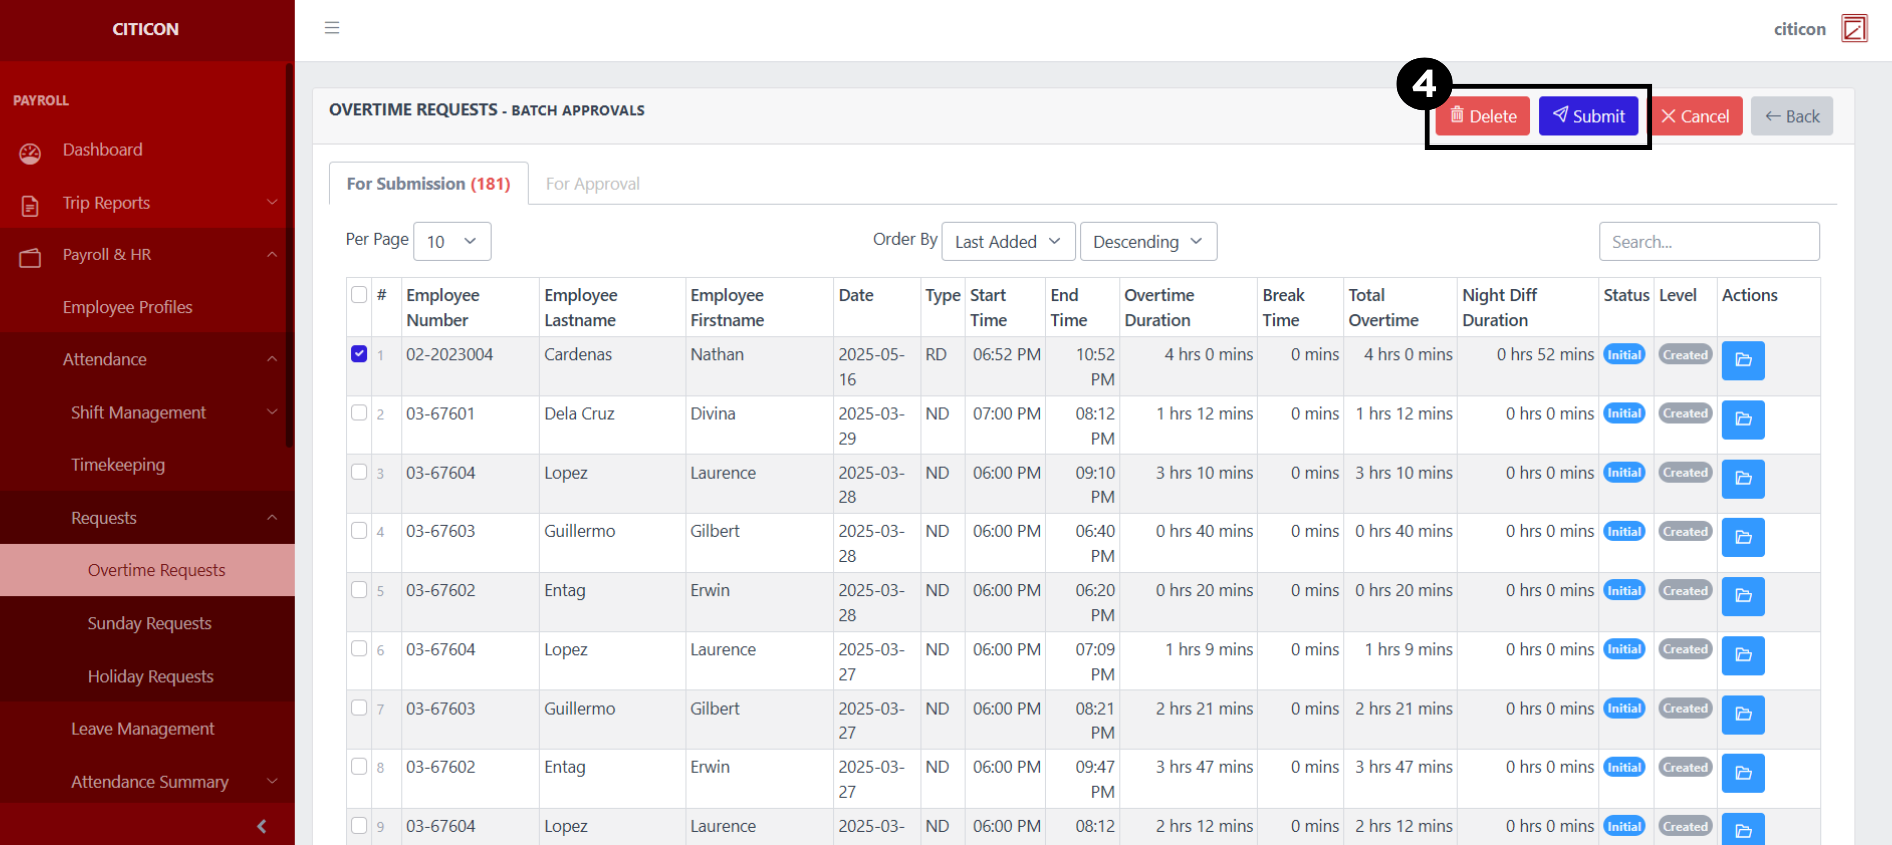
Submit Entry
- Select the Batch Approvals button to submit an entry.
- Select the For Submission tab.

- Select the entry that you want to submit.
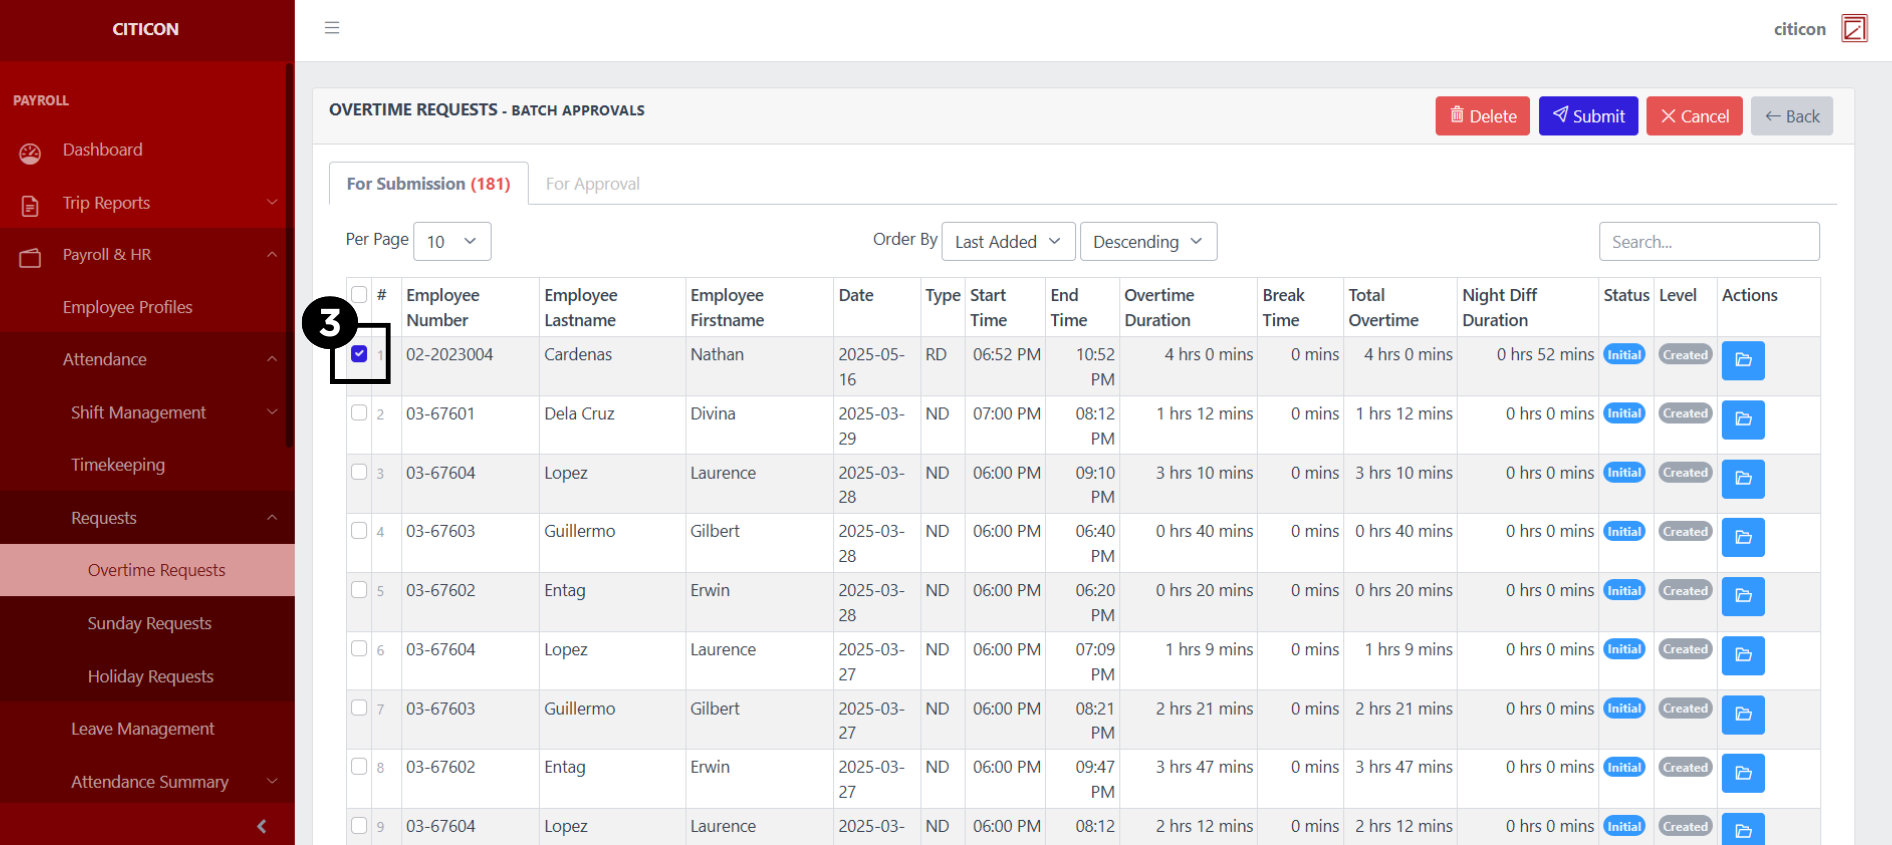
- Select the Submit button to submit the entry. In cases where you want to delete a entry, select the entry you want to delete, then select the Delete button.
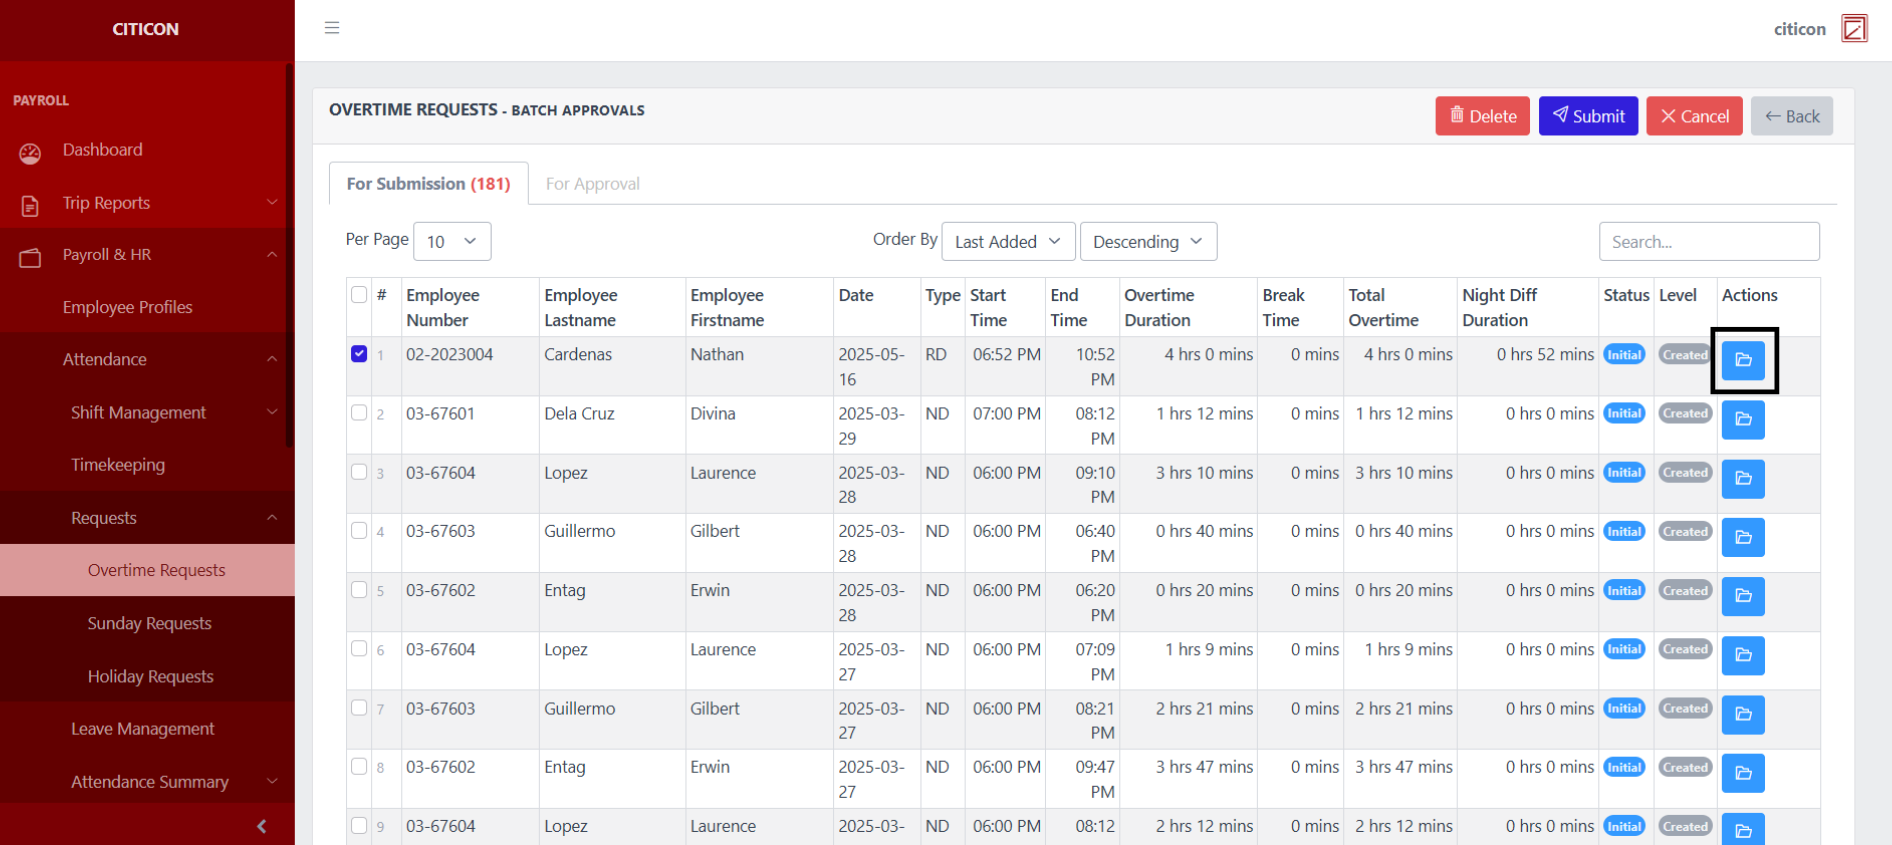
 To view the details of an individual entry, select the folder button and from here, you may either Edit, Delete, Submit, or Cancel the entry.
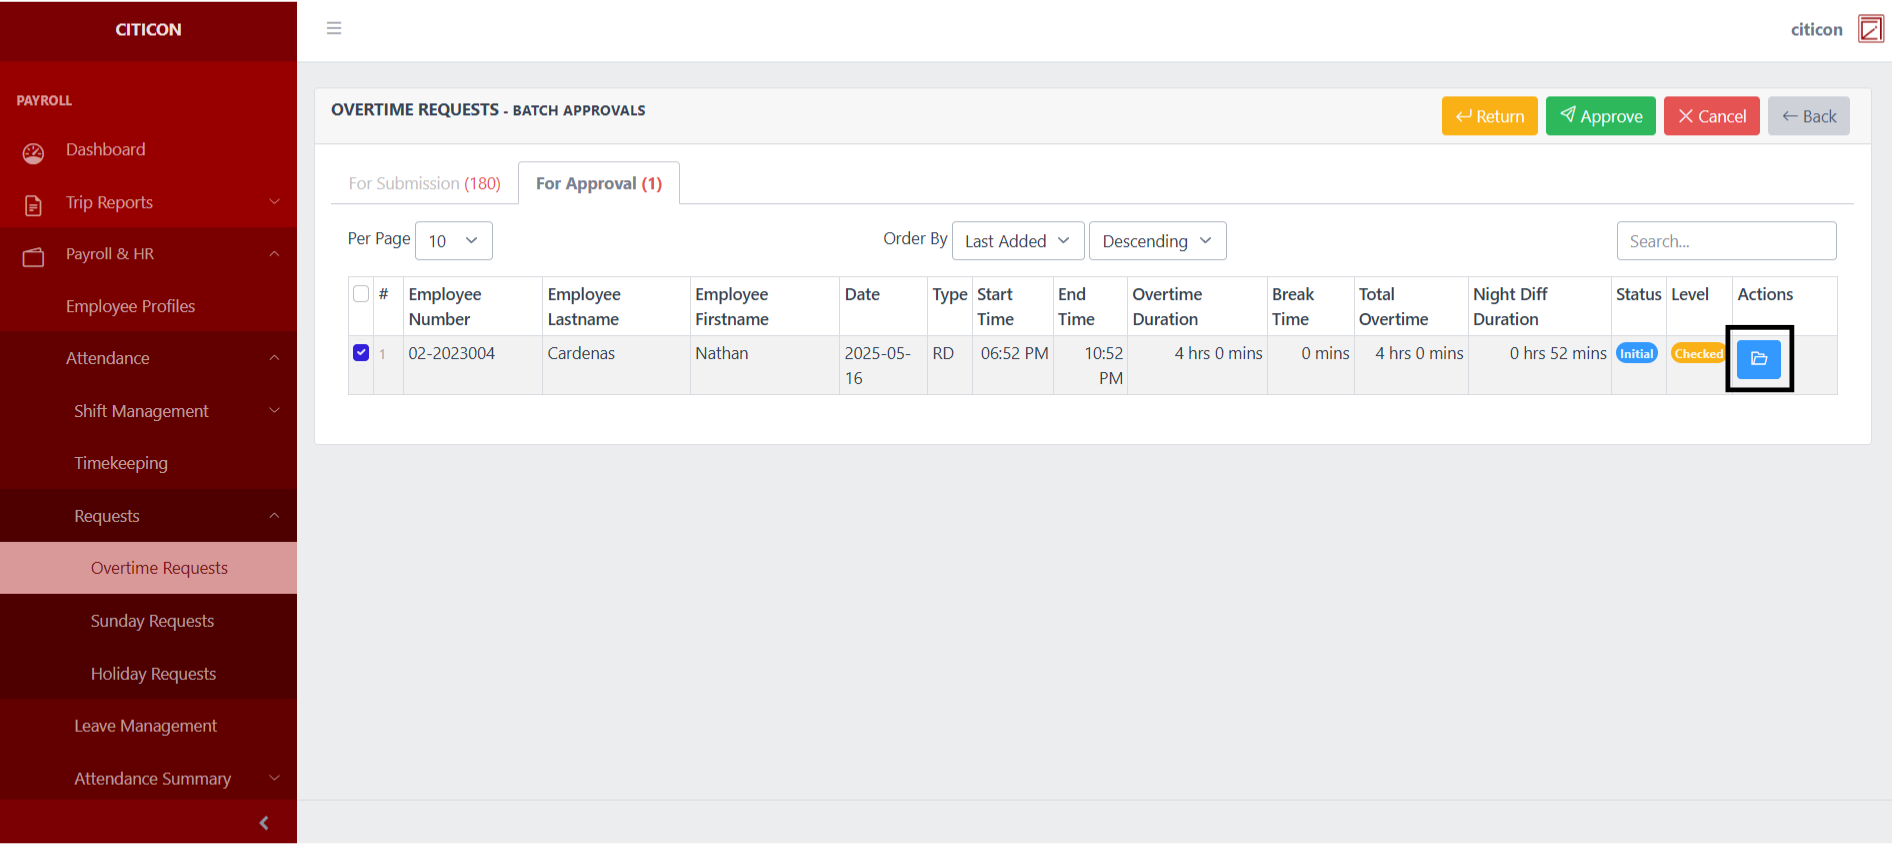
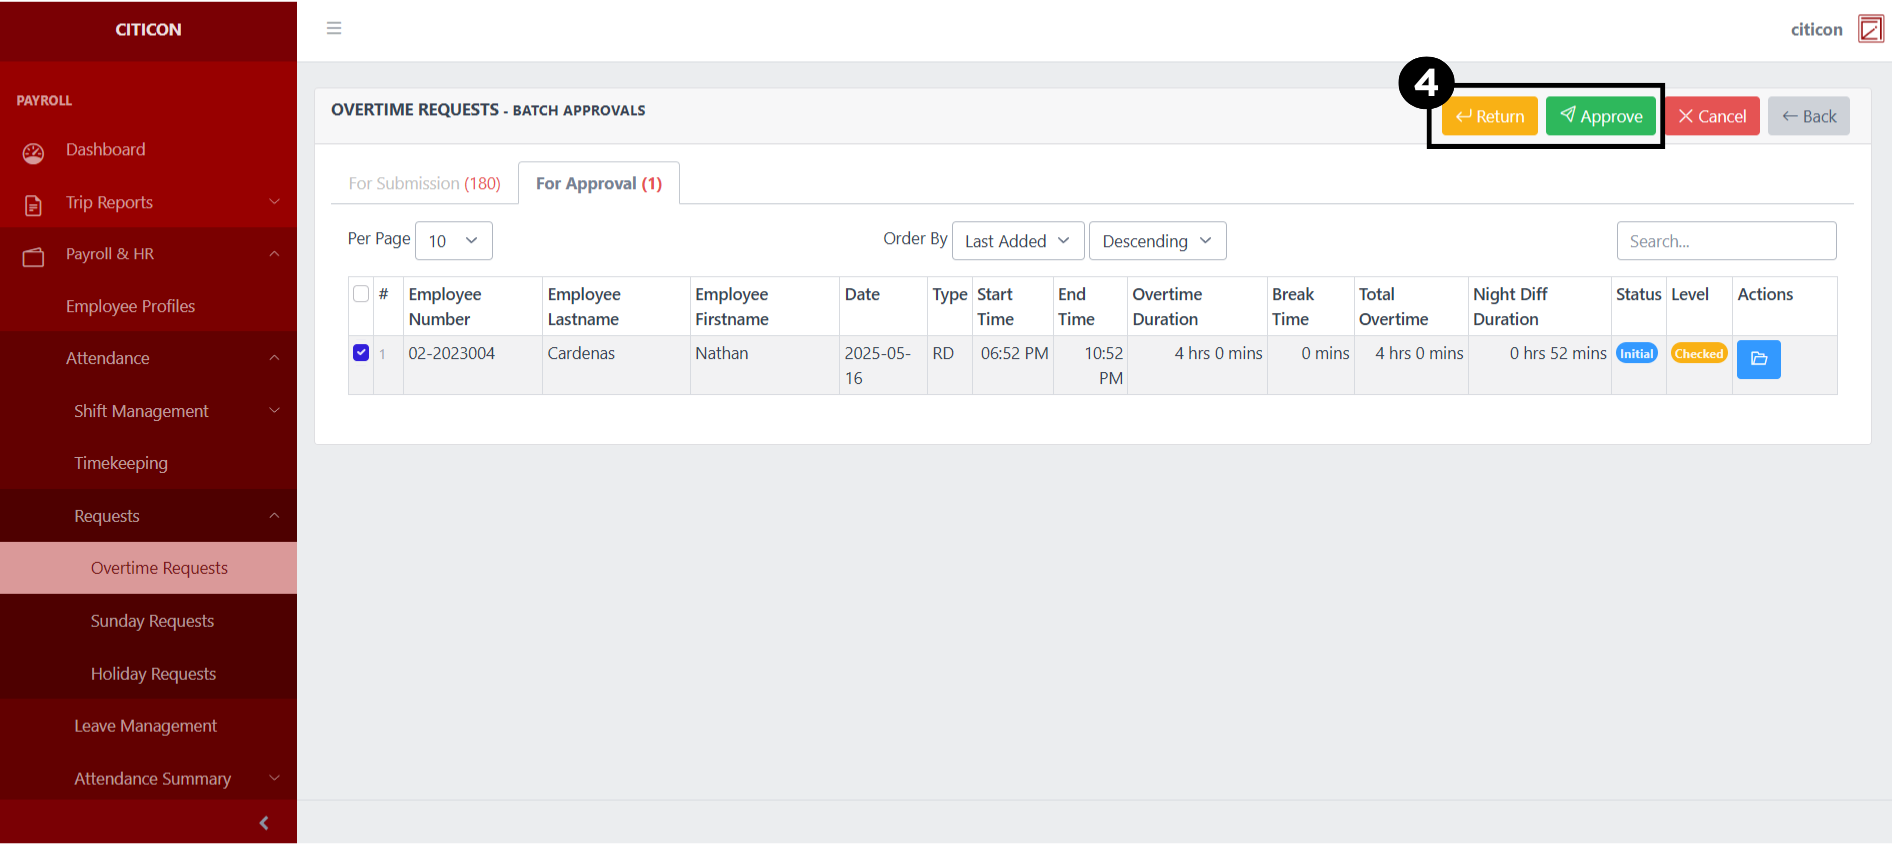
Approve Entry
- Select the Batch Approvals button to approve a entry.

- Select the For Approval tab.
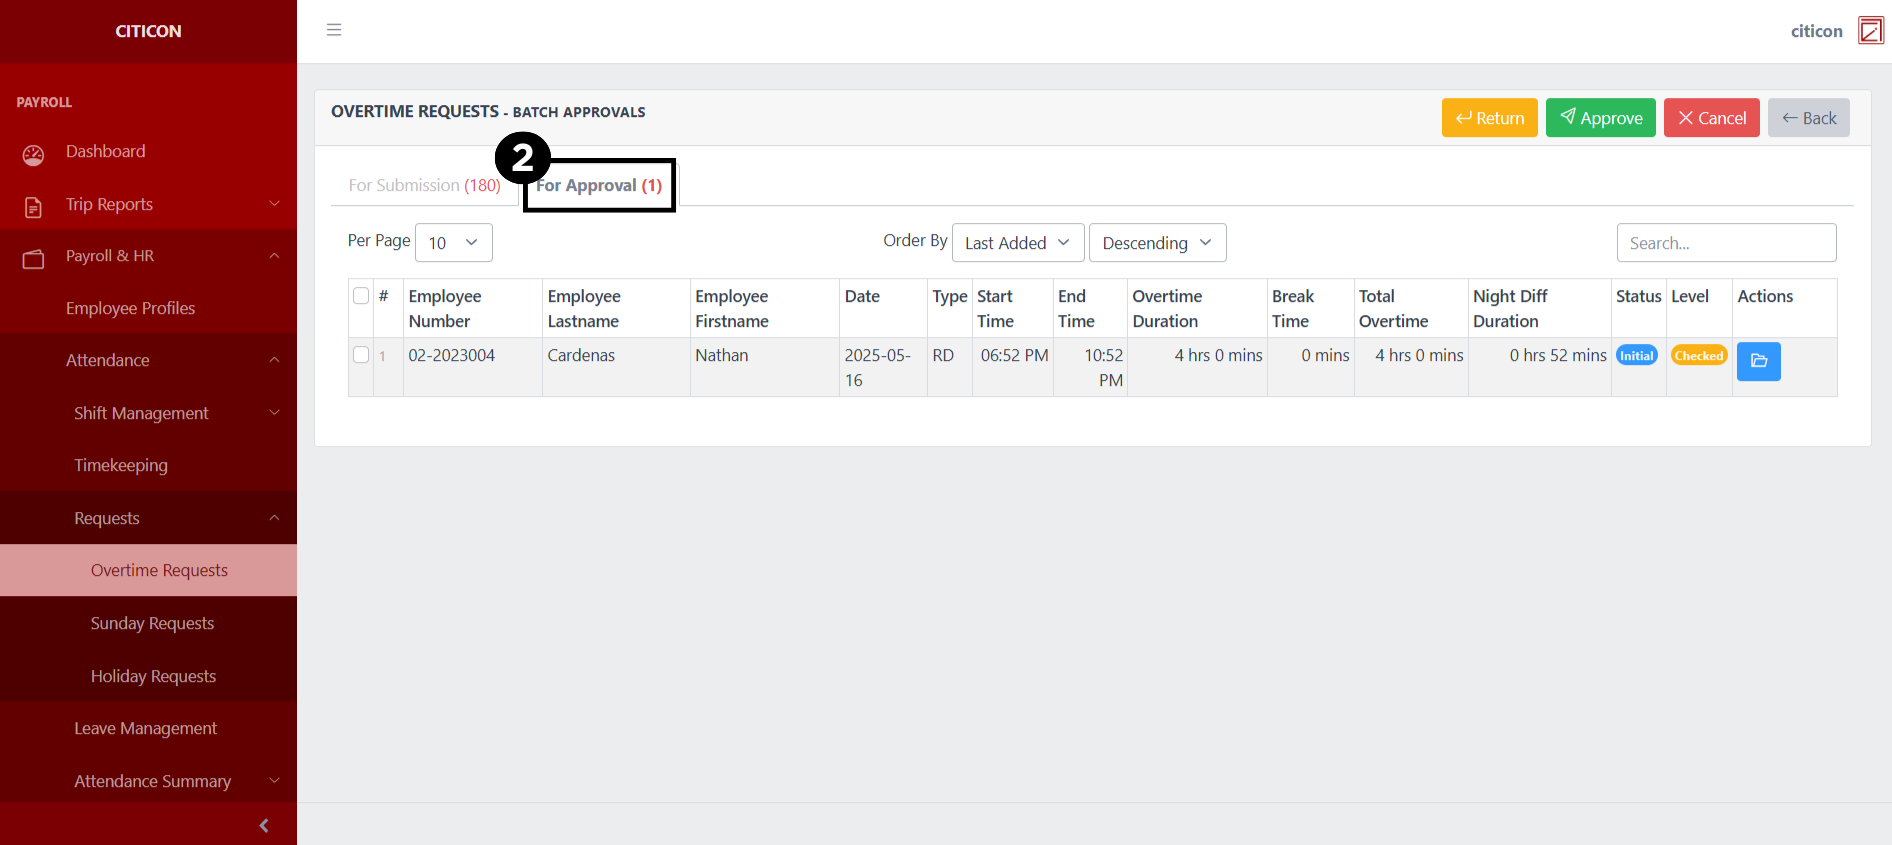
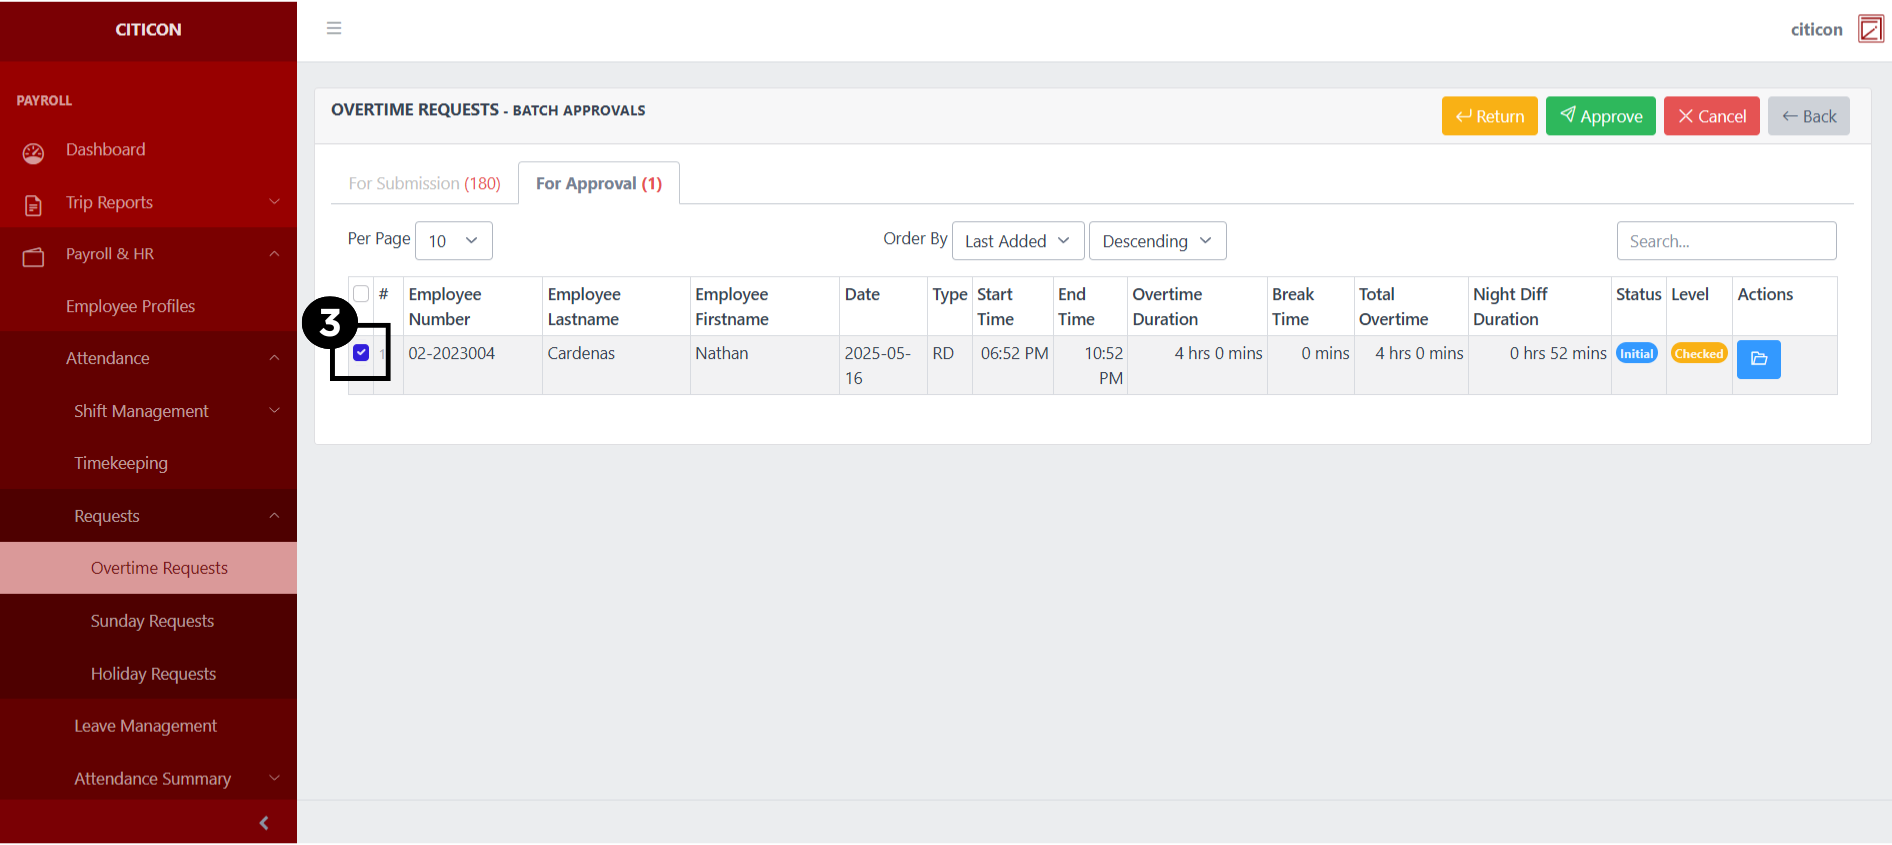
- Select the entry that you want to approve.
- Select the Approve button to approve the entry. In cases where you want to return a entry to submission section, select the entry you want to return, then select the Return button.
 To view the details of an individual entry, select the folder button and from here, you may either Return, Approve, or Cancel the entry.