Attendance Summary - Dump Truck
Welcome to Citicon Payroll and Accounting Systems Configuration for Dump Truck under the Attendance Summary section of the Attendance submodule in the Payroll & HR module. This section is designed to manage and consolidate attendance data specific to Dump Truck personnel, enabling accurate payroll processing and streamlined attendance tracking.
Efficient attendance management for Dump Truck employees ensures consistent payroll accuracy and supports effective workforce oversight.
Key Purposes
- Summarize Attendance Data: Display essential attendance details—including entry number, employee information, and cutoff pay periods—for all Dump Truck personnel.
- Facilitate Payroll Preparation: Serve as the foundational source for payroll computation by providing validated attendance records for each cutoff period.
- Monitor Submission and Approval: Track the current status and approval levels of each entry to maintain processing transparency and timeliness.
- Manage Entry Lifecycle: Allow authorized users to add, submit, and approve attendance entries within a centralized interface.
- Enhance Accuracy and Oversight: Improve the integrity of payroll operations by ensuring only reviewed and approved attendance summaries are considered.
Dump Truck Module User-Manual
This section provides details, and set-by-step instructions to access, view, and update the Dump Truck entries stored in the system.
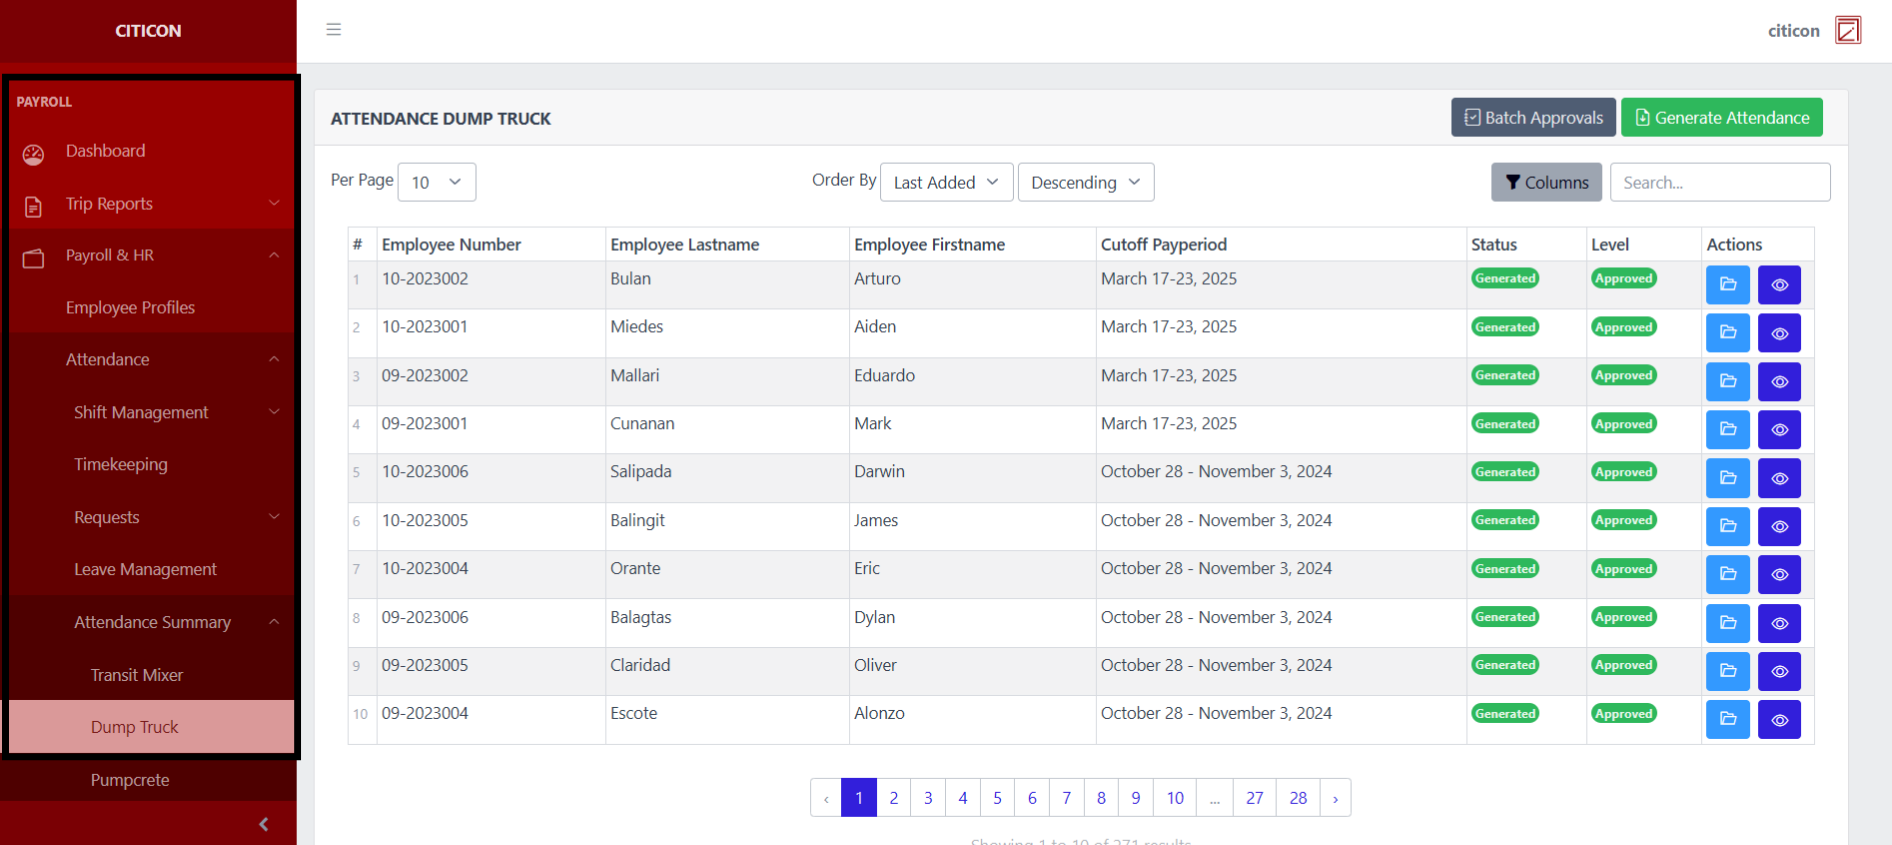
Index Page
To access the Dump Truck. Go to Payroll, select Payroll & HR, select Attendance, select Attendance Summary, then select Dump Truck.
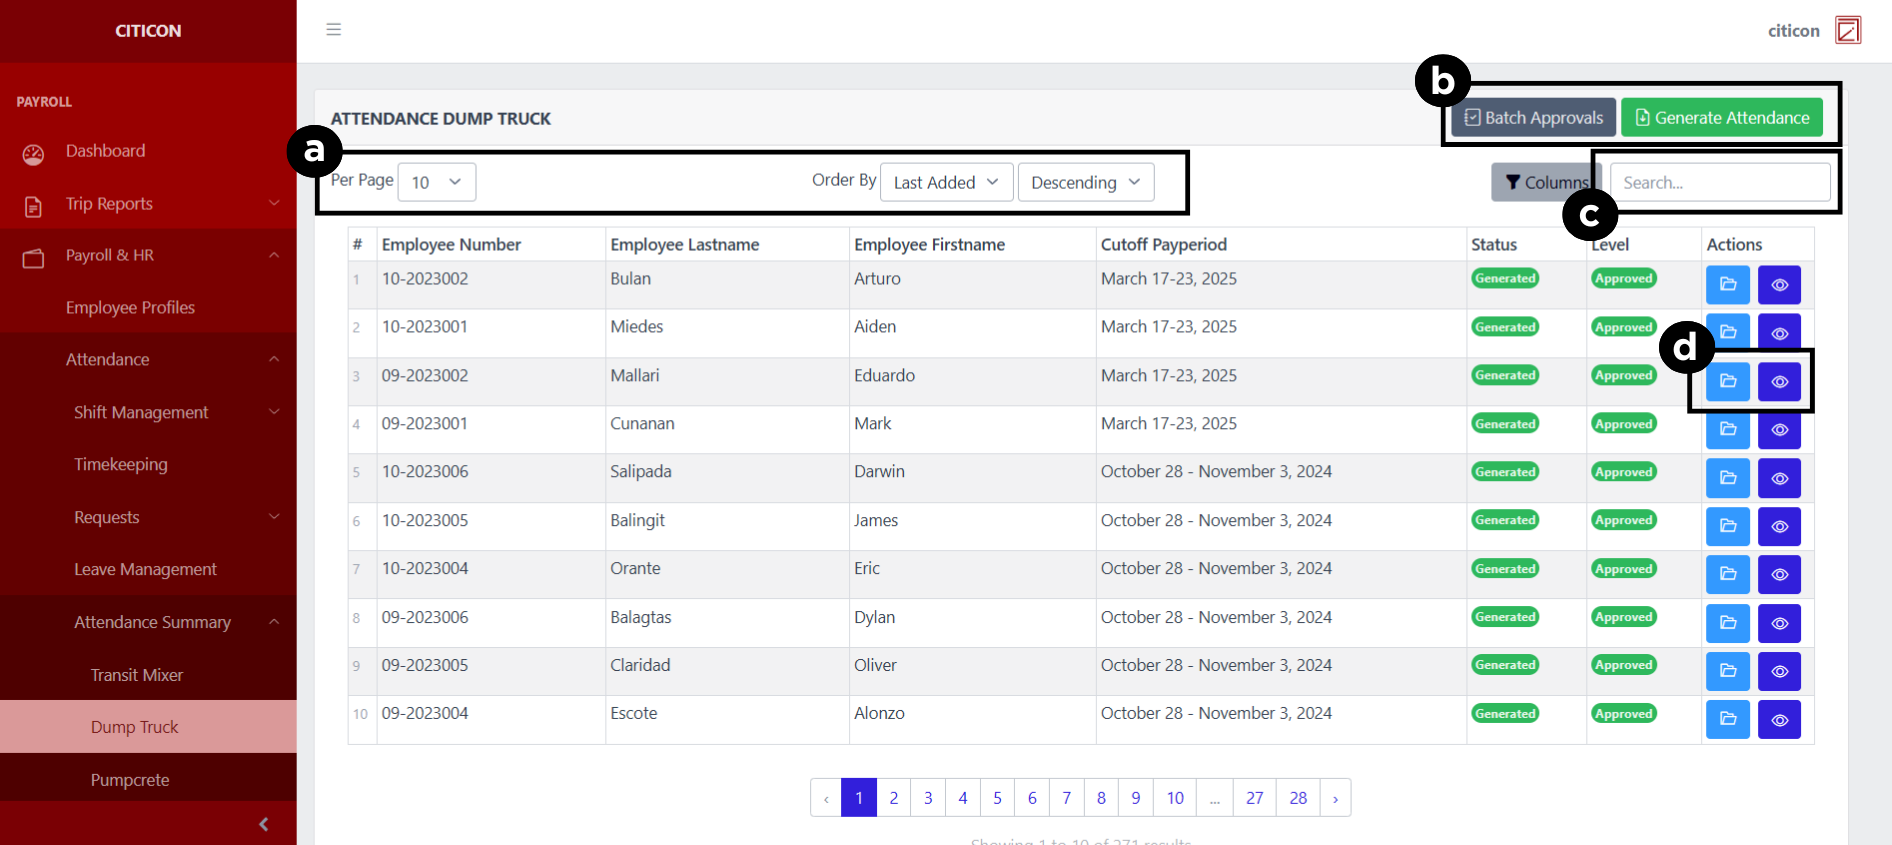
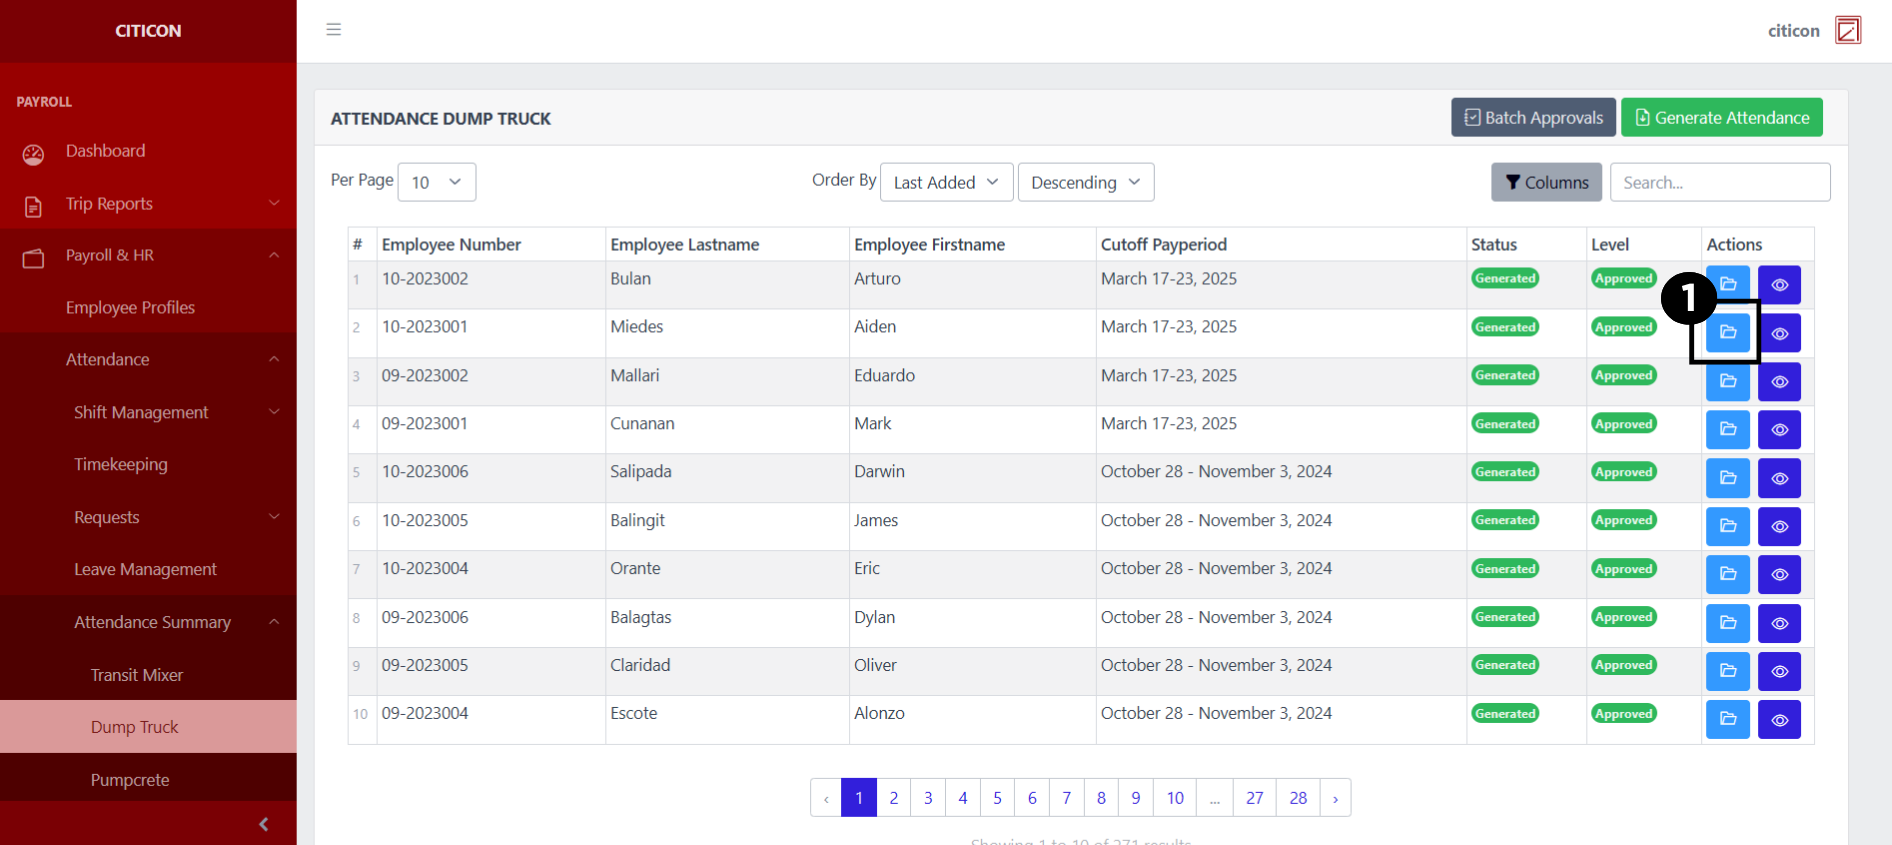
a. Adjust the paging, ordering, and sorting of the Dump Truck Page here.
b. Select the respective button to either Generate Attendance or process entries to be approved.
c. Search for specific entry details using the search bar.
d. View or Cancel entries by selecting the folder button. You can view the Attendance Summary by selecting the eye button.
Generate Attendance
- Select the Generate Attendance button to add a new entry.
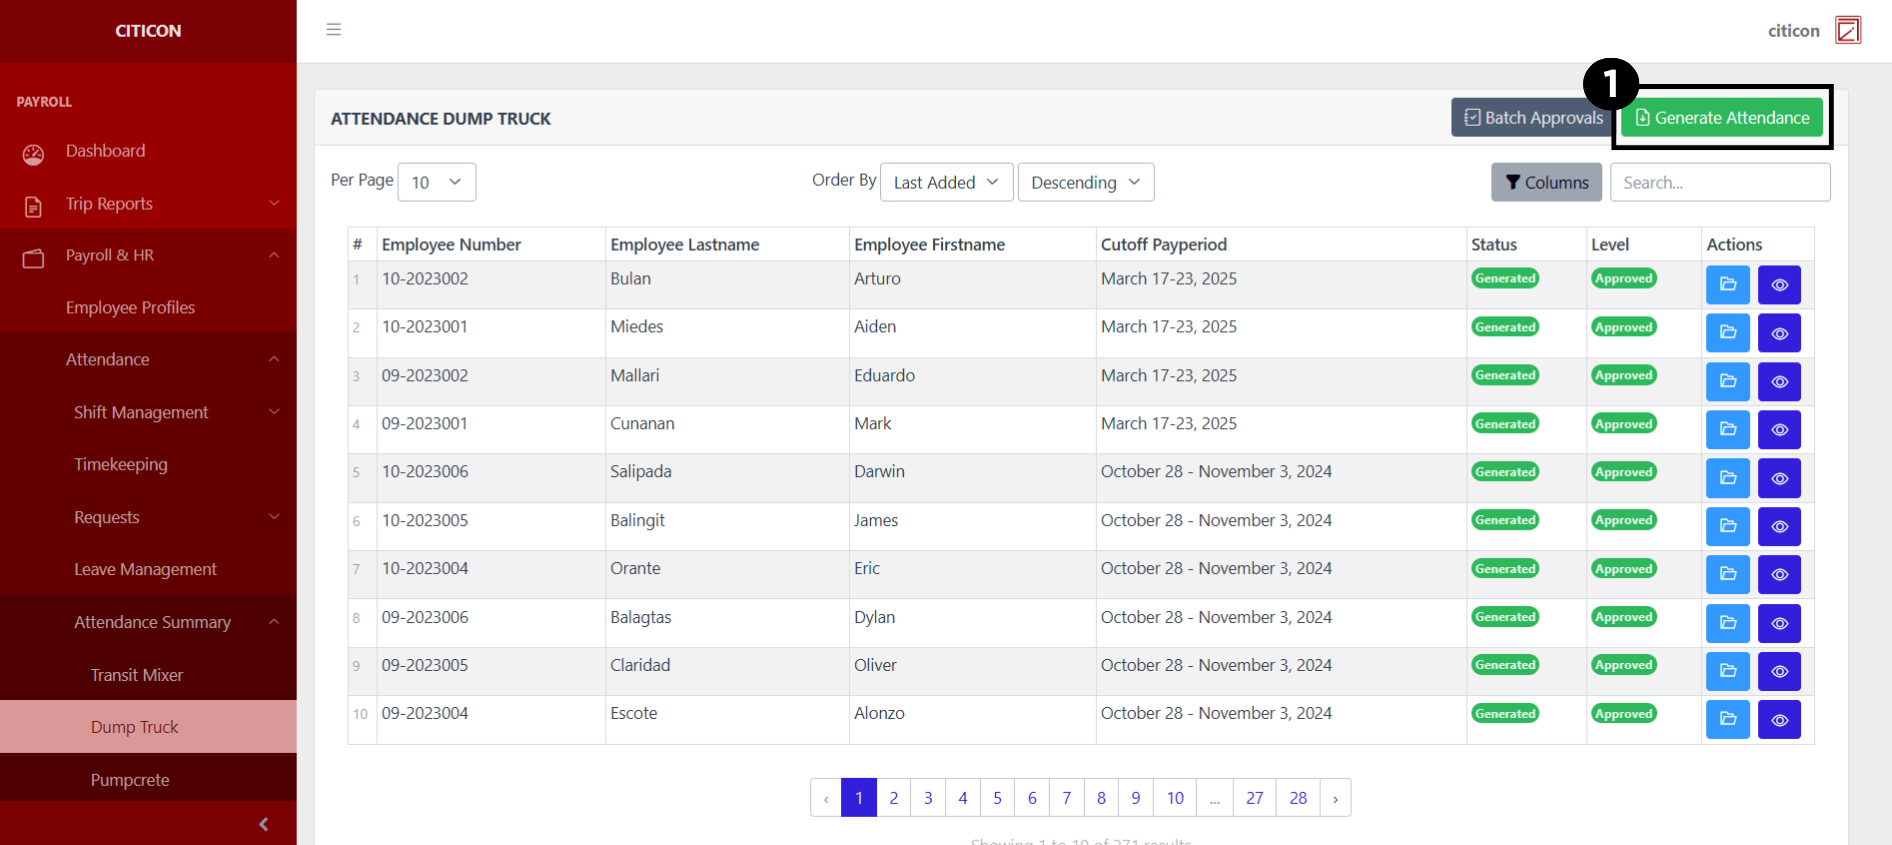
- Input the necessary details for your new entry, then select the Generate button.
All fields that has an asterisk (*) are required to be filled up.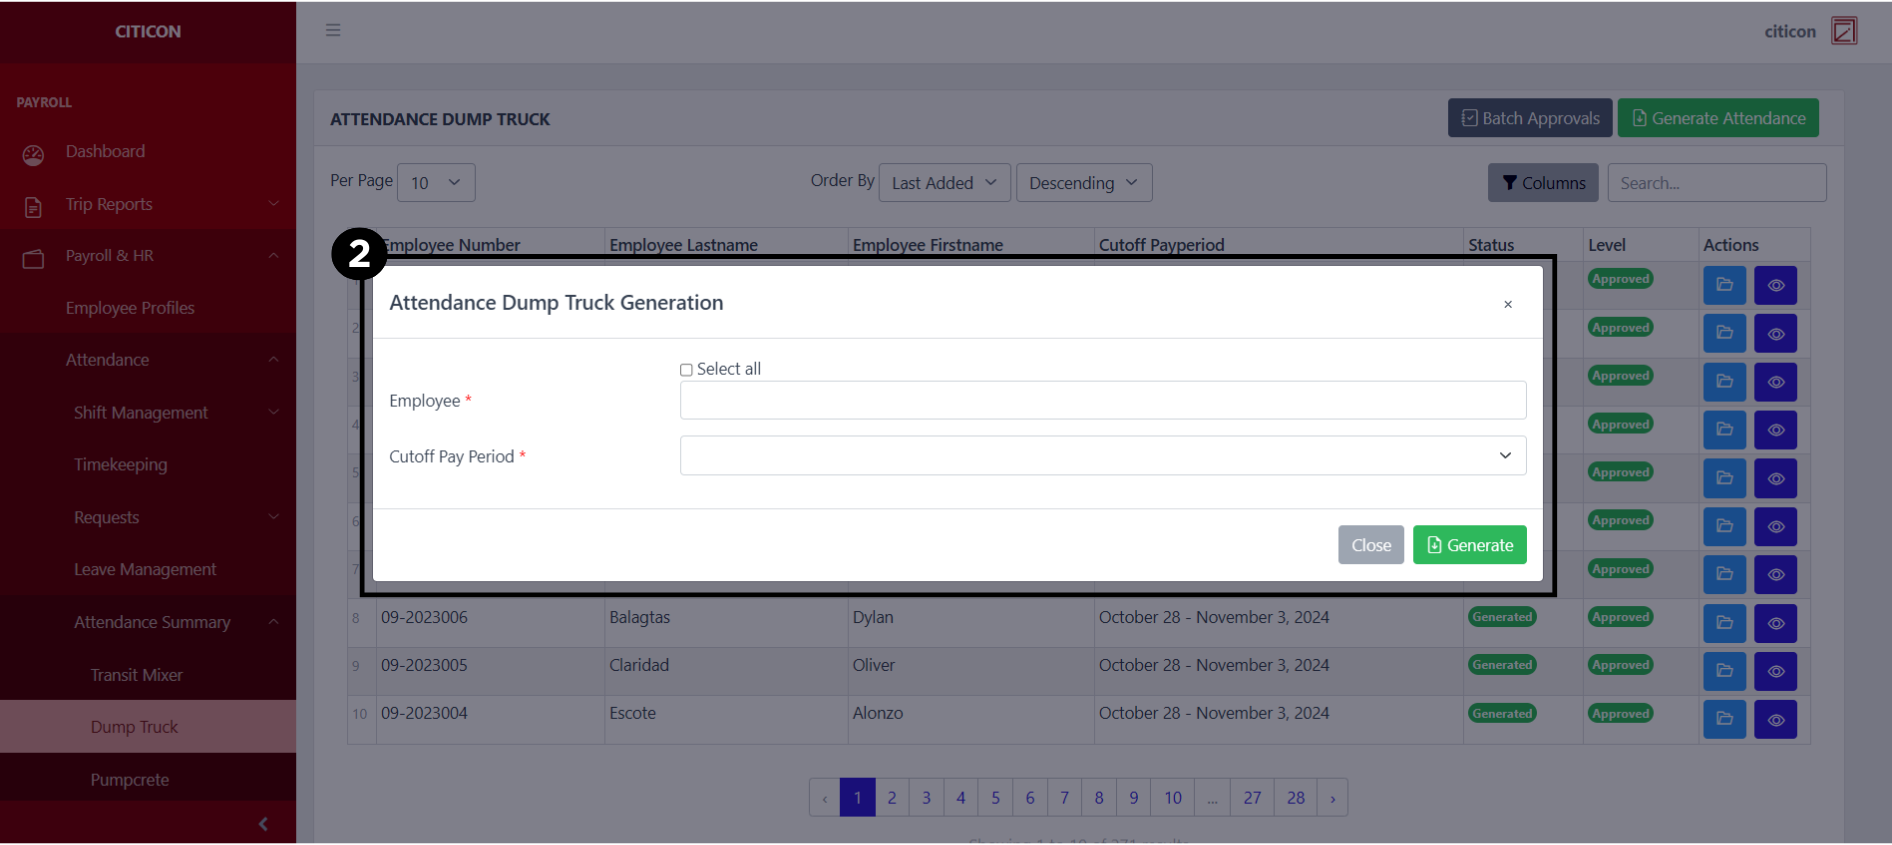
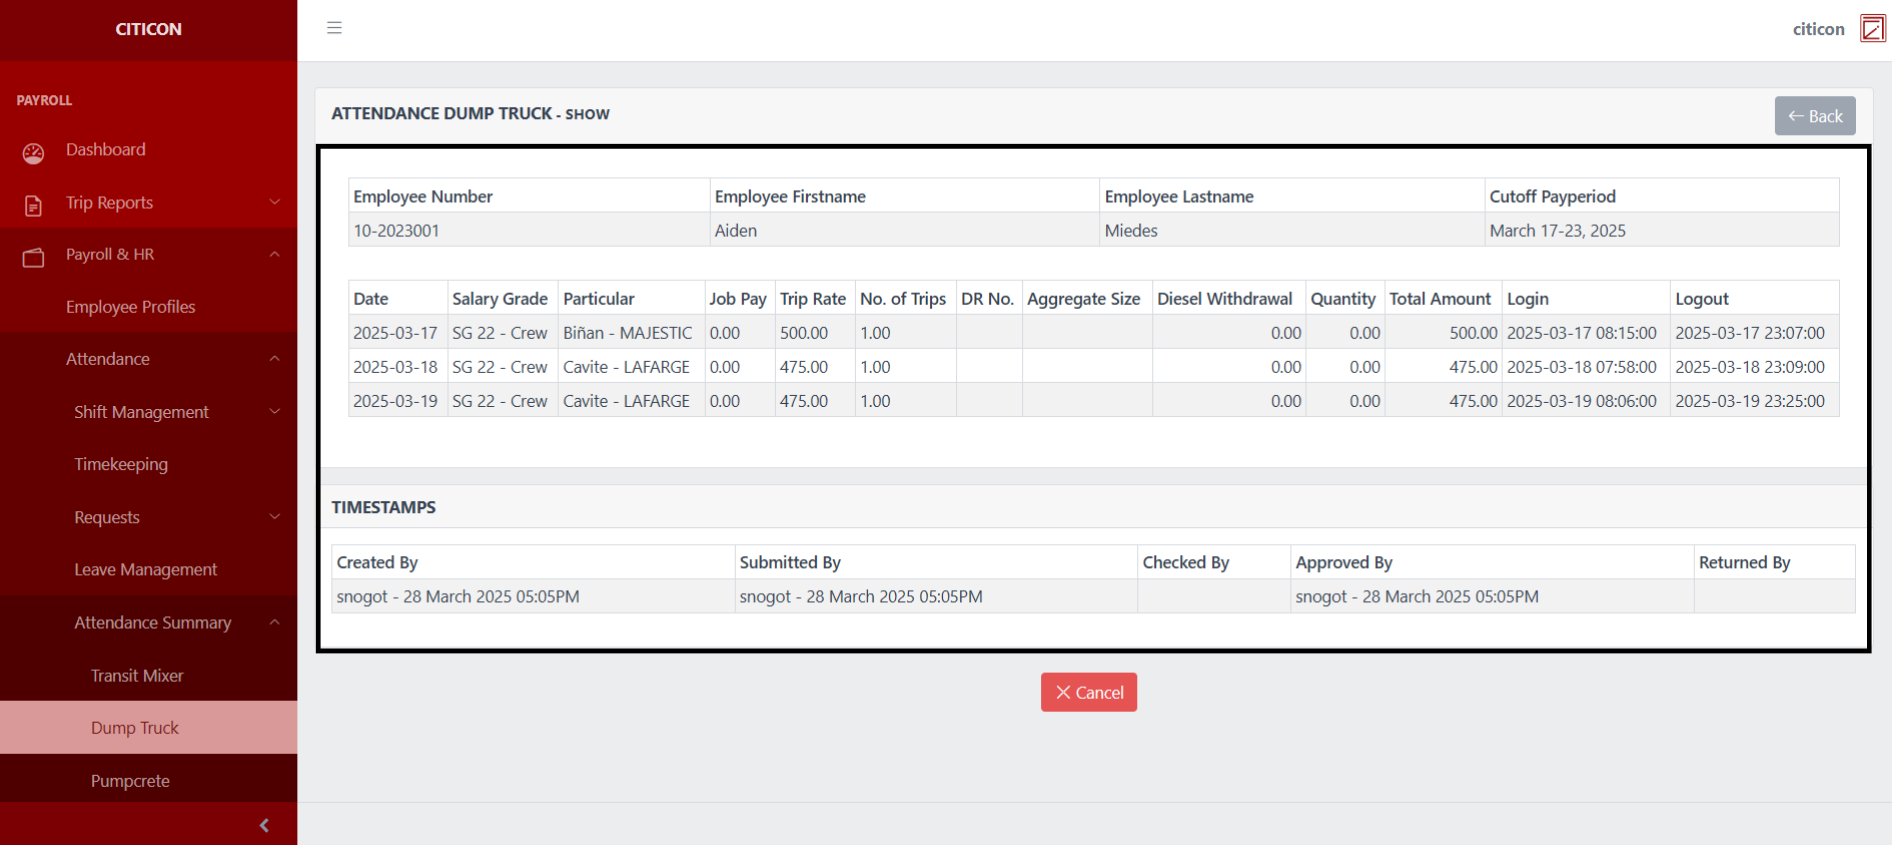
Show Entry
- Select the folder button to view an entry.
 Here you can view more specific details on the entry that you selected.
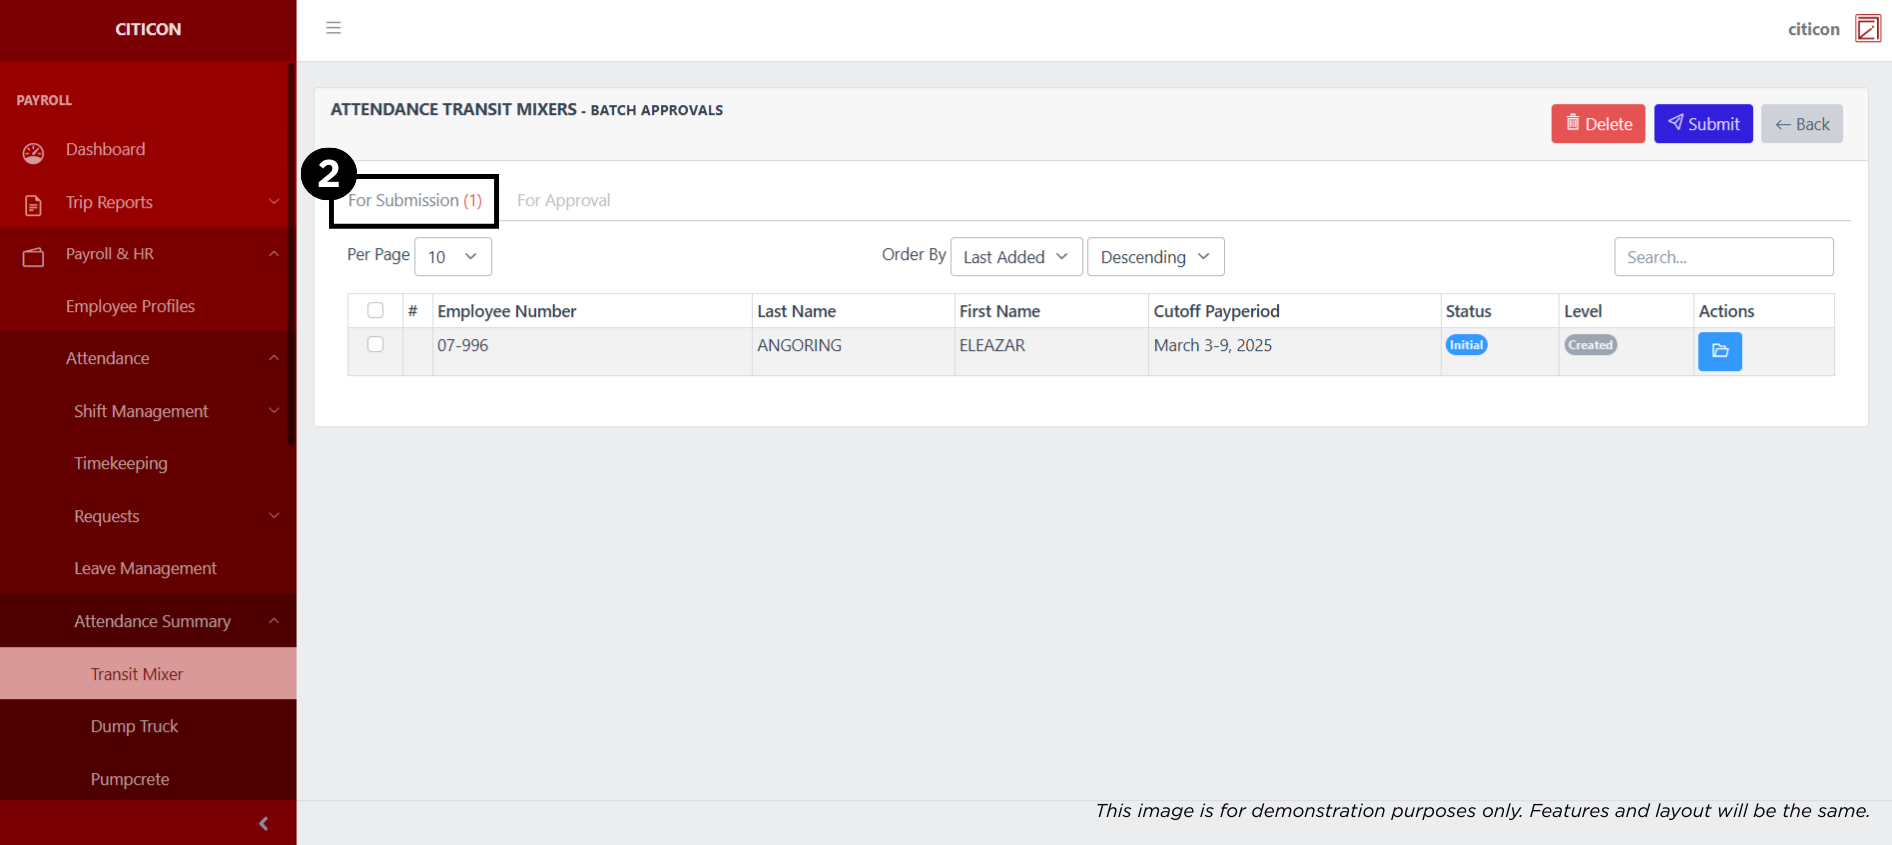
Submit Entry
- Select the Batch Approvals button to submit an entry.
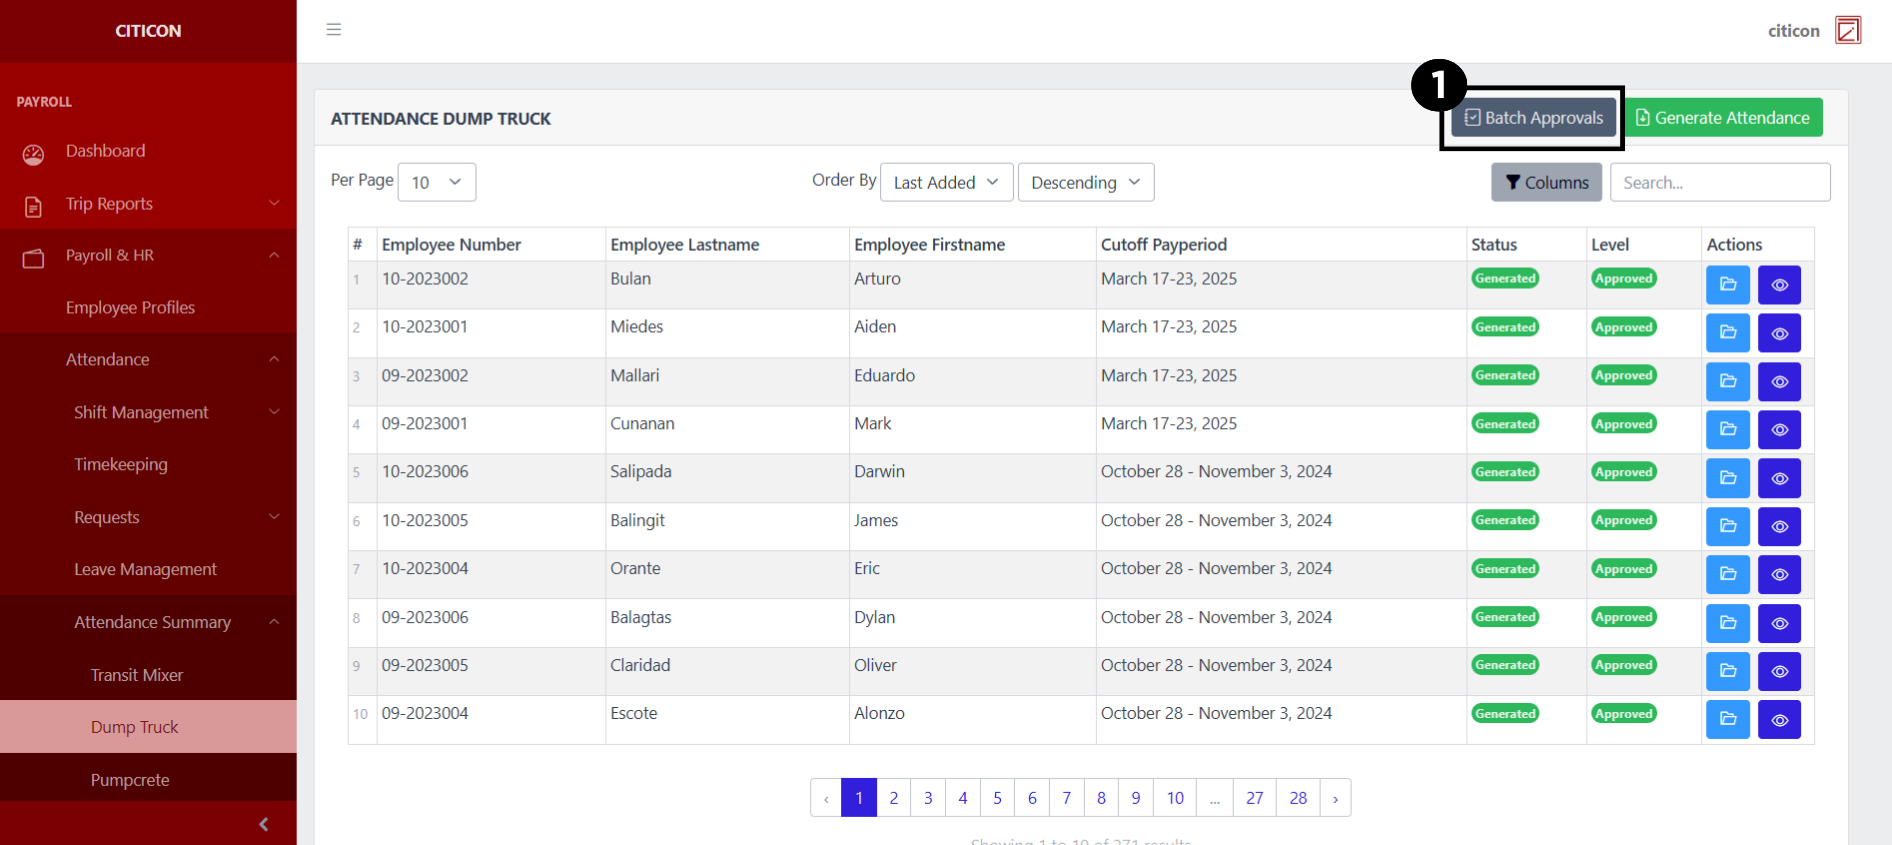
- Select the For Submission tab.
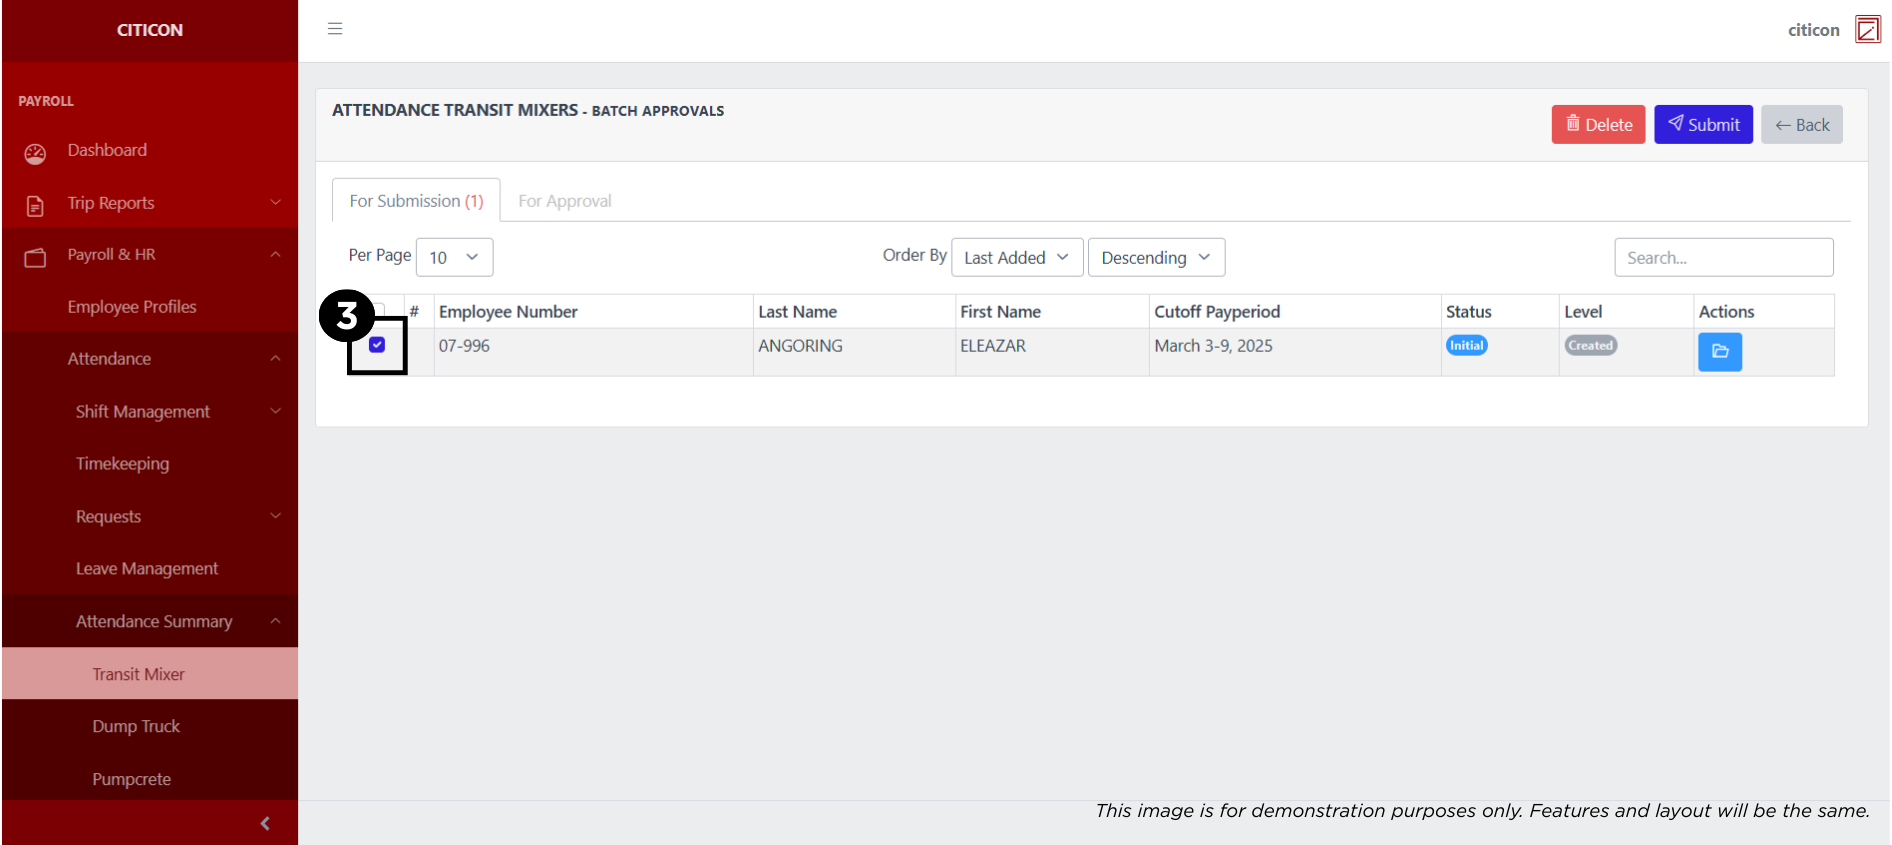
- Select the entry that you want to submit.
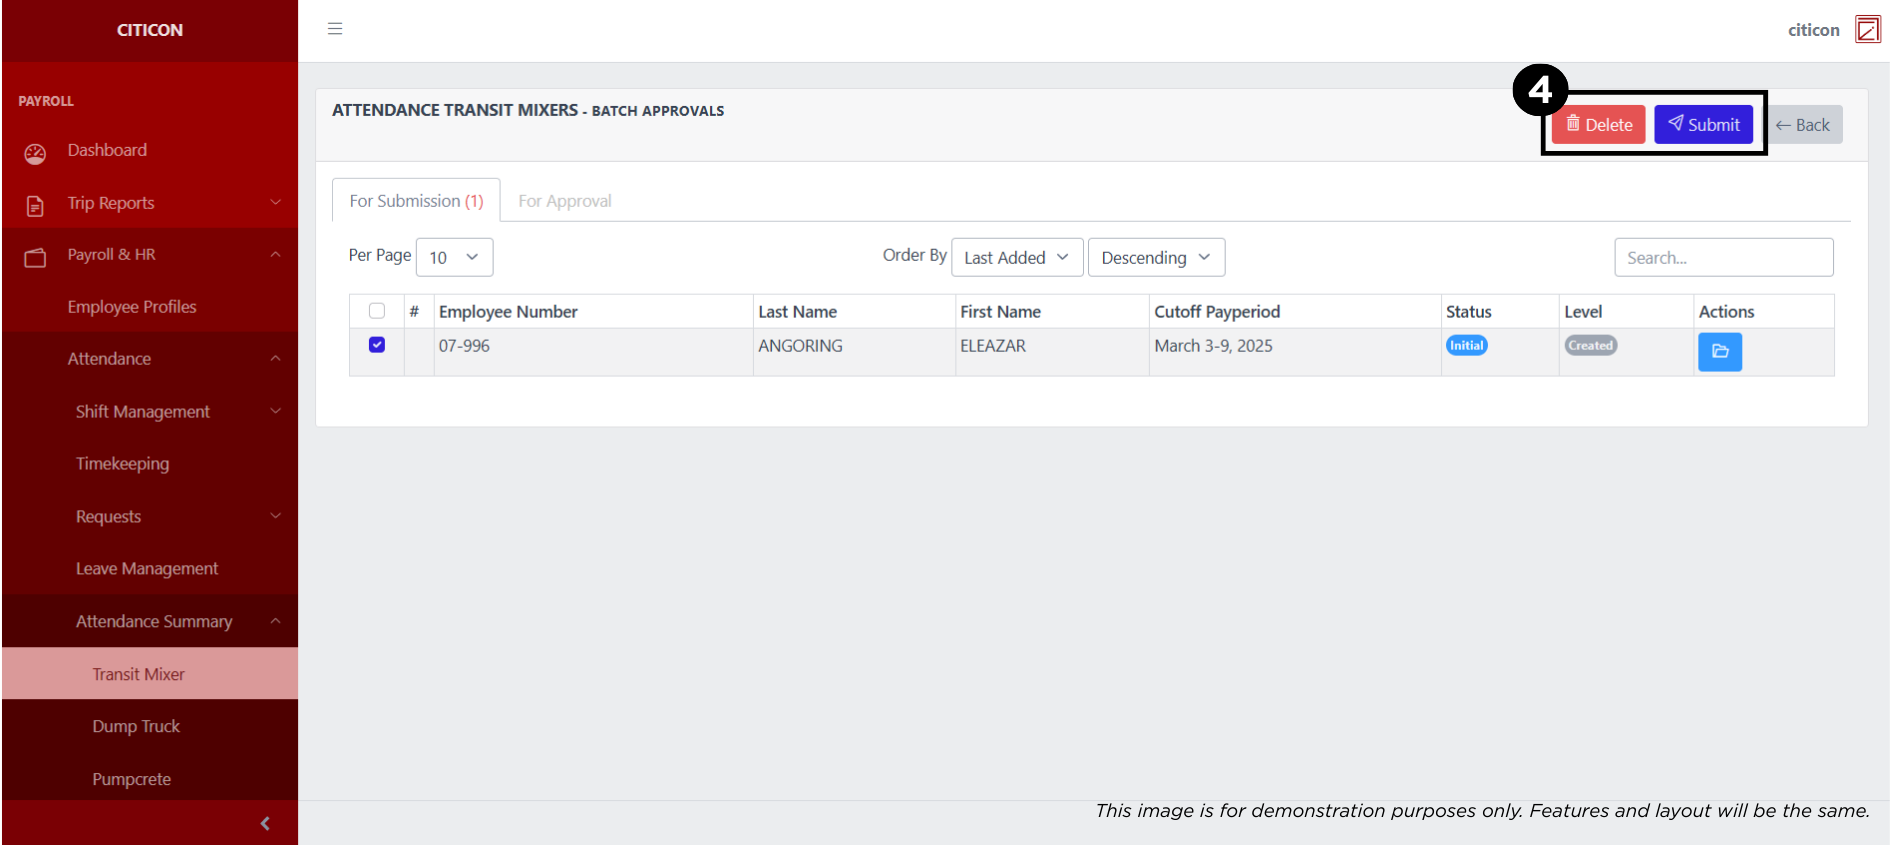
- Select the Submit button to submit the entry. In cases where you want to delete a entry, select the entry you want to delete, then select the Delete button.
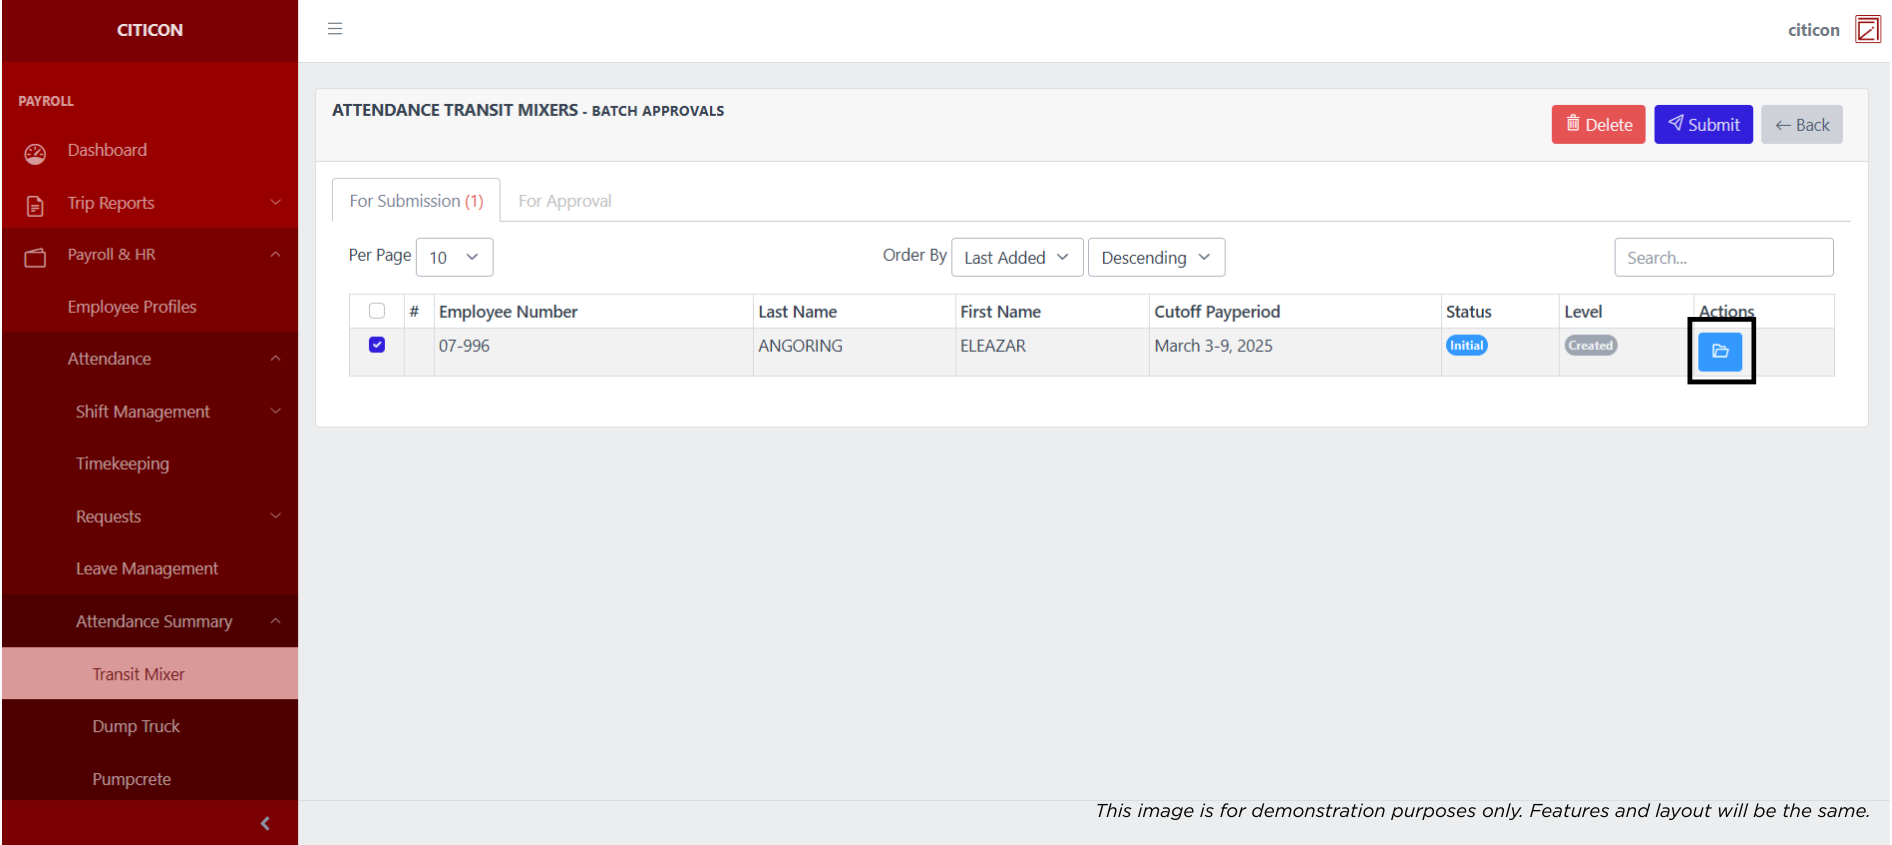
 To view the details of an individual entry, select the folder button and from here, you may either Edit, Delete, Submit, or Cancel the entry.
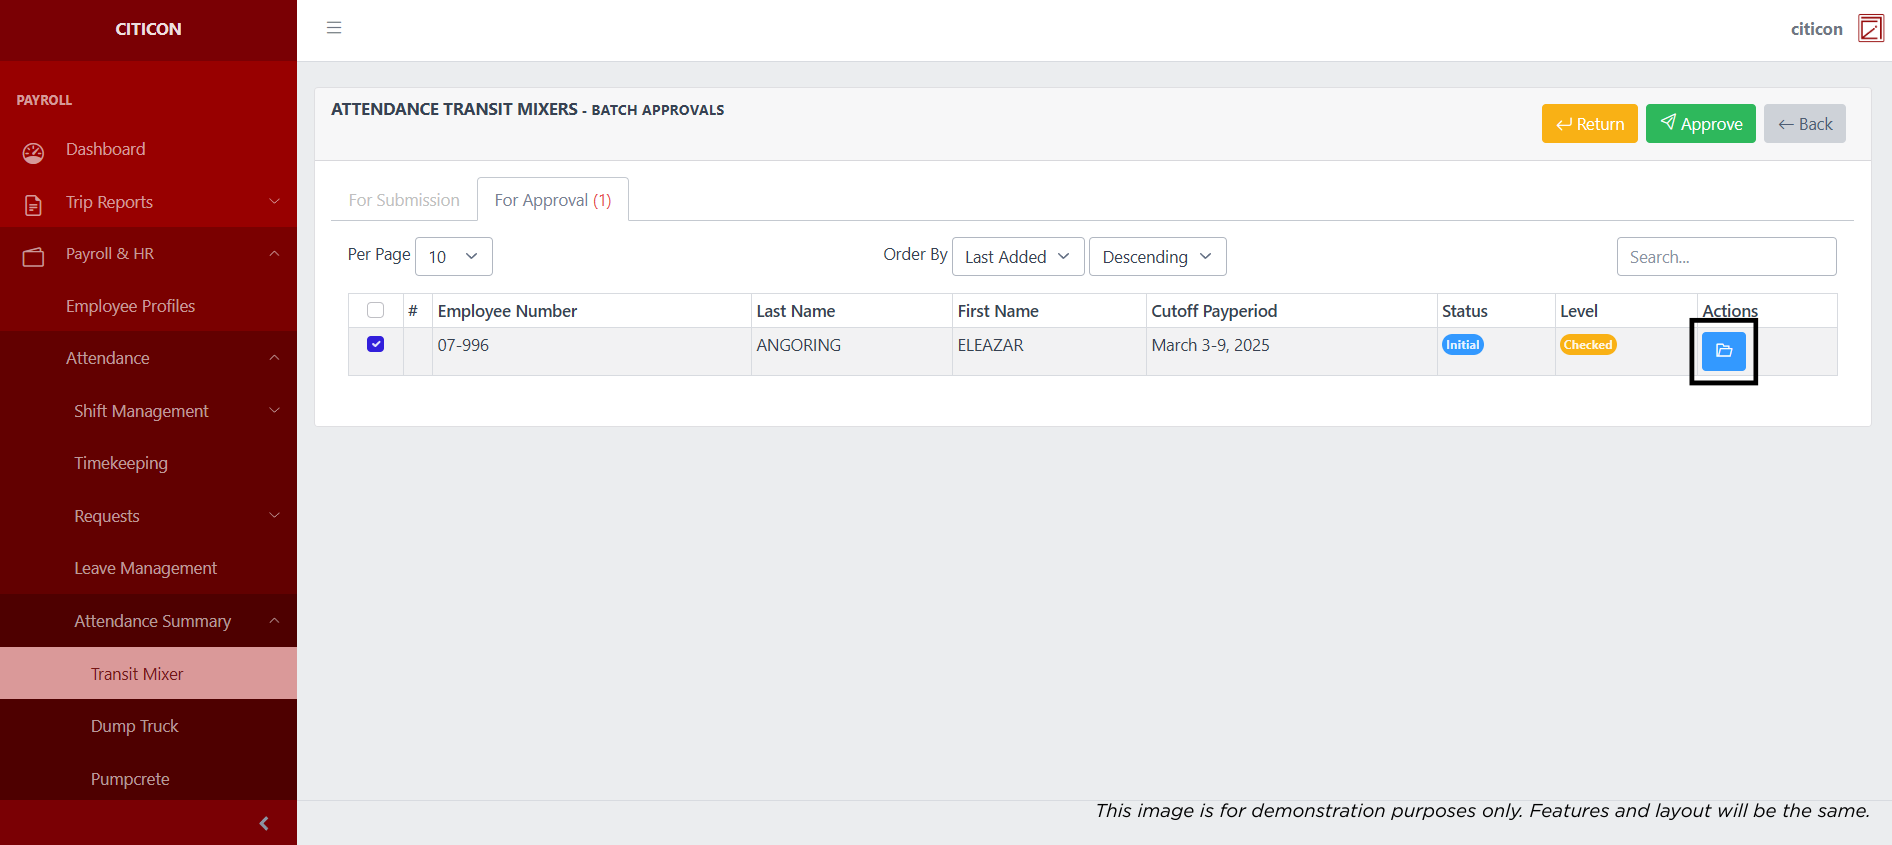
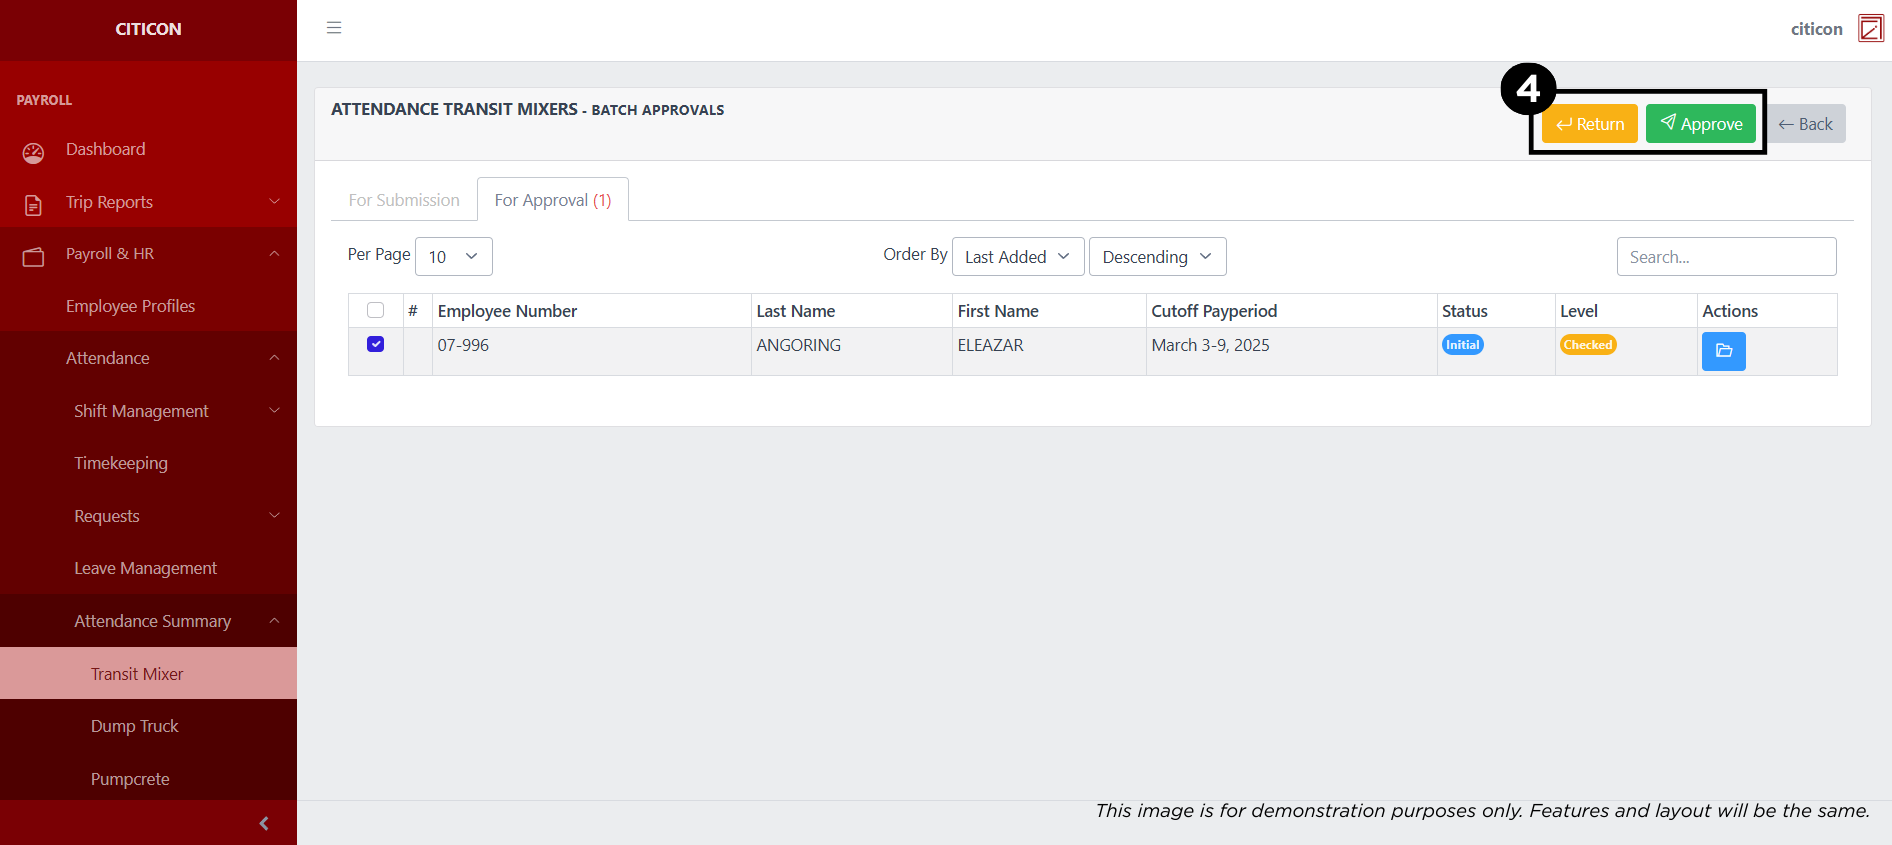
Approve Entry
- Select the Batch Approvals button to approve a entry.

- Select the For Approval tab.
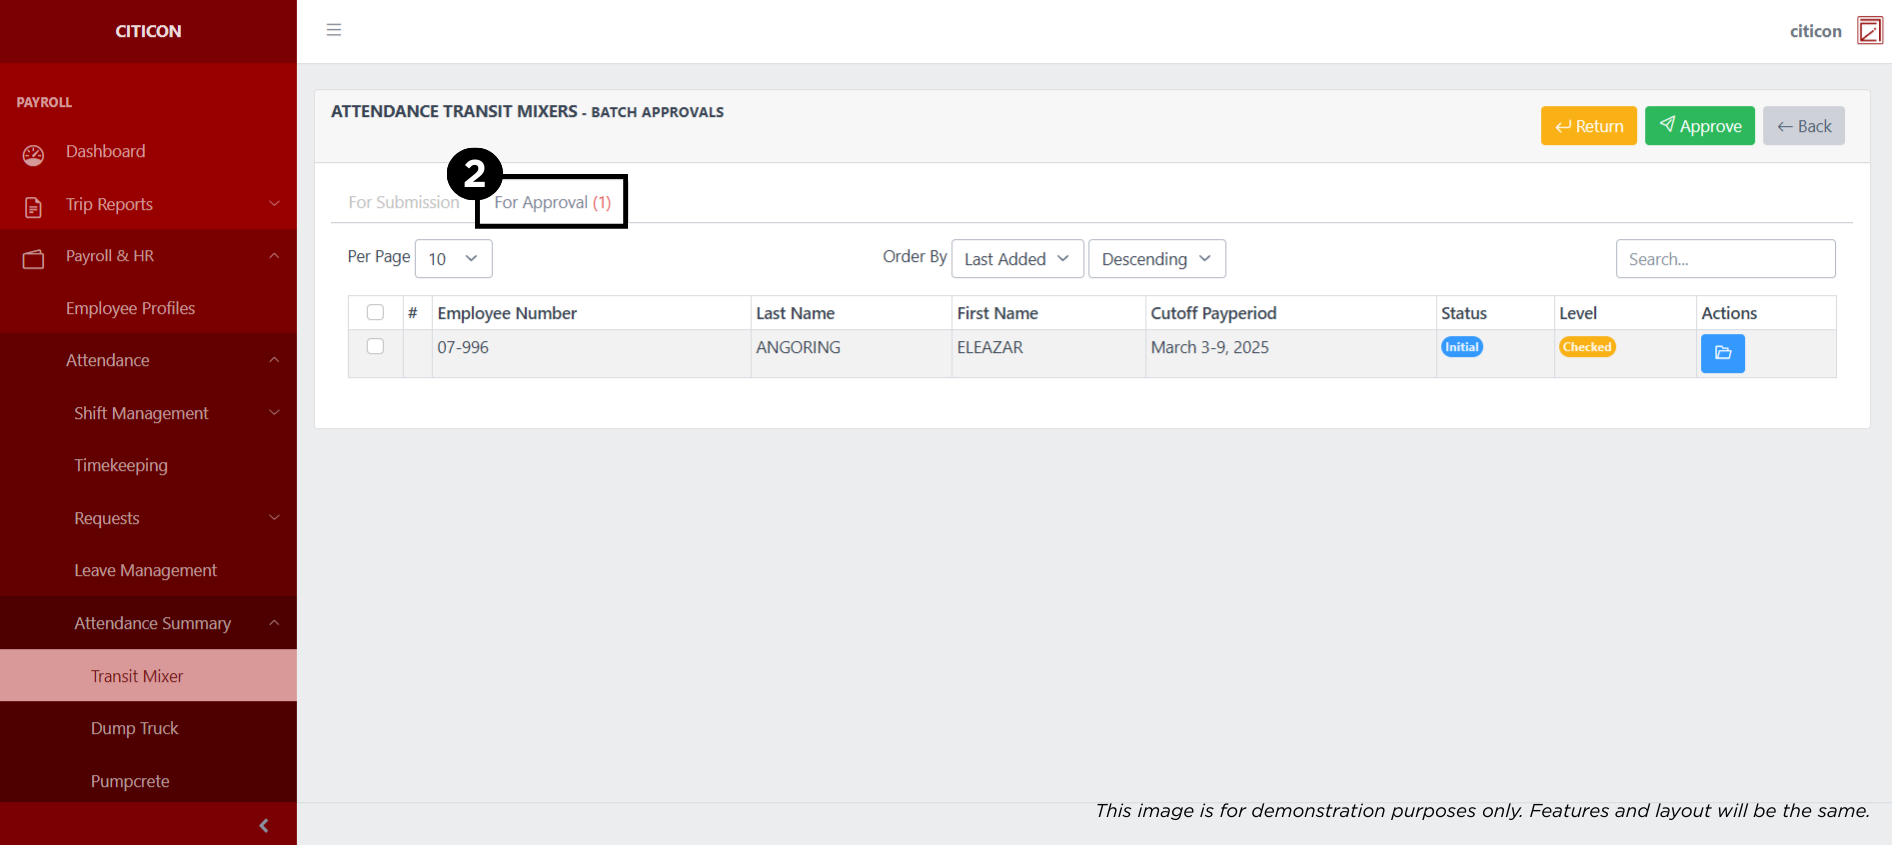
- Select the entry that you want to approve.
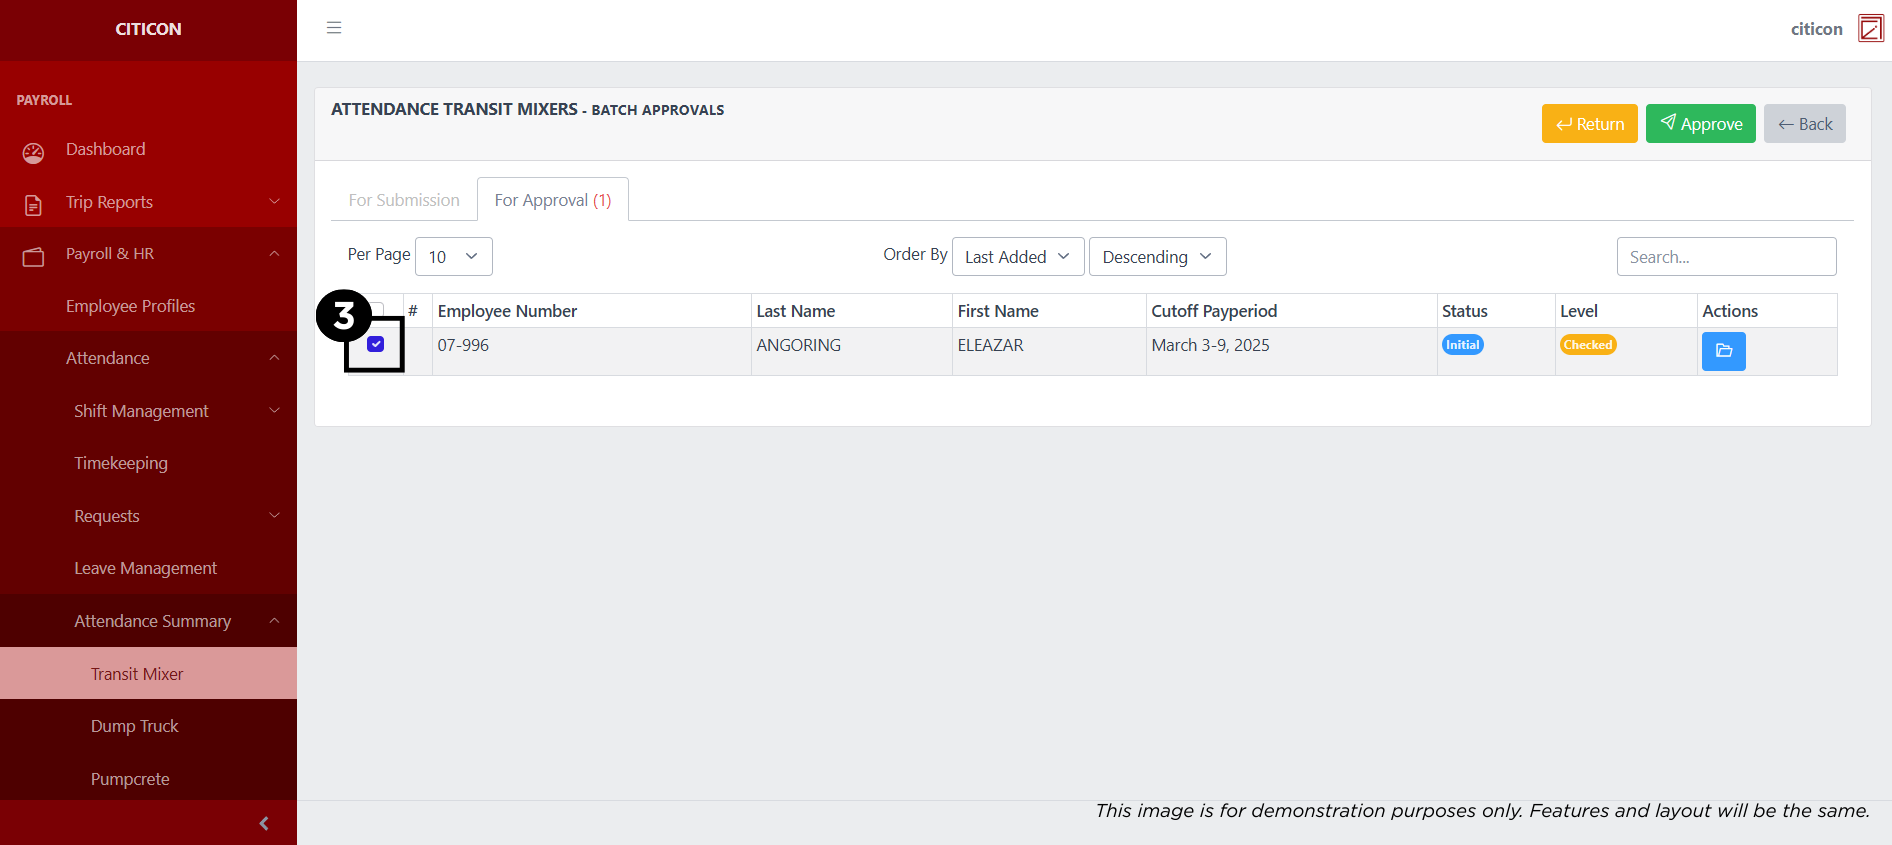
- Select the Approve button to approve the entry. In cases where you want to return a entry to submission section, select the entry you want to return, then select the Return button.
 To view the details of an individual entry, select the folder button and from here, you may either Return, Approve, or Cancel the entry.