Sales, Billings, & Collections - Delivery Receipts
Welcome to Citicon Payroll and Accounting Systems - Delivery Receipts module. This module is designed to meticulously record and manage all delivery receipts for materials, ensuring accurate documentation of dispatched goods and services.
Key Purposes
- Accurate Delivery Documentation: Generate precise delivery receipts for each dispatched load, capturing critical details such as quantity, specifications, and delivery timelines.
- Comprehensive Transaction Tracking: Maintain a detailed record of every delivery, linking it to the customer, project, and specific pouring event for end-to-end visibility.
- Quality Control Verification: Include fields for material strength, aggregate, and specifications, ensuring that delivered goods meet the required quality standards.
- Workflow Status Management: Track the status and approval level of each delivery receipt, facilitating a smooth transition from dispatch to billing.
- Efficient Batch Processing: Enable the batch approval of multiple delivery receipts, enhancing administrative efficiency and accelerating the billing cycle.
Delivery Receipts Module User-Manual
This section provides details, and set-by-step instructions to view, and access the Delivery Receipts module.
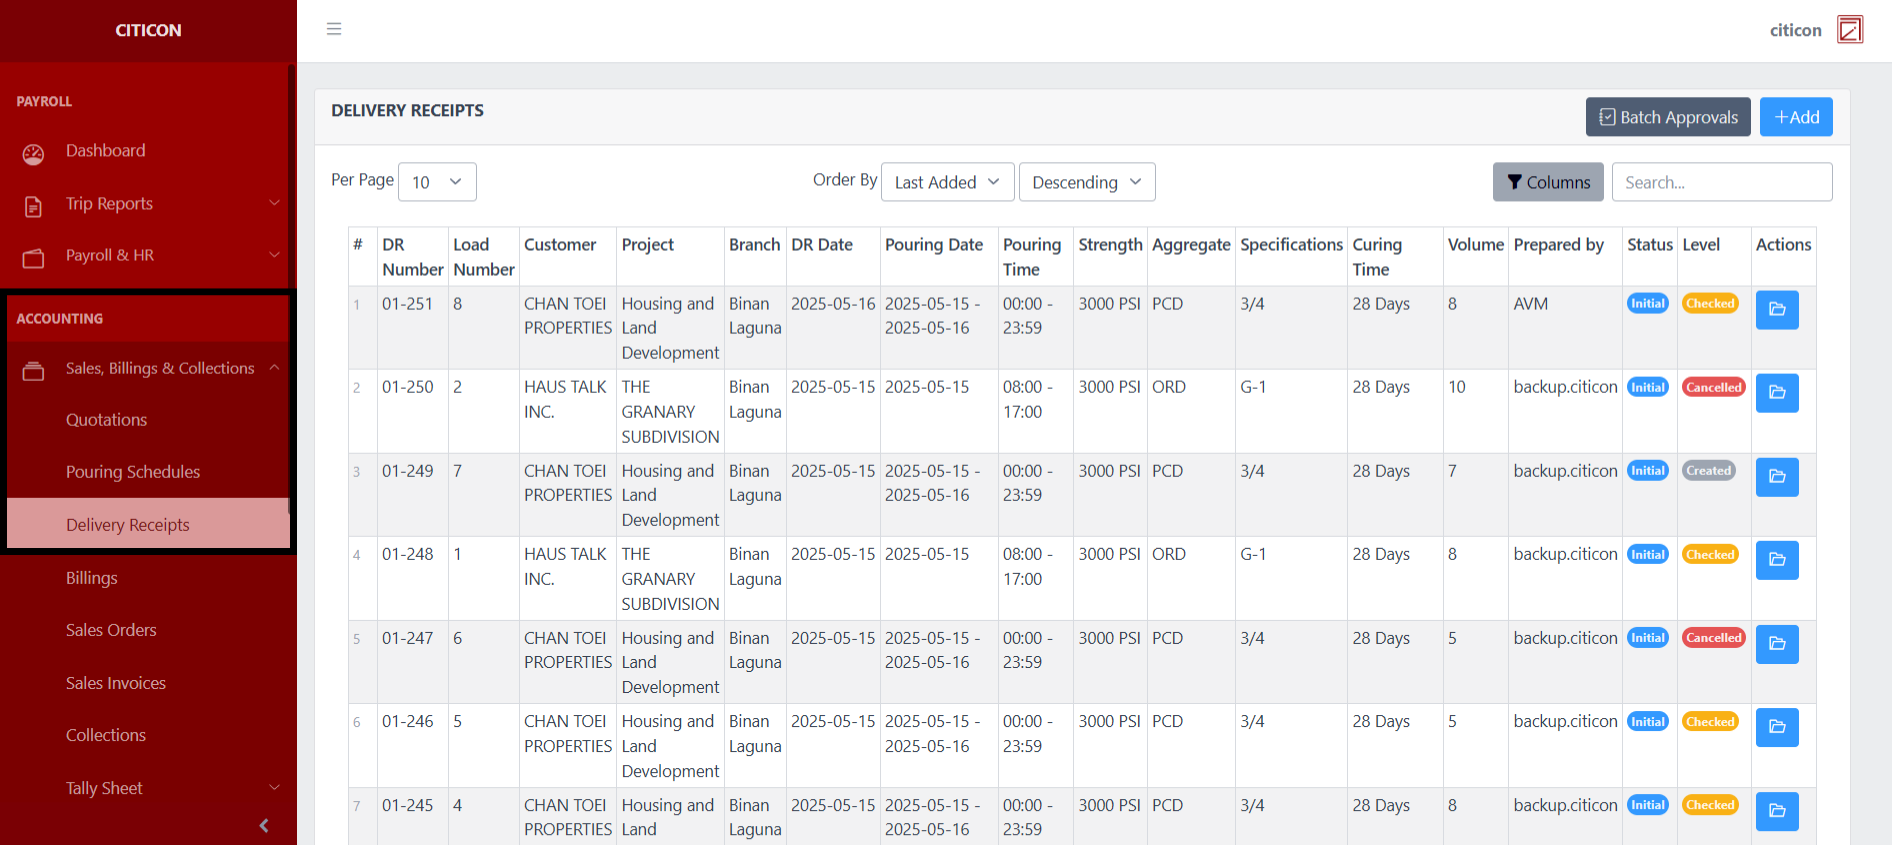
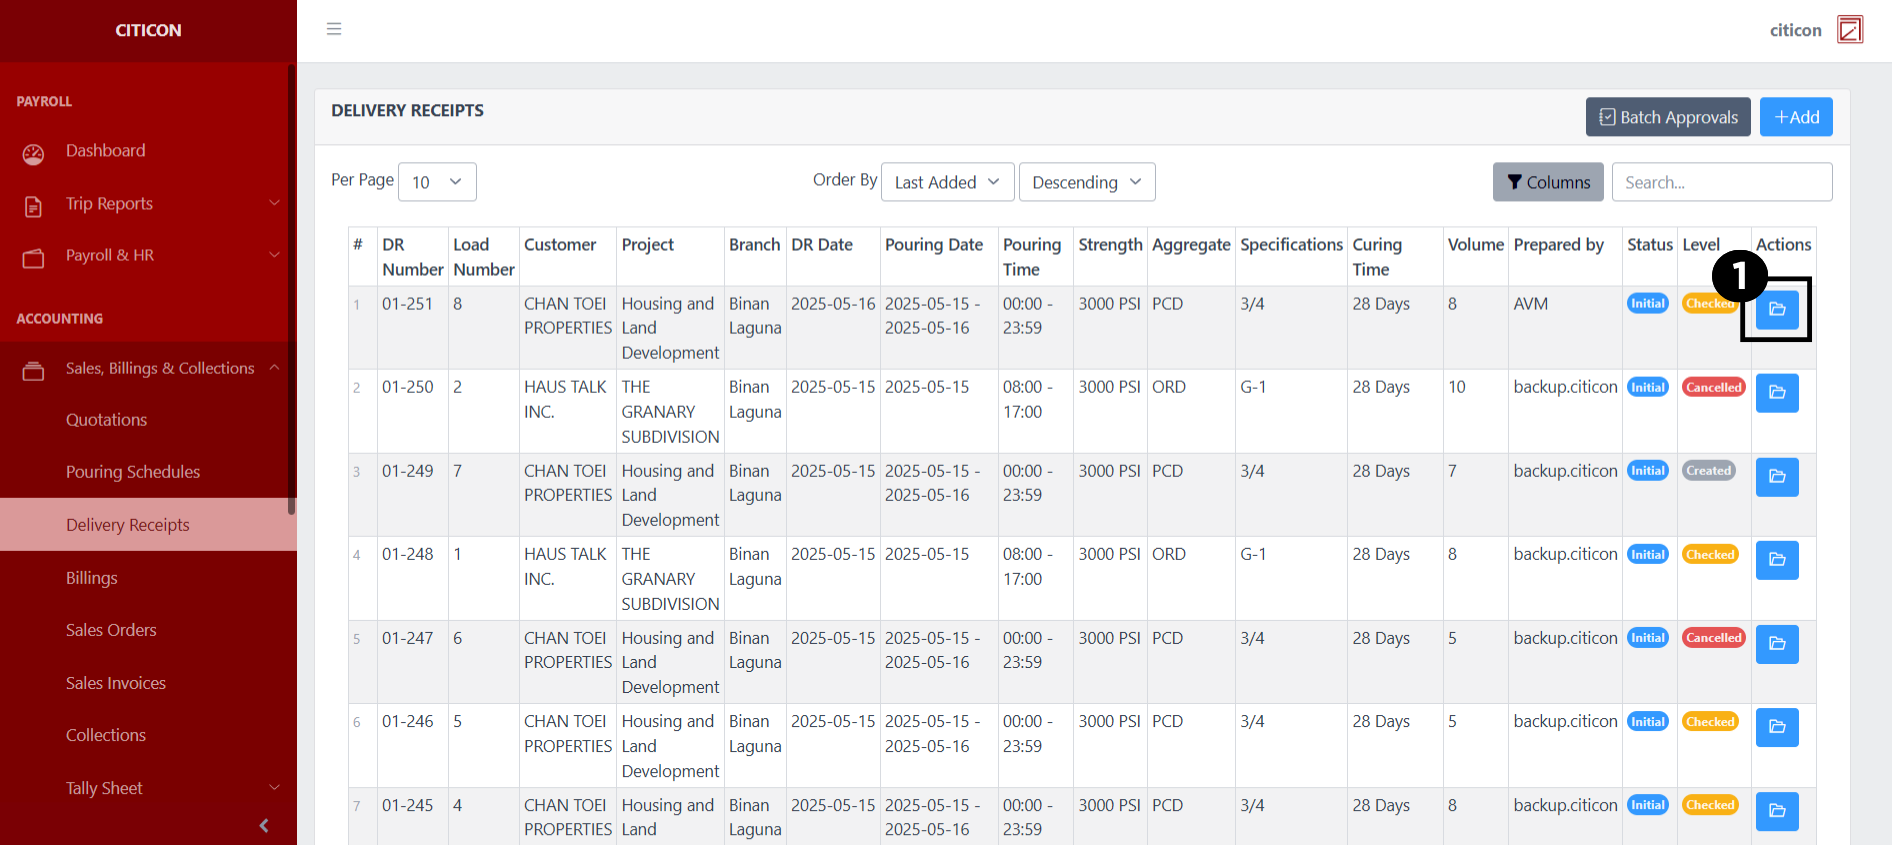
Index Page
To access the Delivery Receipts. Go to Accounting, select Sales, Billings, & Collections, then select Delivery Receipts.
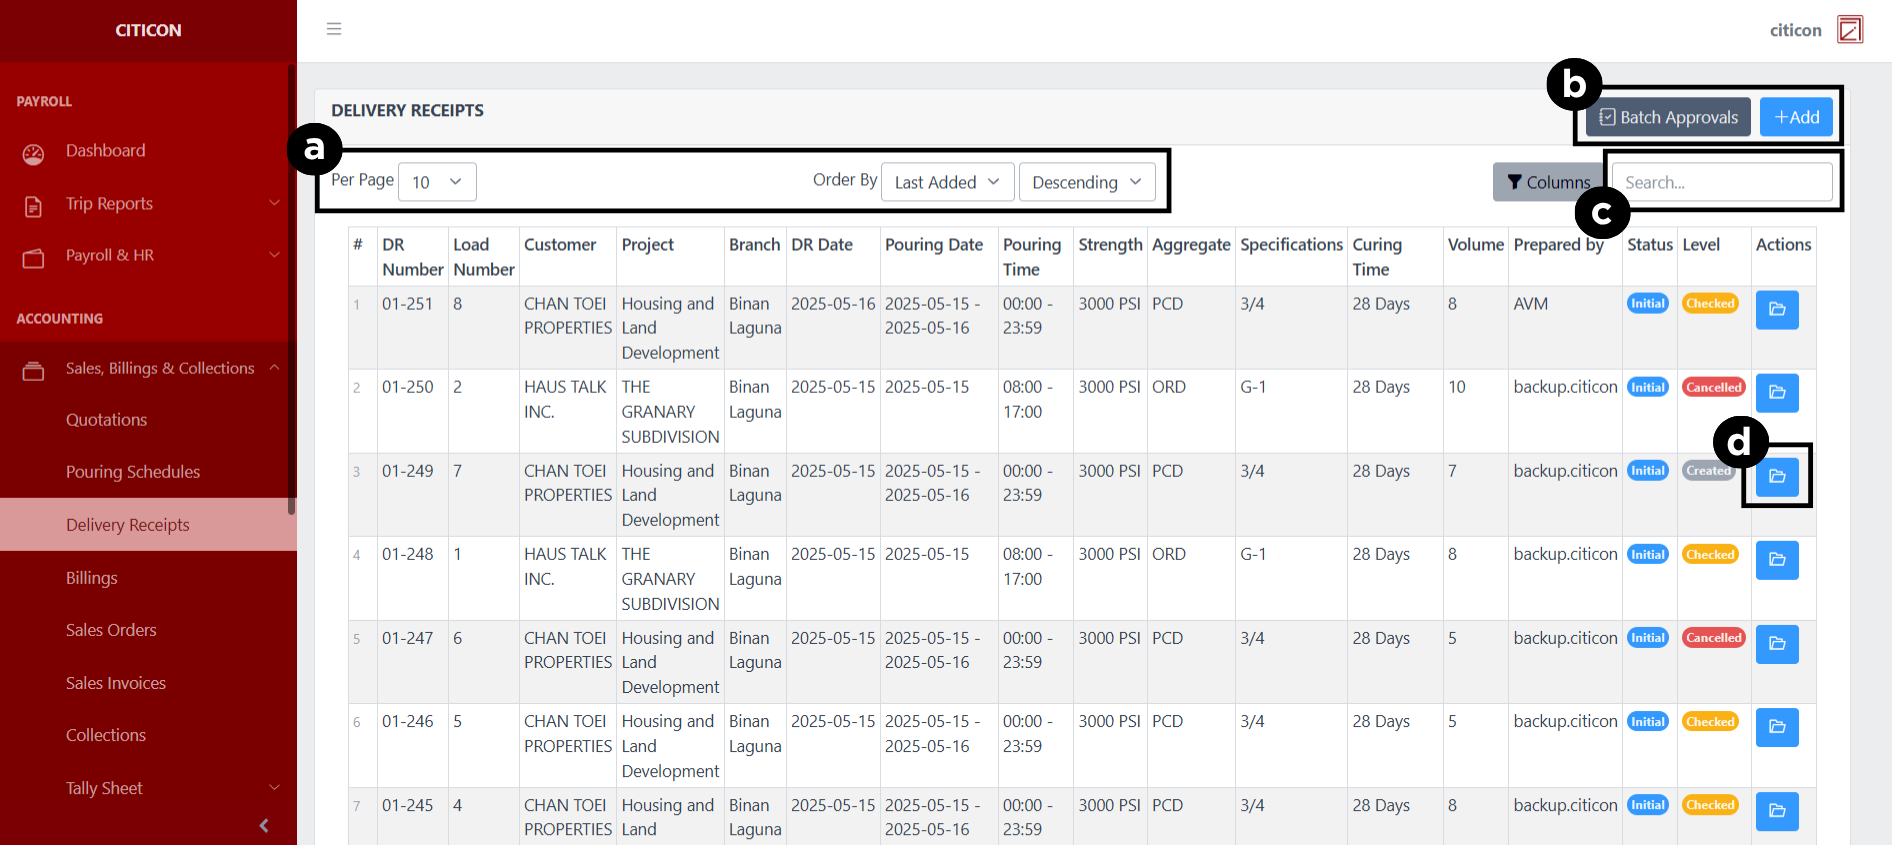
a. Adjust the paging, ordering, and sorting of the entries here.
b. Select the respective button to either Add or Approve entries.
c. Search for specific entry details using the search bar.
d. View, Export, or Timestamp an entry by selecting this button.
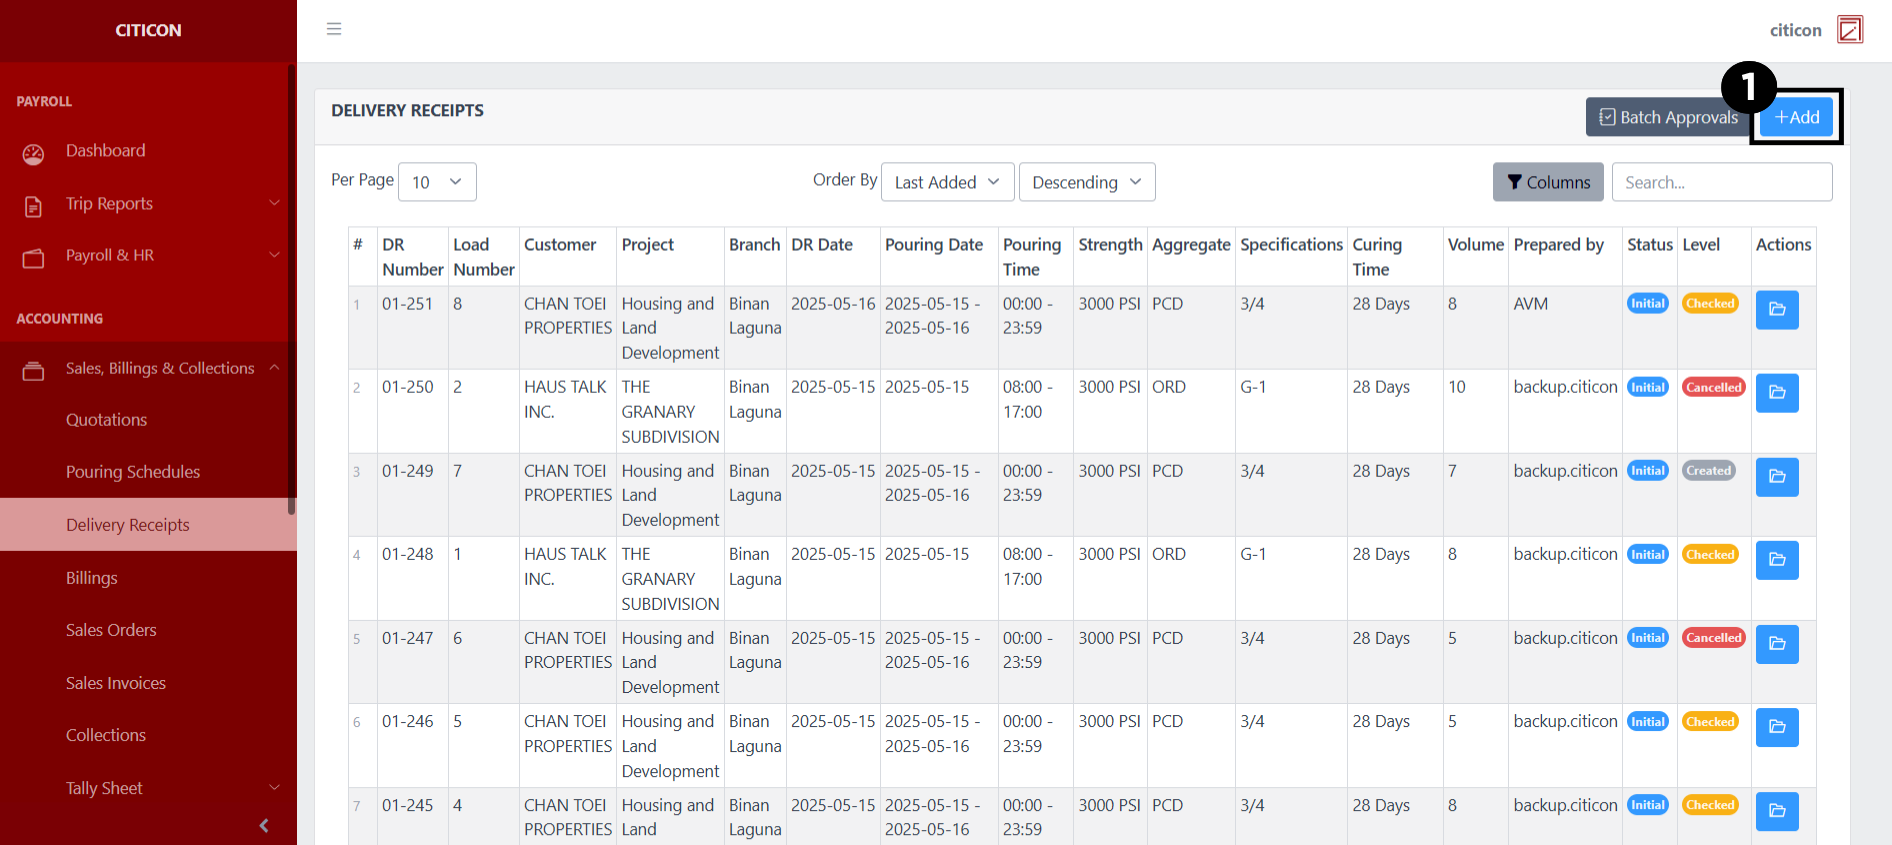
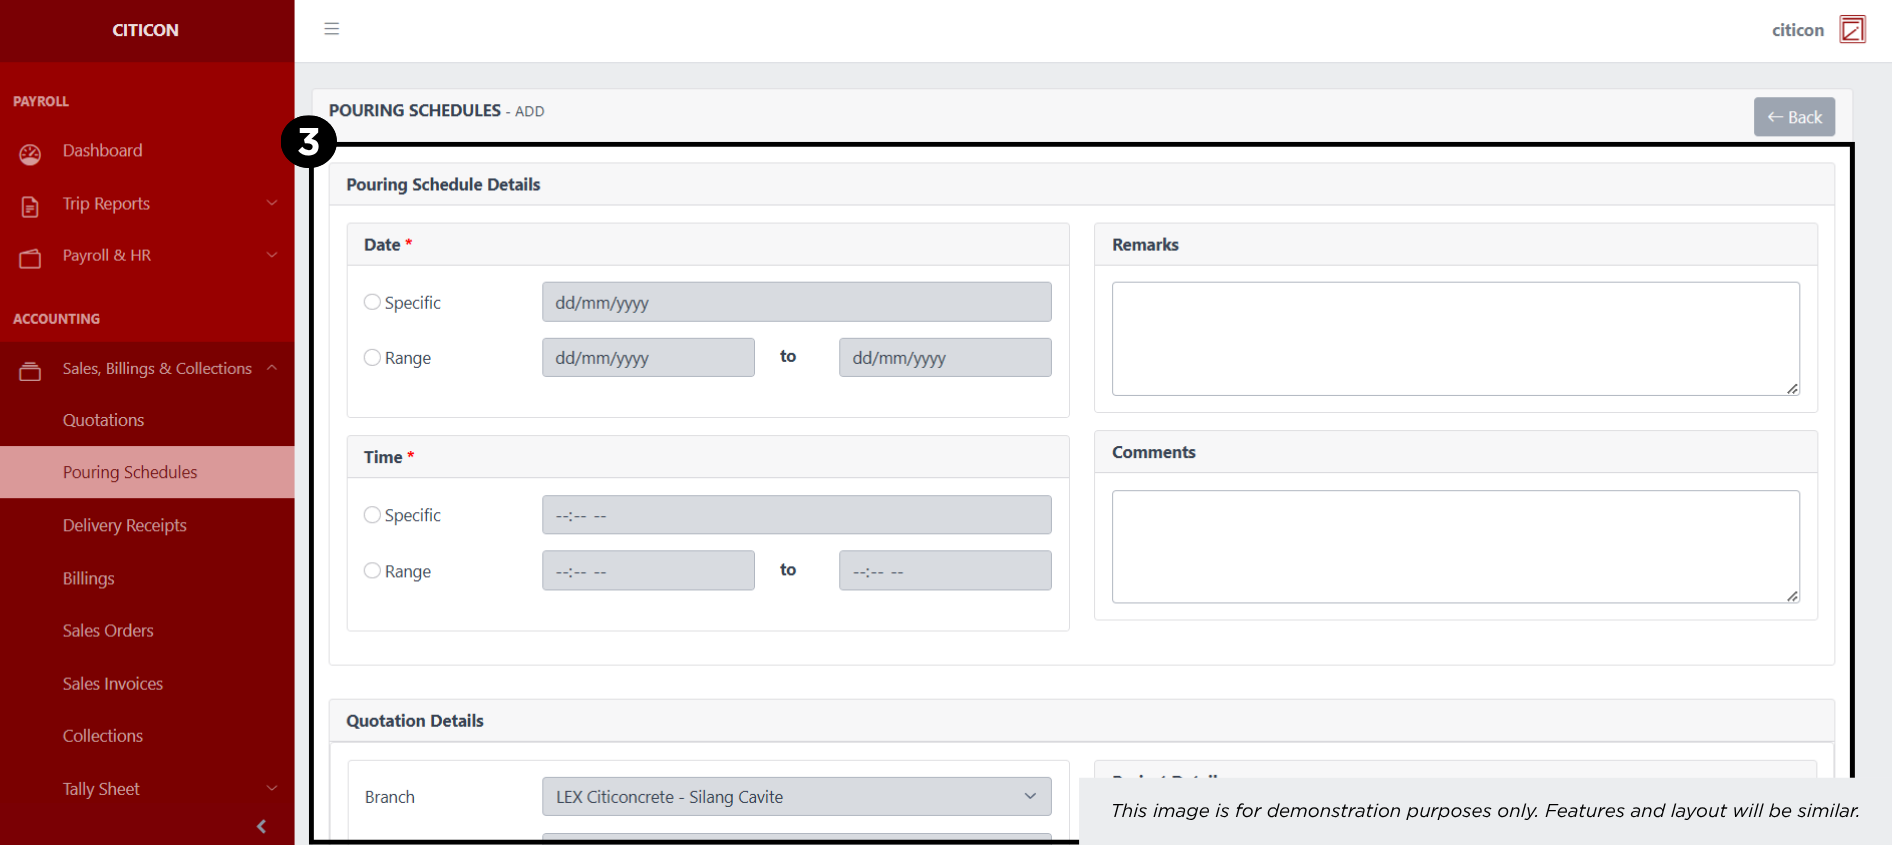
Add Entry
- Select the Add button to add a new entry.
- Select an entry from the list, then select the CREATE DR button.
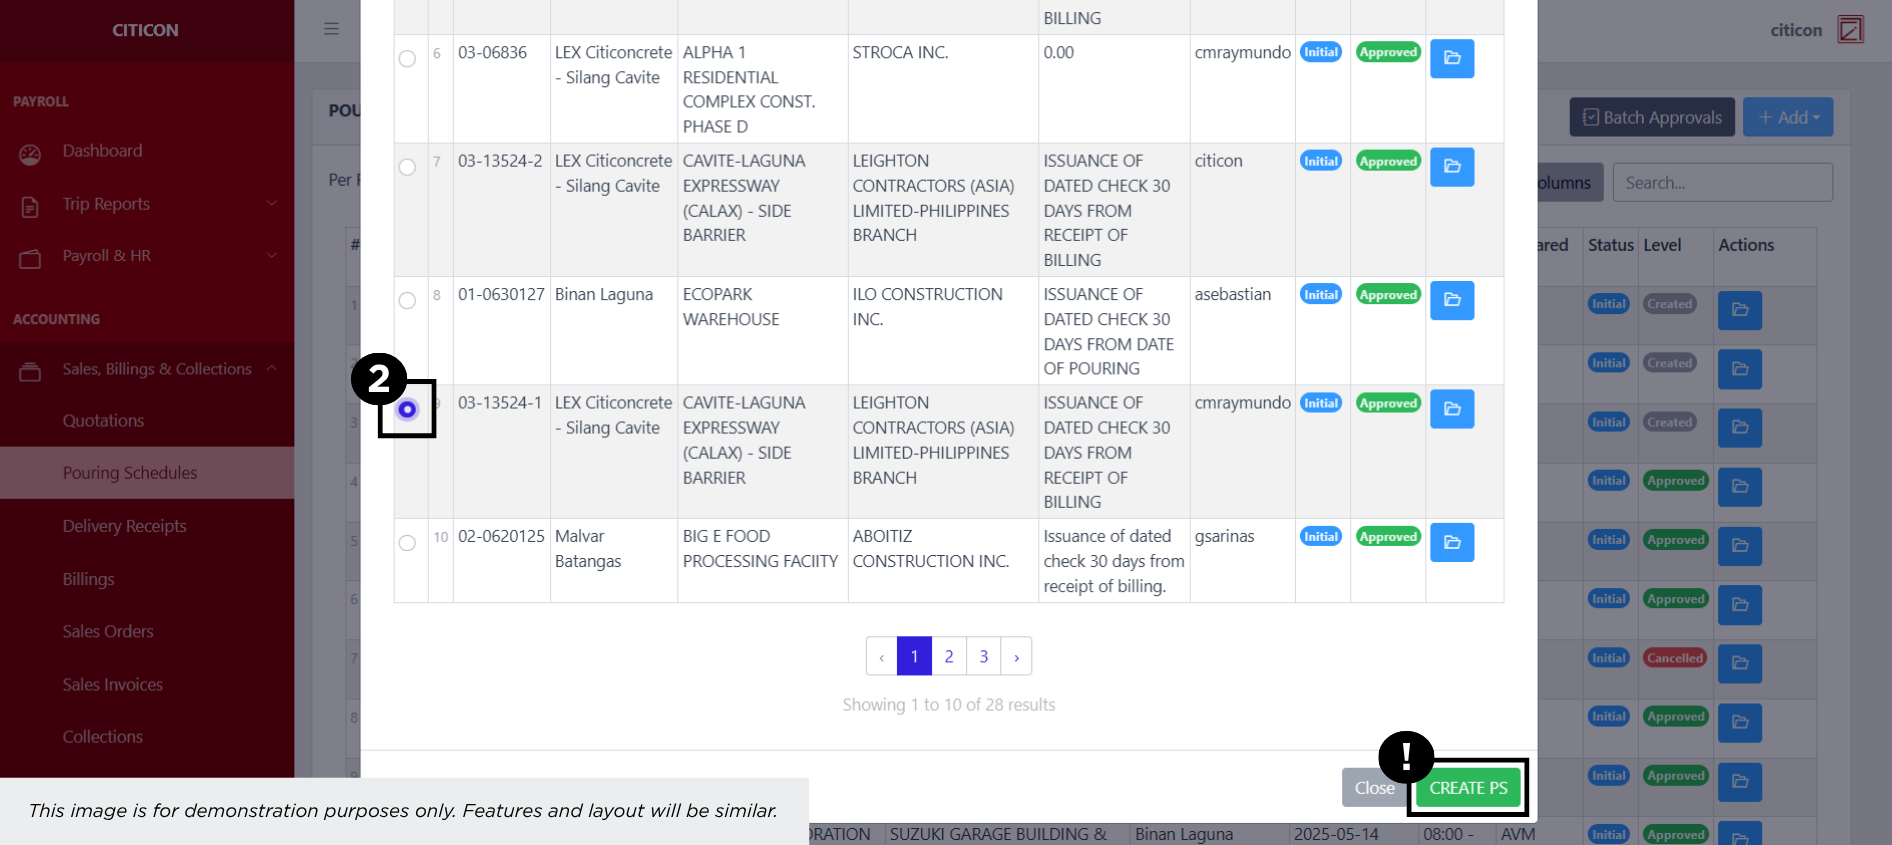
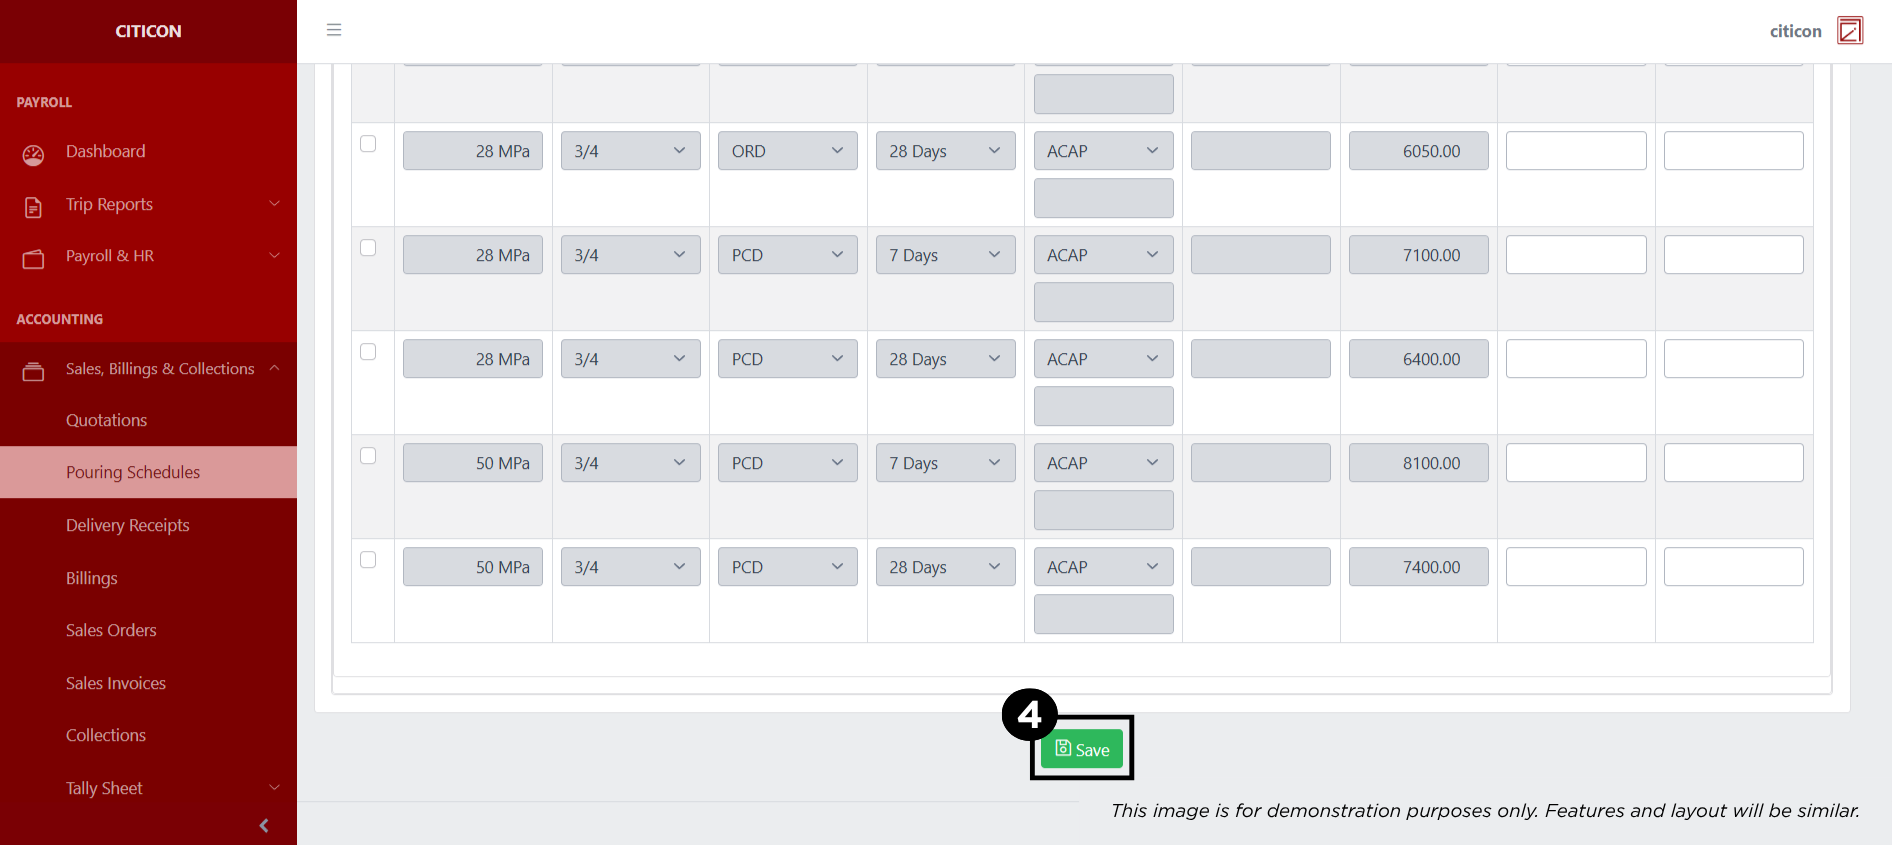
- Input the necessary details for your new entry.
All fields that has an asterisk (*) are required to be filled up.
- Select the Save button to save your new entry.
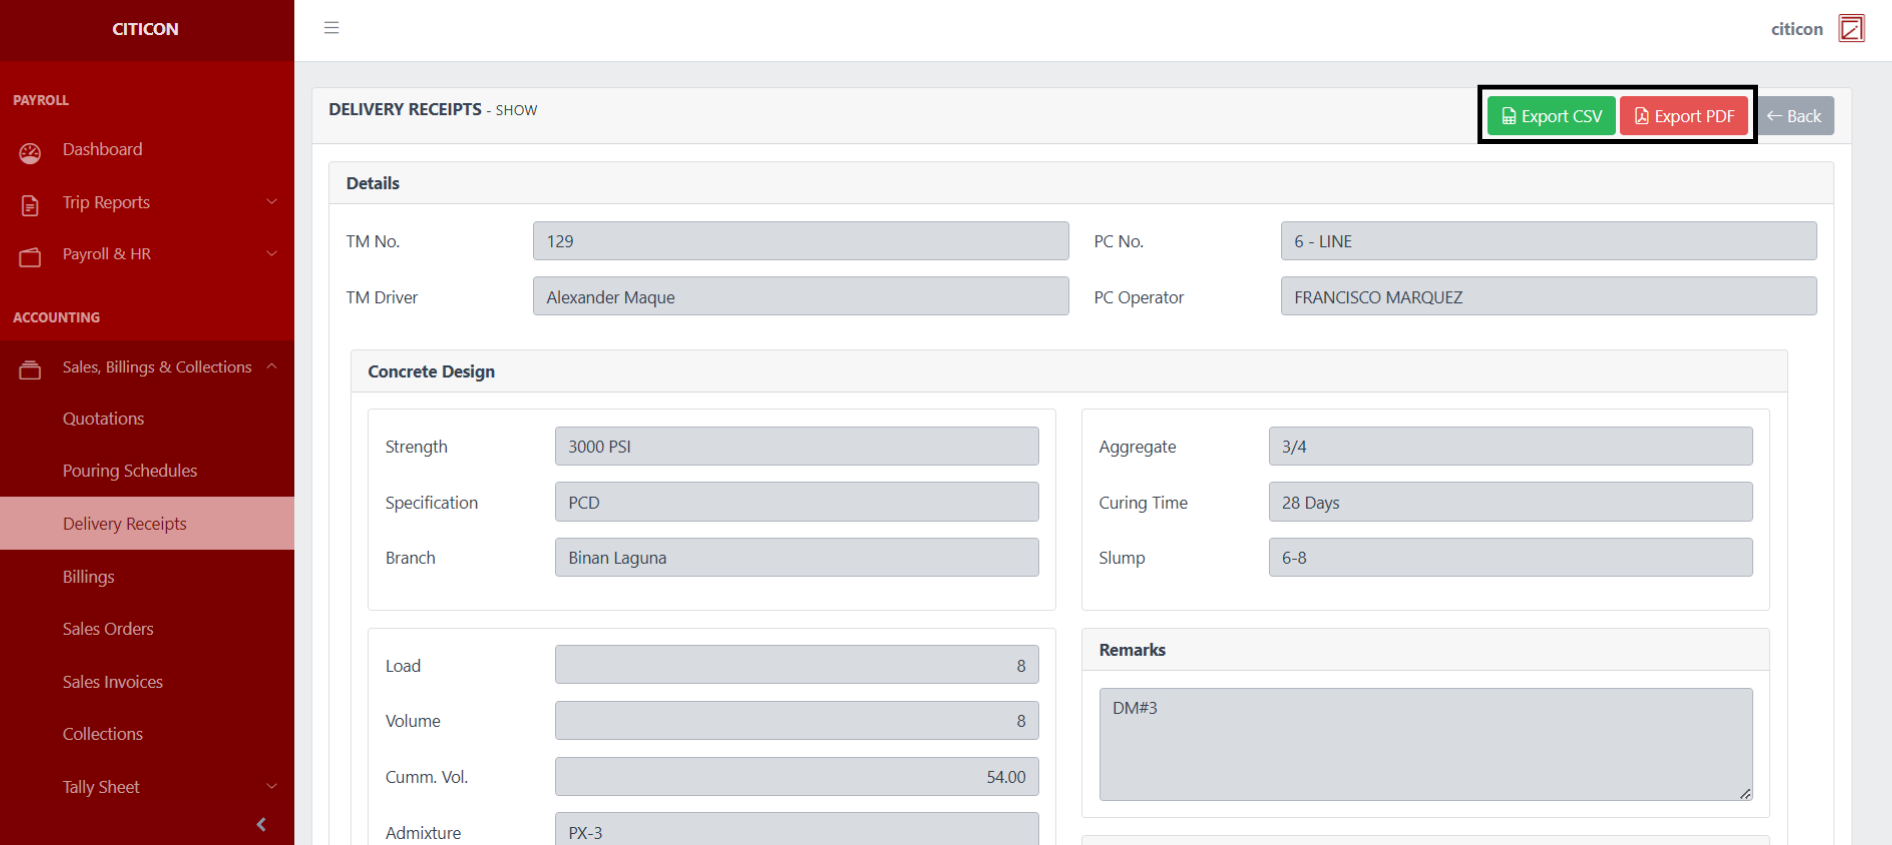
Show Entry
- Select the folder button to view an entry.
Here you can view more specific details on the entry that you selected.
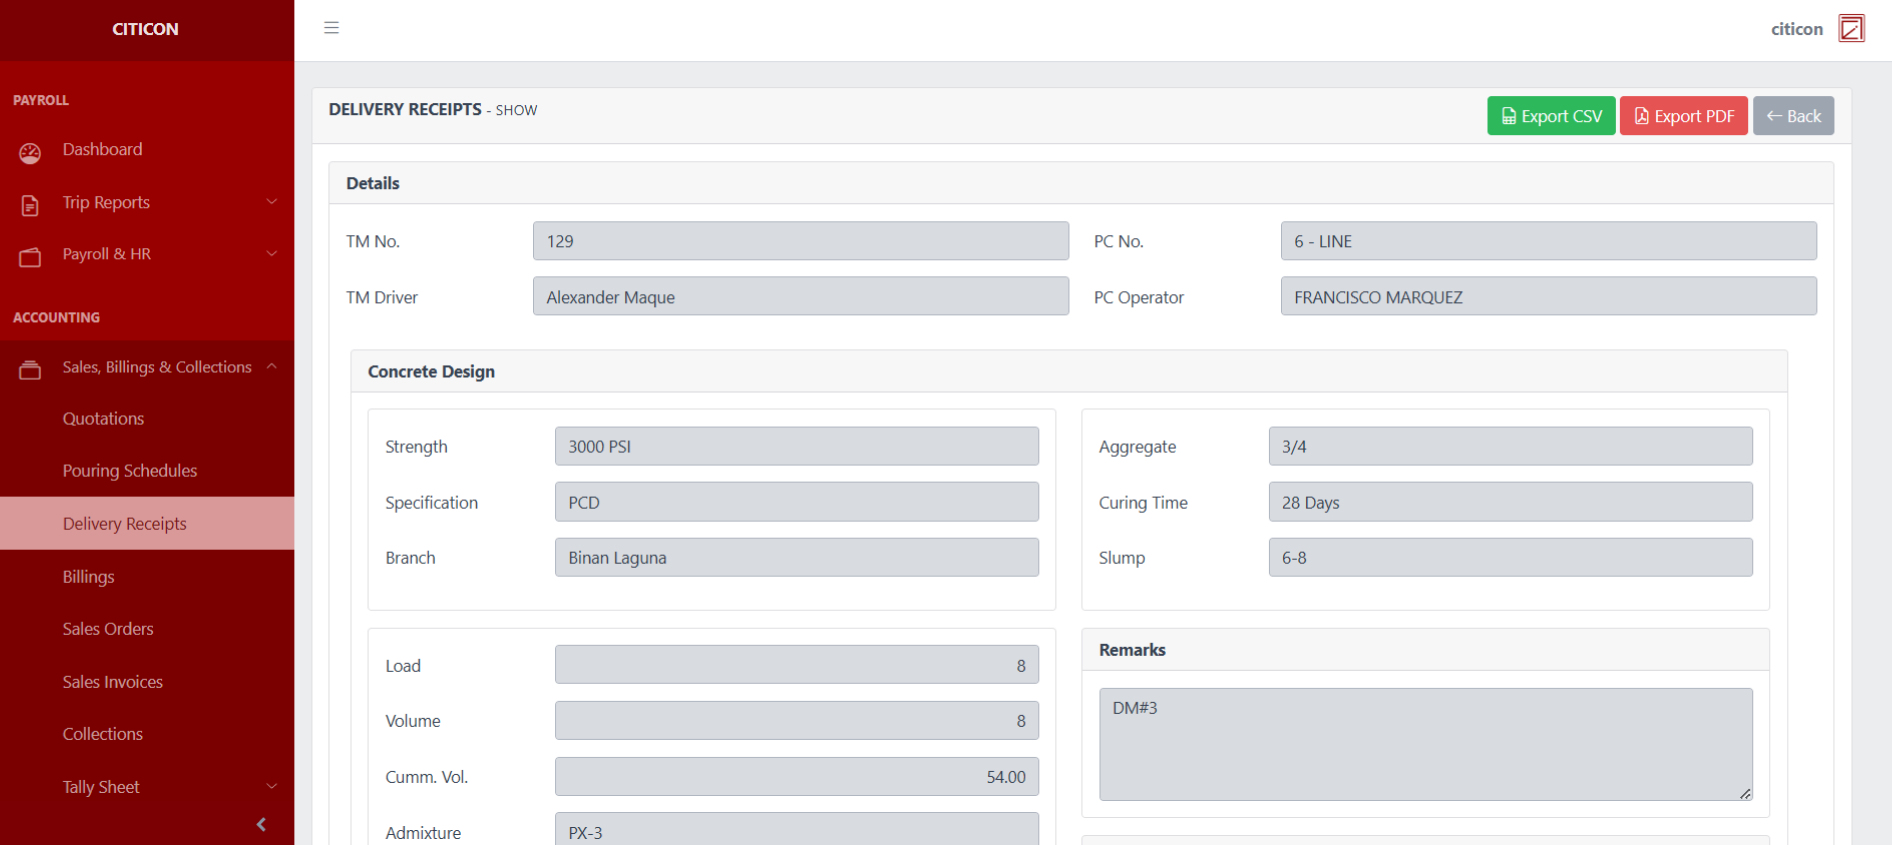
Select the respective button to either Export the entry in CSV or PDF.
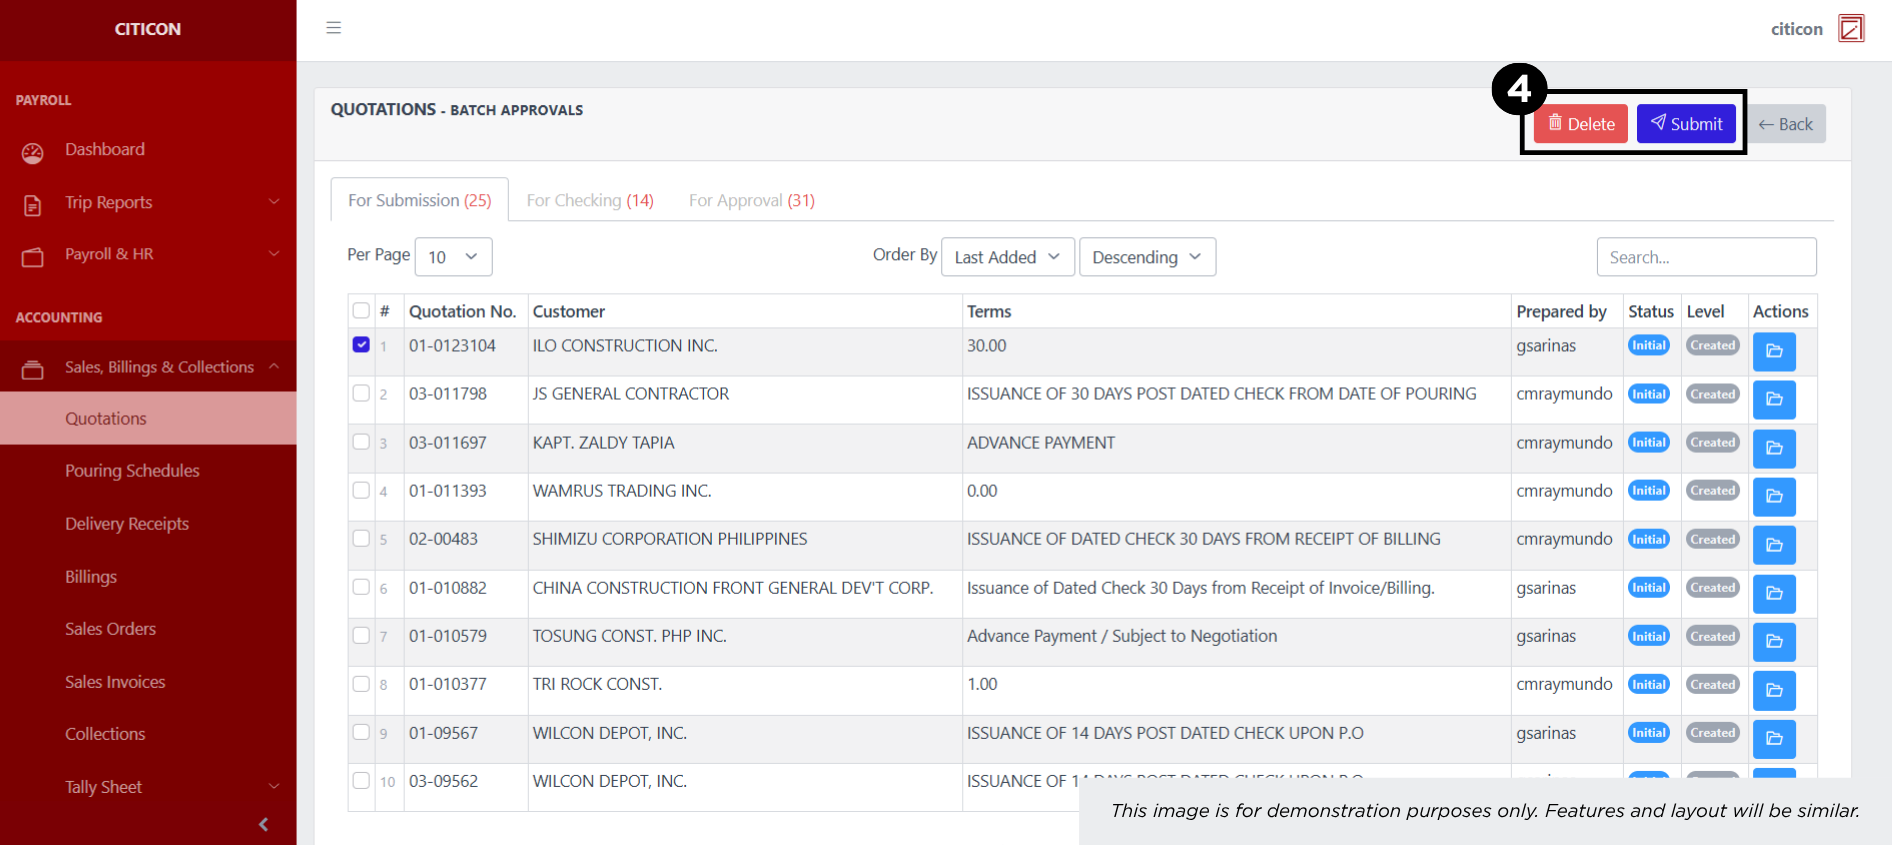
Submit Entry
- Select the Batch Approvals button to submit an entry.

- Select the For Submission tab.

- Select the entry that you want to submit.

- Select the Submit button to submit the entry. In cases where you want to delete a entry, select the entry you want to delete, then select the Delete button.
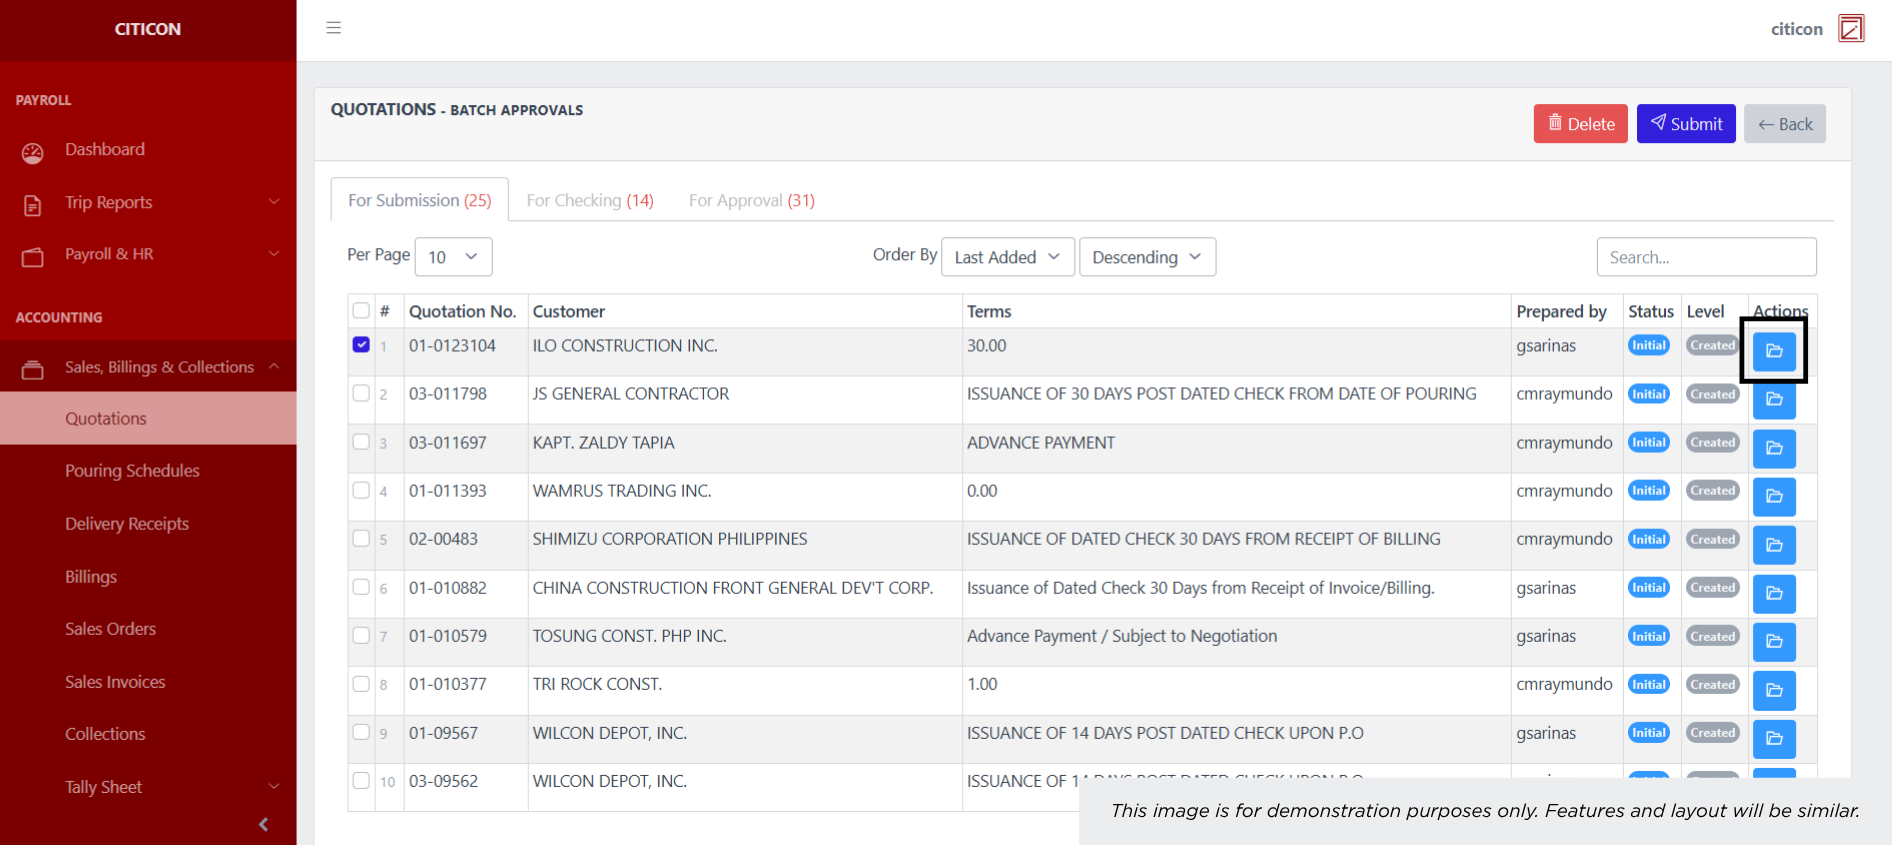
 To view the details of an individual entry, select the folder button and from here, you may either Edit, Submit, or Cancel the entry.
Approve Entry
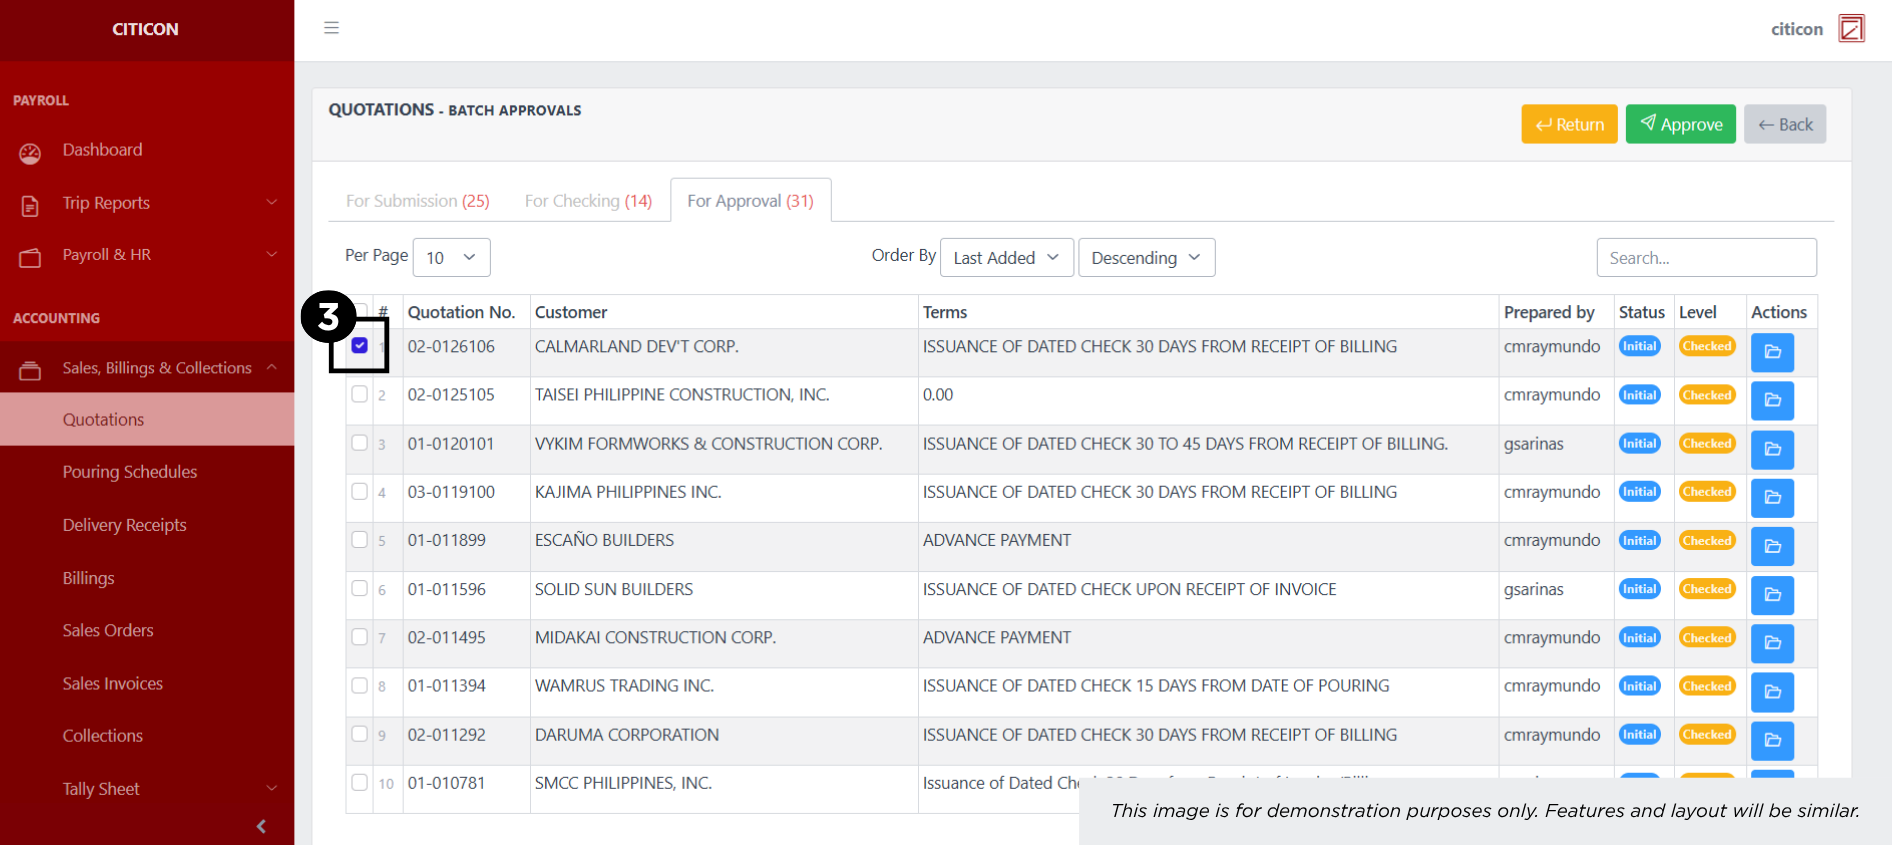
- Select the Batch Approvals button to approve a entry.

- Select the For Approval tab.
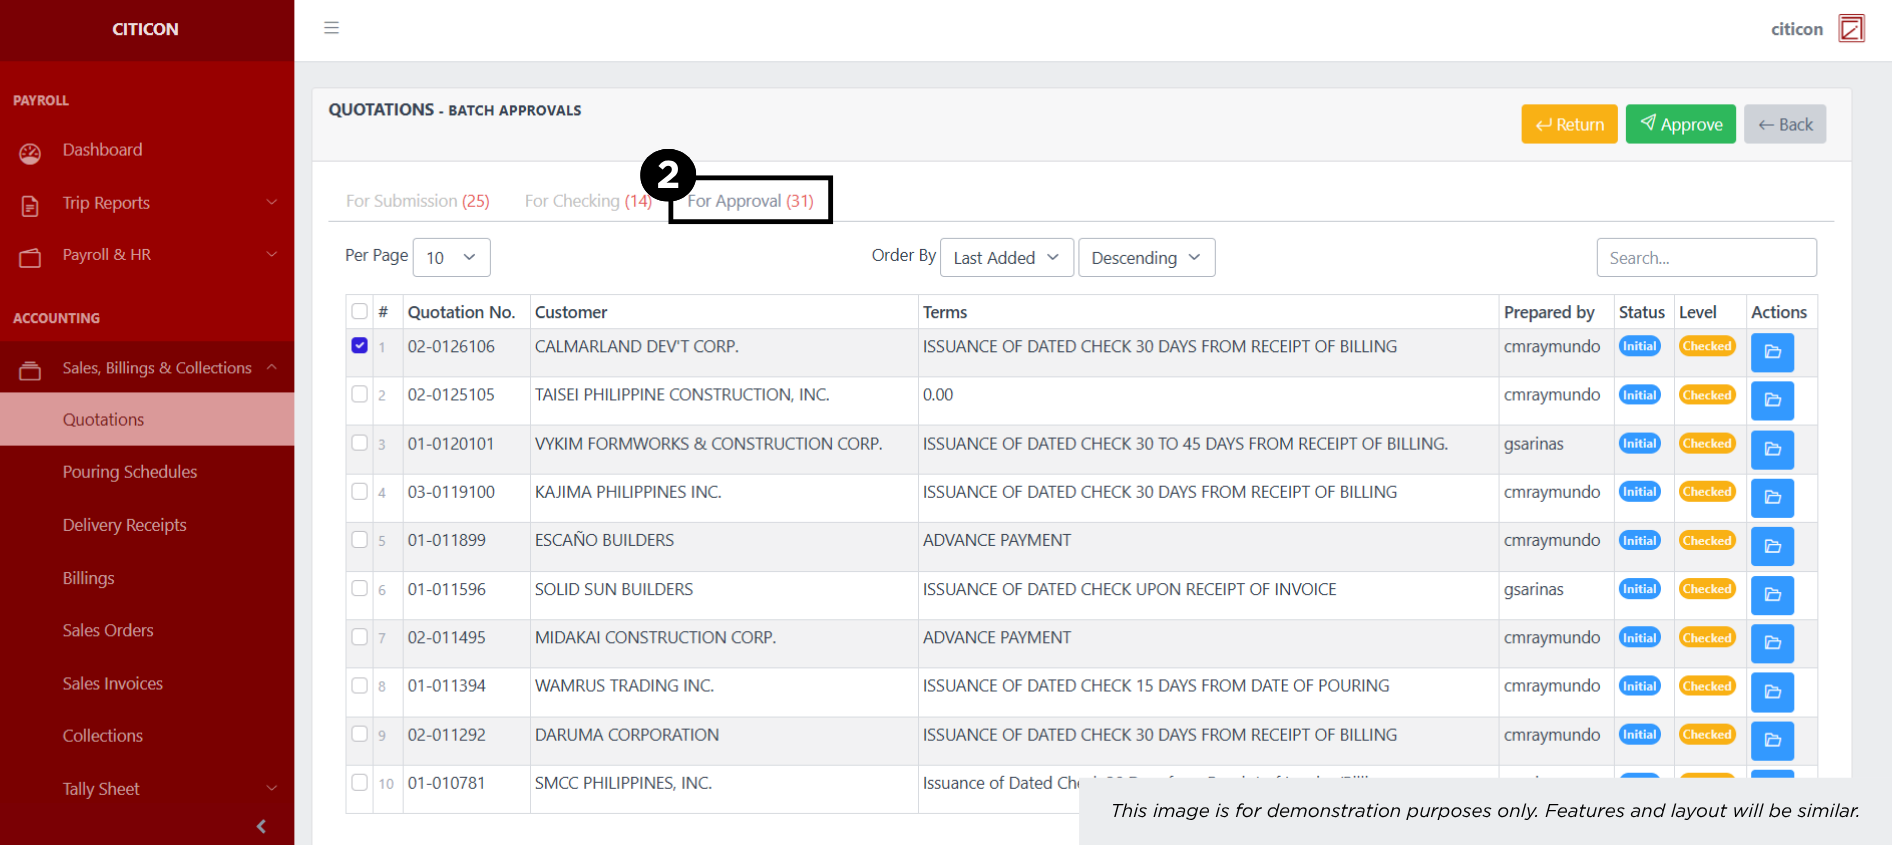
- Select the entry that you want to approve.
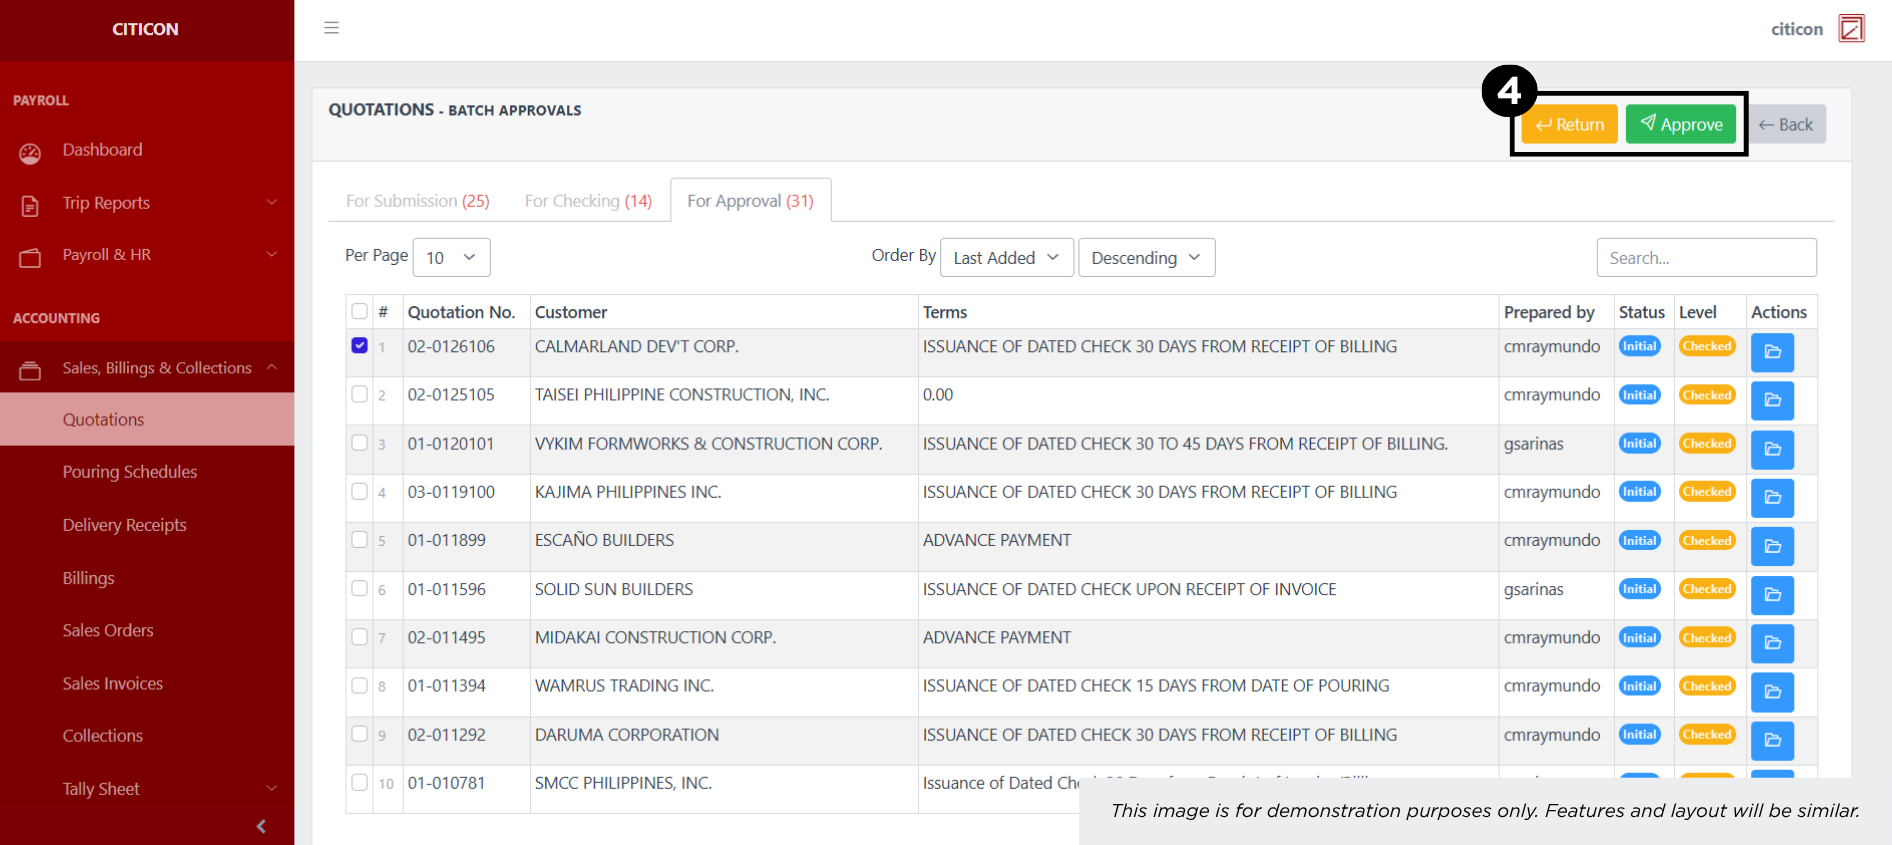
- Select the Approve button to approve the entry. In cases where you want to return a entry to submission section, select the entry you want to return, then select the Return button.
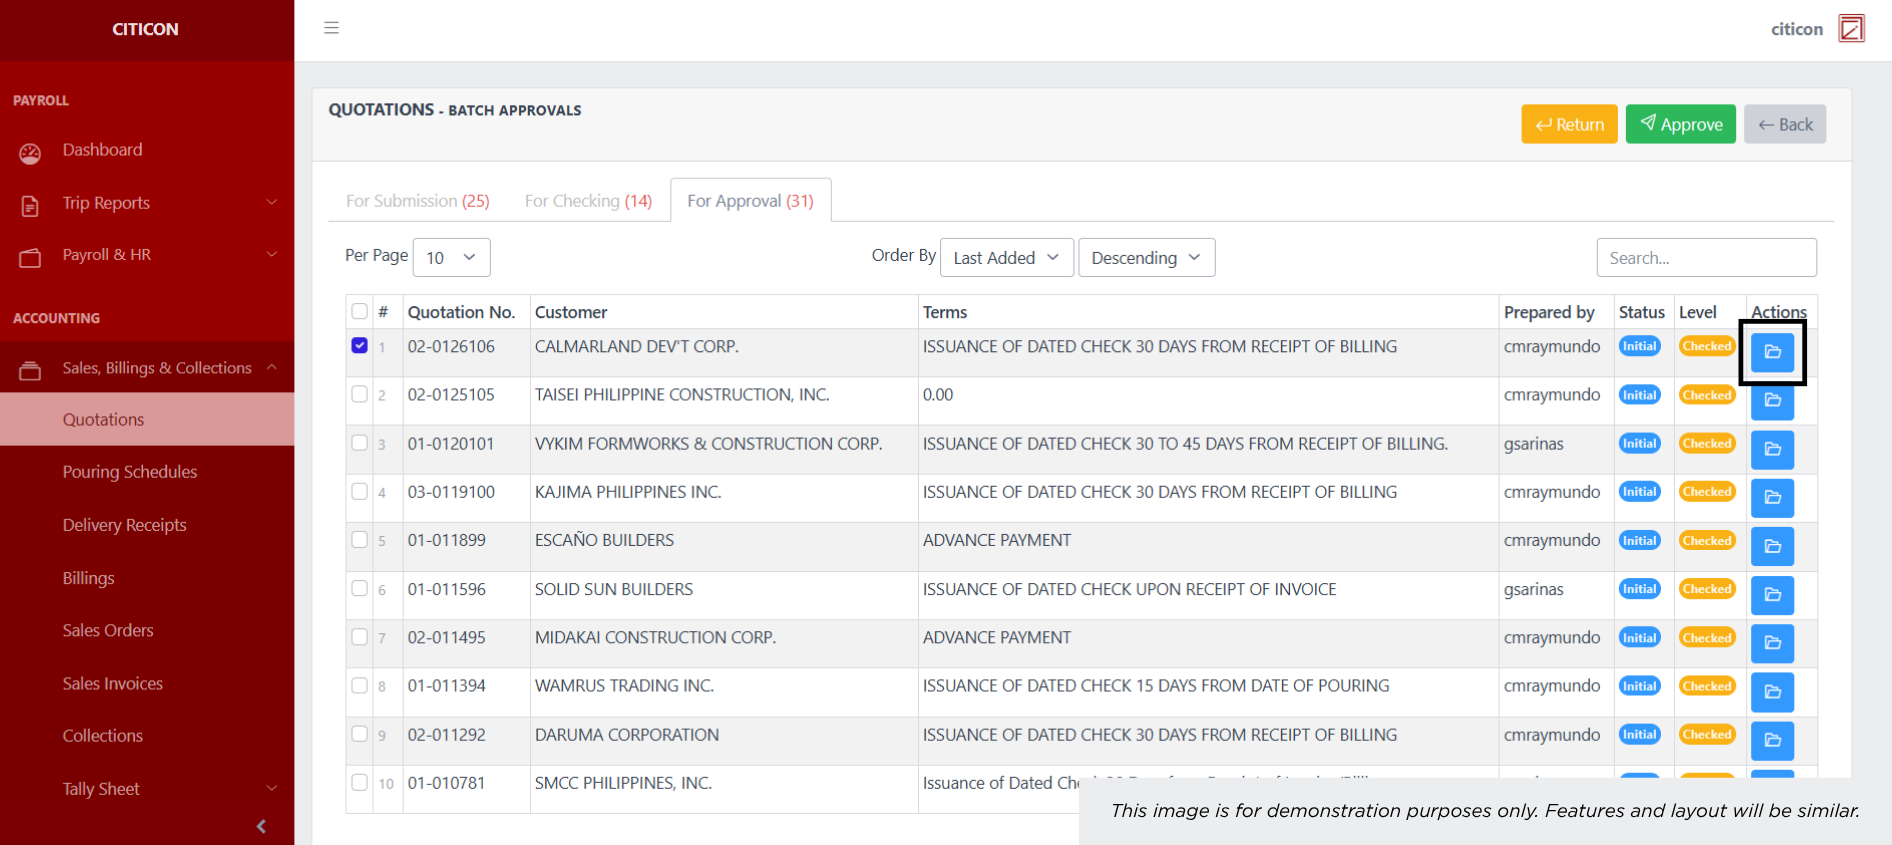
 To view the details of an individual entry, select the folder button and from here, you may either Return, Approve, or Cancel the entry.
Explore Citicon Payroll and Accounting System: Accounting - Billings