Sales, Billings, & Collections - Collections
Welcome to Citicon Payroll and Accounting Systems - Collections module. This module is designed for comprehensive management and tracking of all incoming payments, facilitating efficient reconciliation and robust cash flow management.
Key Purposes
- Detailed Collection Tracking: Accurately record and categorize all incoming payments by type, collection number, and document reference for meticulous financial tracking.
- Client and Branch Specificity: Link collections to specific clients and branches, enabling precise financial reporting and reconciliation at various organizational levels.
- Payment Status and Approval Oversight: Monitor the status and approval level of each collection entry, ensuring proper authorization and streamlining the accounting process.
- Diverse Payment Instrument Handling: Support the entry and management of various payment types including Advance Payments, Post Dated Checks, and Dated Checks, alongside credit allocations.
- Efficient Batch Processing and Viewing: Allow for bulk approval of multiple collection entries and provide a consolidated view of all entries, enhancing operational efficiency and data accessibility.
Collections Module User-Manual
This section provides details, and set-by-step instructions to view, and access the Collections module.
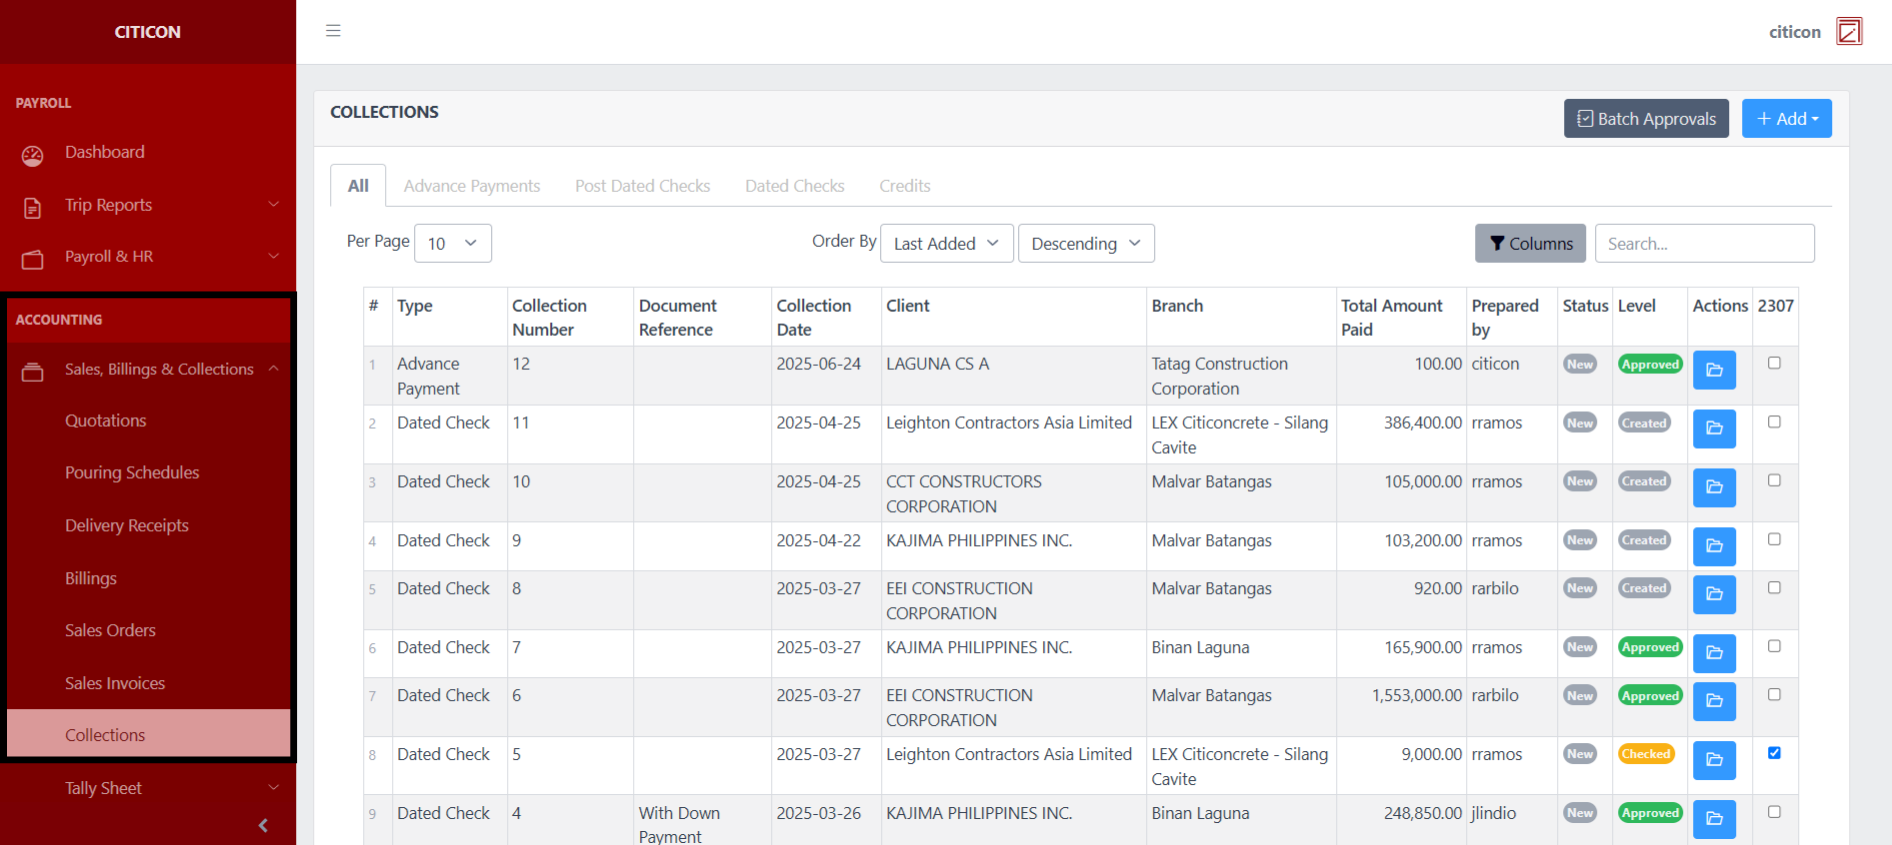
Index Page
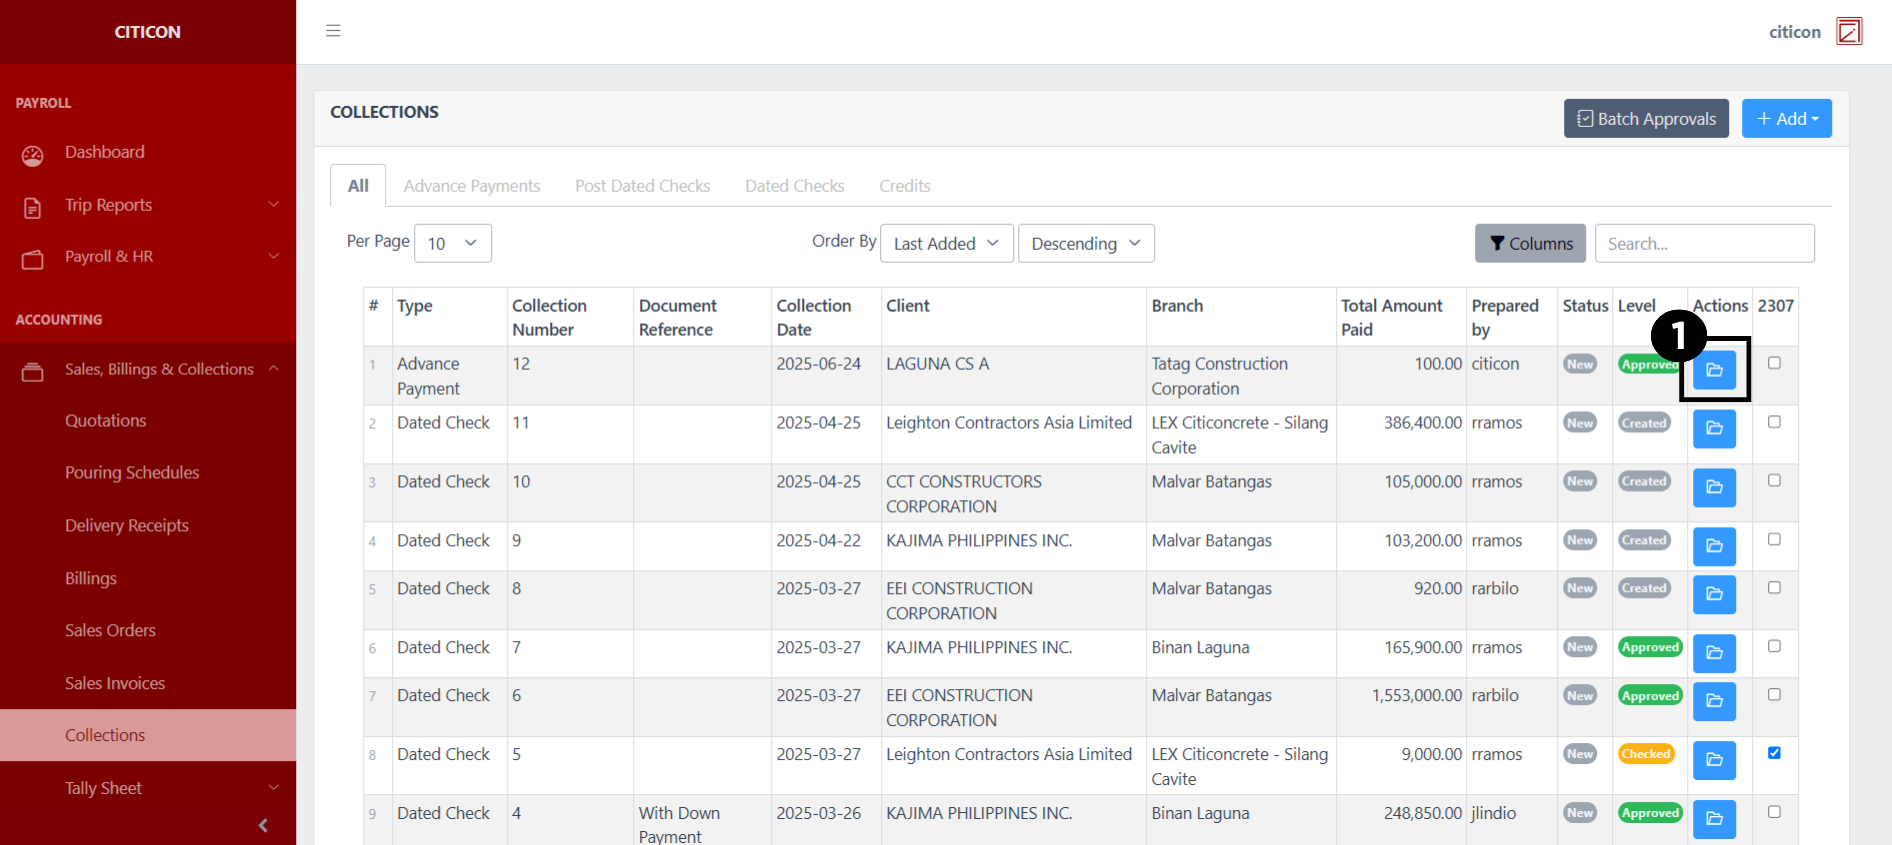
To access the Collections. Go to Accounting, select Sales, Billings, & Collections, then select Collections.
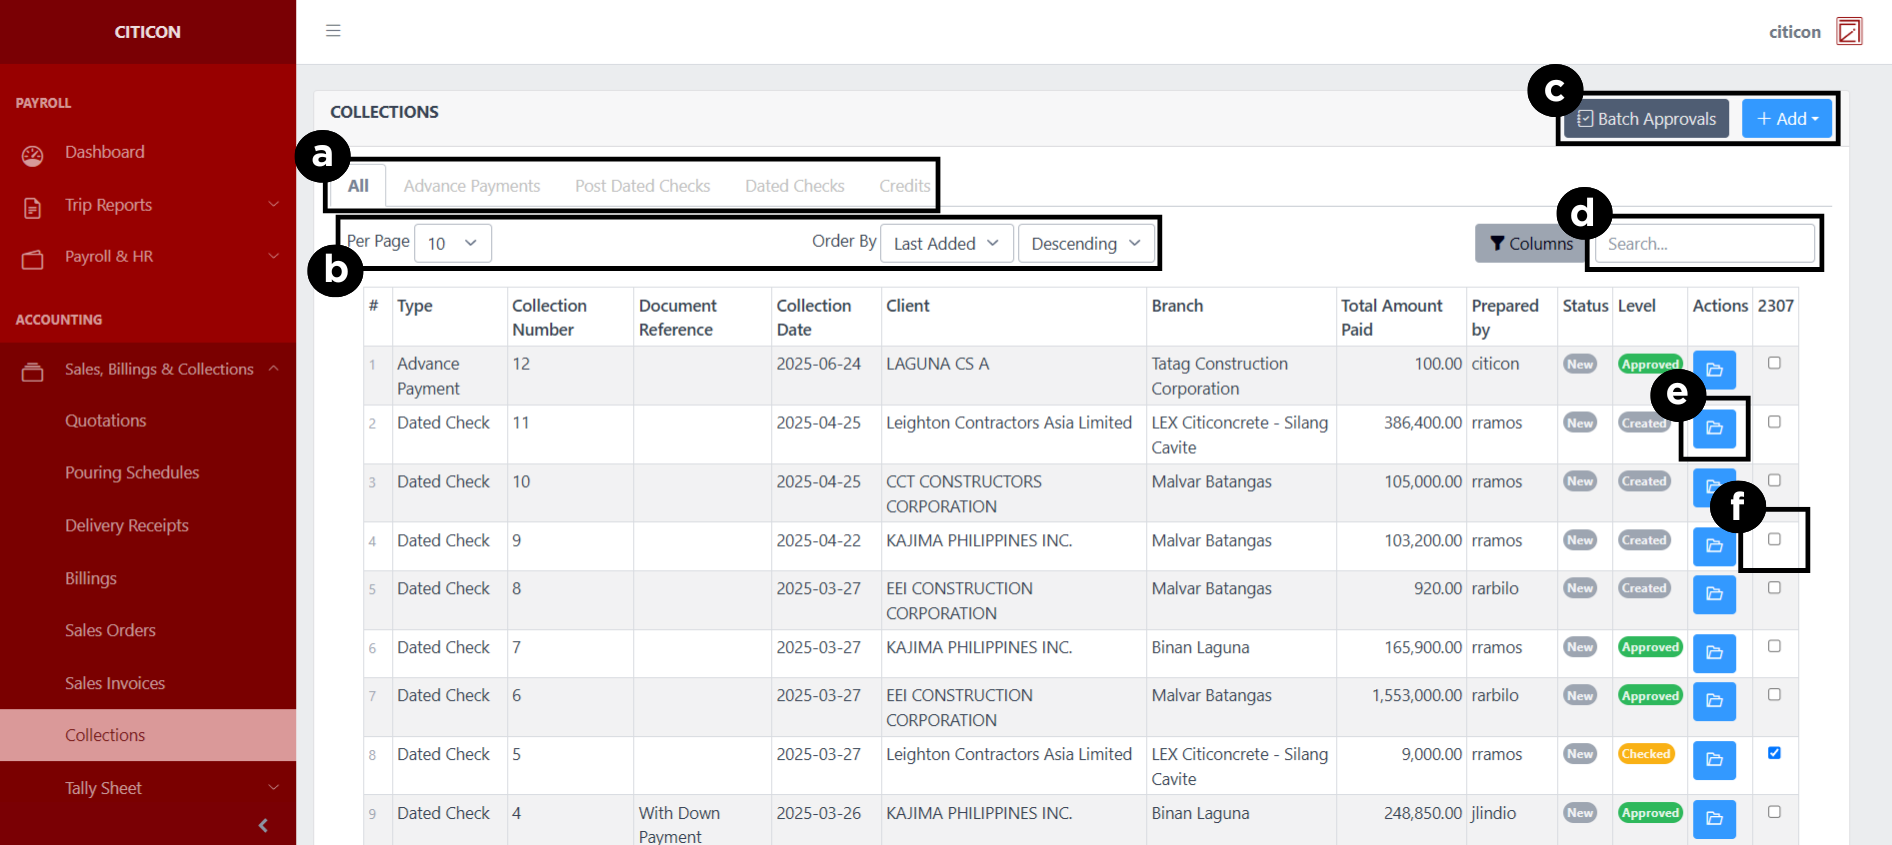
a. Select the respective tab to change the Collections type being shown.
b. Adjust the paging, ordering, and sorting of the entries here.
c. Select the respective button to either Add or Approve entries.
d. Search for specific entry details using the search bar.
e. View, Export, Edit, or Delete an entry by selecting this button.
f. Select the checkbox to indicate if an entry has a BIR Form 2307.
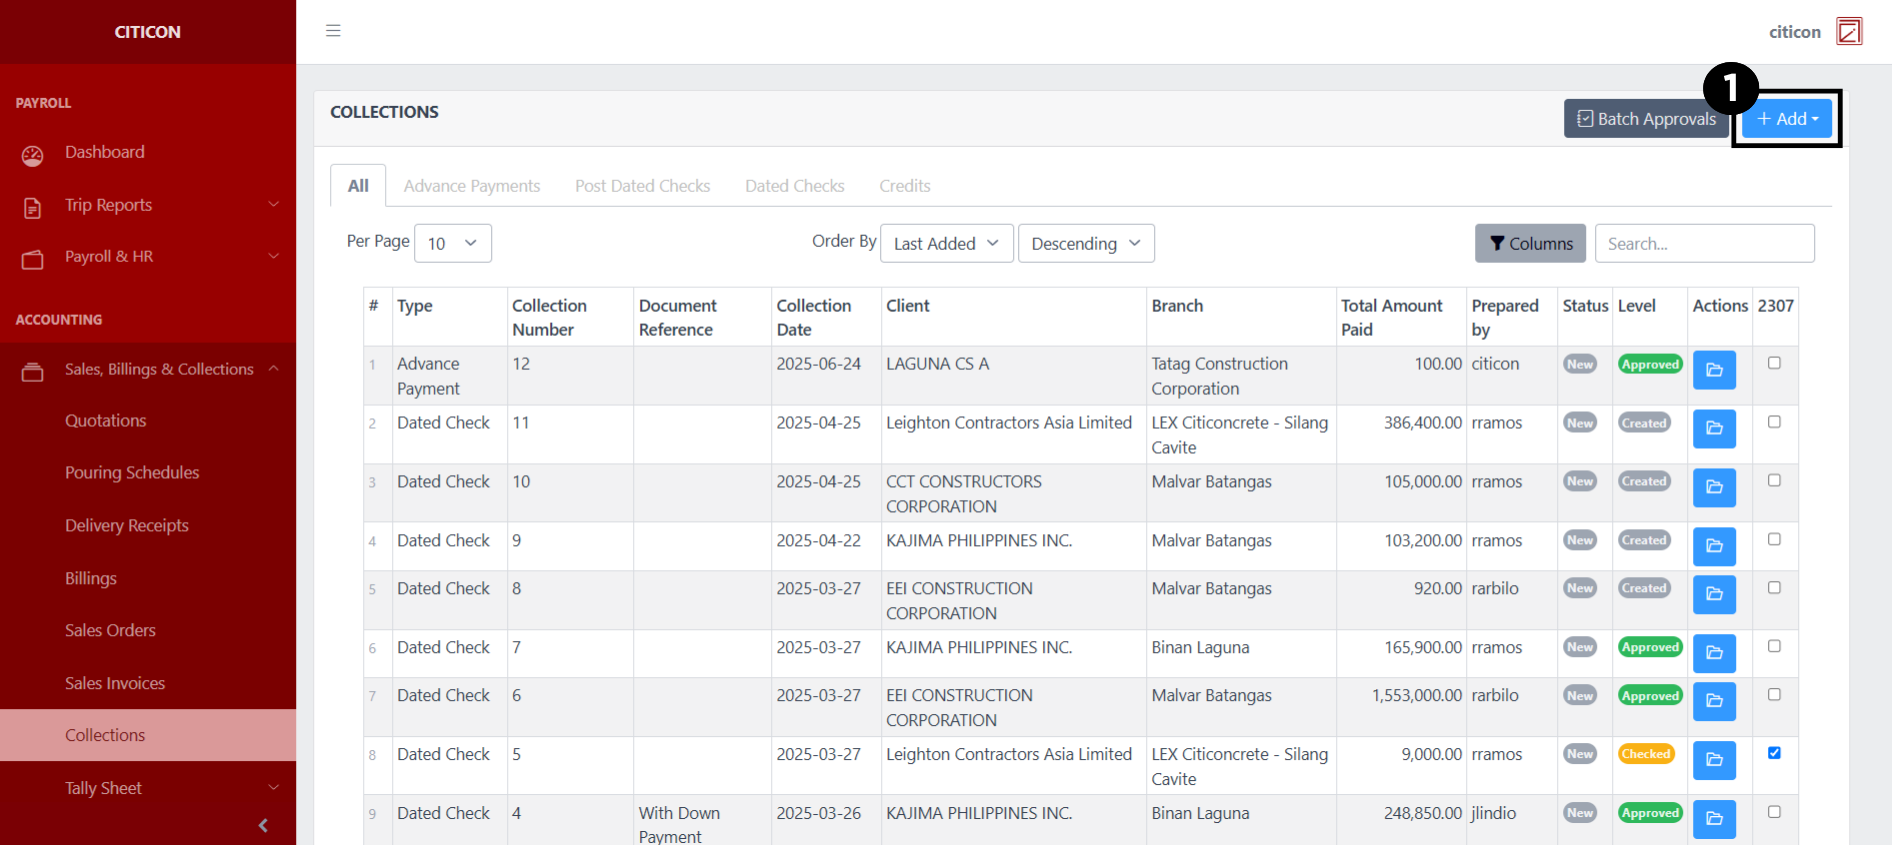
Add Entry
- Select the Add button to add a new entry.
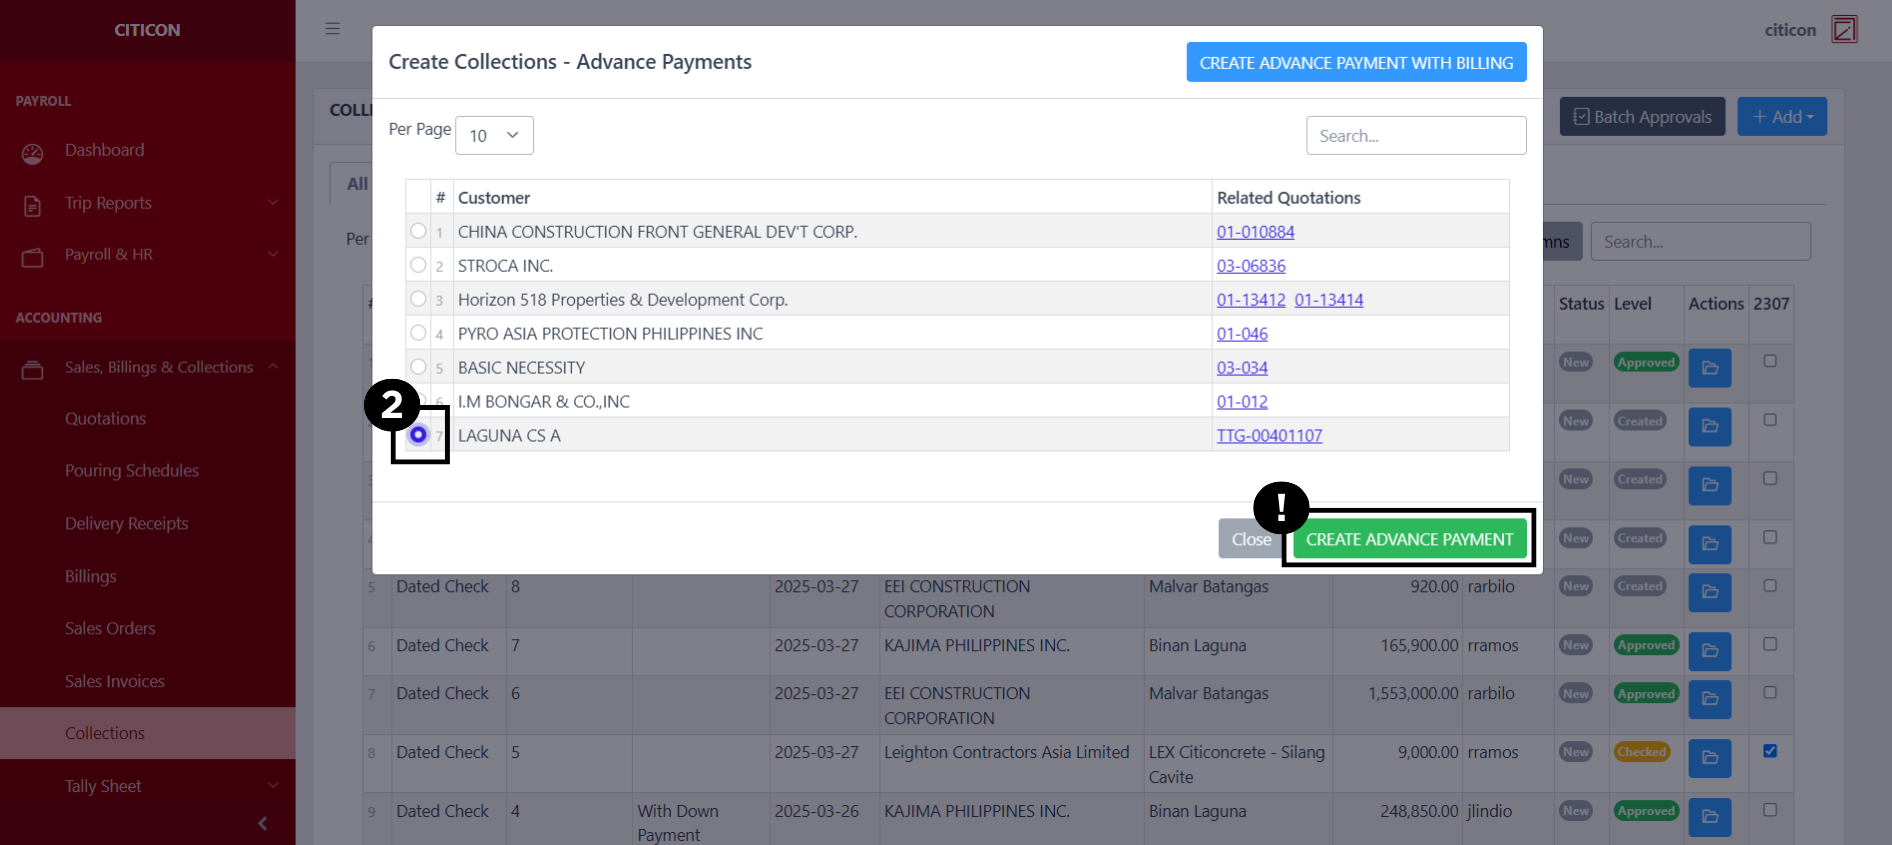
Select if the entry is an Advance Payments, Post Dated Checks, or Dated Checks type.
- Select the entry you want to add as collection, then select the green button.
For Advance Payment Collections, you can create an entry with a billing.
For Dated Checks Collections, you can create a down payment without a billing.
- Input the necessary details for your new entry.
All fields that has an asterisk (*) are required to be filled up.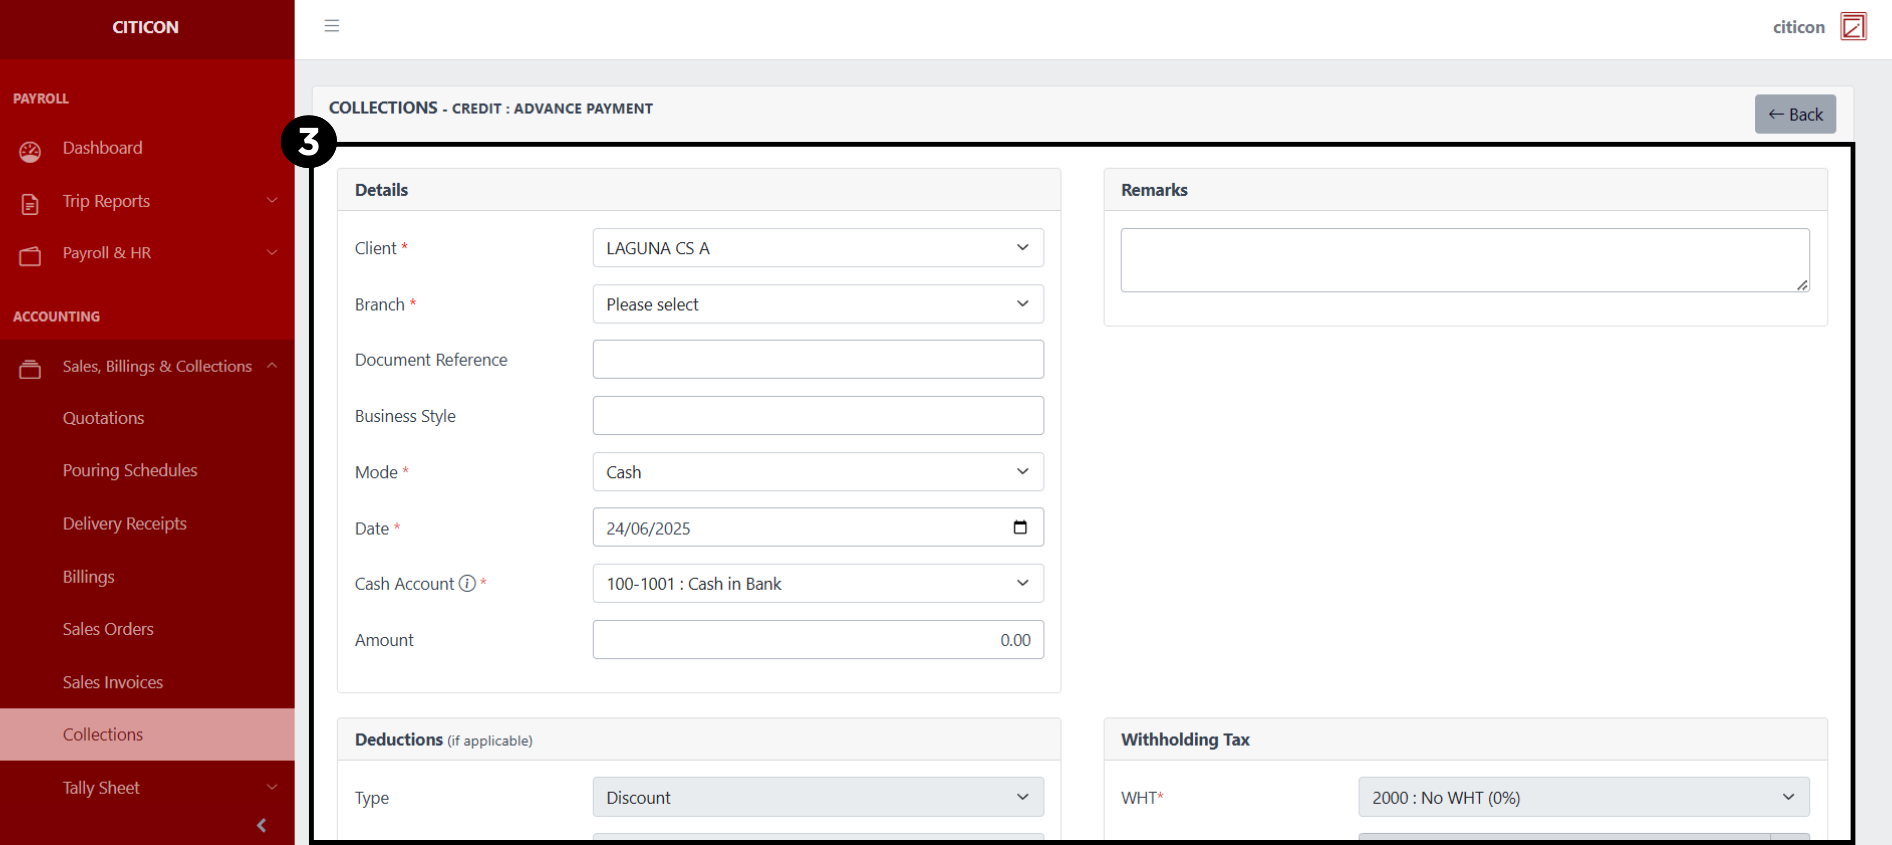
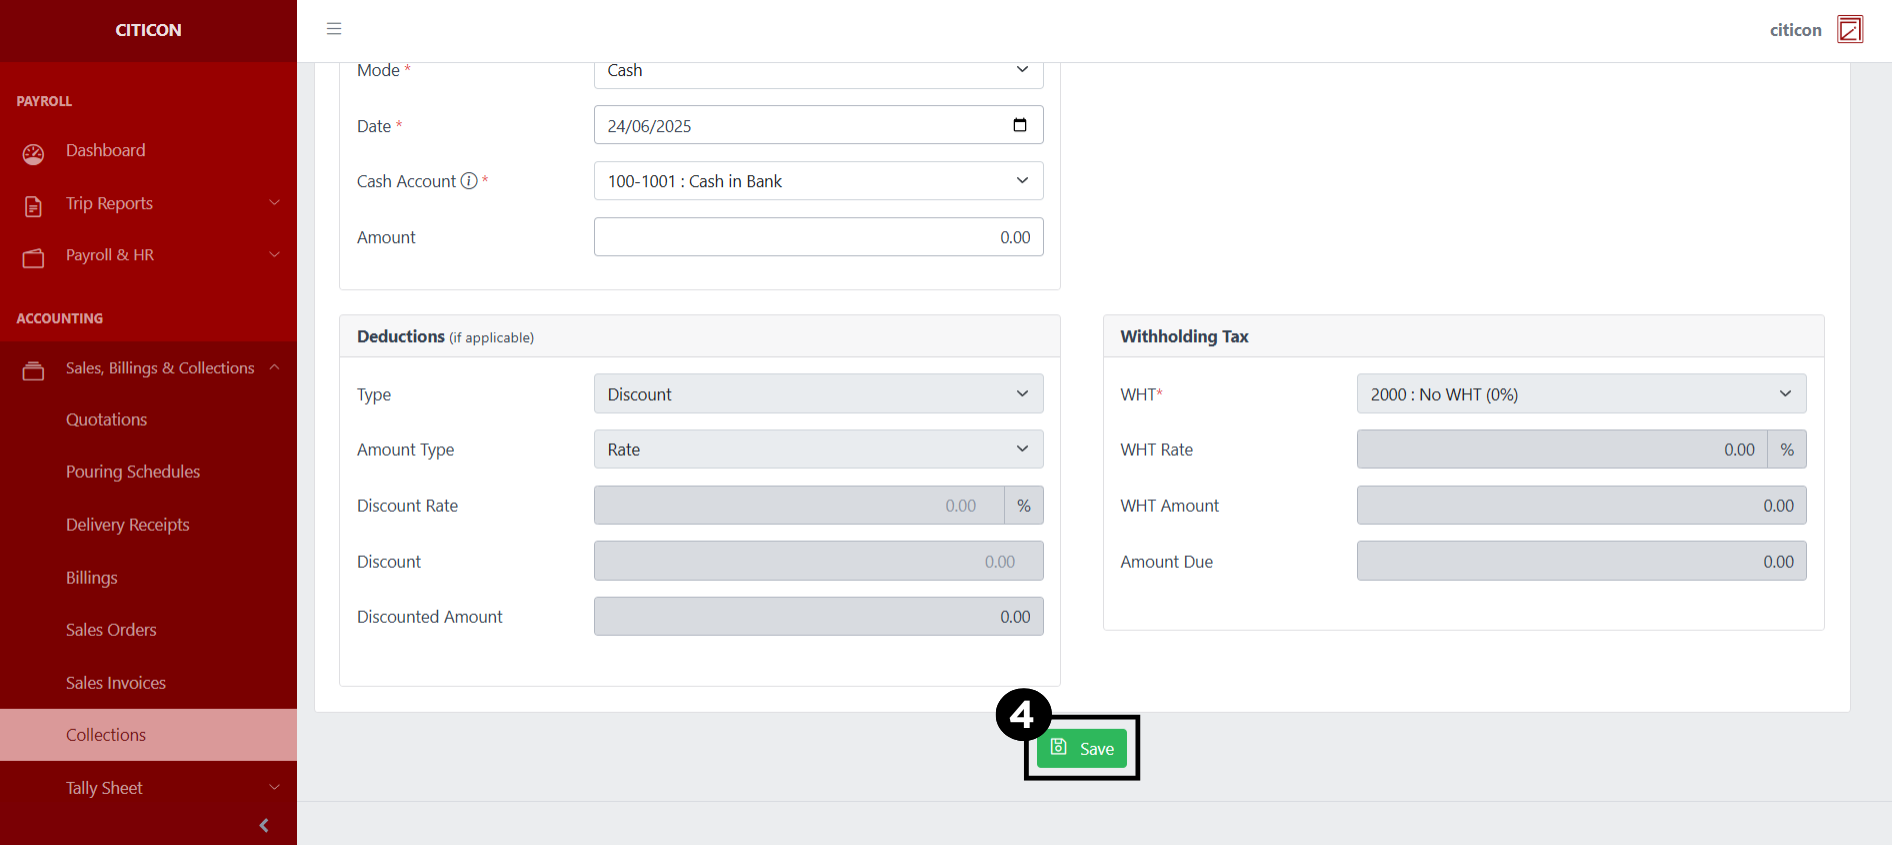
- Select the Save button to save your new entry.
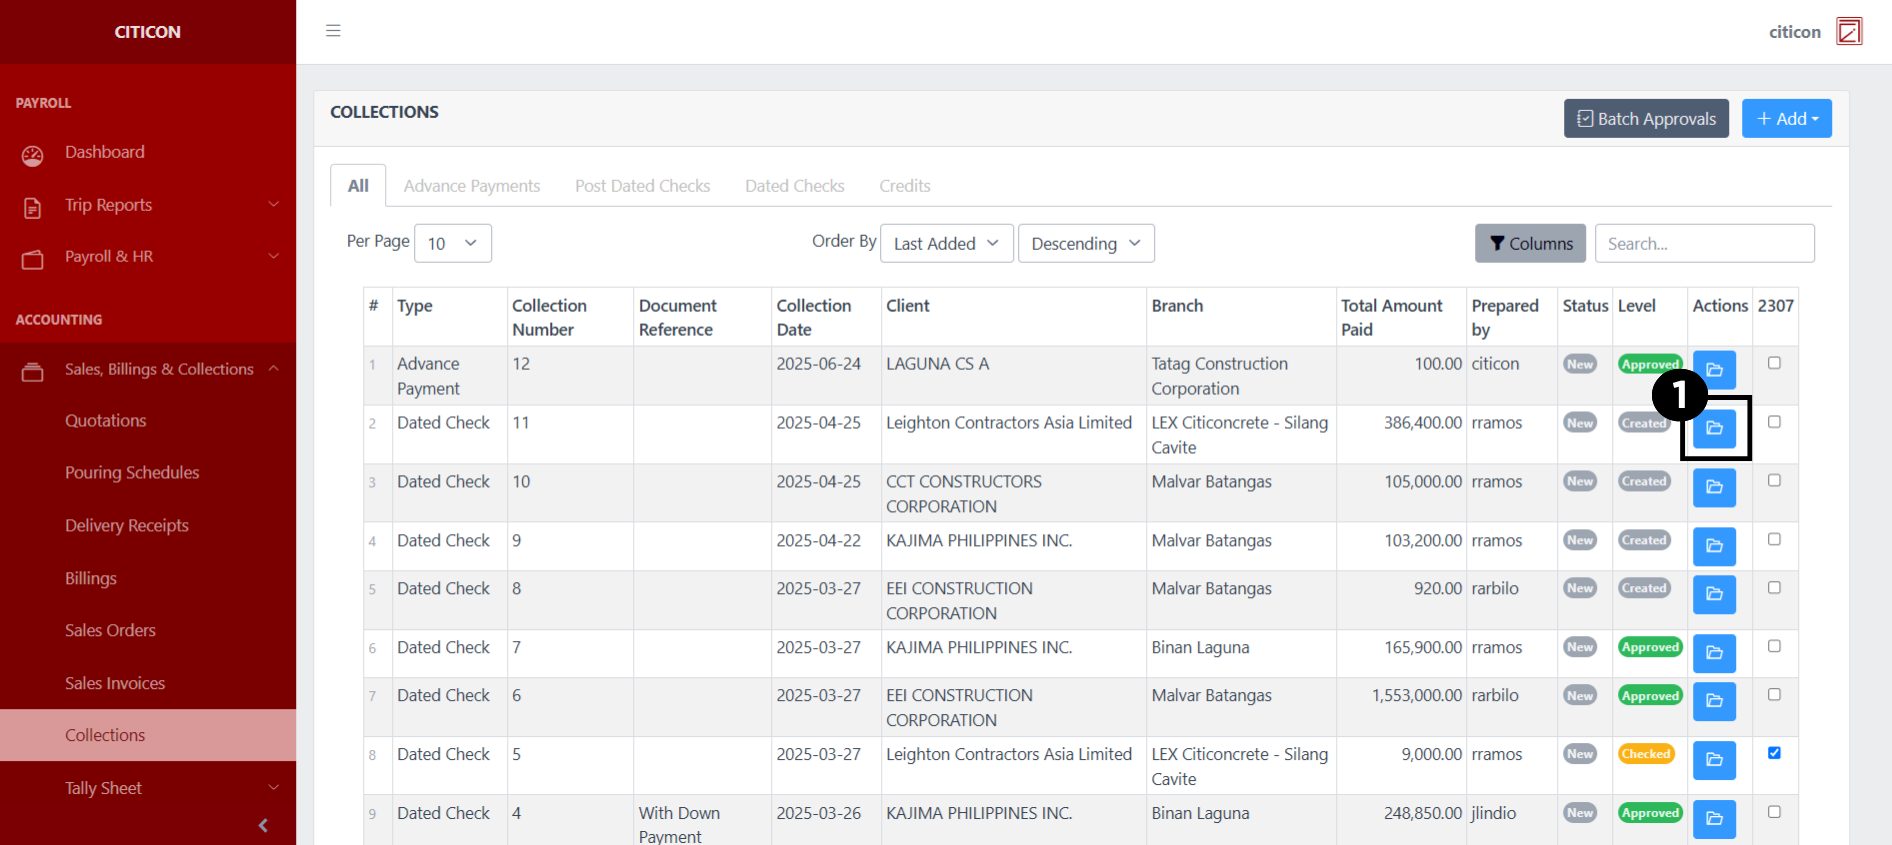
Show Entry
- Select the folder button to view an entry.
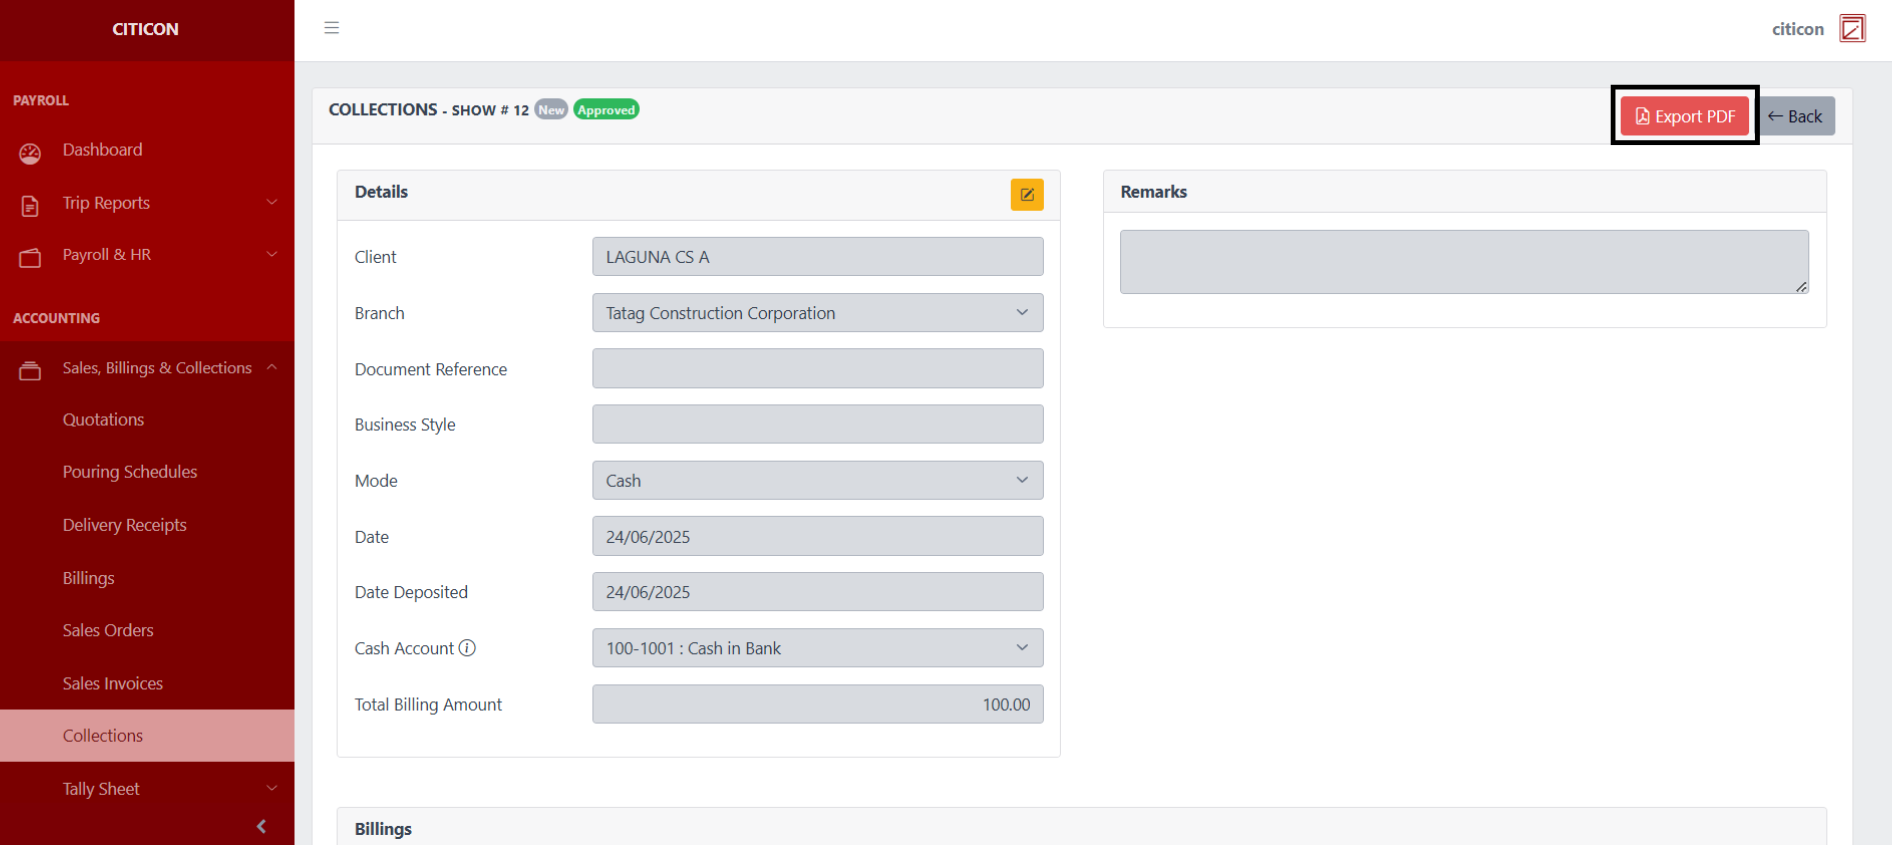
 Here you can view more specific details on the entry that you selected.
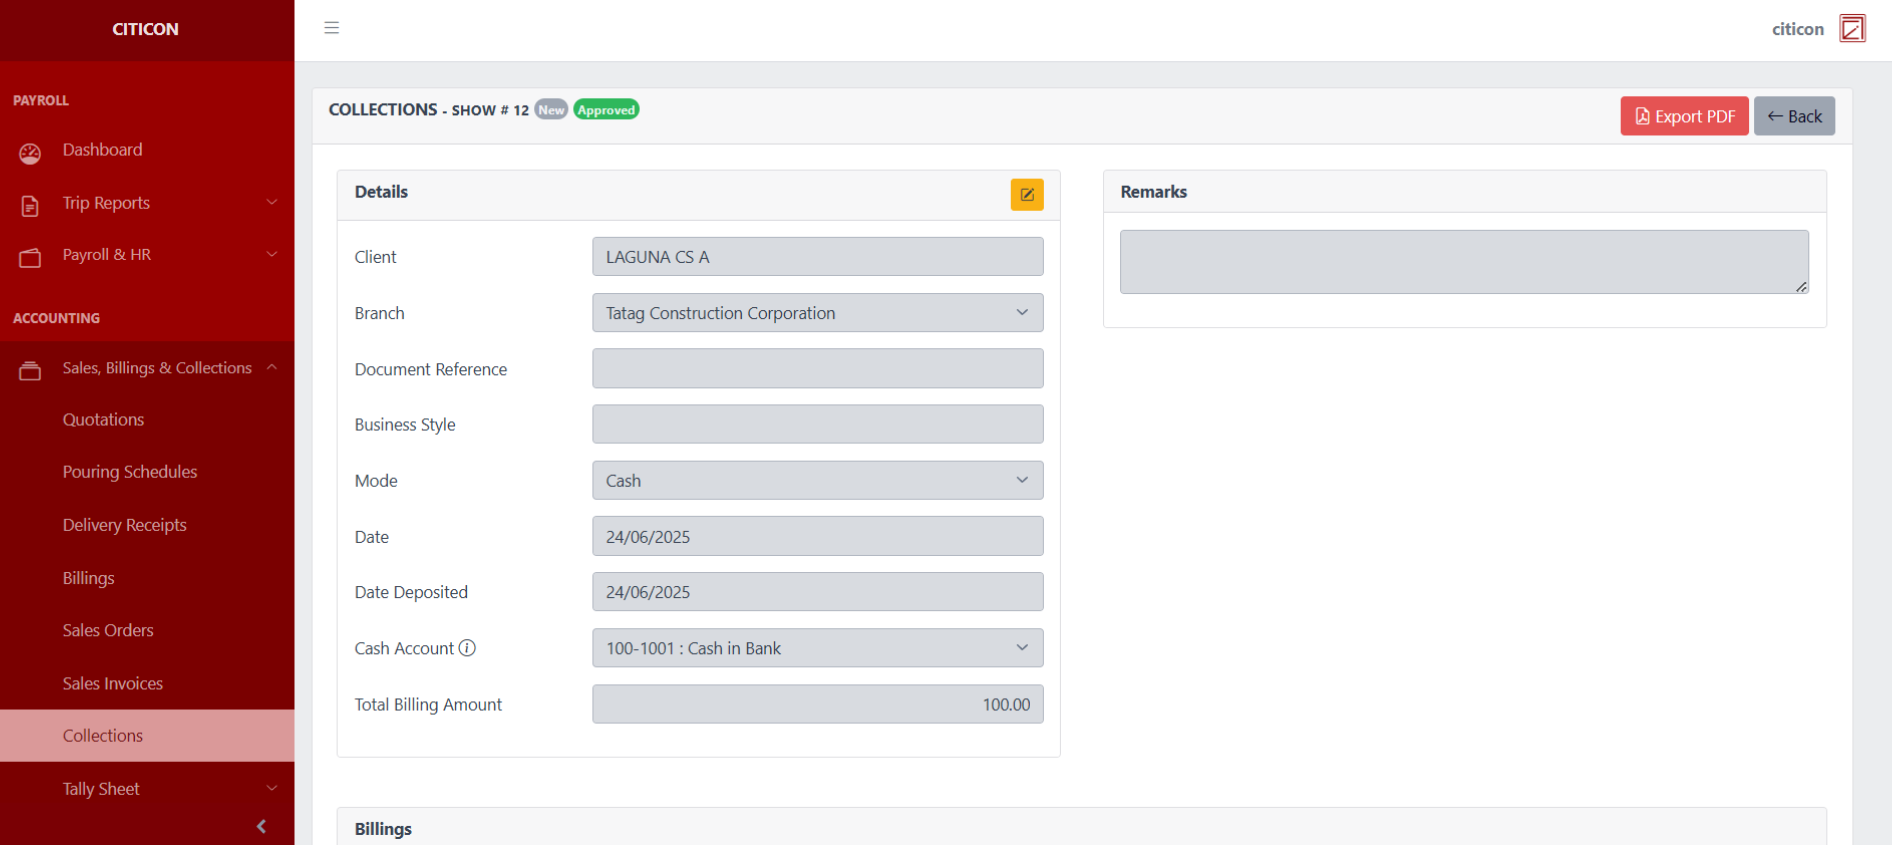 Select this button to Export the entry in PDF.
Update Entry
- Select the folder button of the entry which you want to edit.
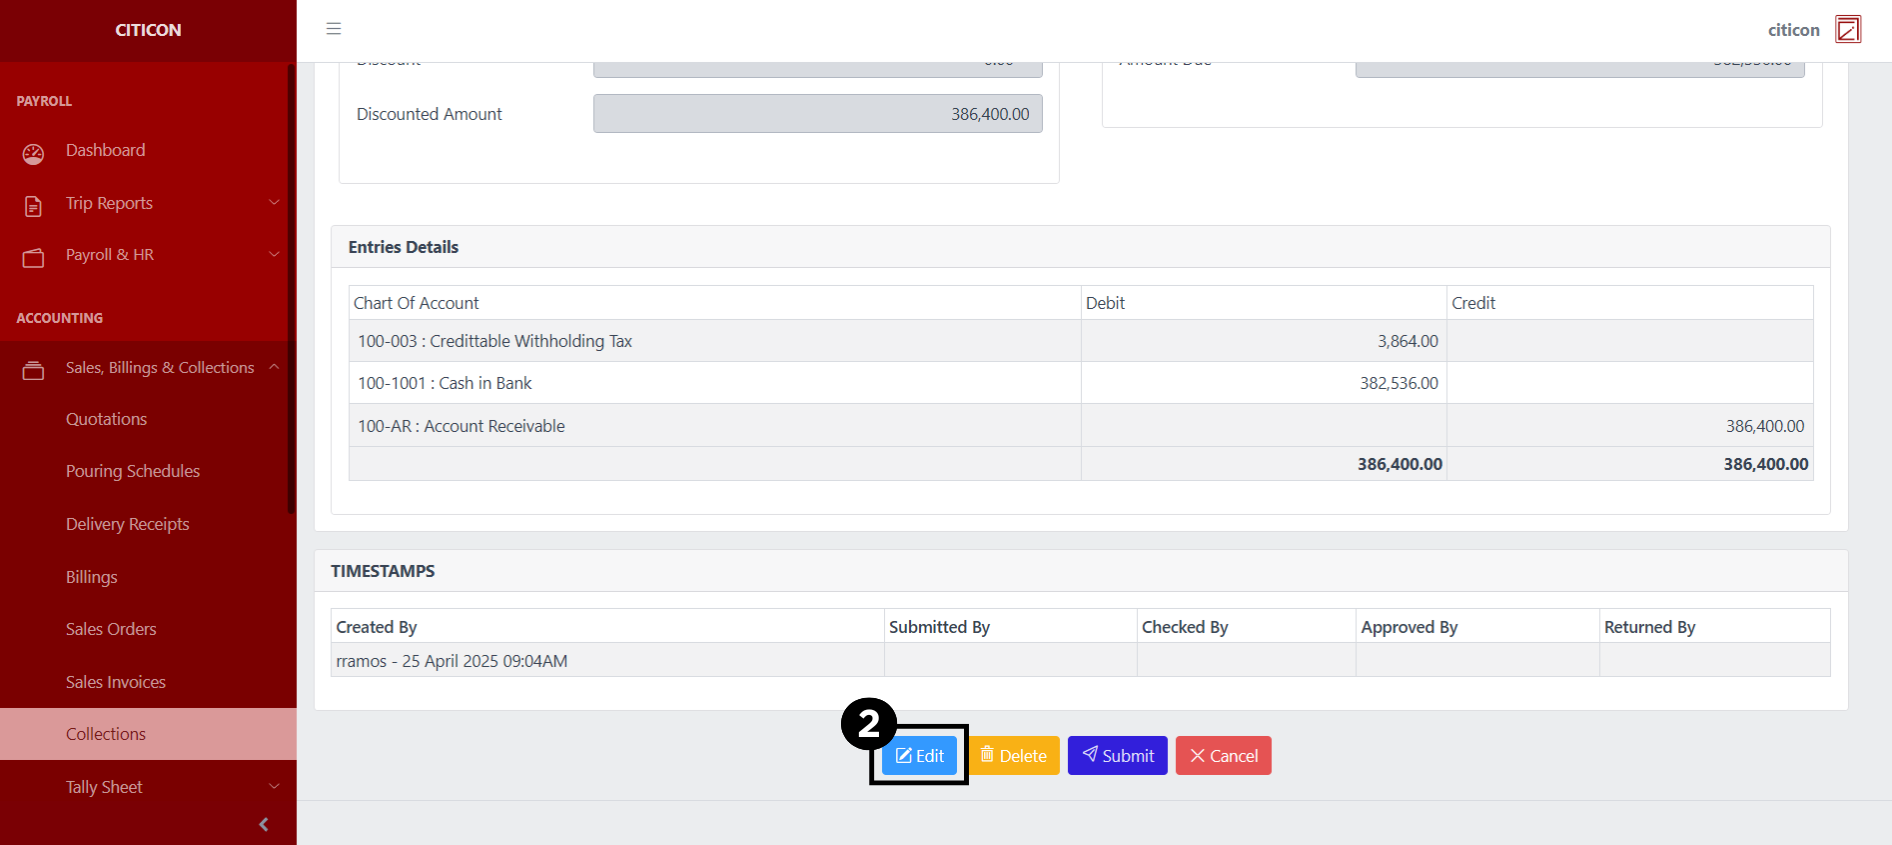
- Select the Edit button to update the details of the entry.
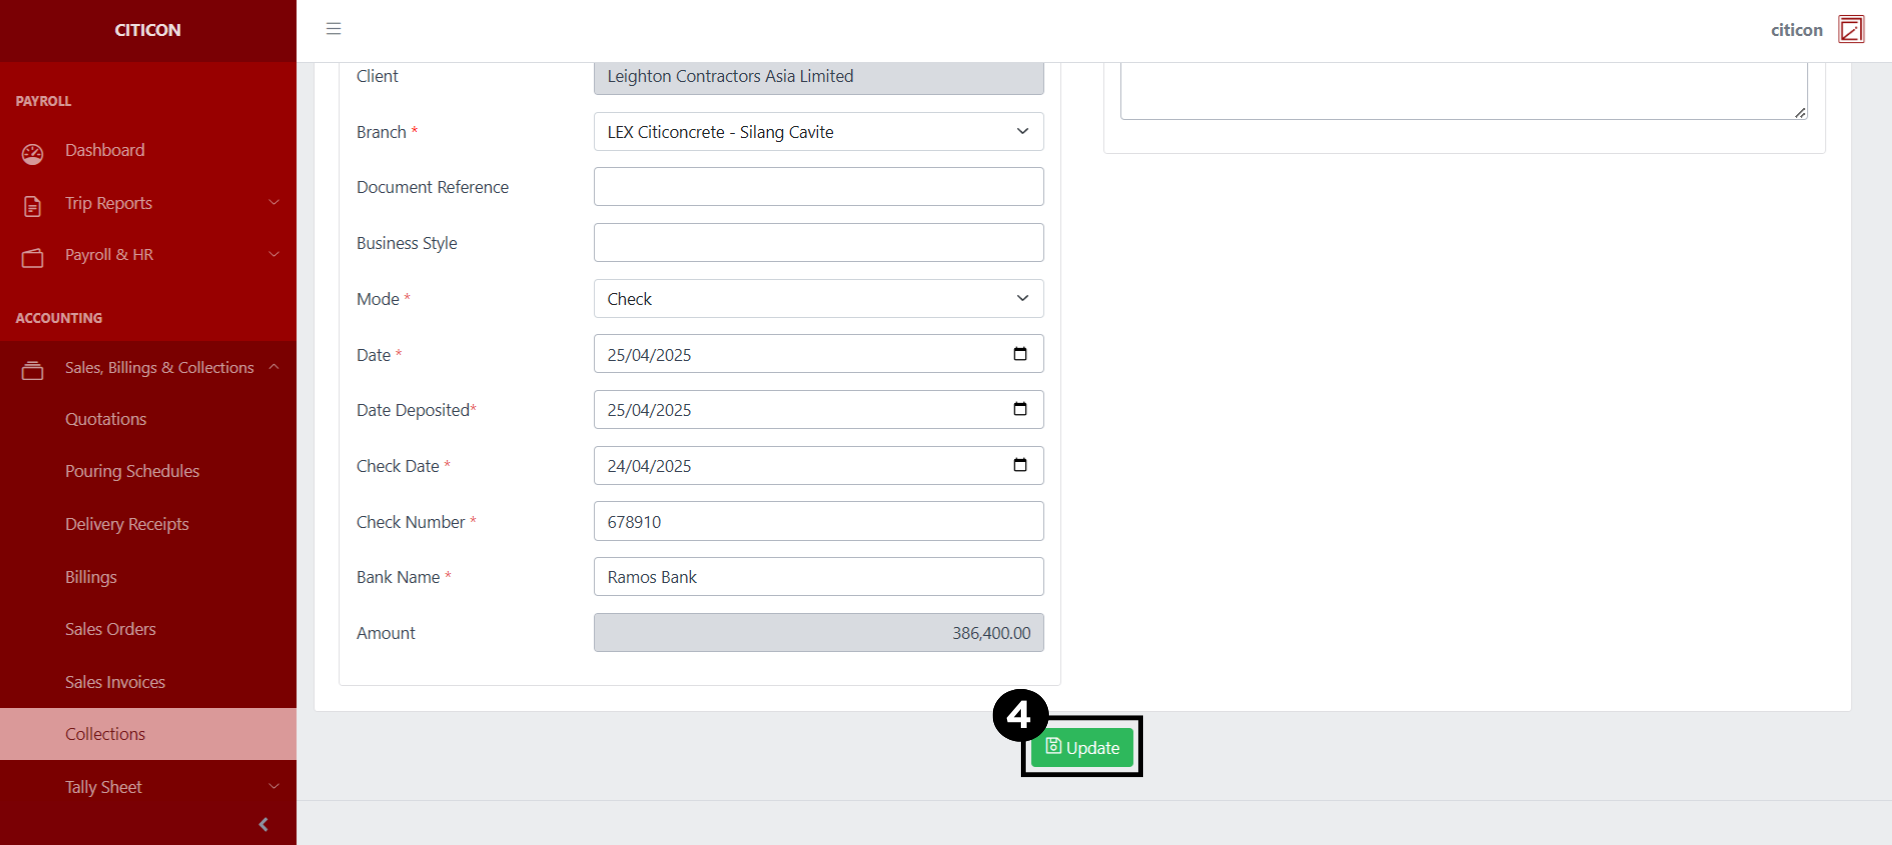
- Select a detail section which you want to edit, and enter the necessary changes.
All fields with an asterisk (*) are required to be filled up.

- Select the Update button to save the changes you have made.
Submit Entry
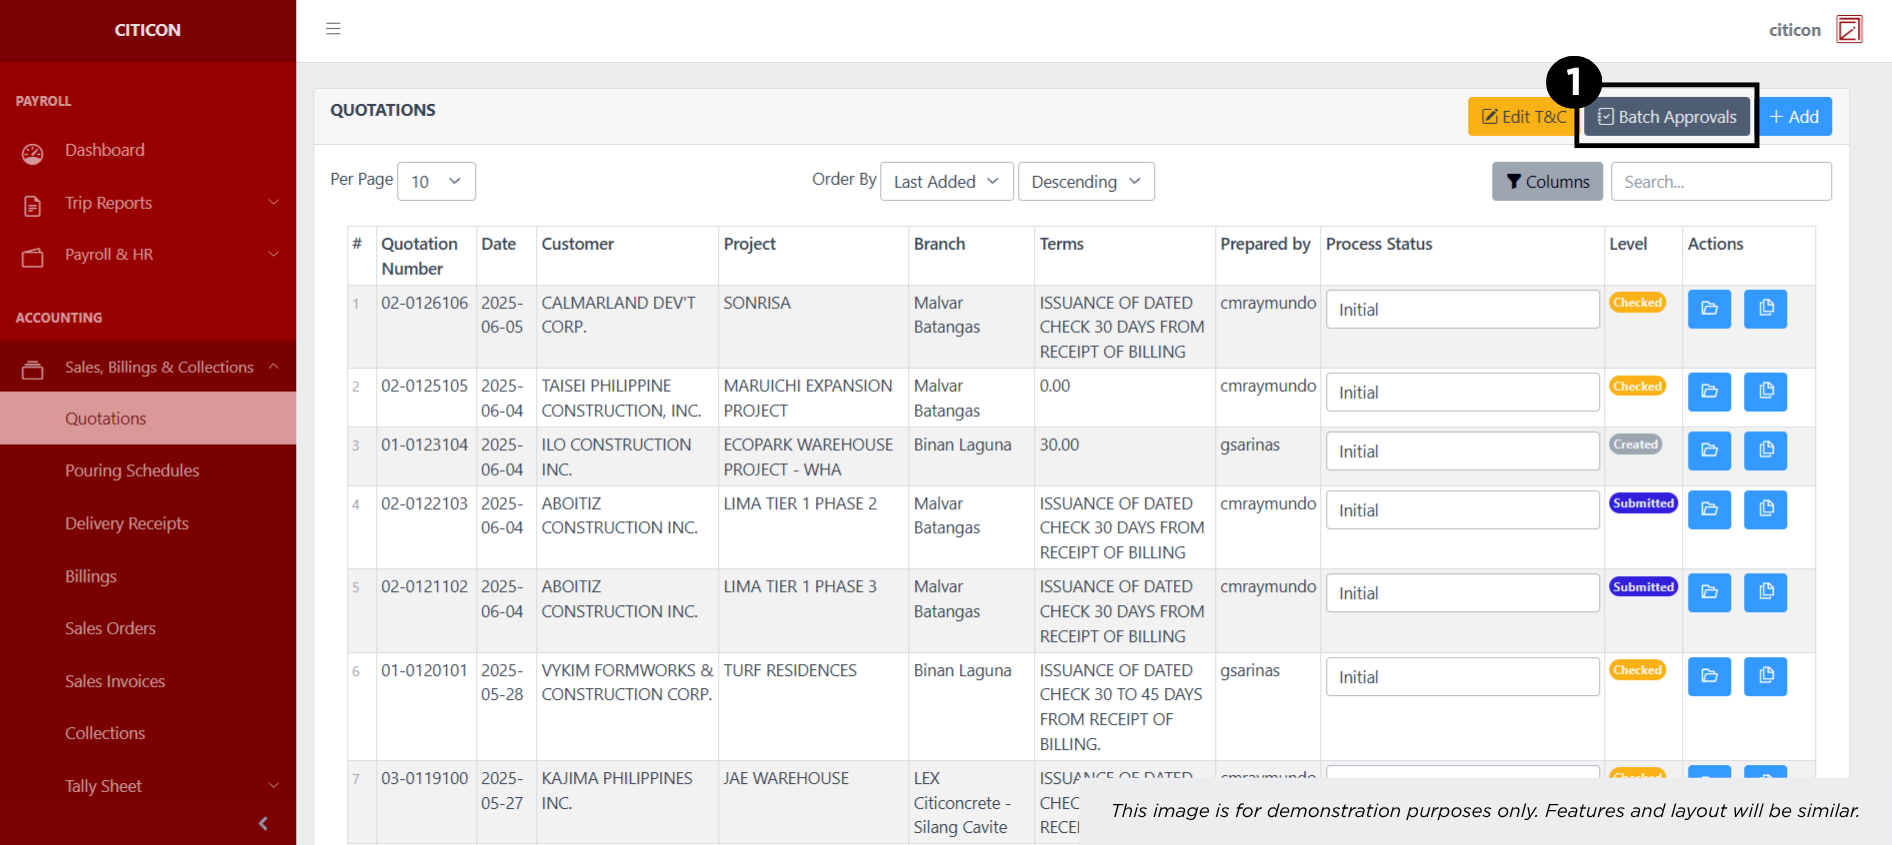
- Select the Batch Approvals button to submit an entry.
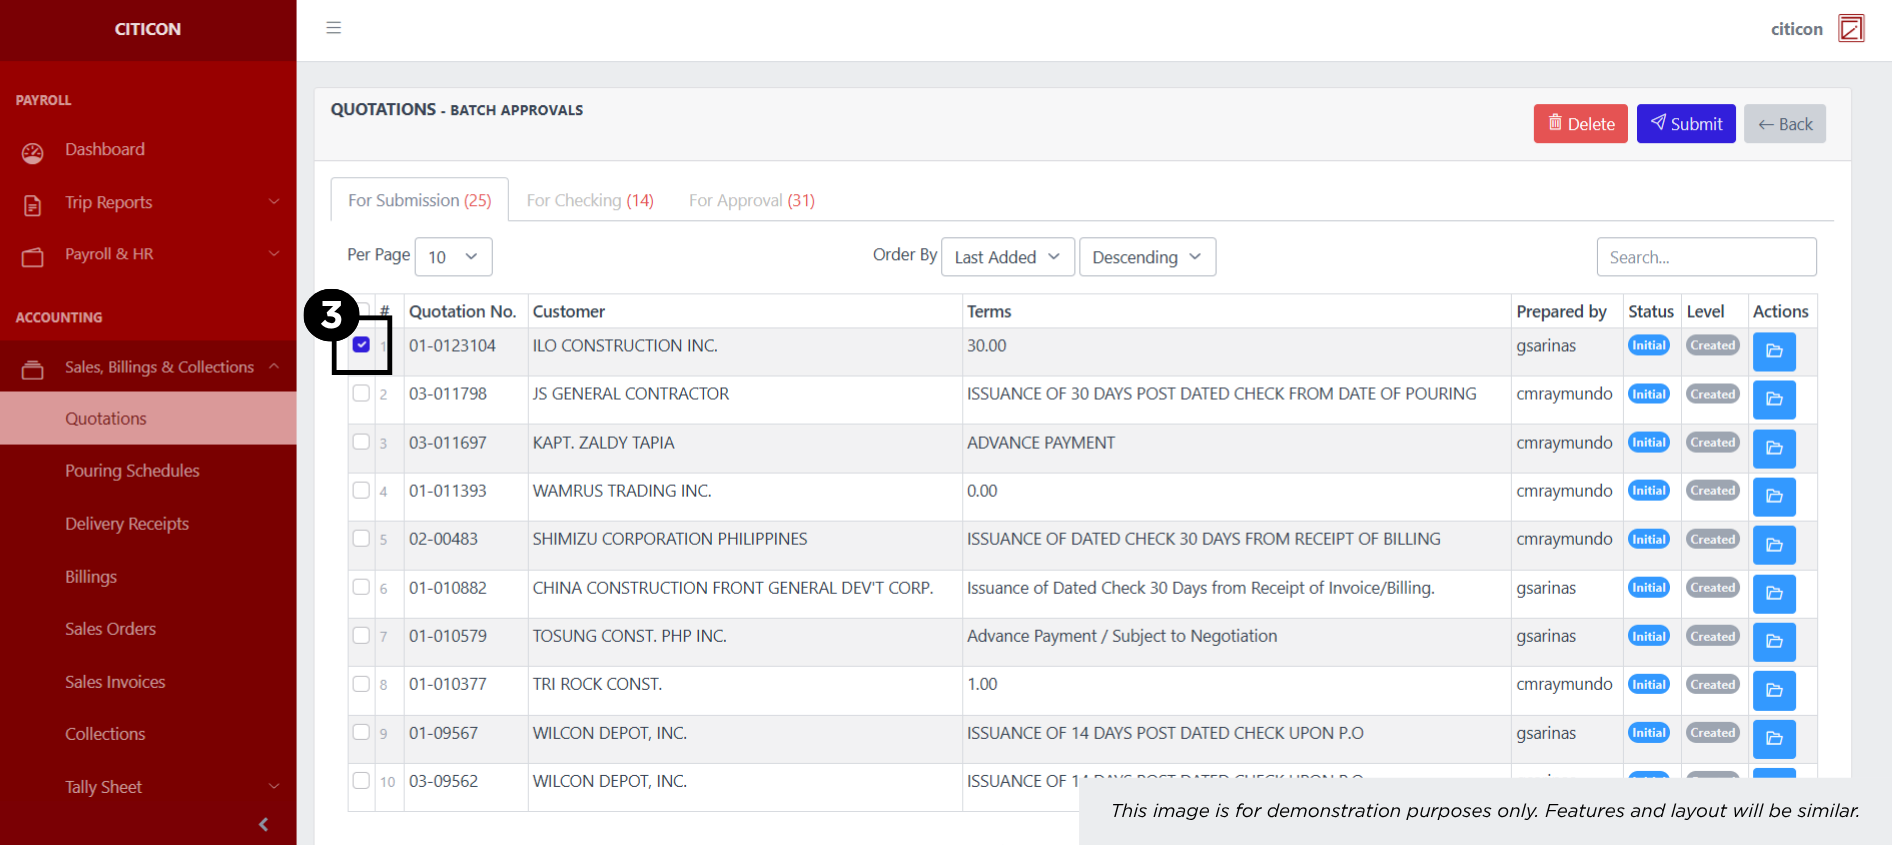
- Select the For Submission tab.

- Select the entry that you want to submit.
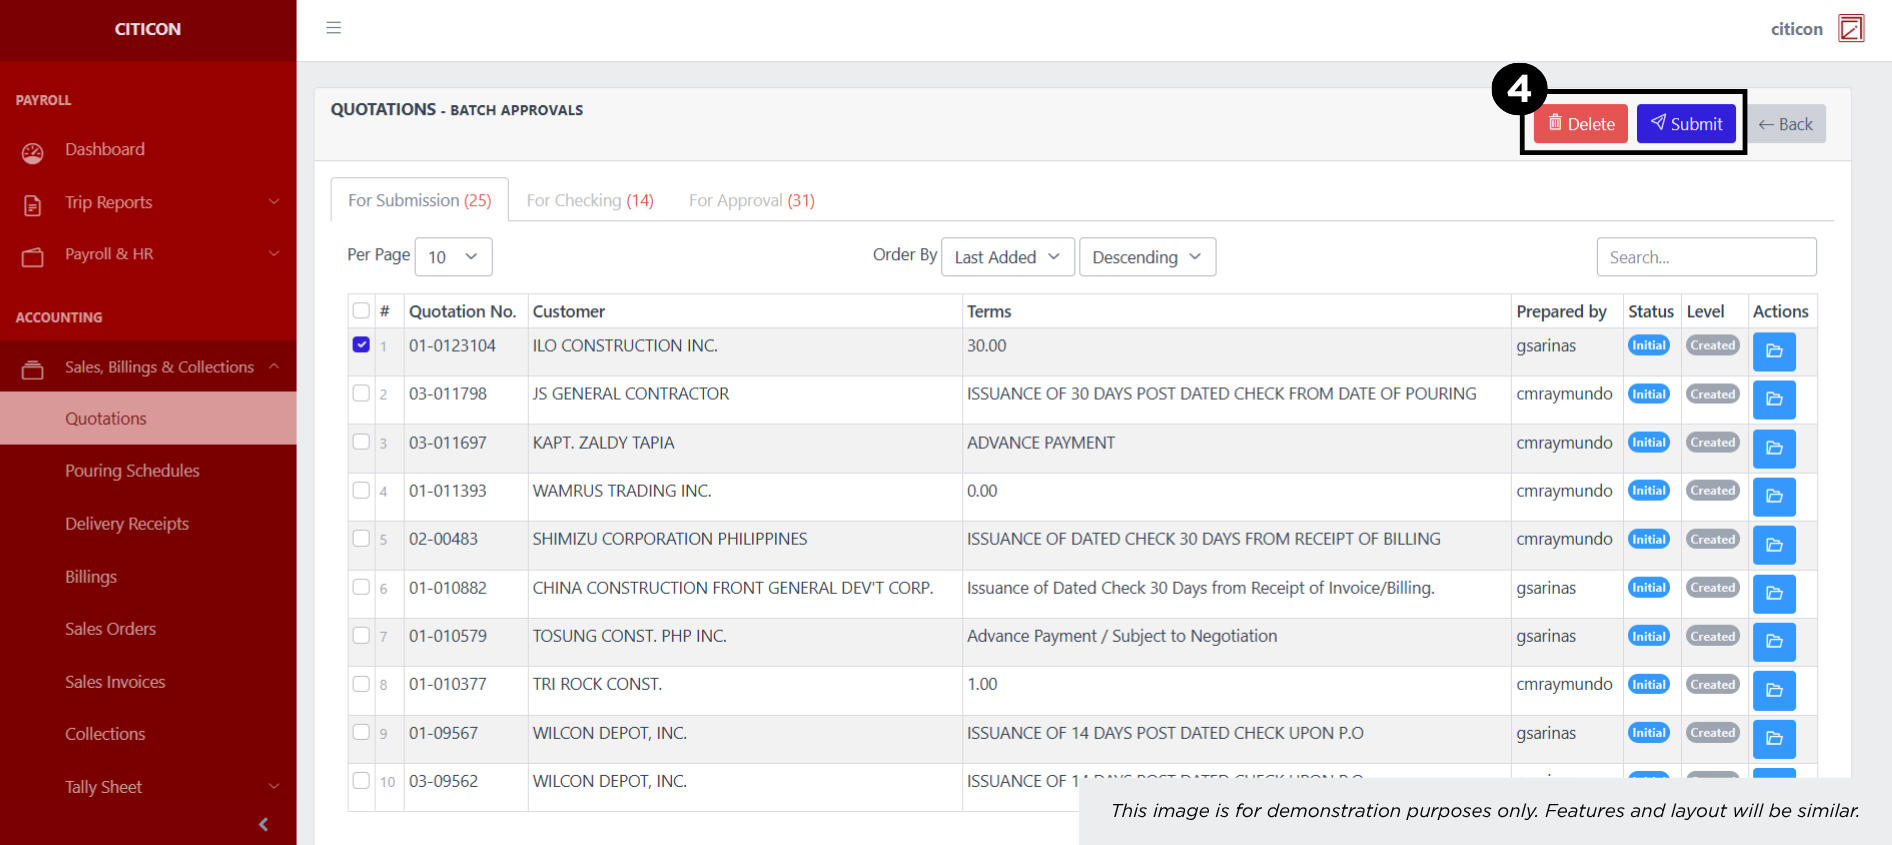
- Select the Submit button to submit the entry. In cases where you want to delete a entry, select the entry you want to delete, then select the Delete button.
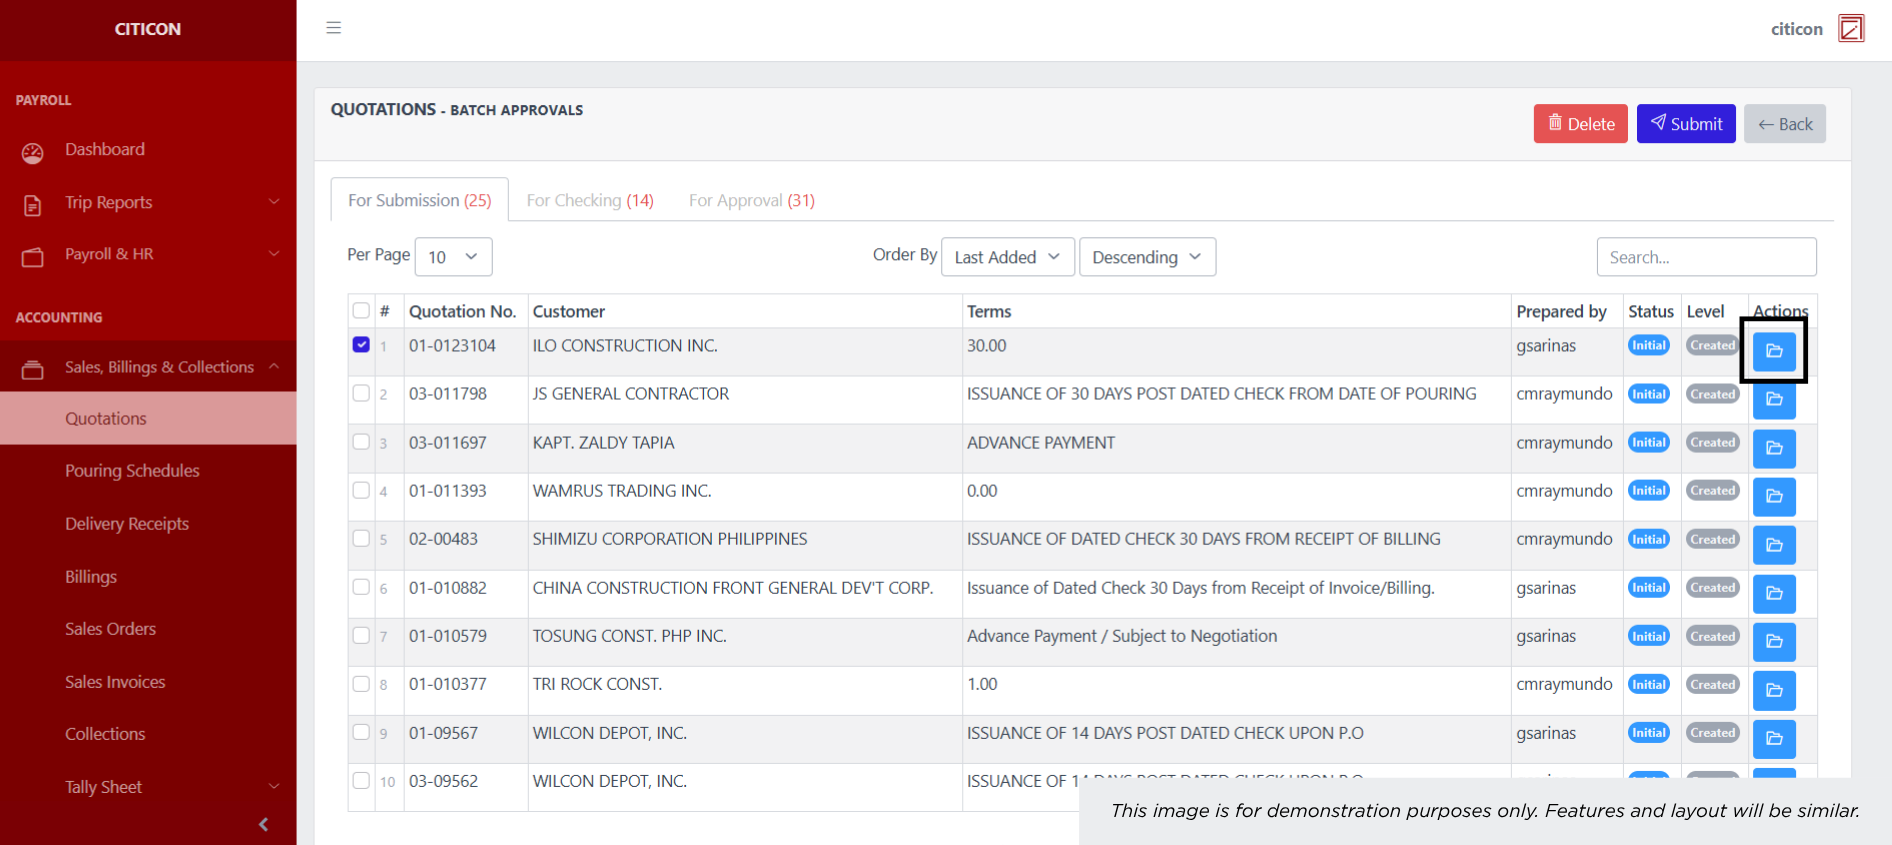
 To view the details of an individual entry, select the folder button and from here, you may either Edit, Submit, or Cancel the entry.
Check Entry
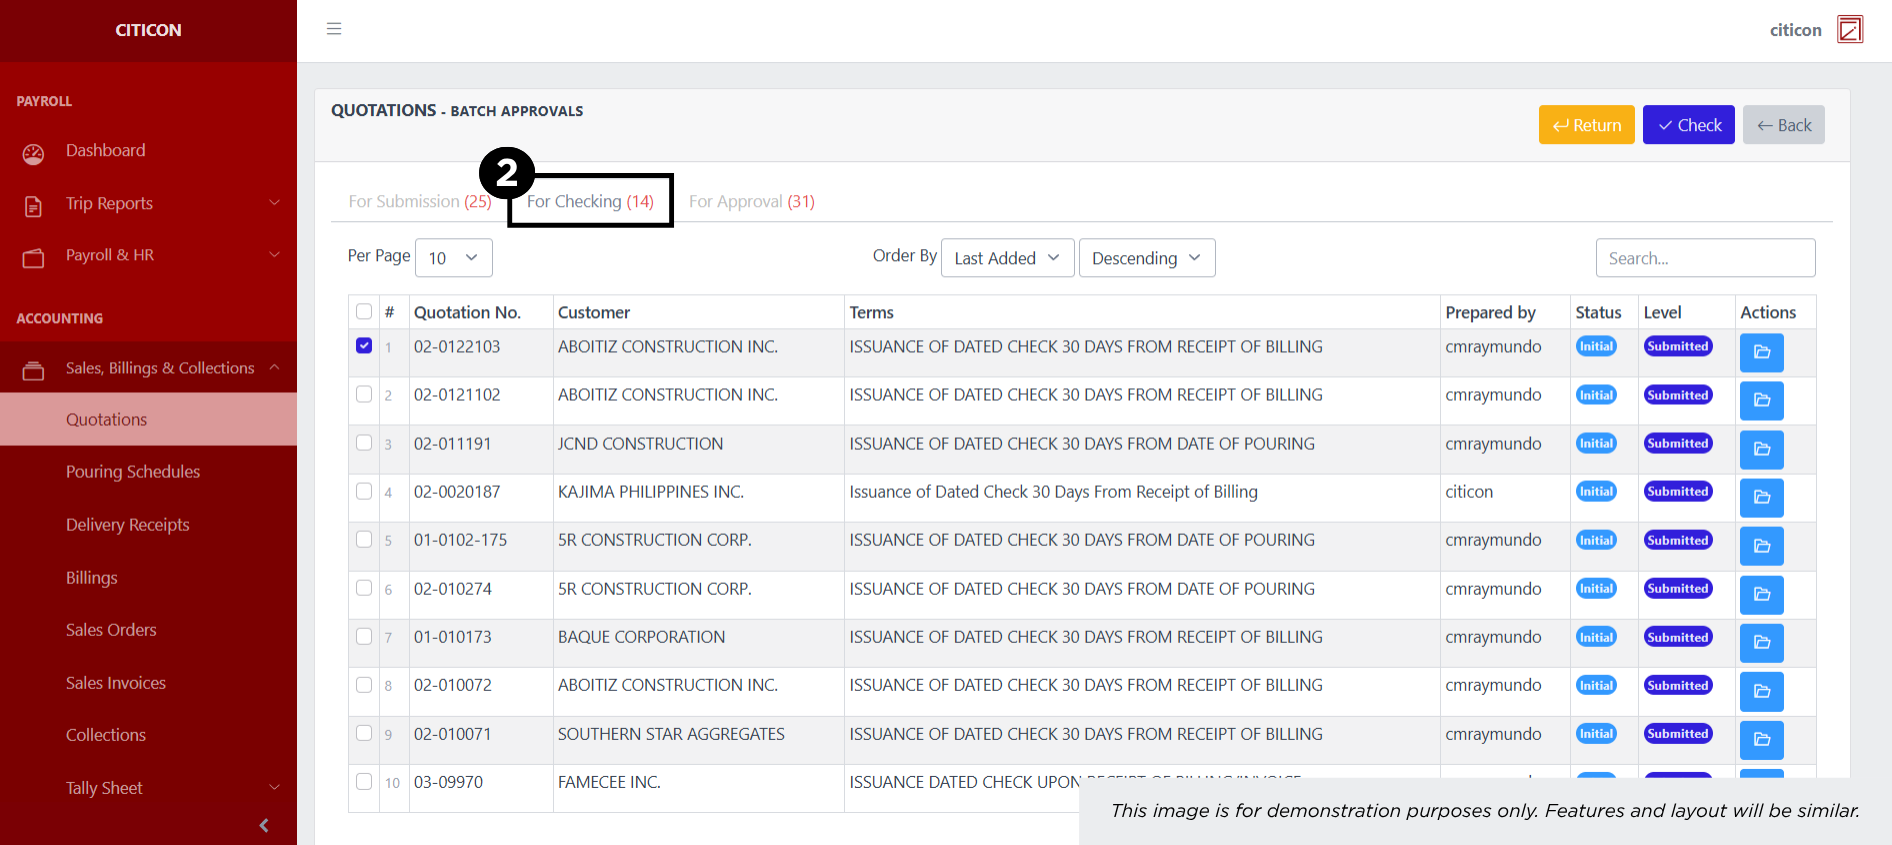
- Select the Batch Approvals button to check an entry.

- Select the For Checking tab.
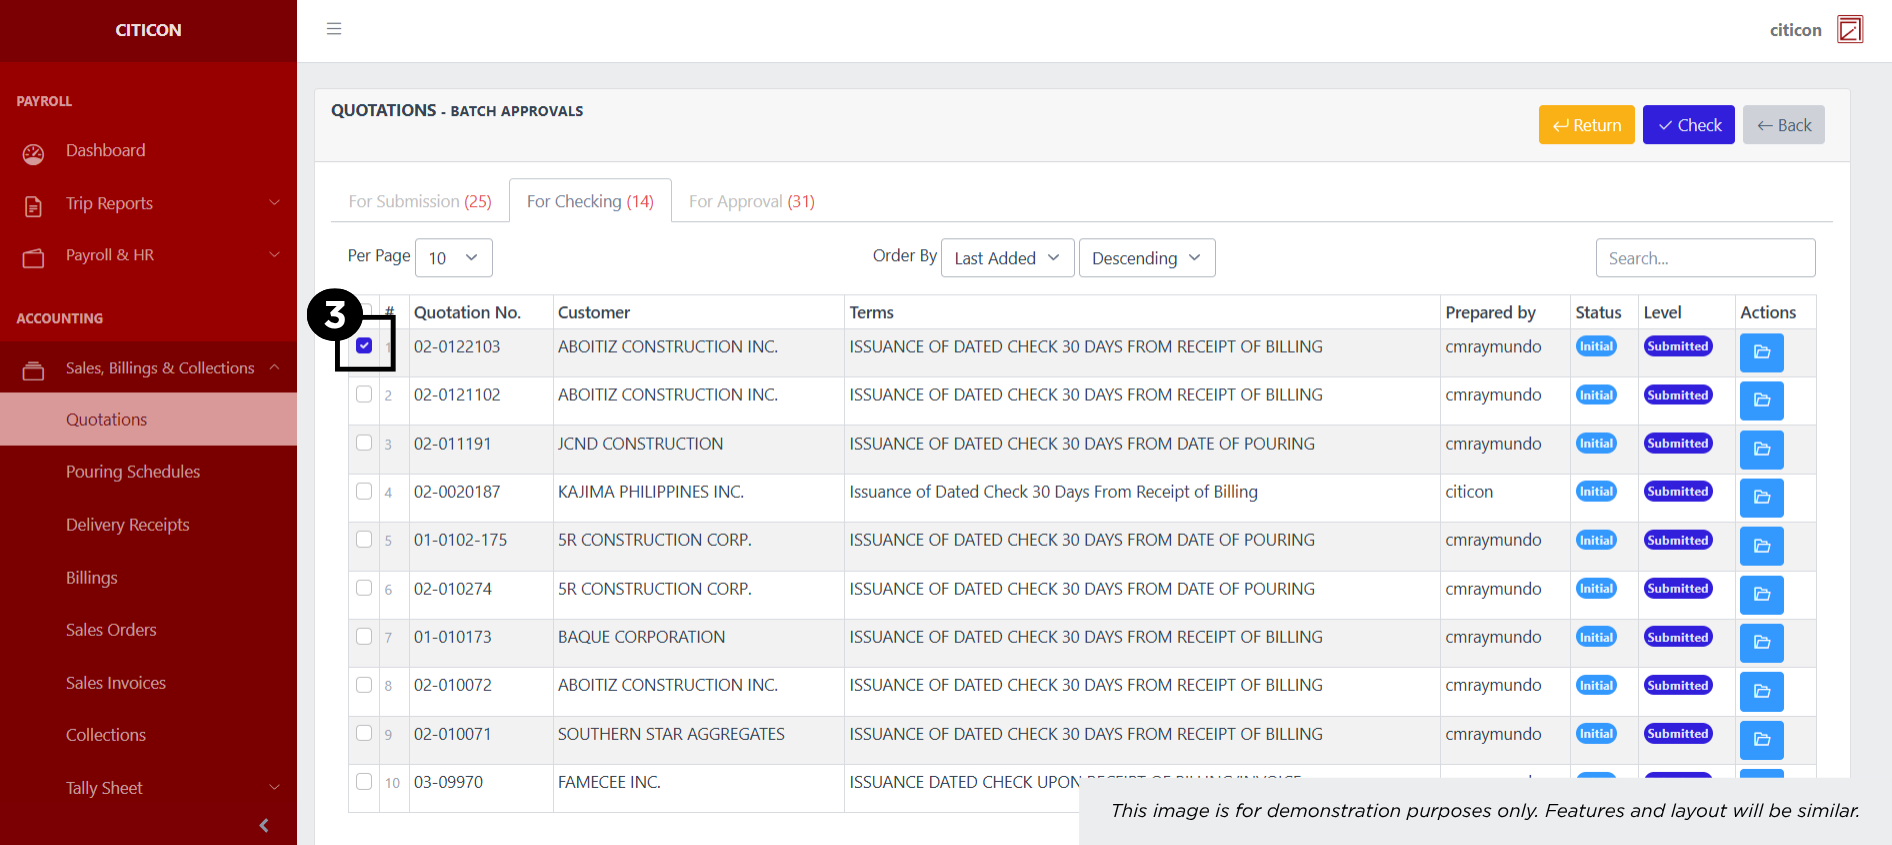
- Select the entry that you want to be checked.
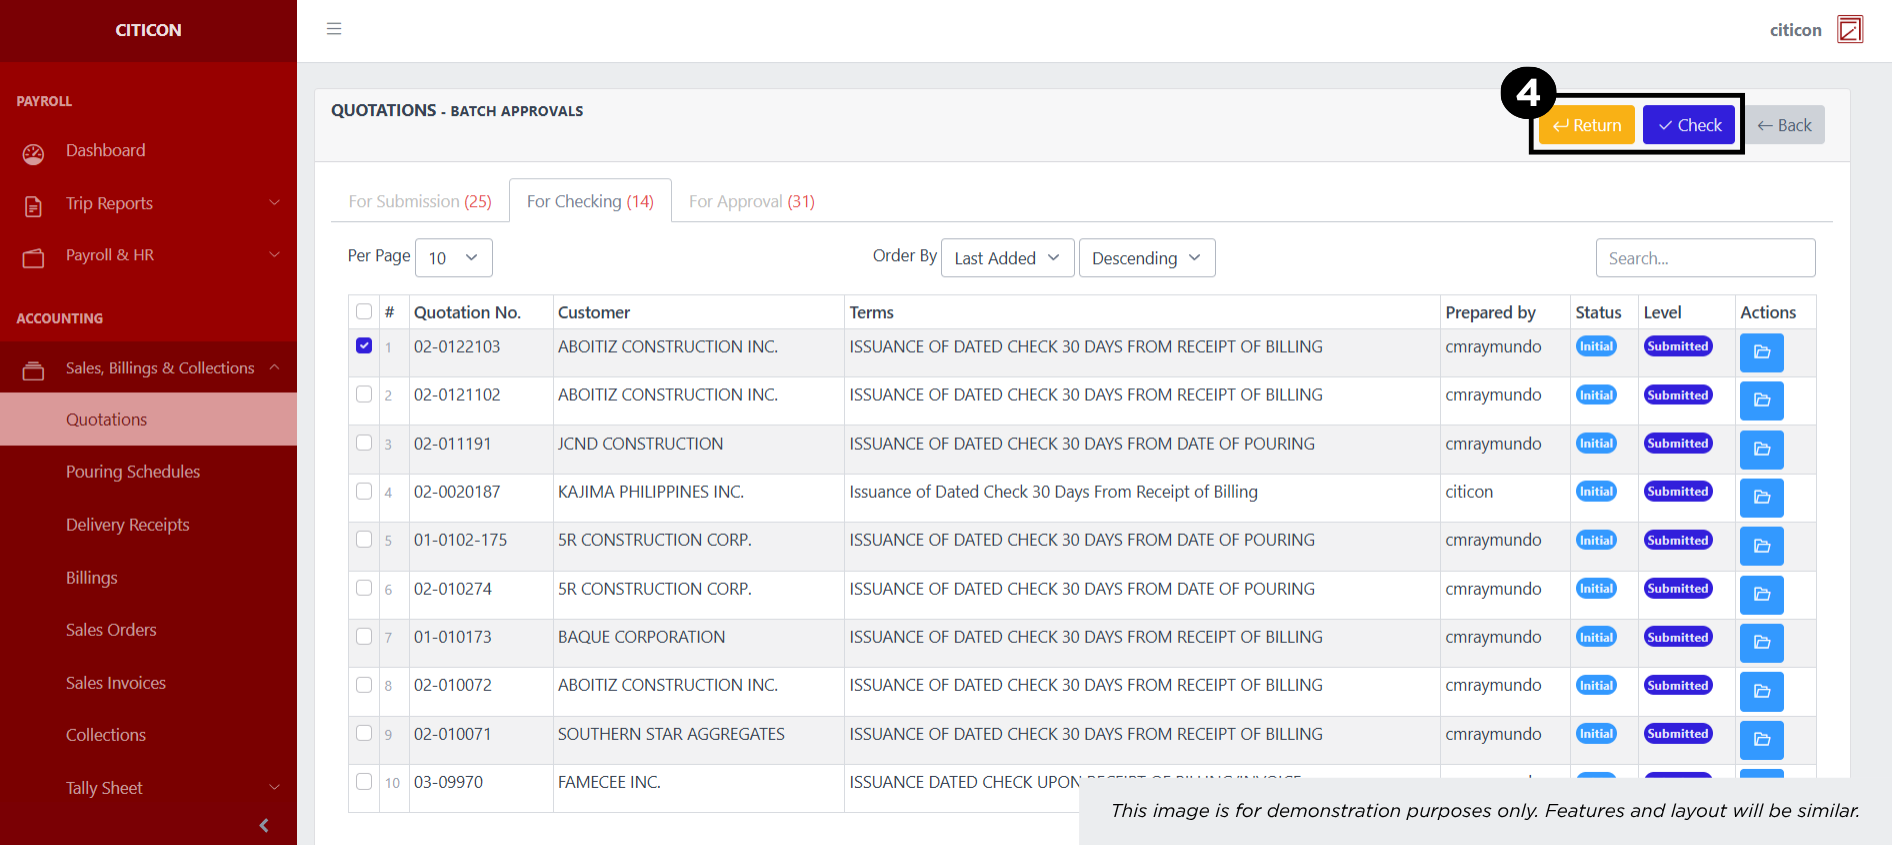
- Select the Check button to check the entry. In cases where you want to return a entry, select the entry you want to return, then select the Return button.
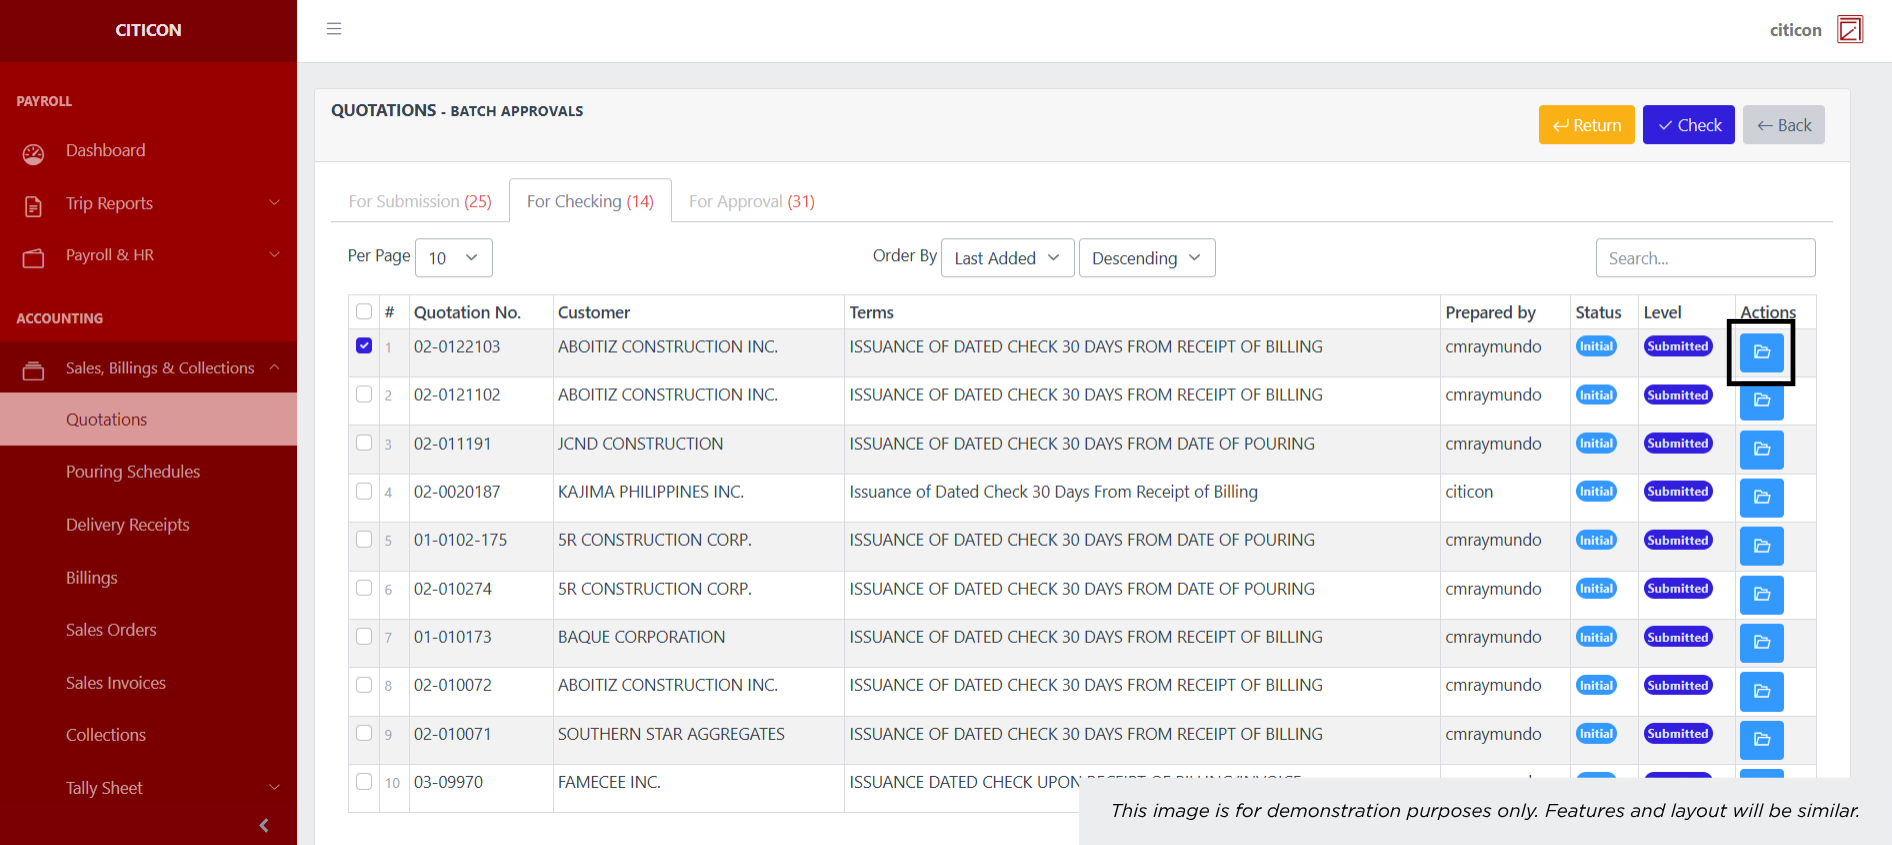
 To view the details of an individual entry, select the folder button and from here, you may either Edit, Delete, Check, or Cancel the entry.
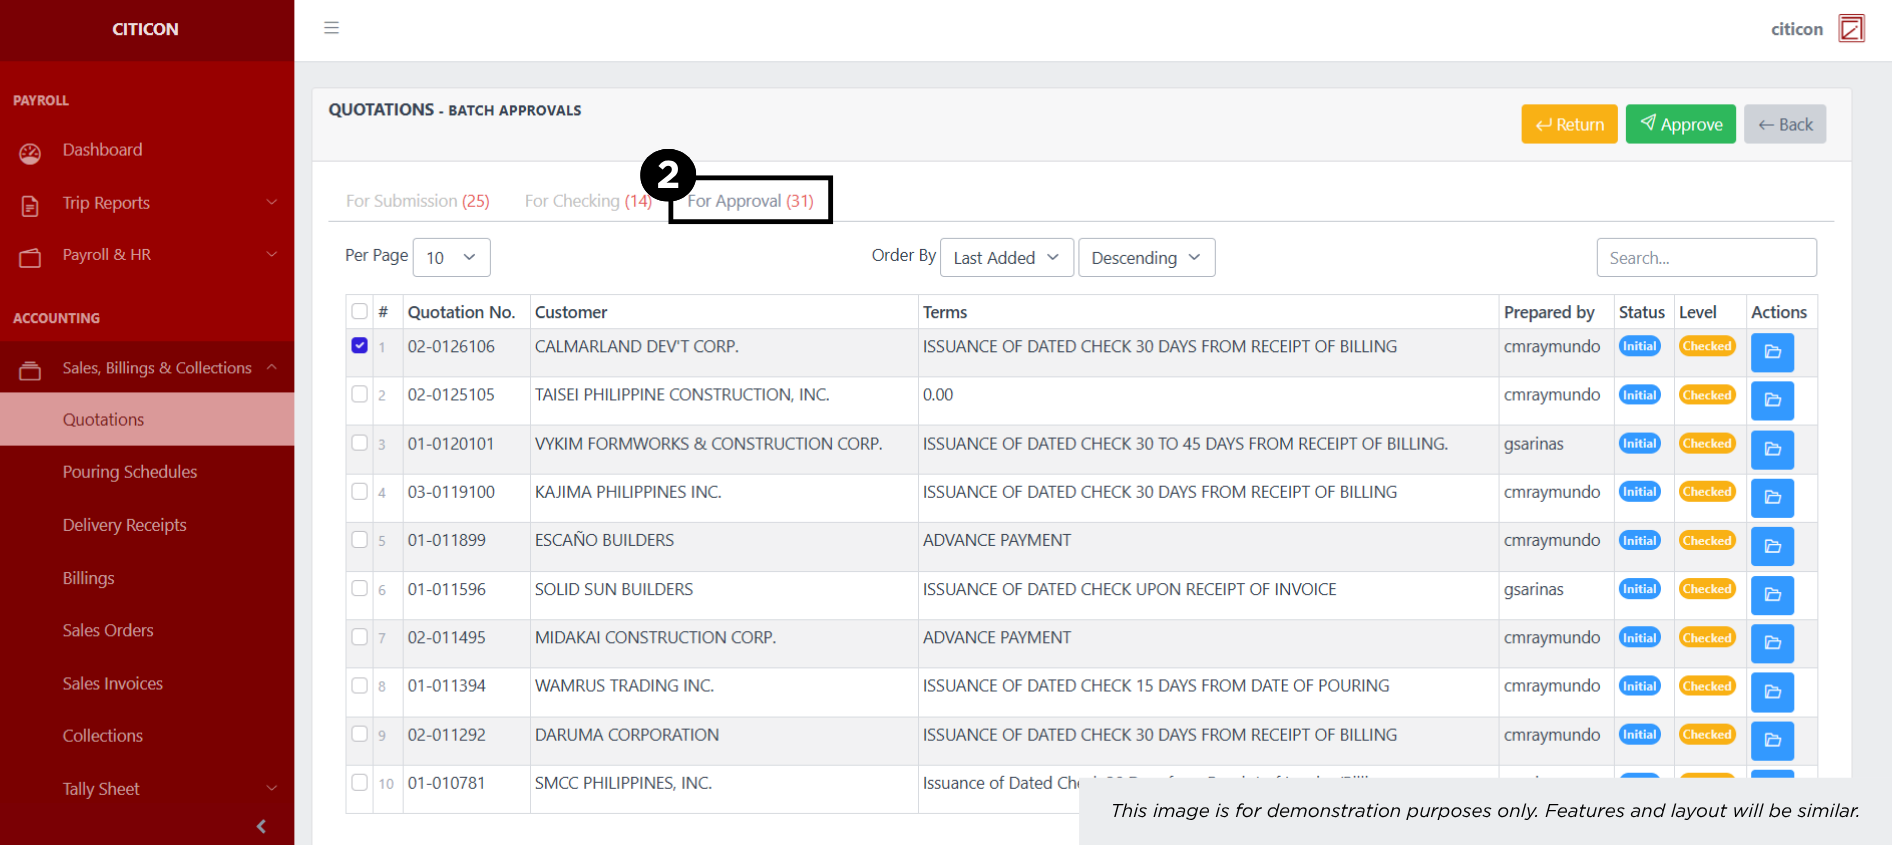
Approve Entry
- Select the Batch Approvals button to approve a entry.

- Select the For Approval tab.
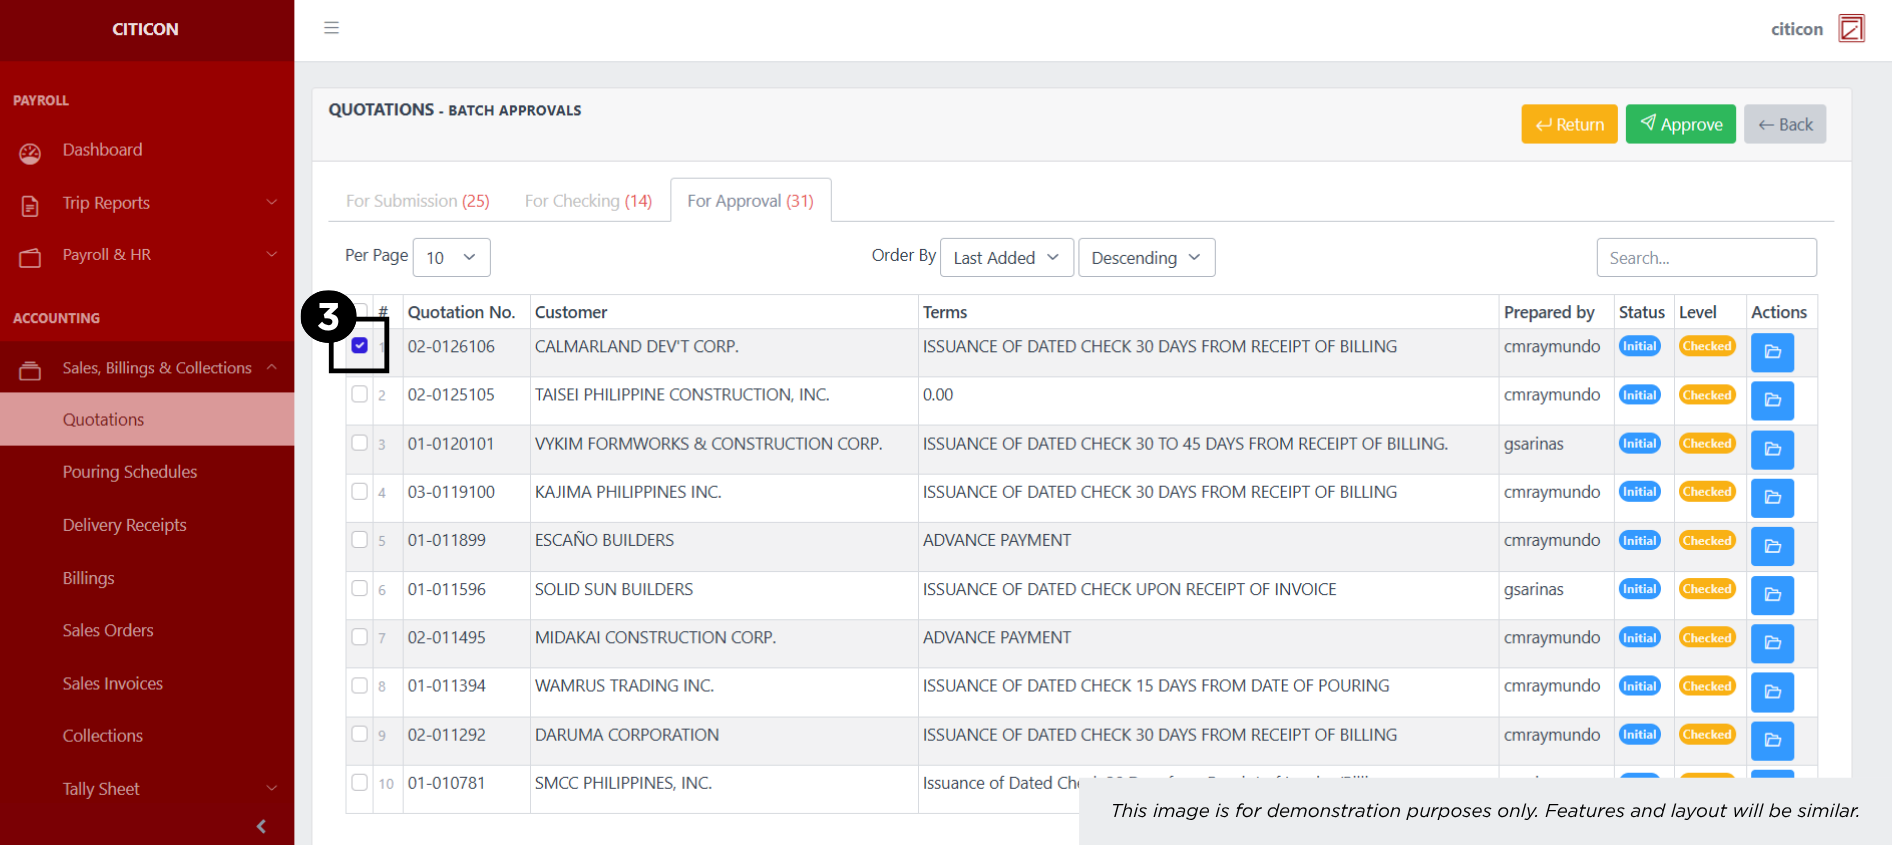
- Select the entry that you want to approve.
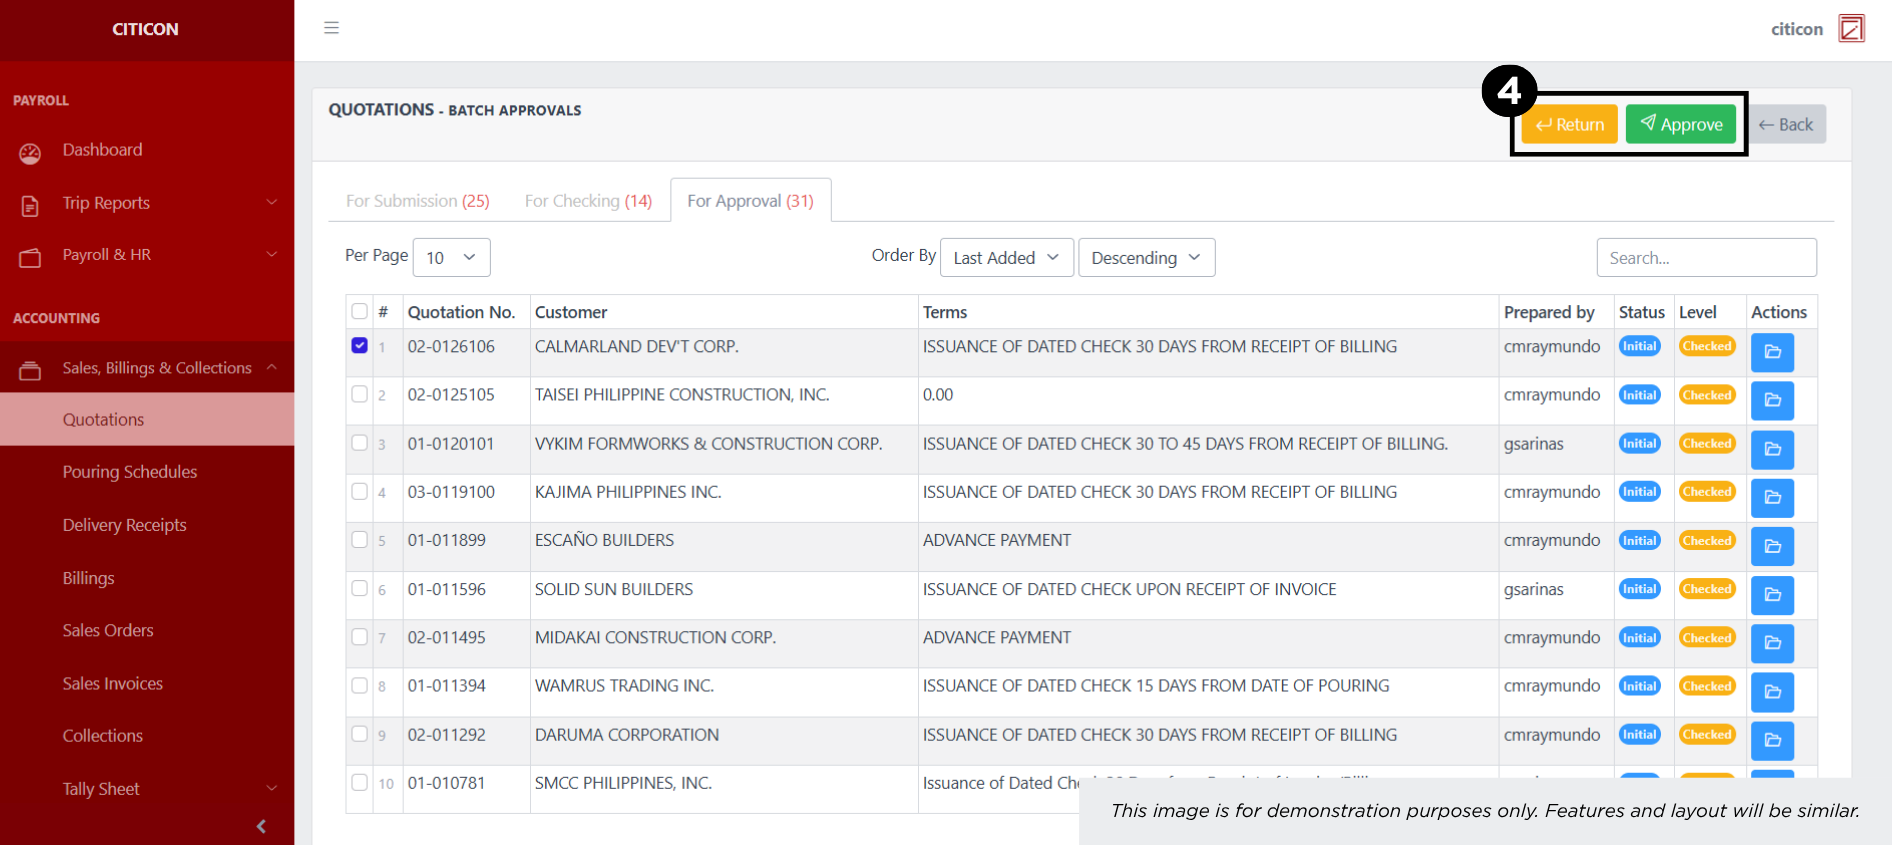
- Select the Approve button to approve the entry. In cases where you want to return a entry to submission section, select the entry you want to return, then select the Return button.
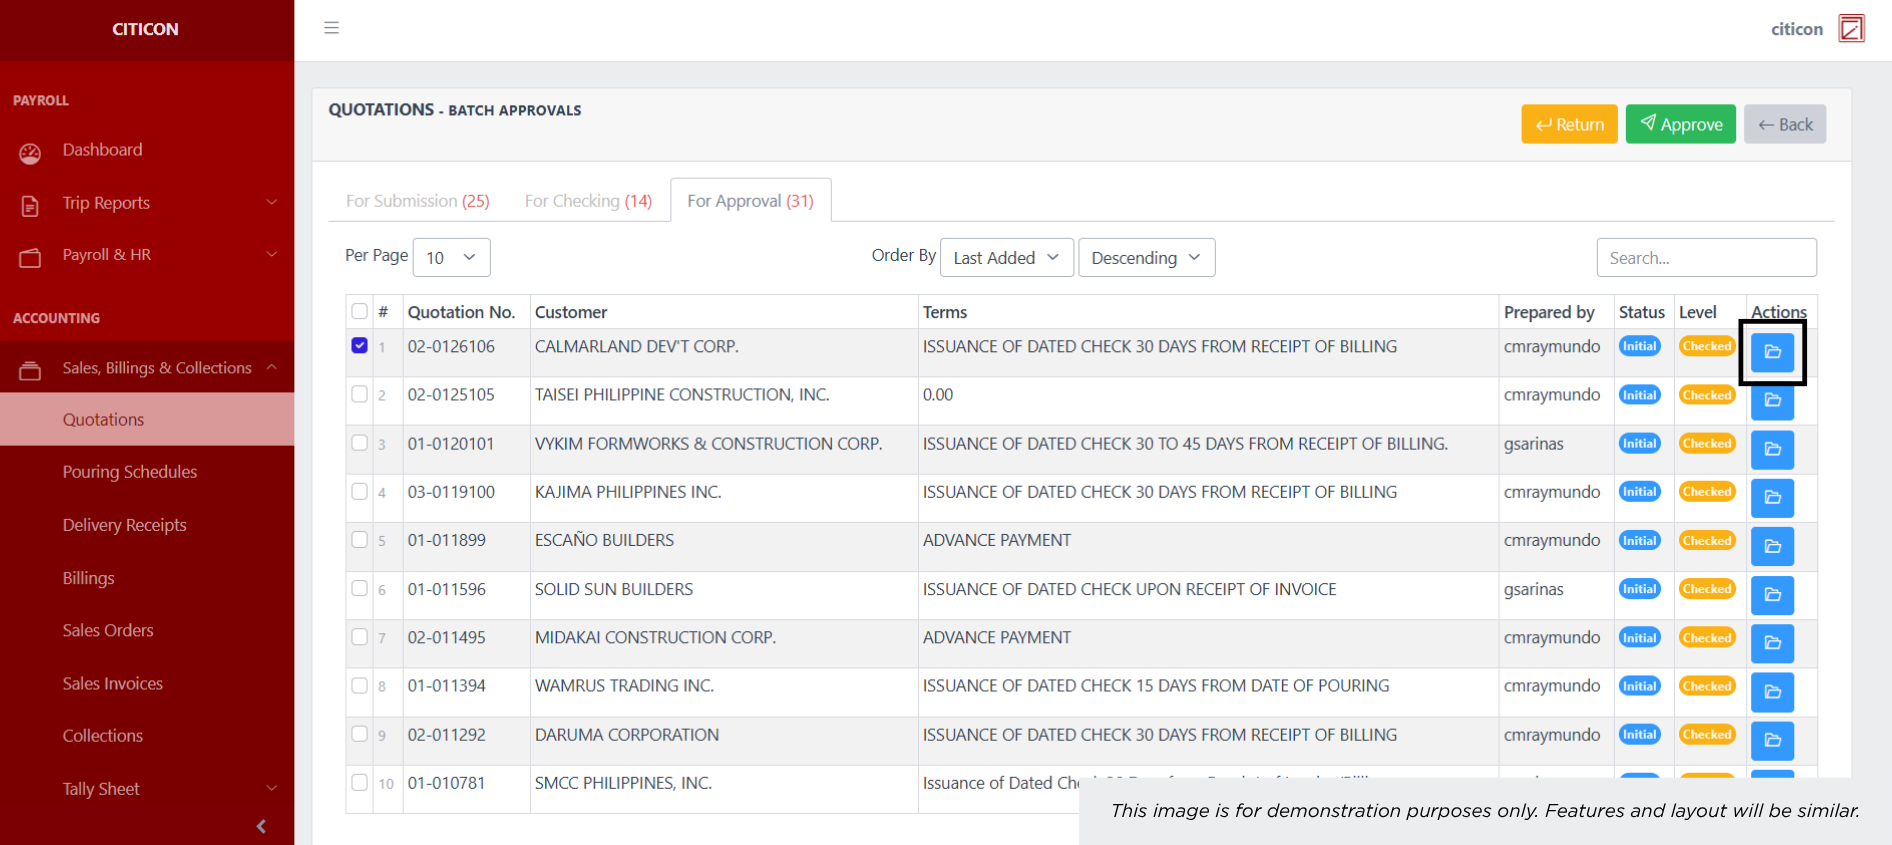
 To view the details of an individual entry, select the folder button and from here, you may either Return, Approve, or Cancel the entry.
Explore Citicon Payroll and Accounting System: Accounting - Tally Sheet (Per Day)