Sales, Billings, & Collections - Billings
Welcome to Citicon Payroll and Accounting Systems - Billings module. This module is designed to facilitate the accurate and timely generation and management of invoices and billing statements for services rendered and goods delivered.
Key Purposes
- Streamlined Invoice Generation: Create various types of billing statements efficiently, ensuring all relevant financial details for services or goods are accurately captured.
- Comprehensive Billing Record-Keeping: Maintain a centralized and detailed record of all invoices, including billing numbers, dates, customer information, and project associations.
- Financial Tracking and Monitoring: Provide clear visibility into the total billed amounts and outstanding balances, enabling effective accounts receivable management.
- Workflow and Approval Management: Implement a structured process for tracking the status and approval levels of each billing entry, ensuring proper authorization before issuance.
- Efficient Batch Processing: Allow for the batch approval of multiple billing entries, enhancing administrative efficiency and accelerating the revenue recognition cycle.
Billings Module User-Manual
This section provides details, and set-by-step instructions to view, and access the Billings module.
Index Page
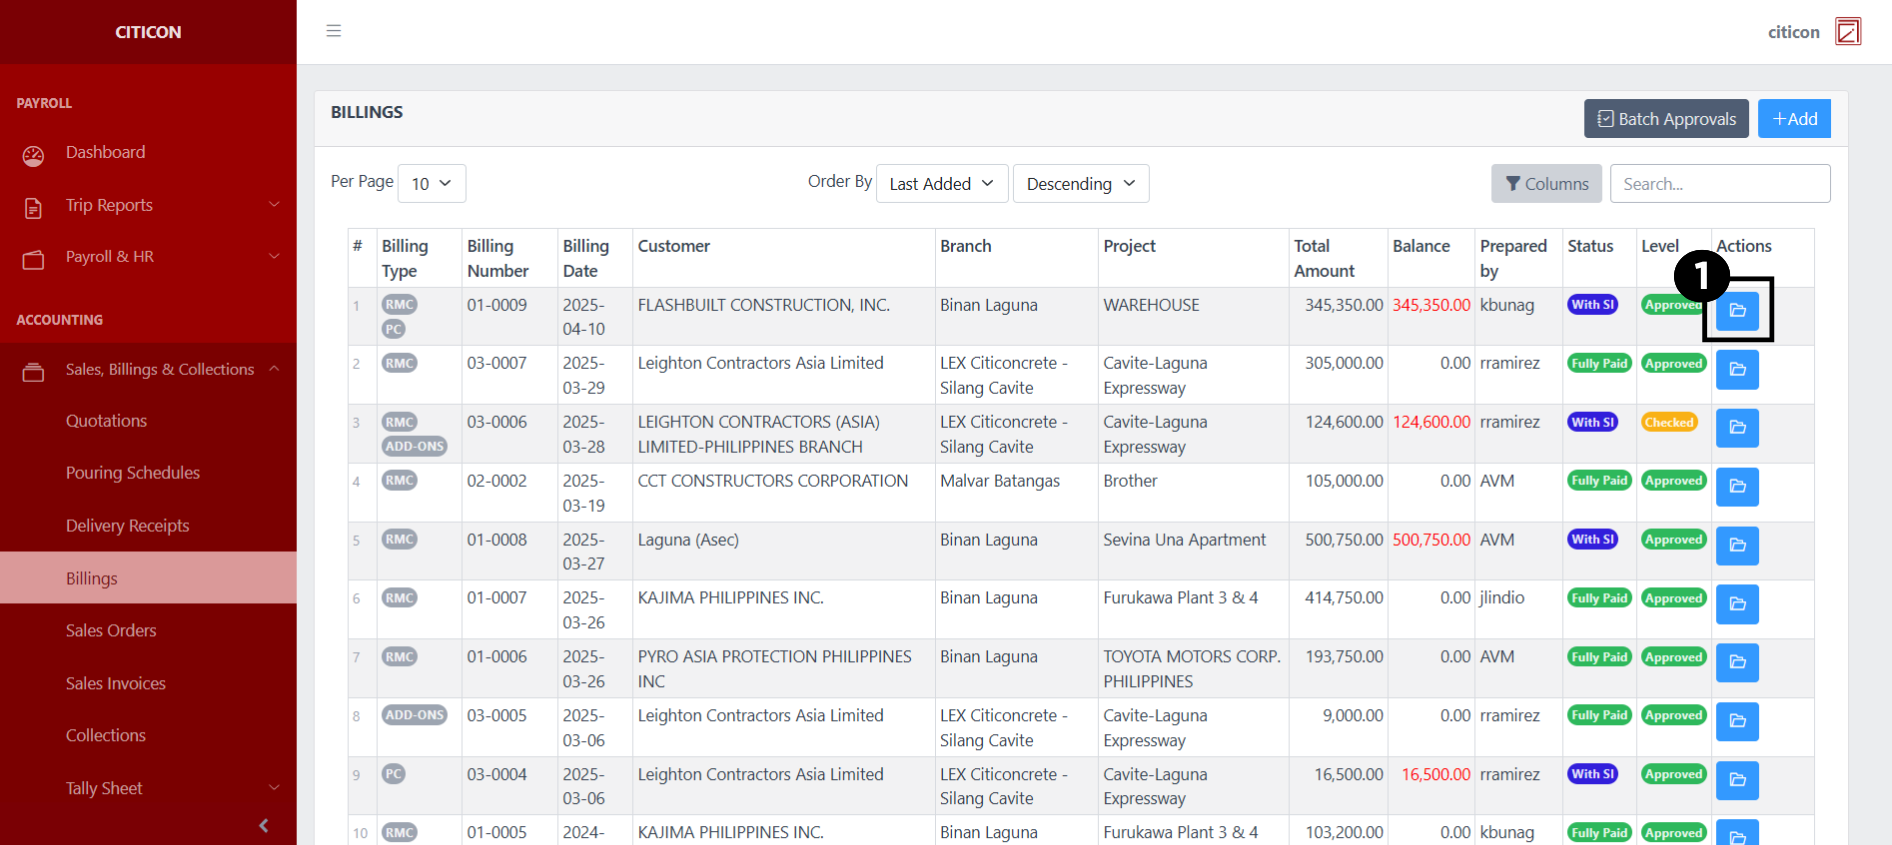
To access the Billings. Go to Accounting, select Sales, Billings, & Collections, then select Billings.
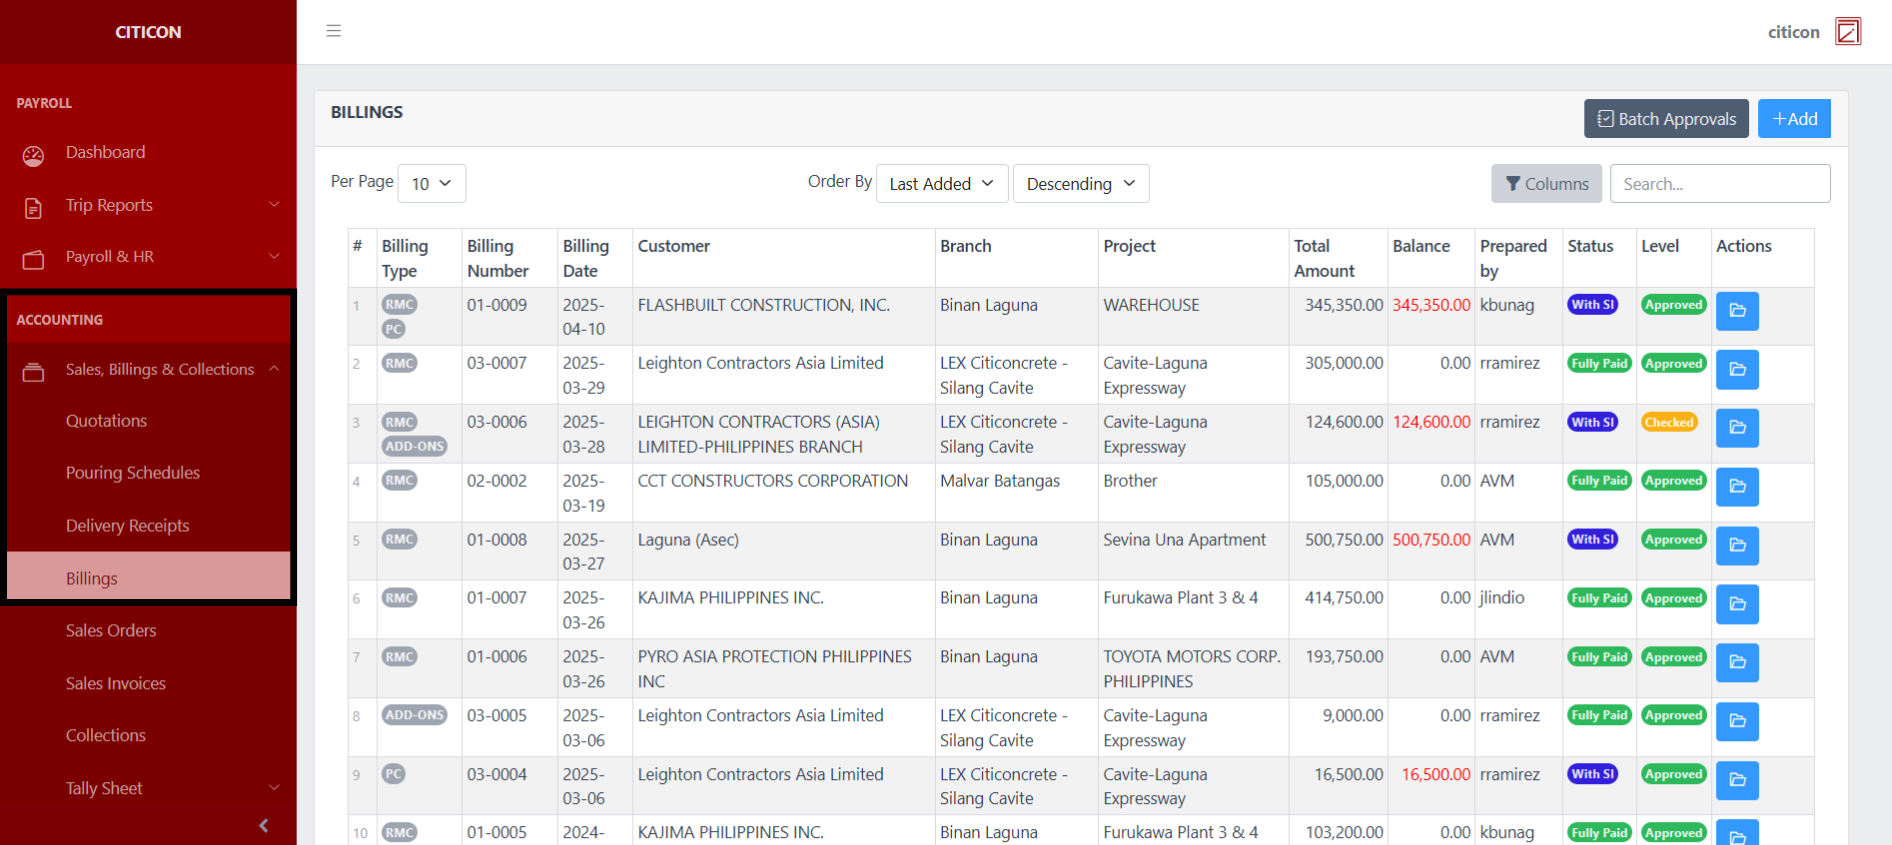
a. Adjust the paging, ordering, and sorting of the entries here.
b. Select the respective button to either Add or Approve entries.
c. Search for specific entry details using the search bar.
d. View, or Export an entry by selecting this button.

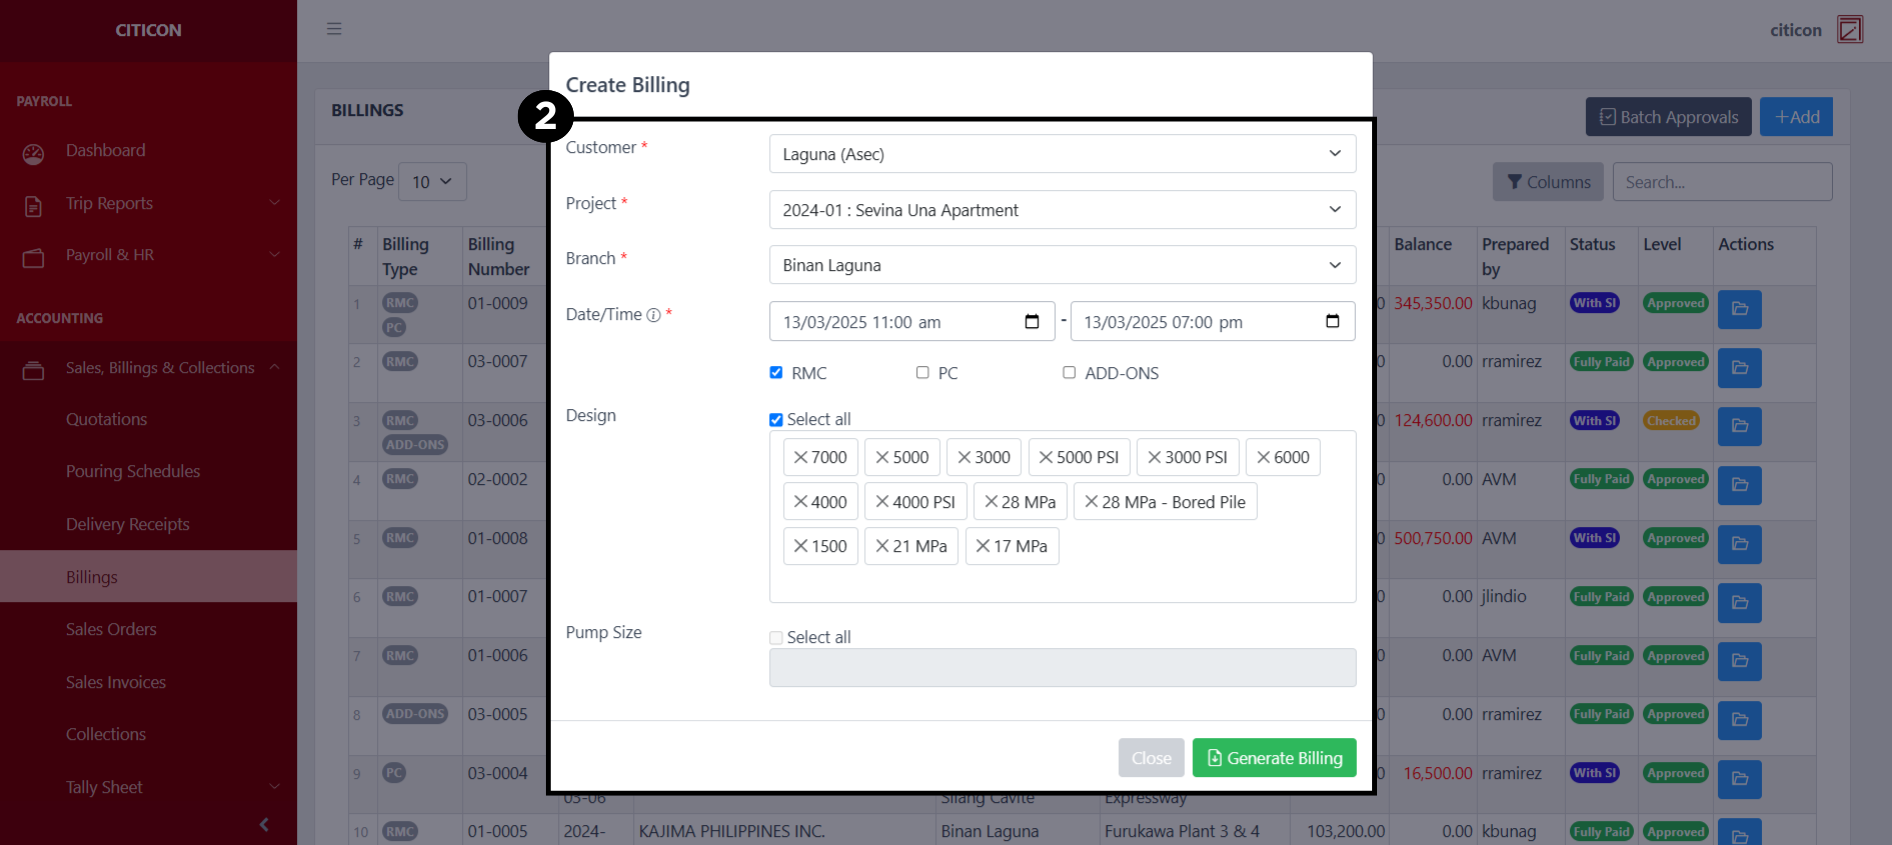
Add Entry
- Select the Add button to add a new entry.

- Input the necessary details for your billing entry, then select the Generate Billing button.
All fields that has an asterisk (*) are required to be filled up.
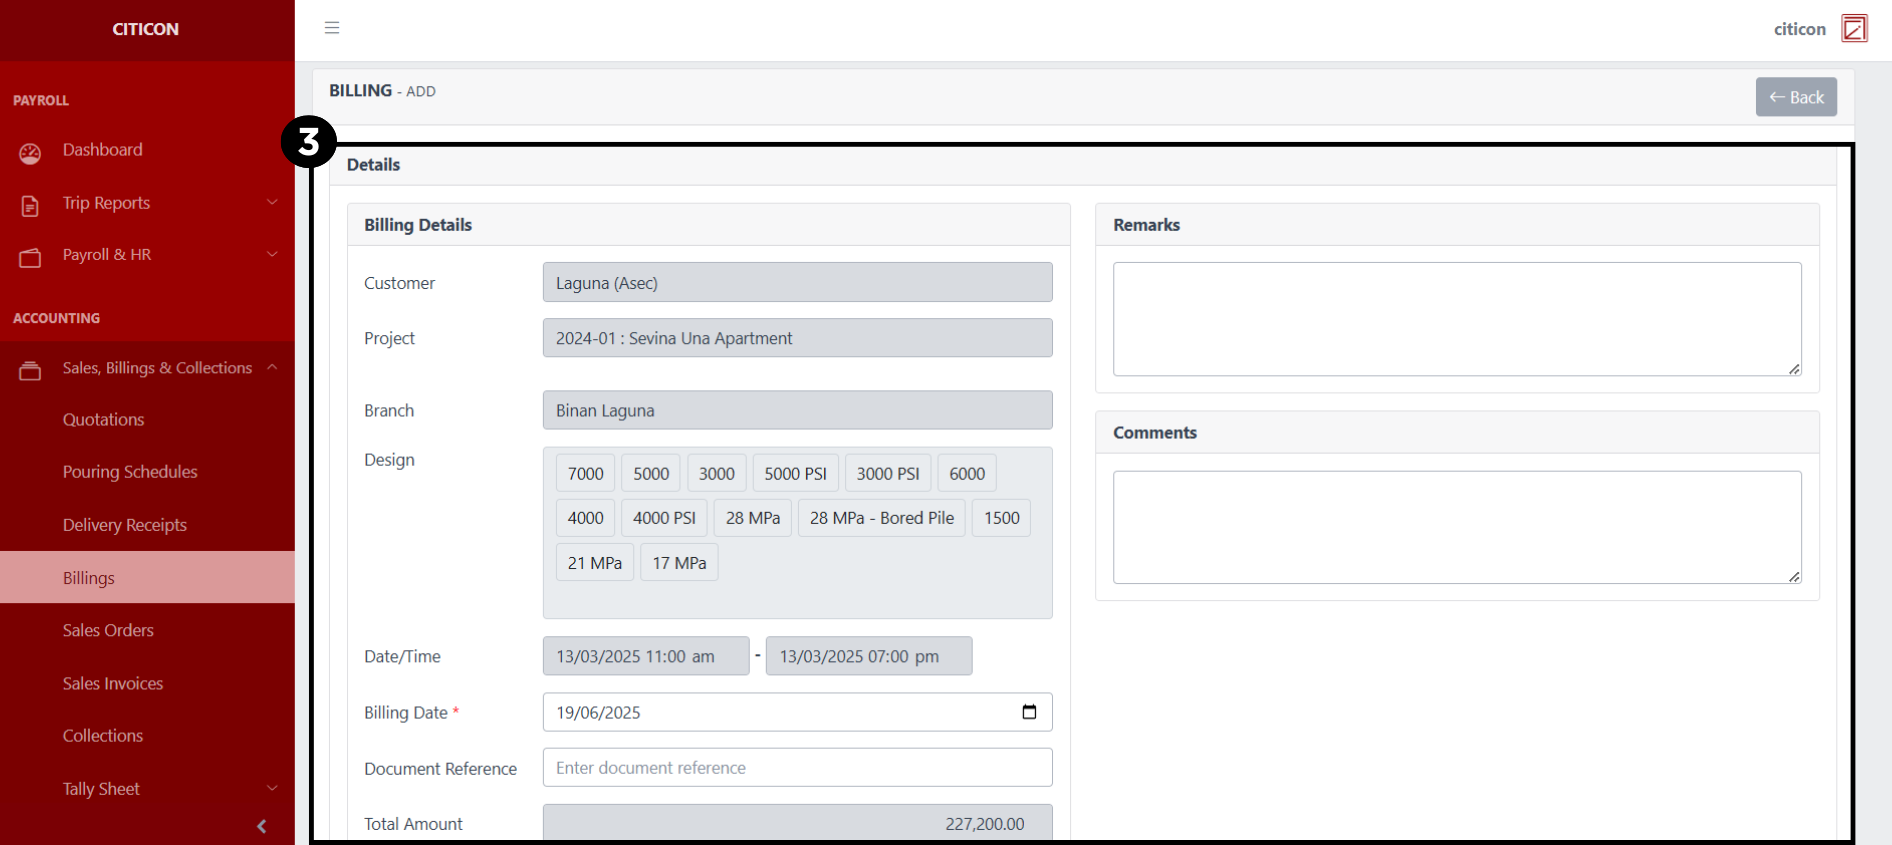
- Input additional details for your billing entry.
All fields that has an asterisk (*) are required to be filled up.
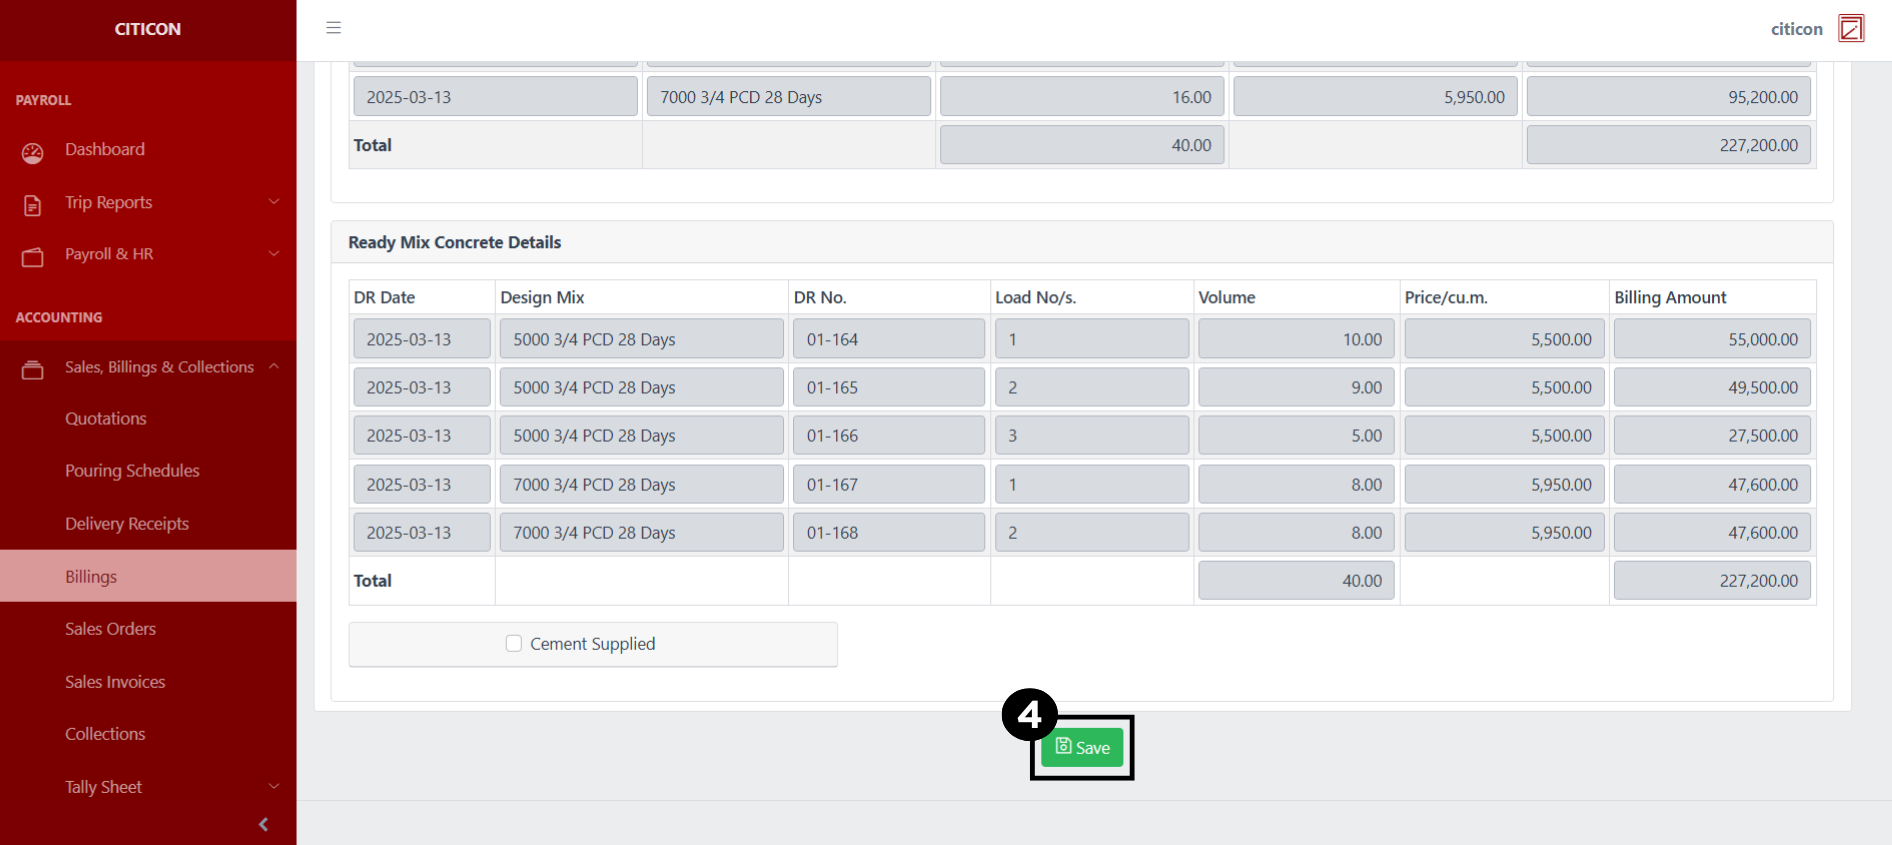
- Select the Save button to save your new billing entry.
Show Entry
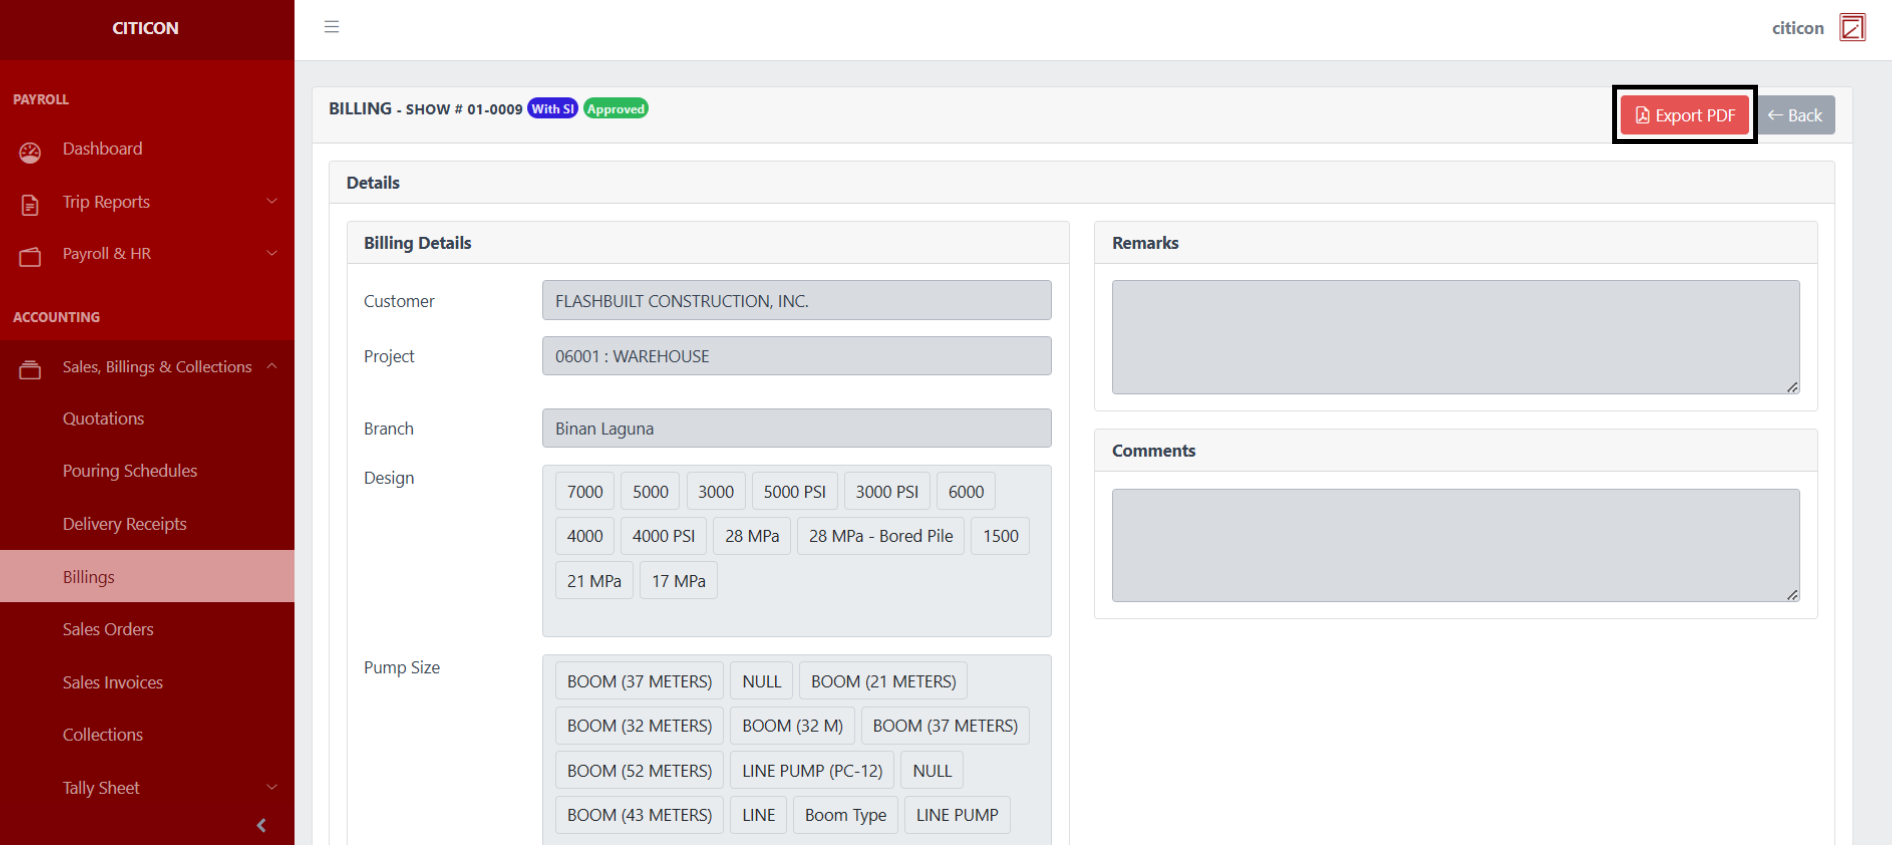
- Select the folder button to view an entry.
 Here you can view more specific details on the entry that you selected.

Select this button to Export the entry in PDF.
Submit Entry
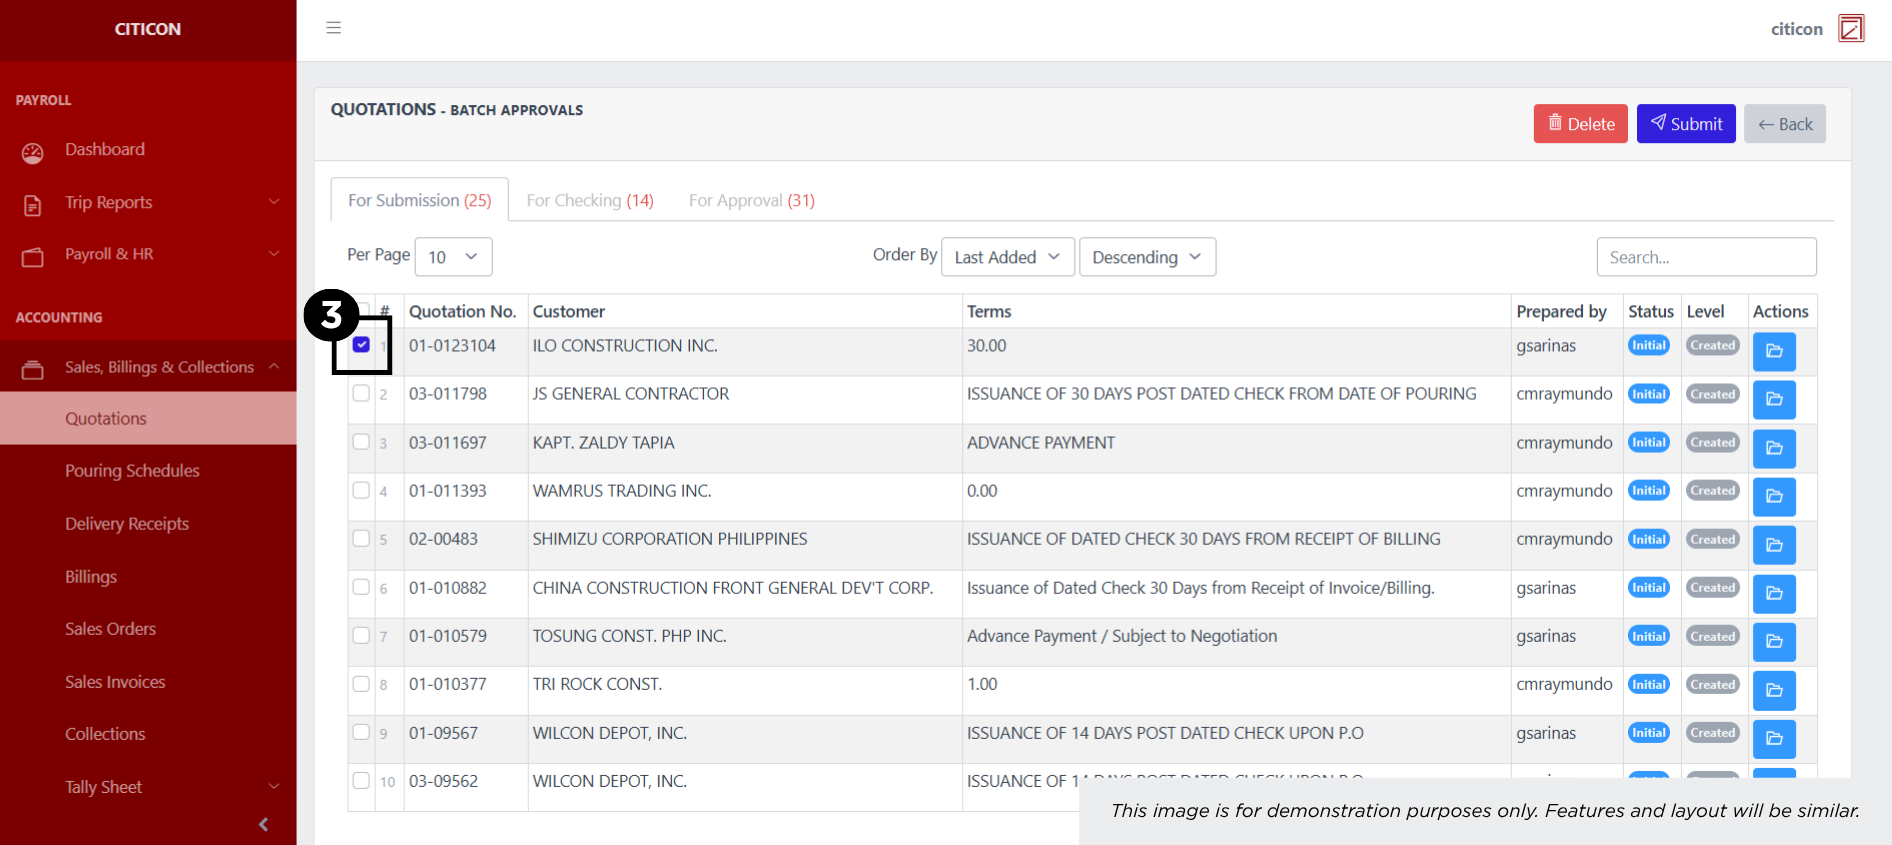
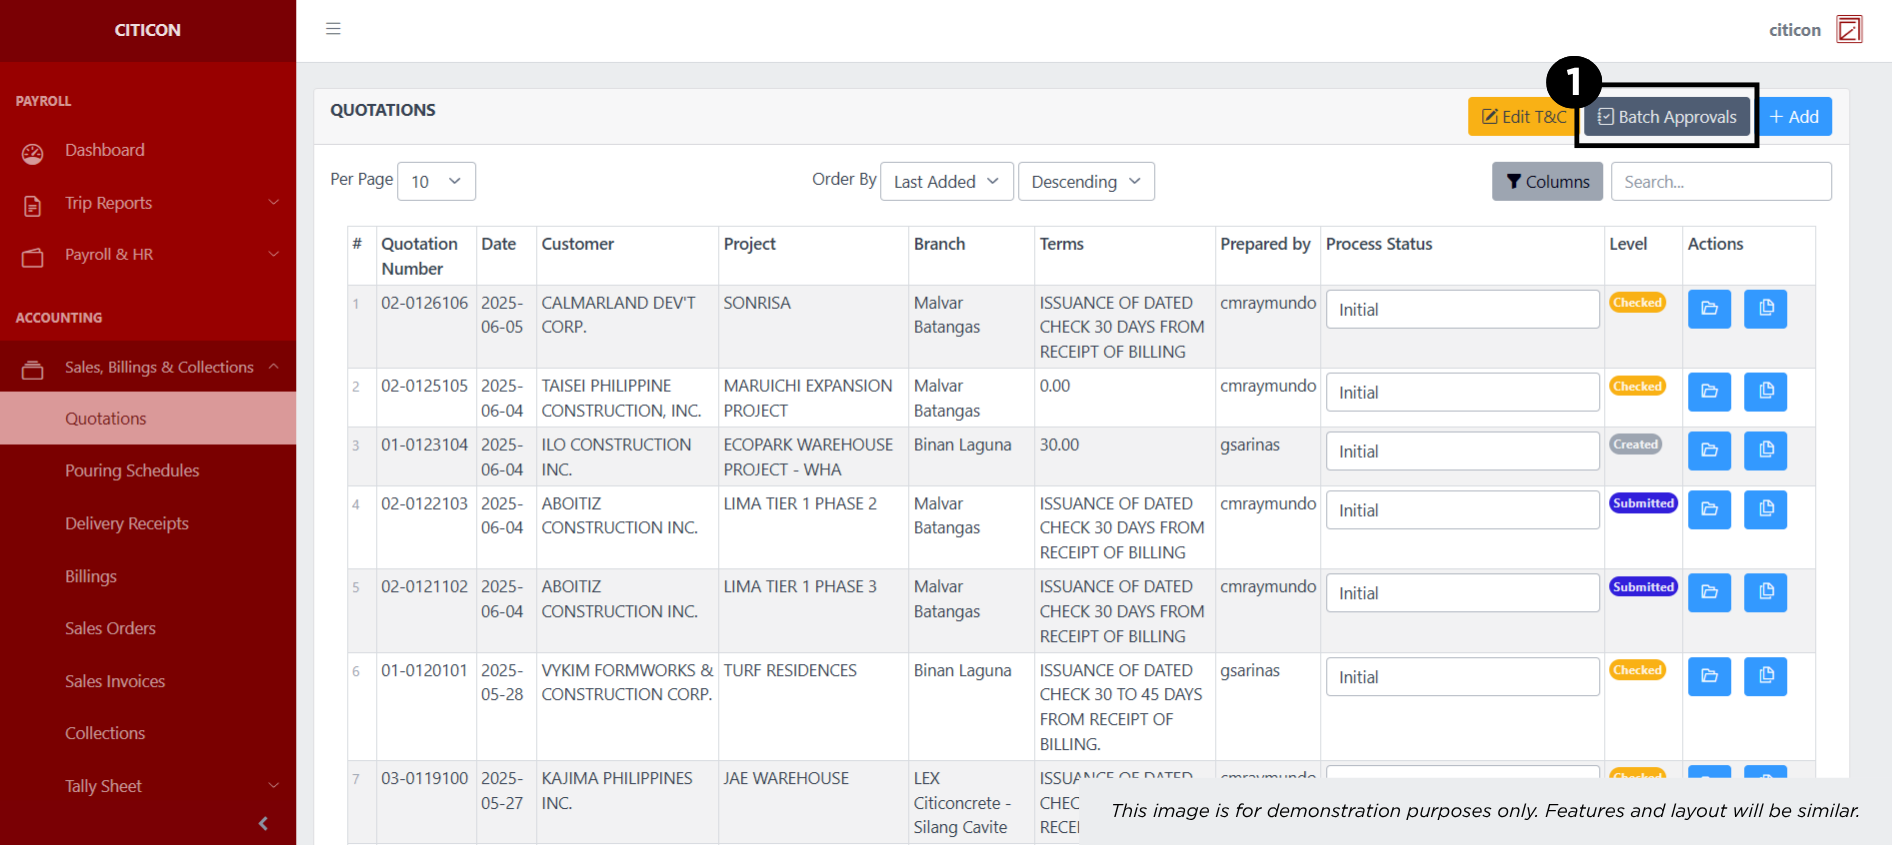
- Select the Batch Approvals button to submit an entry.

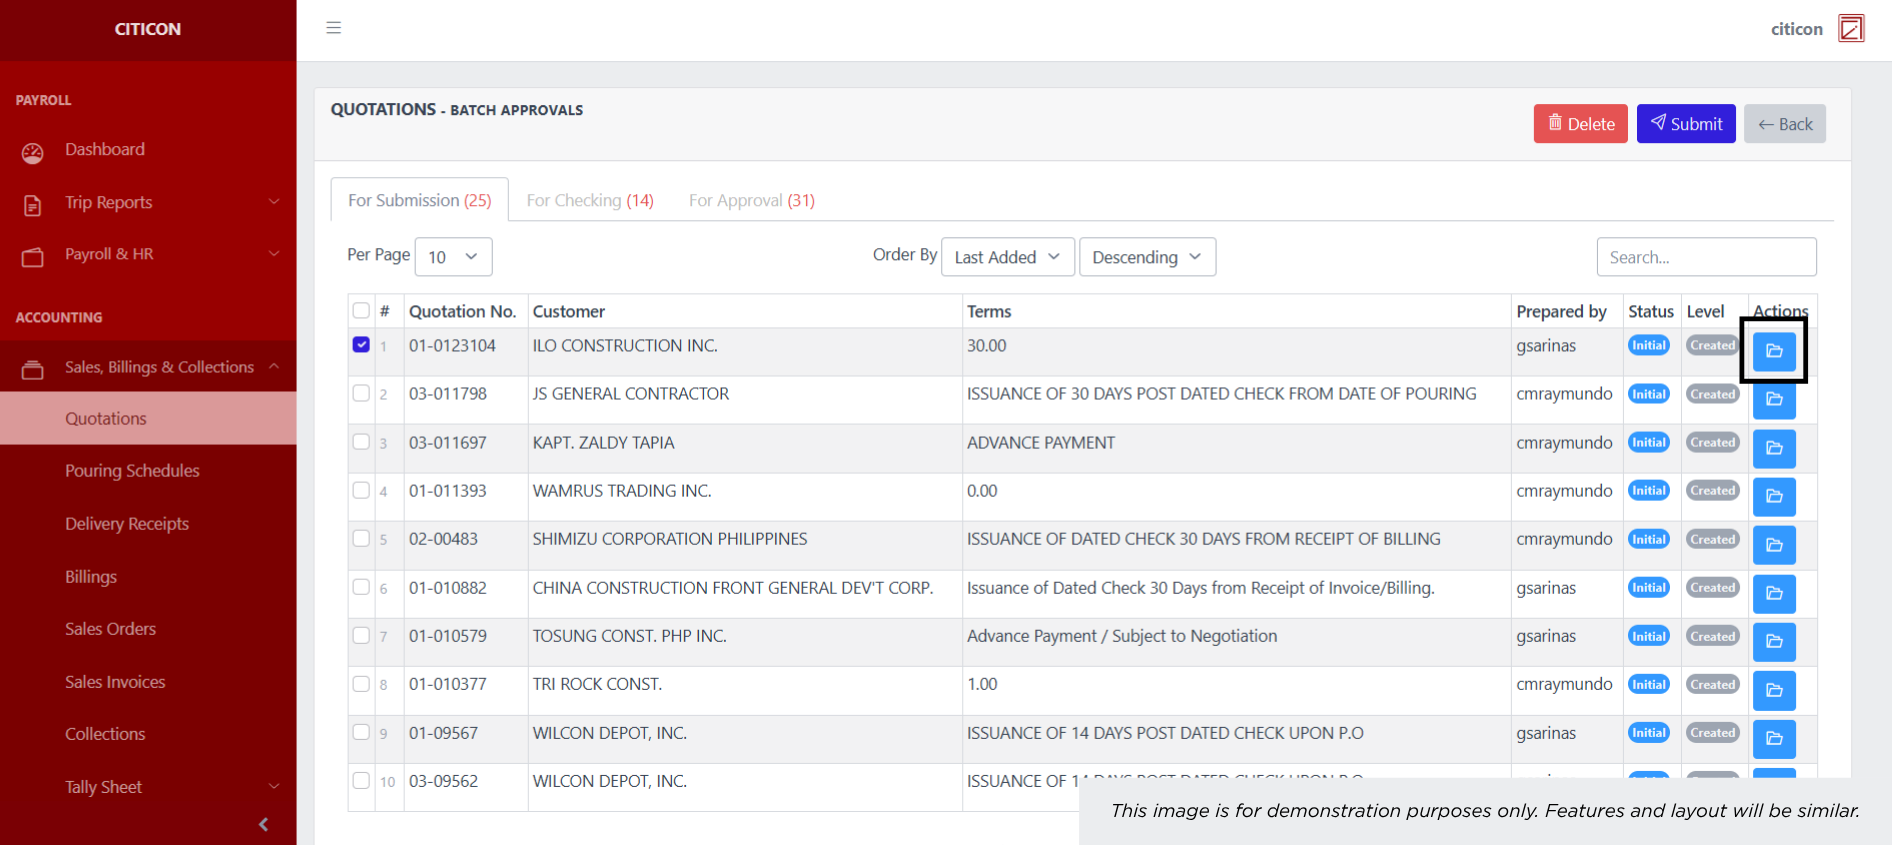
- Select the For Submission tab.

- Select the entry that you want to submit.
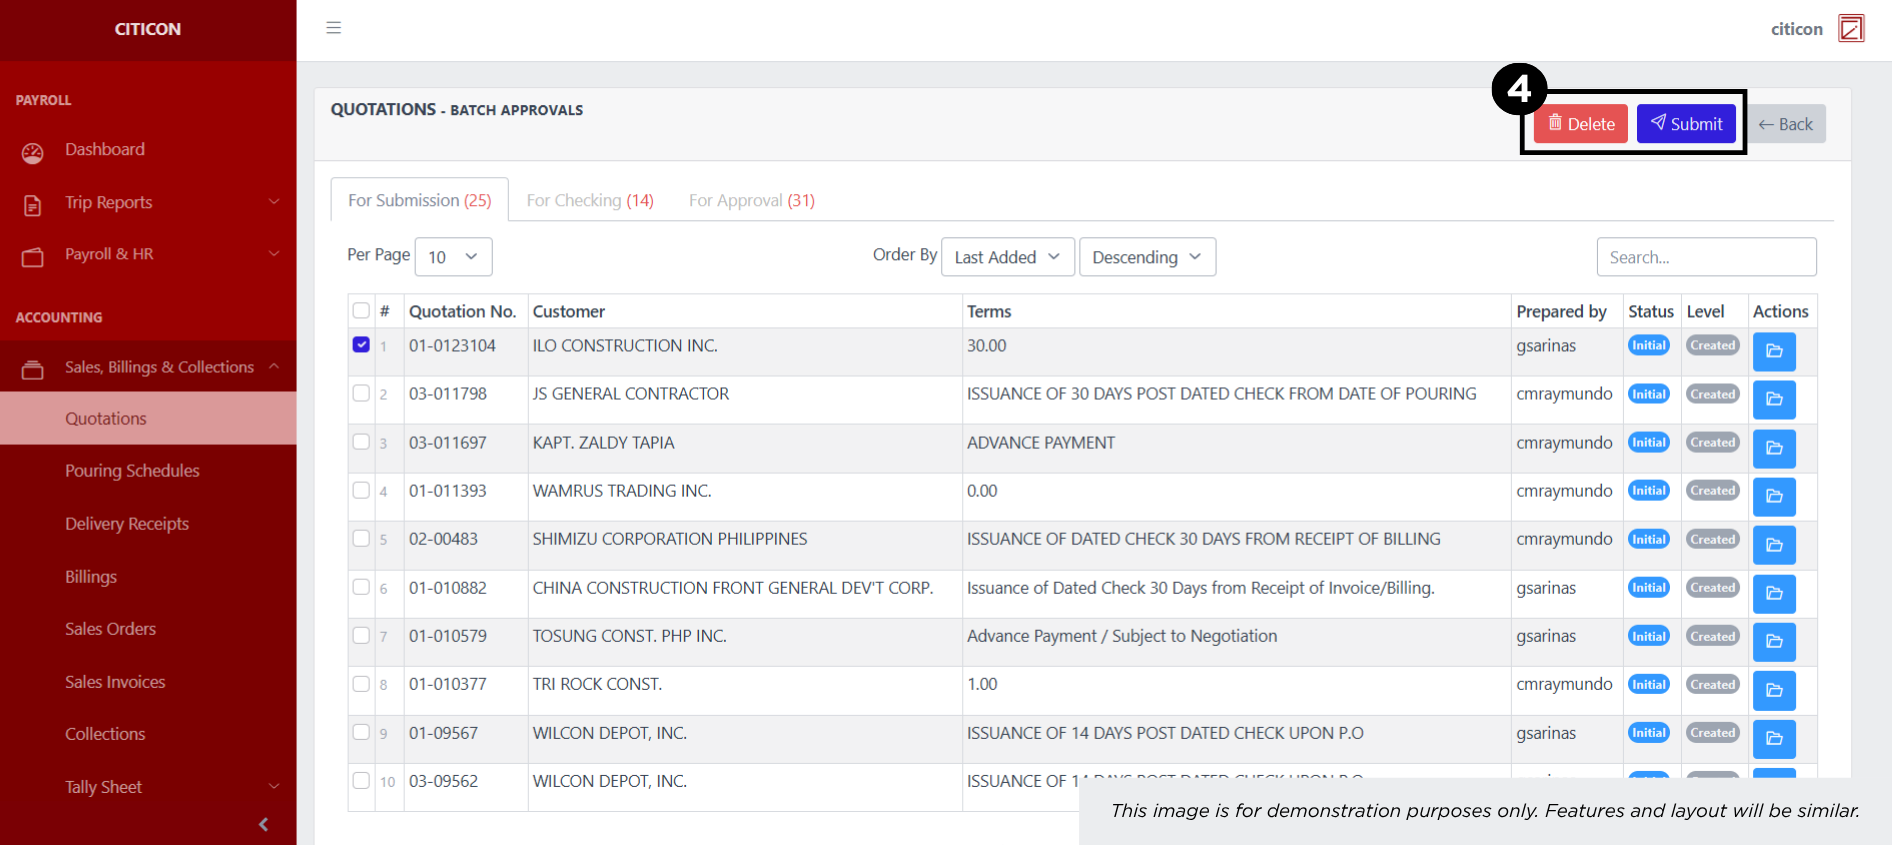
- Select the Submit button to submit the entry. In cases where you want to delete a entry, select the entry you want to delete, then select the Delete button.
 To view the details of an individual entry, select the folder button and from here, you may either Edit, or Delete the entry.
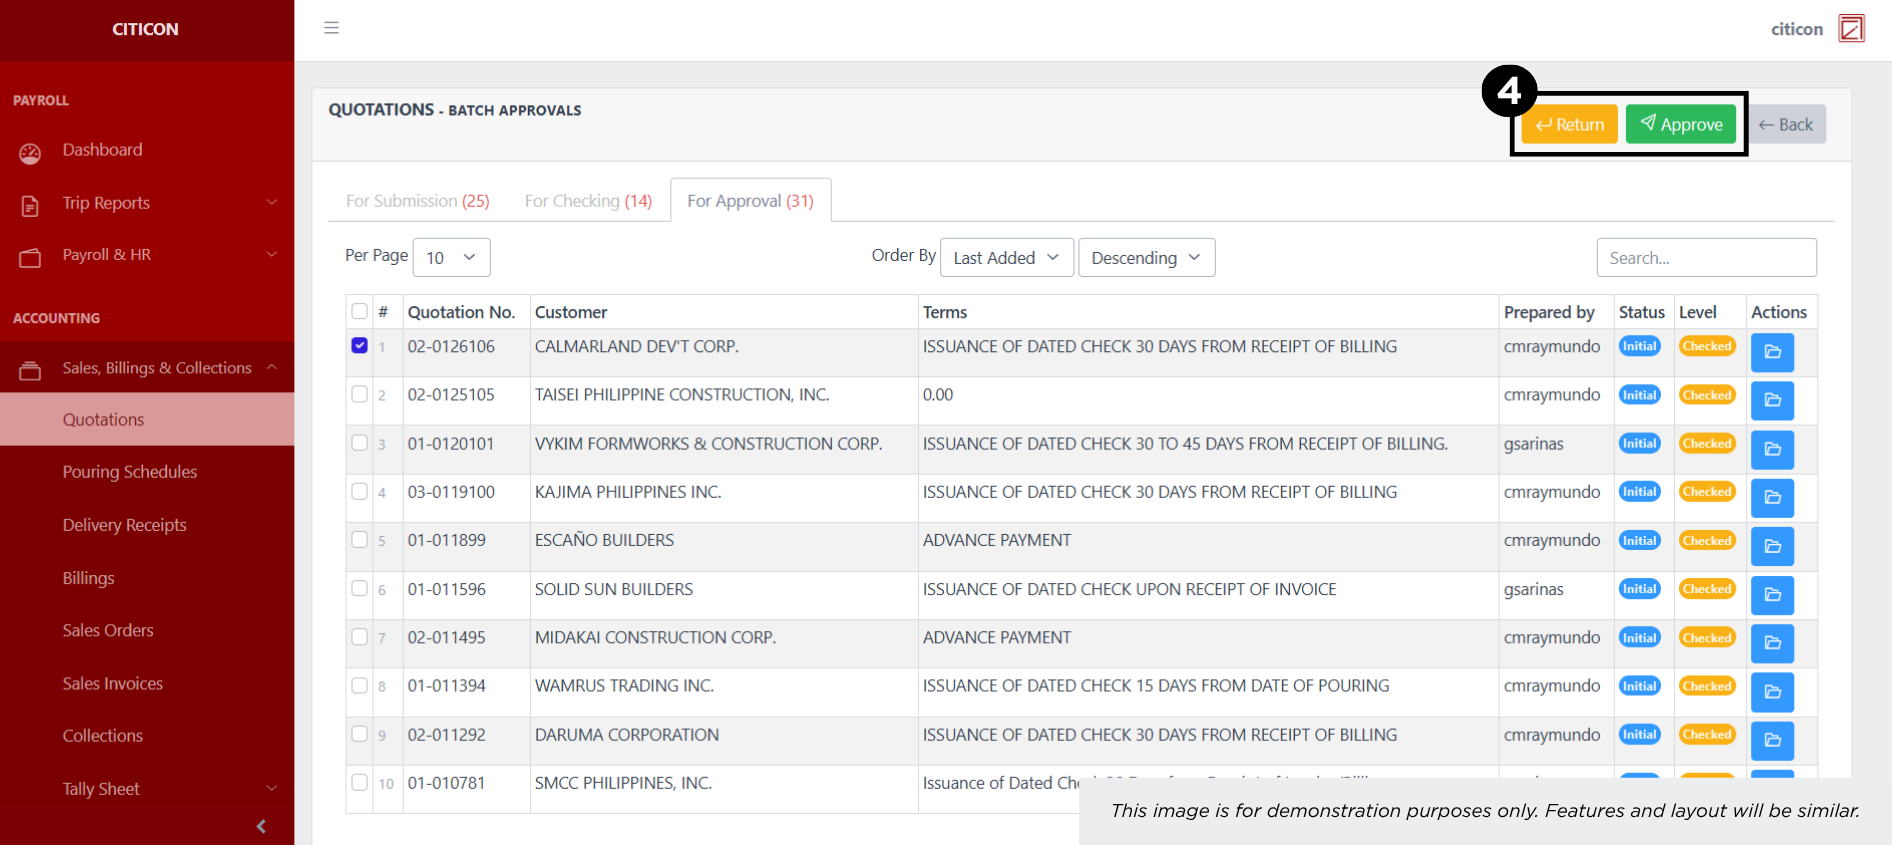
Approve Entry
- Select the Batch Approvals button to approve a entry.
- Select the For Approval tab.
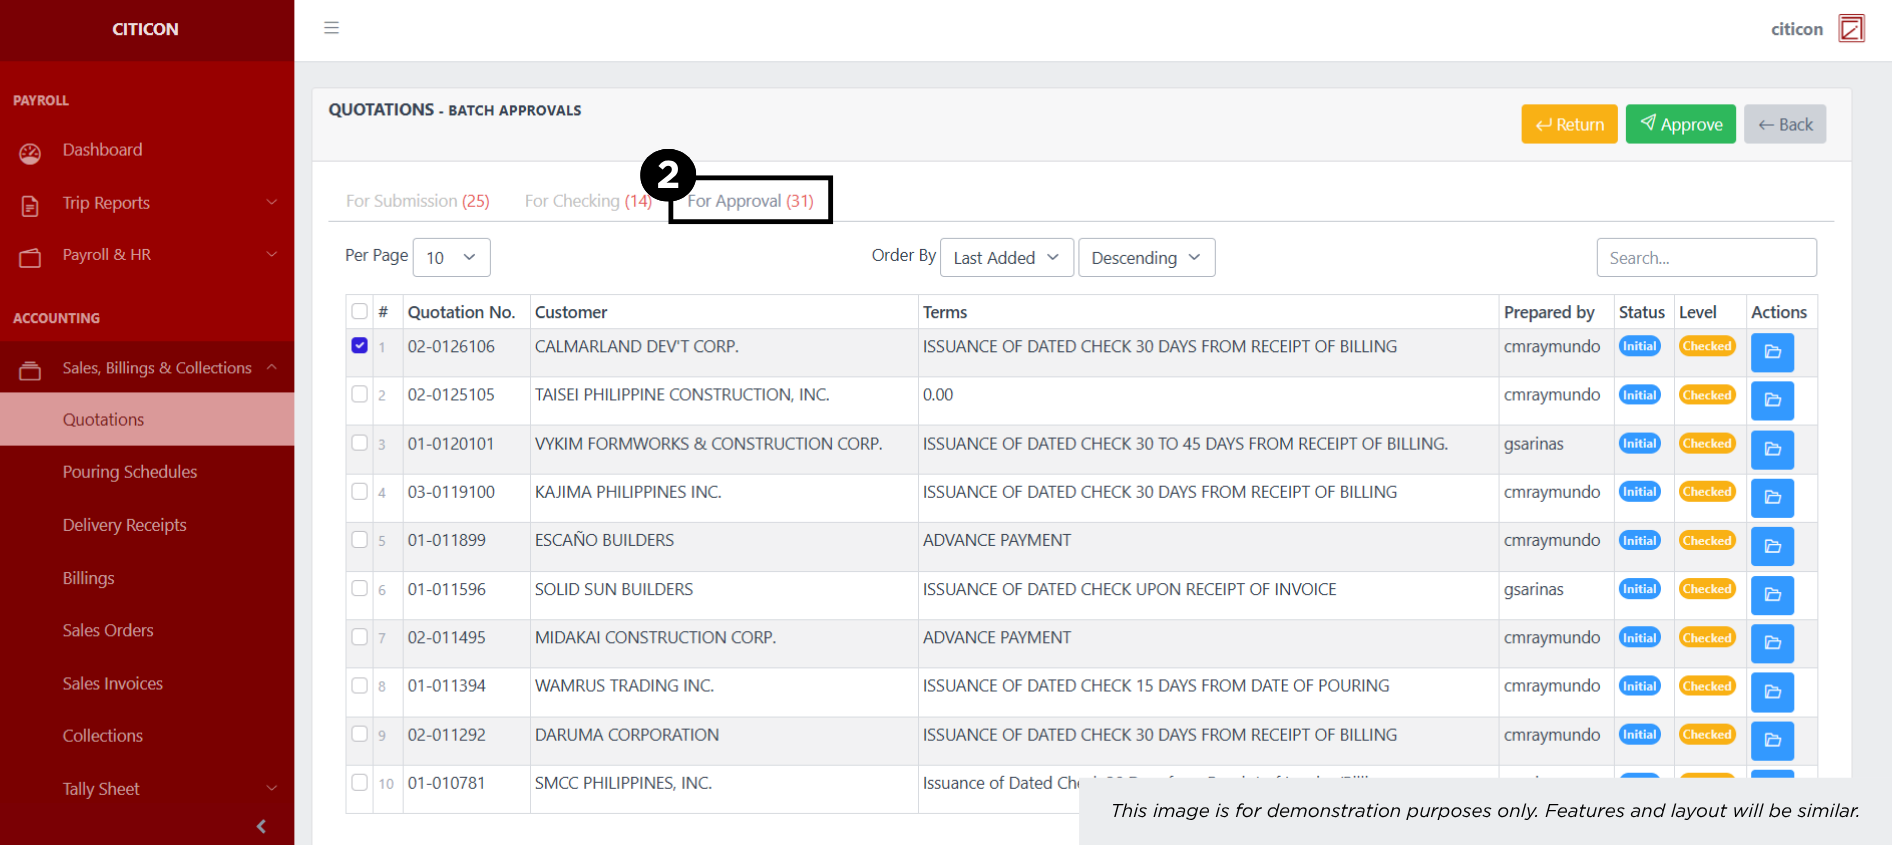
- Select the entry that you want to approve.
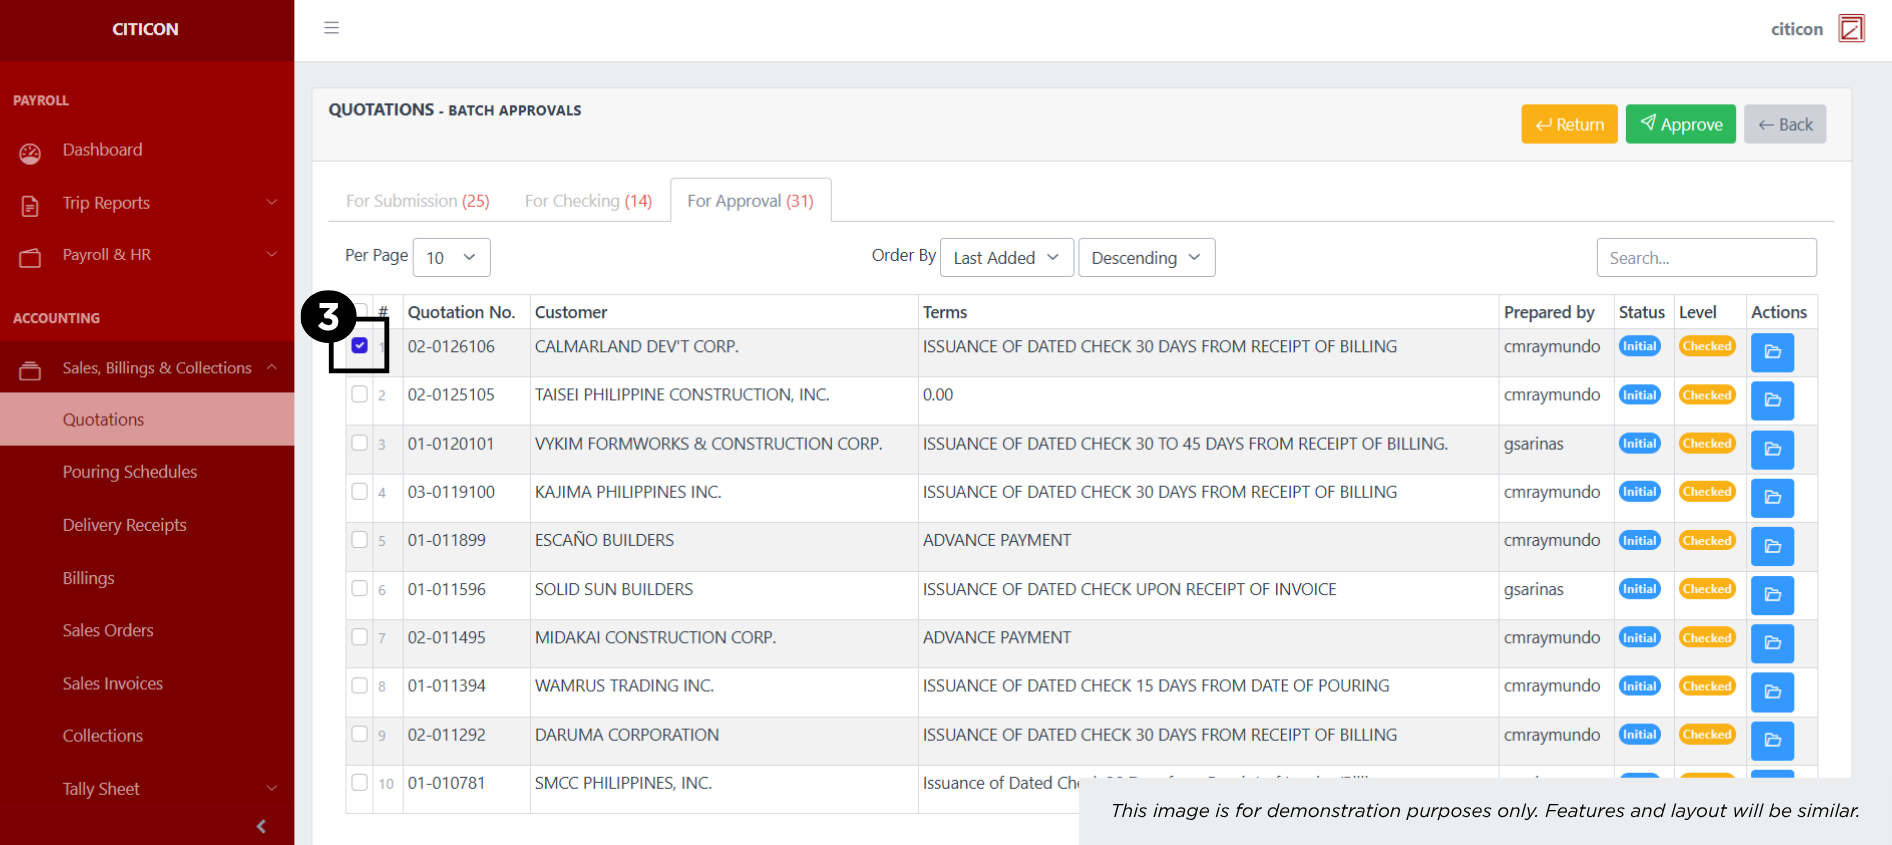
- Select the Approve button to approve the entry. In cases where you want to return a entry to submission section, select the entry you want to return, then select the Return button.
 To view the details of an individual entry, select the folder button and from here, you may either Return, Approve, or Cancel the entry.

Explore Citicon Payroll and Accounting System: Accounting - Sales Orders